Best Of
Re: Wildly off topic. Or is it?
So it should have been — or rather, so it had been. But there were several other problems which meant that this one stupid failure caused a cascade of other problems. Some were design related, but most of the remaining problems were operational — operating shortcuts which had accumulated of the years with not harm.
Not even that. A wire wasn't stripped correctly, so it couldn't enter the connector fully and eventually wiggled loose.

Re: Hydronics resources for a newbie?
I'll add, Visit Heating Help every day. You have access to thousands of years of experience here. I've learned so much by spending time here.😊
Yours, Larry

Re: Radiant slab operation, as the slab warms
I appreciate the analysis.
Let me offer a slightly different take. When the slab is at steady temperature, the heat flow in and the heat flow out is balanced. The heat flow in is what the boiler provides. The heat flow out can be divided into useful heat, which heats the occupied space, and unusable heat which goes somewhere else.
To get the 27 BTU/sf calculated load, the surface of the slab has to be 13.5F above room temperature. Let's say we've achieved steady state, the room is at 66.5F, the surface of the slab is at 80F. There is 40,500 BTU/hr going into the room, and some unknown amount going into unusable heat.
Then let's turn the clock back to when the heat was turned on. The room was at 50F, the slab was at 50F and heat flow into the slab was zero. So unusable heat was zero. When you first turn the heat on, the slab temperature doesn't change right away, so the heat going into the room is still zero, the unusable heat is still zero, and all of the heat supplied goes into warming the slab.
But as the slab warms, it starts releasing heat into the room as well as losing unusable heat. So if you apply a constant amount of heat, the warmer the slab is, the slower it warms. In fact, if the amount of heat is exactly equal to the heating load, the slab never reaches the design temperature — the closer it gets, the more the heat gain slows.
That's complication one.
Complication two is that the building itself has heat capacity. To get to the final steady state, not only do you have to warm the slab, but you have to warm the building too. If the building is starting at 50F like the slab, as soon as the slab warms at all heat is going to start flowing from the slab into the inside air, and from the air into the building and its contents. So even at the lowest temperatures you don't get the full heat load going into the slab.
If you wanted to fully model this you'd have to model the unusable heat with regard to slab temperature, and you'd have to estimate the heat capacity of the building and model the temperature of the building. You could do this with a spreadsheet with a row for each of a series of time intervals. In each time interval:
- The ending temperature of the slab is equal to the starting temperature of the slab plus net heat flow into the slab divided by the heat capacity of the slab.
- Net heat flow into the slab is equal to heat provided by the boiler less heat used warming the room and unusable heat.
- Heat used warming the room is equal to (starting) slab temperature minus (starting) room temperature times a constant (2 BTU/hr/sf)
- Unusable heat is equal to slab temperature minus ground temperature times a constant
- Ending temperature of the room is equal to the starting temperature of the room plus net heat flow into the room divided by the heat capacity of the room.
- Net heat flow into the room is heat used warming the room less room heat loss
- Room heat loss is (starting) room temperature minus outdoor temperature times a constant
Items in bold are calculated values for each time interval, items in italics are constants that you have to estimate.
If you put all that into a spreadsheet, what you'll see is that heating the slab actually takes quite a bit longer. What you also see is that the higher the heat provided by the boiler, the faster the slab responds and the faster the room warms up.
The ideal configuration is something where you have both an outdoor sensor and a slab sensor. When the slab is warm, use the outdoor sensor to guide outdoor reset to keep the boiler output near the heating load. When the slab is cold, put full output into the slab until it warms up.

Apartment Building 1924
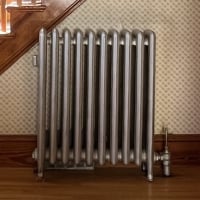
From 1955 until 1960, I lived as a child in a five story apartment building in the Bronx, NY. My uncle was the building superintendent, so I had access to the boiler room. I remember the huge boiler and the pile of coal that fired it then. I am not knowledgeable in HVAC. My son is an apprentice plumber, and he and I have been discussing plumbing and HCAV things. I am reading Dan's "We Got Steam" and that got me thinking of the boiler and radiators in my old apartment in New York. An Internet search, reveals that that building was built in 1924, and has 34 apartments. I have no particular question, but am wondering what you pros tell me about the heating system in that old building. One-pipe? Was coal fired, but now likely gas? Any other comments, technical or otherwise? Just curious about that old building's system. Thanks for any thoughts and comments.


Re: Christmas Wishing for a Warm Classroom
Thank you all for your helpful thoughts and suggestions.
@mattmia2 My classroom is only one floor above the boiler. I'd like to think the debris was the result of a one-time flood, not a chronic problem.
My initial cleaning out of the trap today didn't get the steam flowing, but I didn't have anything but pencils and wrenches at hand. I'll bring some better tools for cleaning the trap tomorrow and see if we can get some steam flowing through.
I'm afraid the school wouldn't look kindly on what would be seen as "tinkering" with school property, so I'm reluctant to share this investigation with the principal or superintendent. But if I can fix the radiator with some knowhow from you all and little work on my part, I still feel I ought to try.
 Forest
Re: Replace missing radiator
Another option would be to run a hot water loop to the area off of the water in the bottom of the boiler.
 mattmia2
Re: Buderus G115 Strangeness
Strange.
I wonder if something is interrupting the burner operation? But you said it is running constantly. The heat must be going somewhere.

Re: Riser, Header, Main pipe sizing
I don't think we've had anyone from this forum at our place yet for a bid. I suspect if we did, we'd be impressed with their knowledge compared to who's been through alreadyWhat about Dave Bunnell?

Is he coming out?
 ChrisJ
Re: Riser, Header, Main pipe sizing
Thanks. The Utica can get us an extra $350 for Energy credit since it's over 83% efficient and was $800 cheaper then the WMC, while the WMC & Peerless were around 81-82% efficient. Not a big deal in the long run, I guess. Any other reccomendations that might be 83% efficient?Part of the struggle everyone is having on this thread is the fact that you seem to be doubting your decisions and waffleing back and forth on what you should do. You locked in on the WM and now, for a mear $350.00 in one time energy credits, you are wanting to buy a boiler (the Utica) that we've all told you has its own set of issues with those side riser tappings and the LWCO probe location. Even though it is also $800.00cheaper than the WM, I always say "you get what you pay for" The design of the two boilers is an apples/oranges comparison. Here are the facts:
The WMC EG75 only had one riser tapping, but at 3 in, that may be enough? Or is that tapping size irrelevant if we can up-size any of them to 4 inches anyway?
- The WM is the better, long term solution for you compared to the Utica.
- The WM EG75 does have two tappings
- The WM will be delivered broken down so as to be more manageable and not damage any panels/skins.
- A drop Header is, by far and away the better option for nice dry steam AND for more head room to connect mains.
- The Risers out of the boiler should be the full boiler tapping size
- The Header (Drop or conventional) should be at least one full size larger than the risers. If you want to go 2 sizes larger, that is even better.
- Per our prior post, now is the time to get that Bull Head Tee out of the equation and tie the two mains directly into the Header.
- If you haven't signed a contract with an installer, call one of the guys that have been recommended in this thread. If you have a contractor, get everything you've been advised to do here, in writing and in the contract.
You have to make a decision and move on to the next phase, ordering and installation.
 Fred
Fred