Washing machine drain solution
Comments
-
you would support the cast iron stack be fore cutting it then leave the support after you're done
0 -
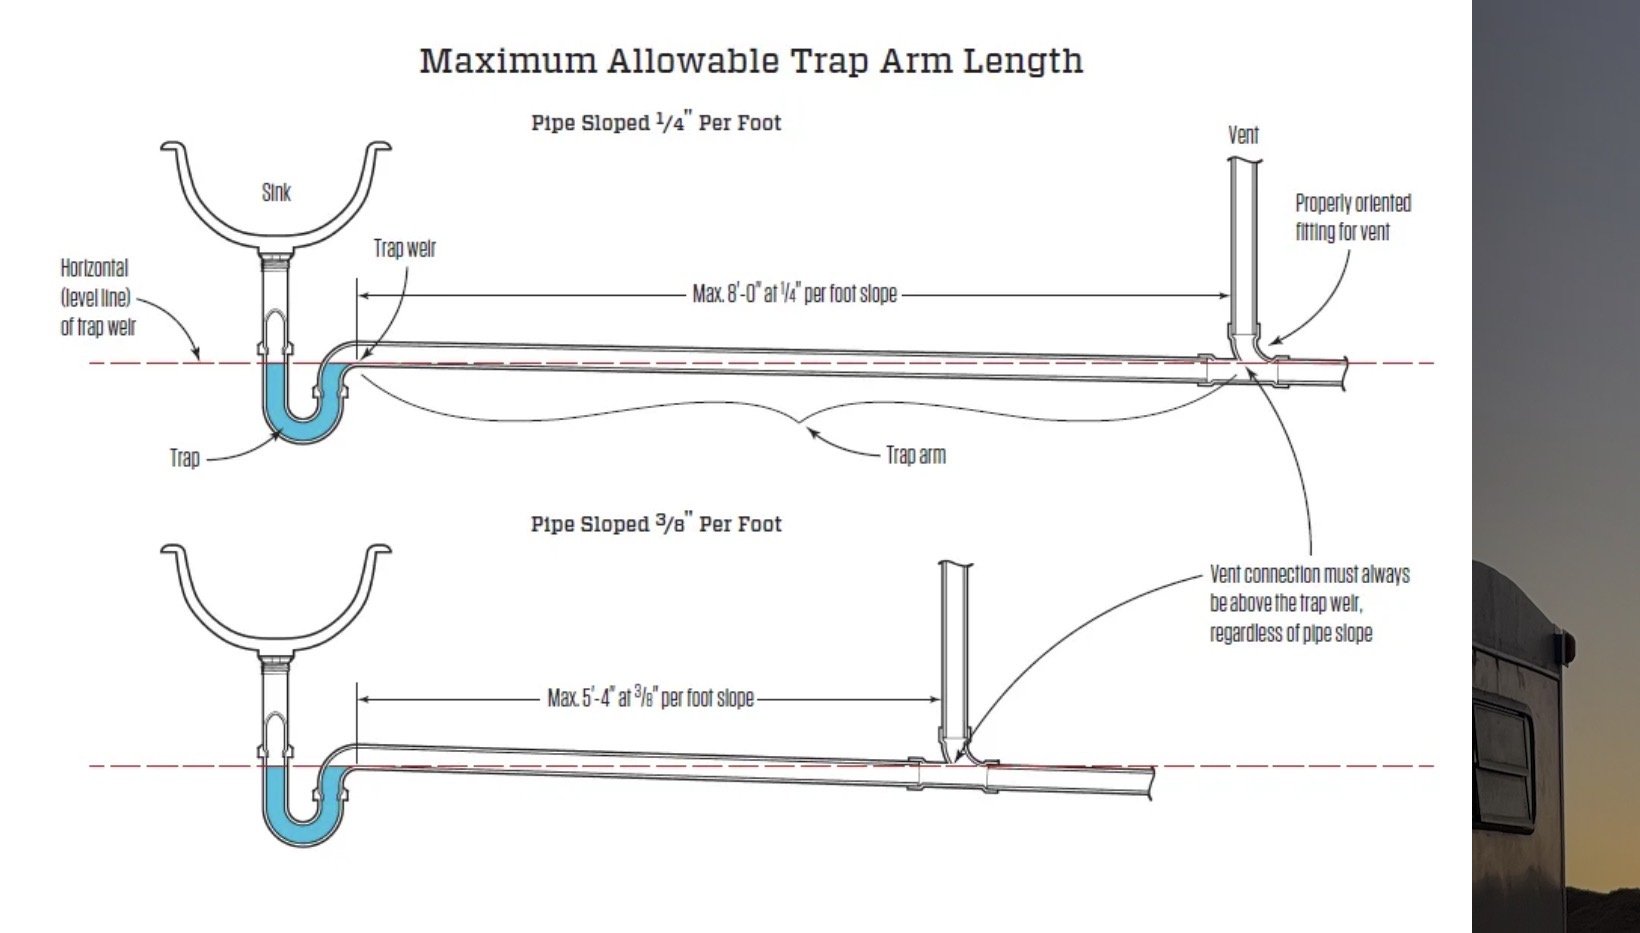
the trap arm is the length from the trap to where the vent takes off. Codes vary, but 5-8’ is typical length.
In your case the is no vent before the WC connection, so when you flush the shower trap may siphon some. If so you end up with sewer gas smells.
The vent taken off a horizontal grain line should be above the centerline if the drain, also.
you could cut a 2” y into the shower trap arm, wet vent the washer into it. Not exactly legal but it solves two issues. It gets you a 2” washer drain and vents the shower drain.
1-1/2” washer drains were allowed in codes for many years. If the washer discharges 9 gpm or less, they work.
Many washers drain into laundry sinks in basements.
But you have options to correct that rube.
Bob "hot rod" Rohr
trainer for Caleffi NA
Living the hydronic dream0 -
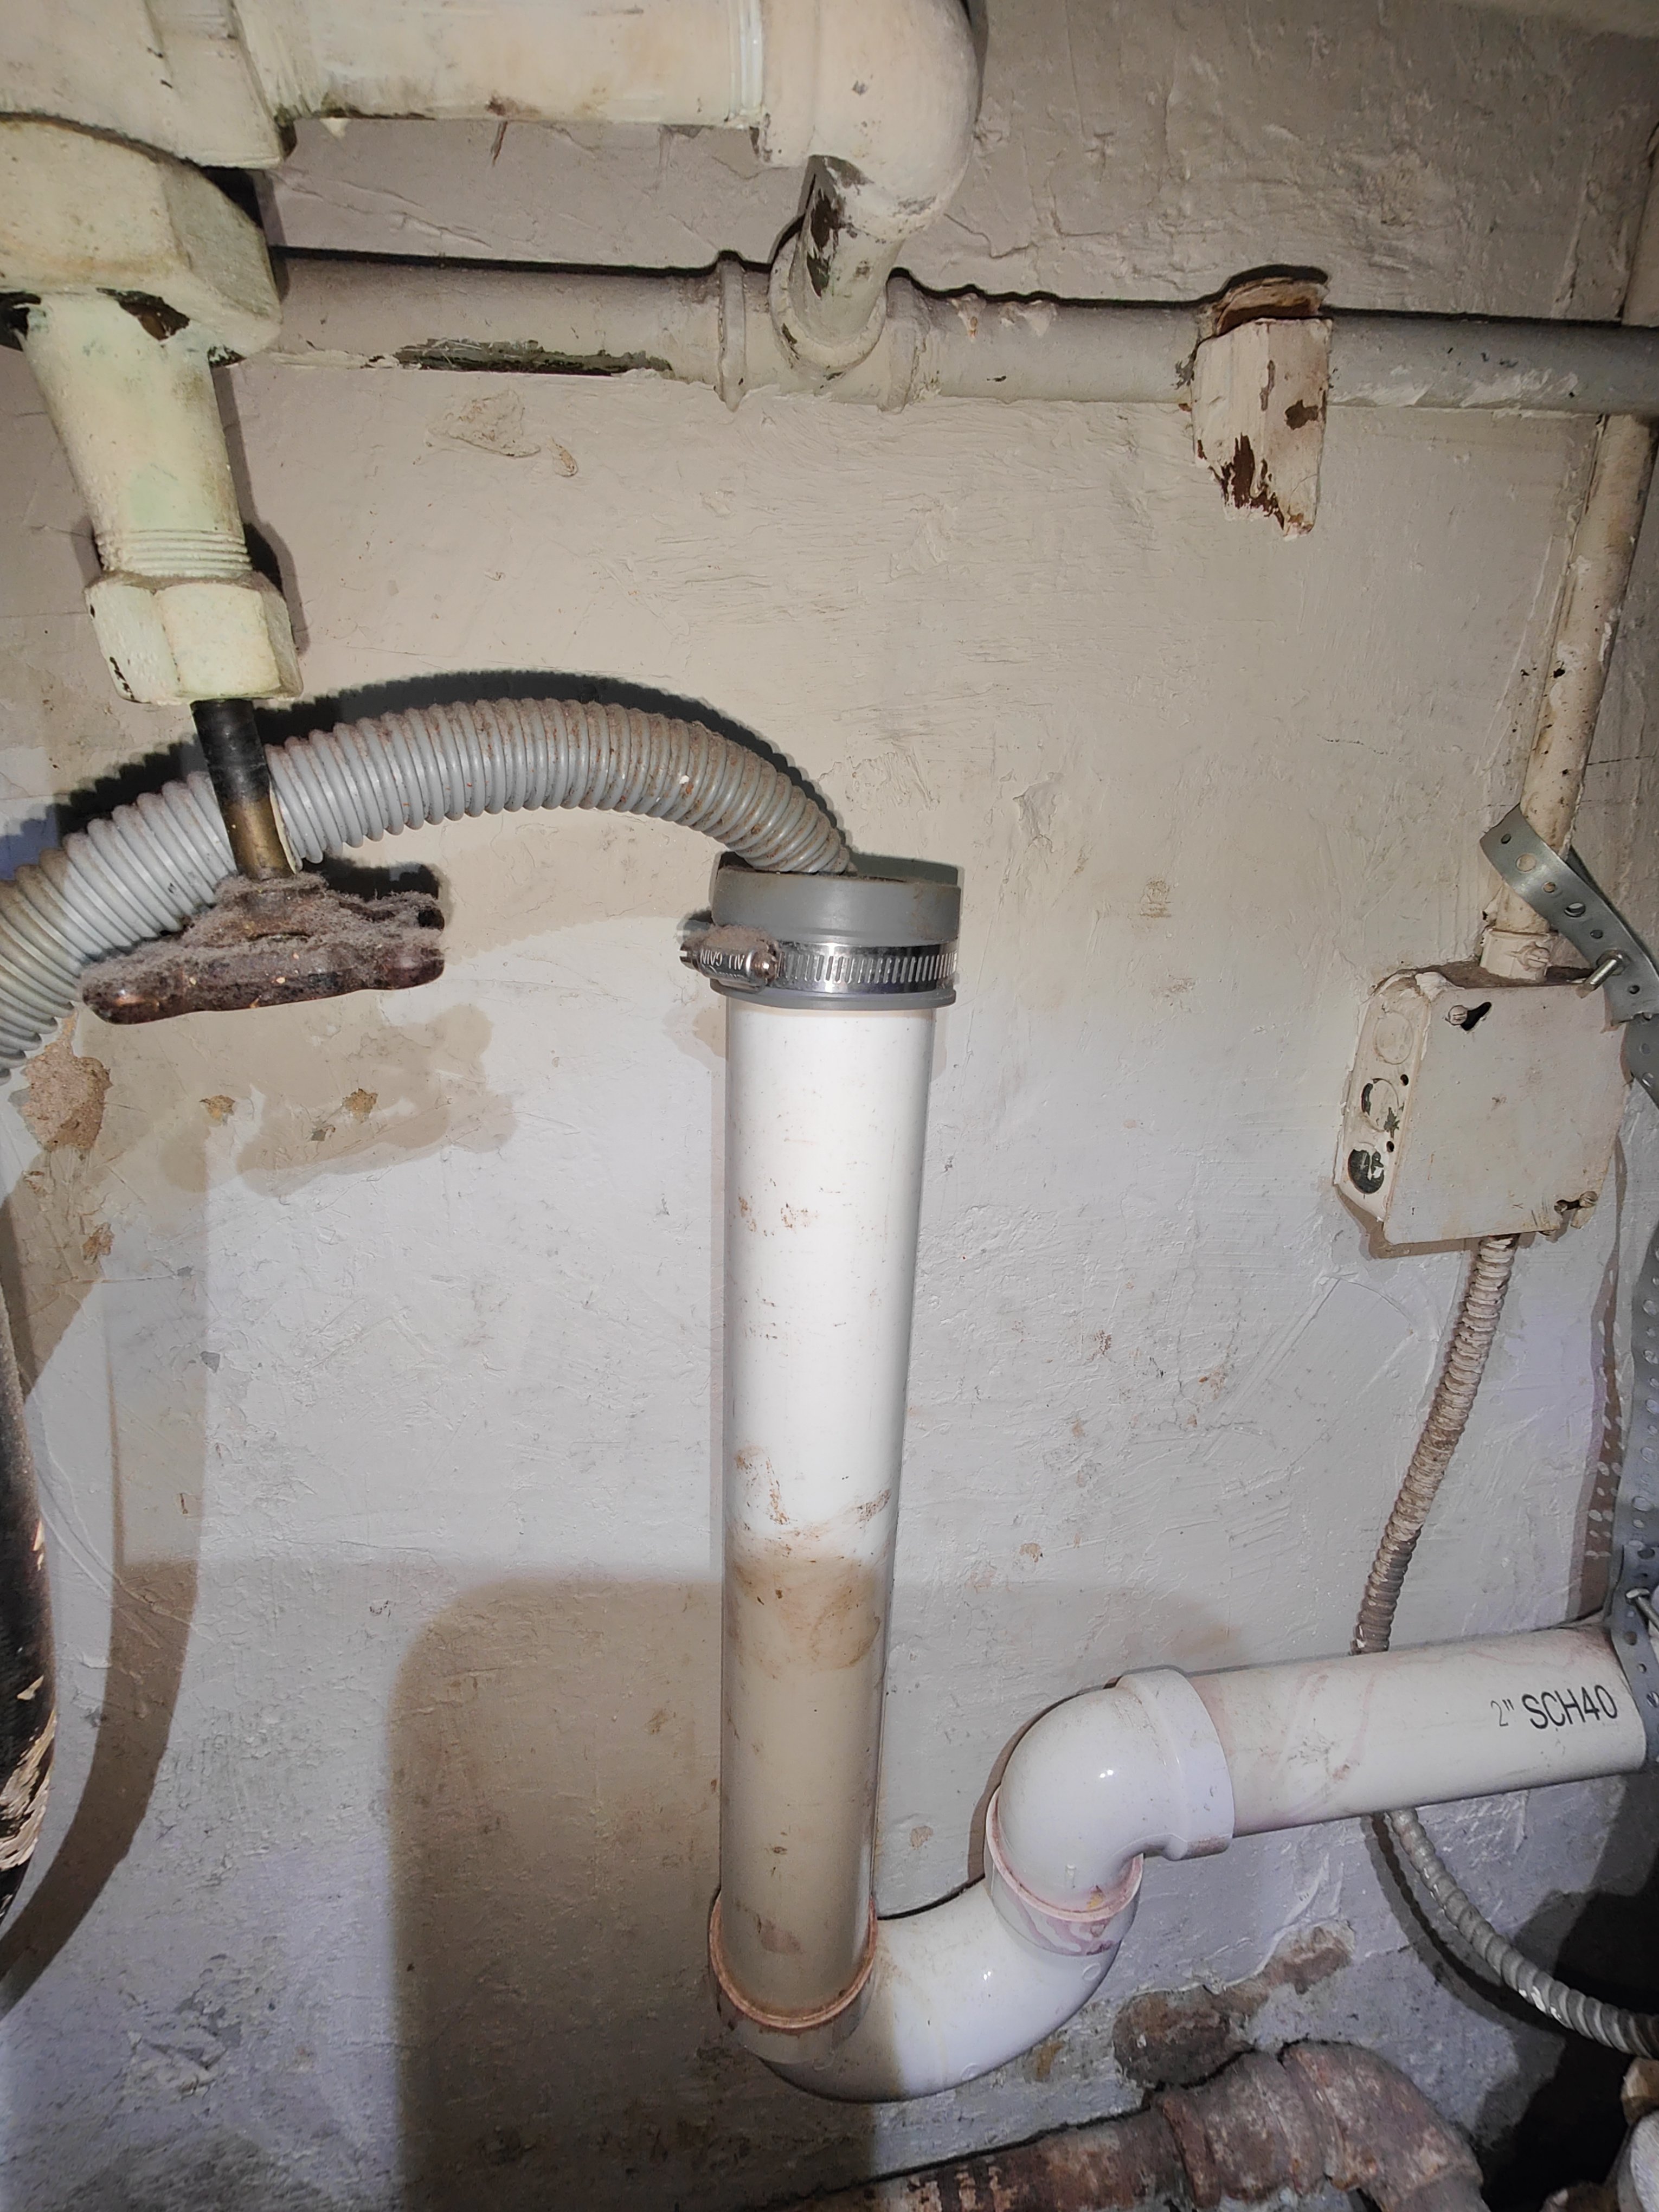
This is the existing washing machine drain in the basement. The drain hose is tucked into a 2" stand pipe.
The existing PVC pipe inside the vanity is a standard 1.5". The steel pipe that it ties to looks also like 1.5". Due to the concerns on overflow, the planned washer drain inside the vanity cannot use a standpipe. Question is how to connect the corrugated drain hose to the planned T via a control valve as you mentioned?
Years ago, I used to manually drain the washer into the sink or bathtub each time. What I'm looking for is probably a semi permanent solution.
 0
0 -
i believe the manufacturer of the washer says it has to drain in to a laundry tub or standpipe, it can not directly connect to the drain pipe.
 1
1 -
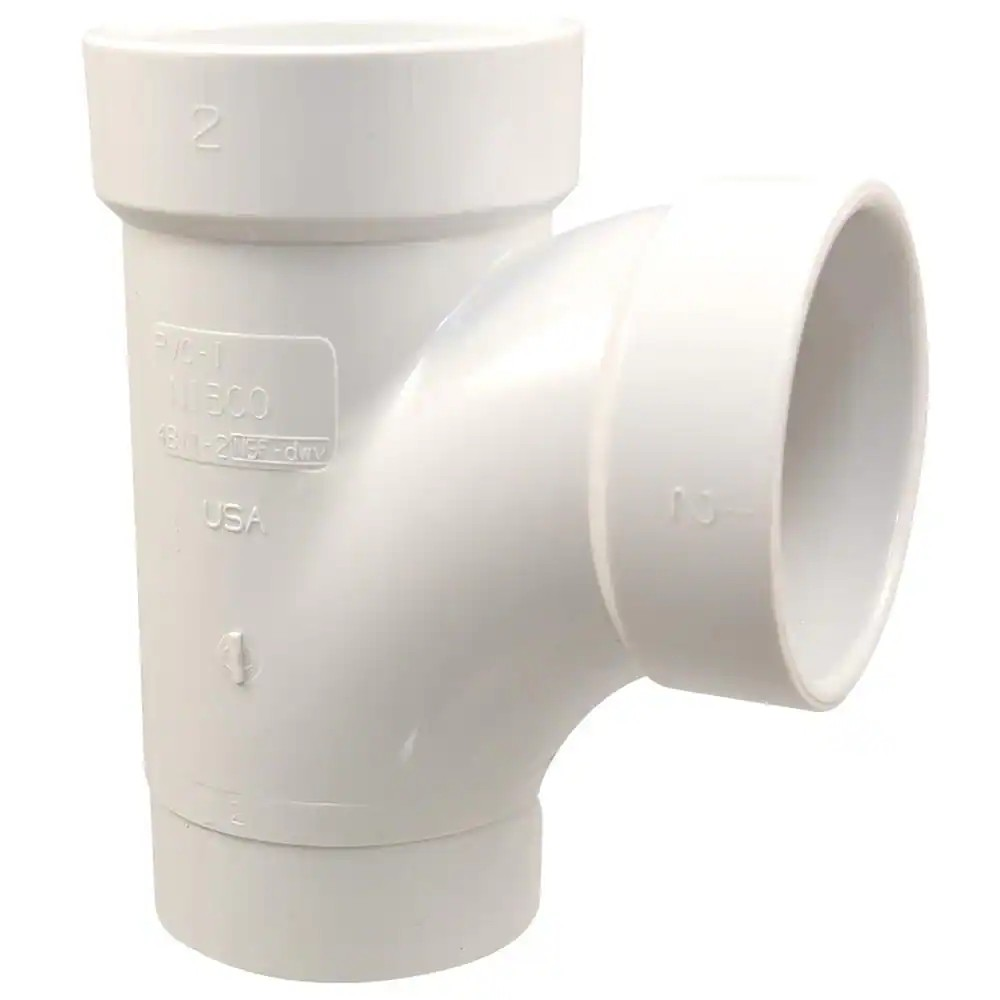
the wye cut into the pvc pipe.. can it be hub x spigot? So spigot end should use a fernco coupling to join to the PVC pipe?
When the washer drain brings into the other hub, it naturally forms a wet vent for the shower drain?
 1
1 -
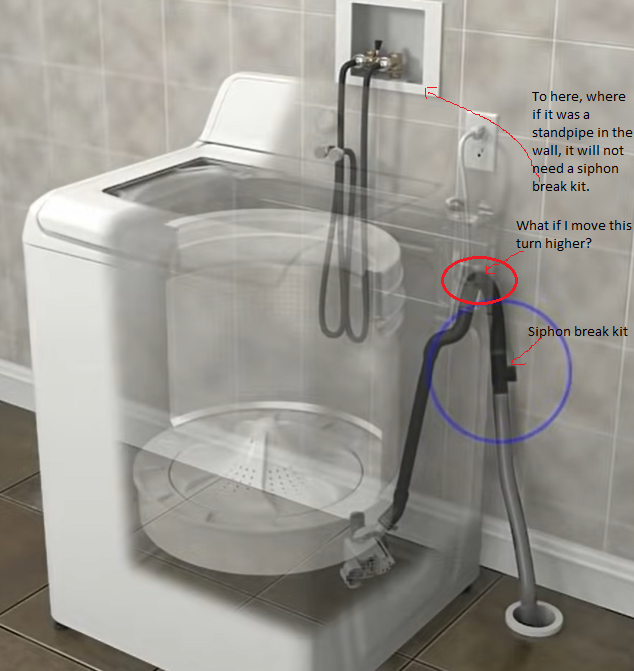
The next question would be how to break the siphon on the washer drain, so that the shower water is not siphoned into the washer.
I don't understand why the air break kit could be installed there.. the water will not be pumped out of that vent?
 0
0 -
the siphon break is a vacuum breaker, it is a check valve that only lets air in, it doesn't let air or water out.
 1
1 -
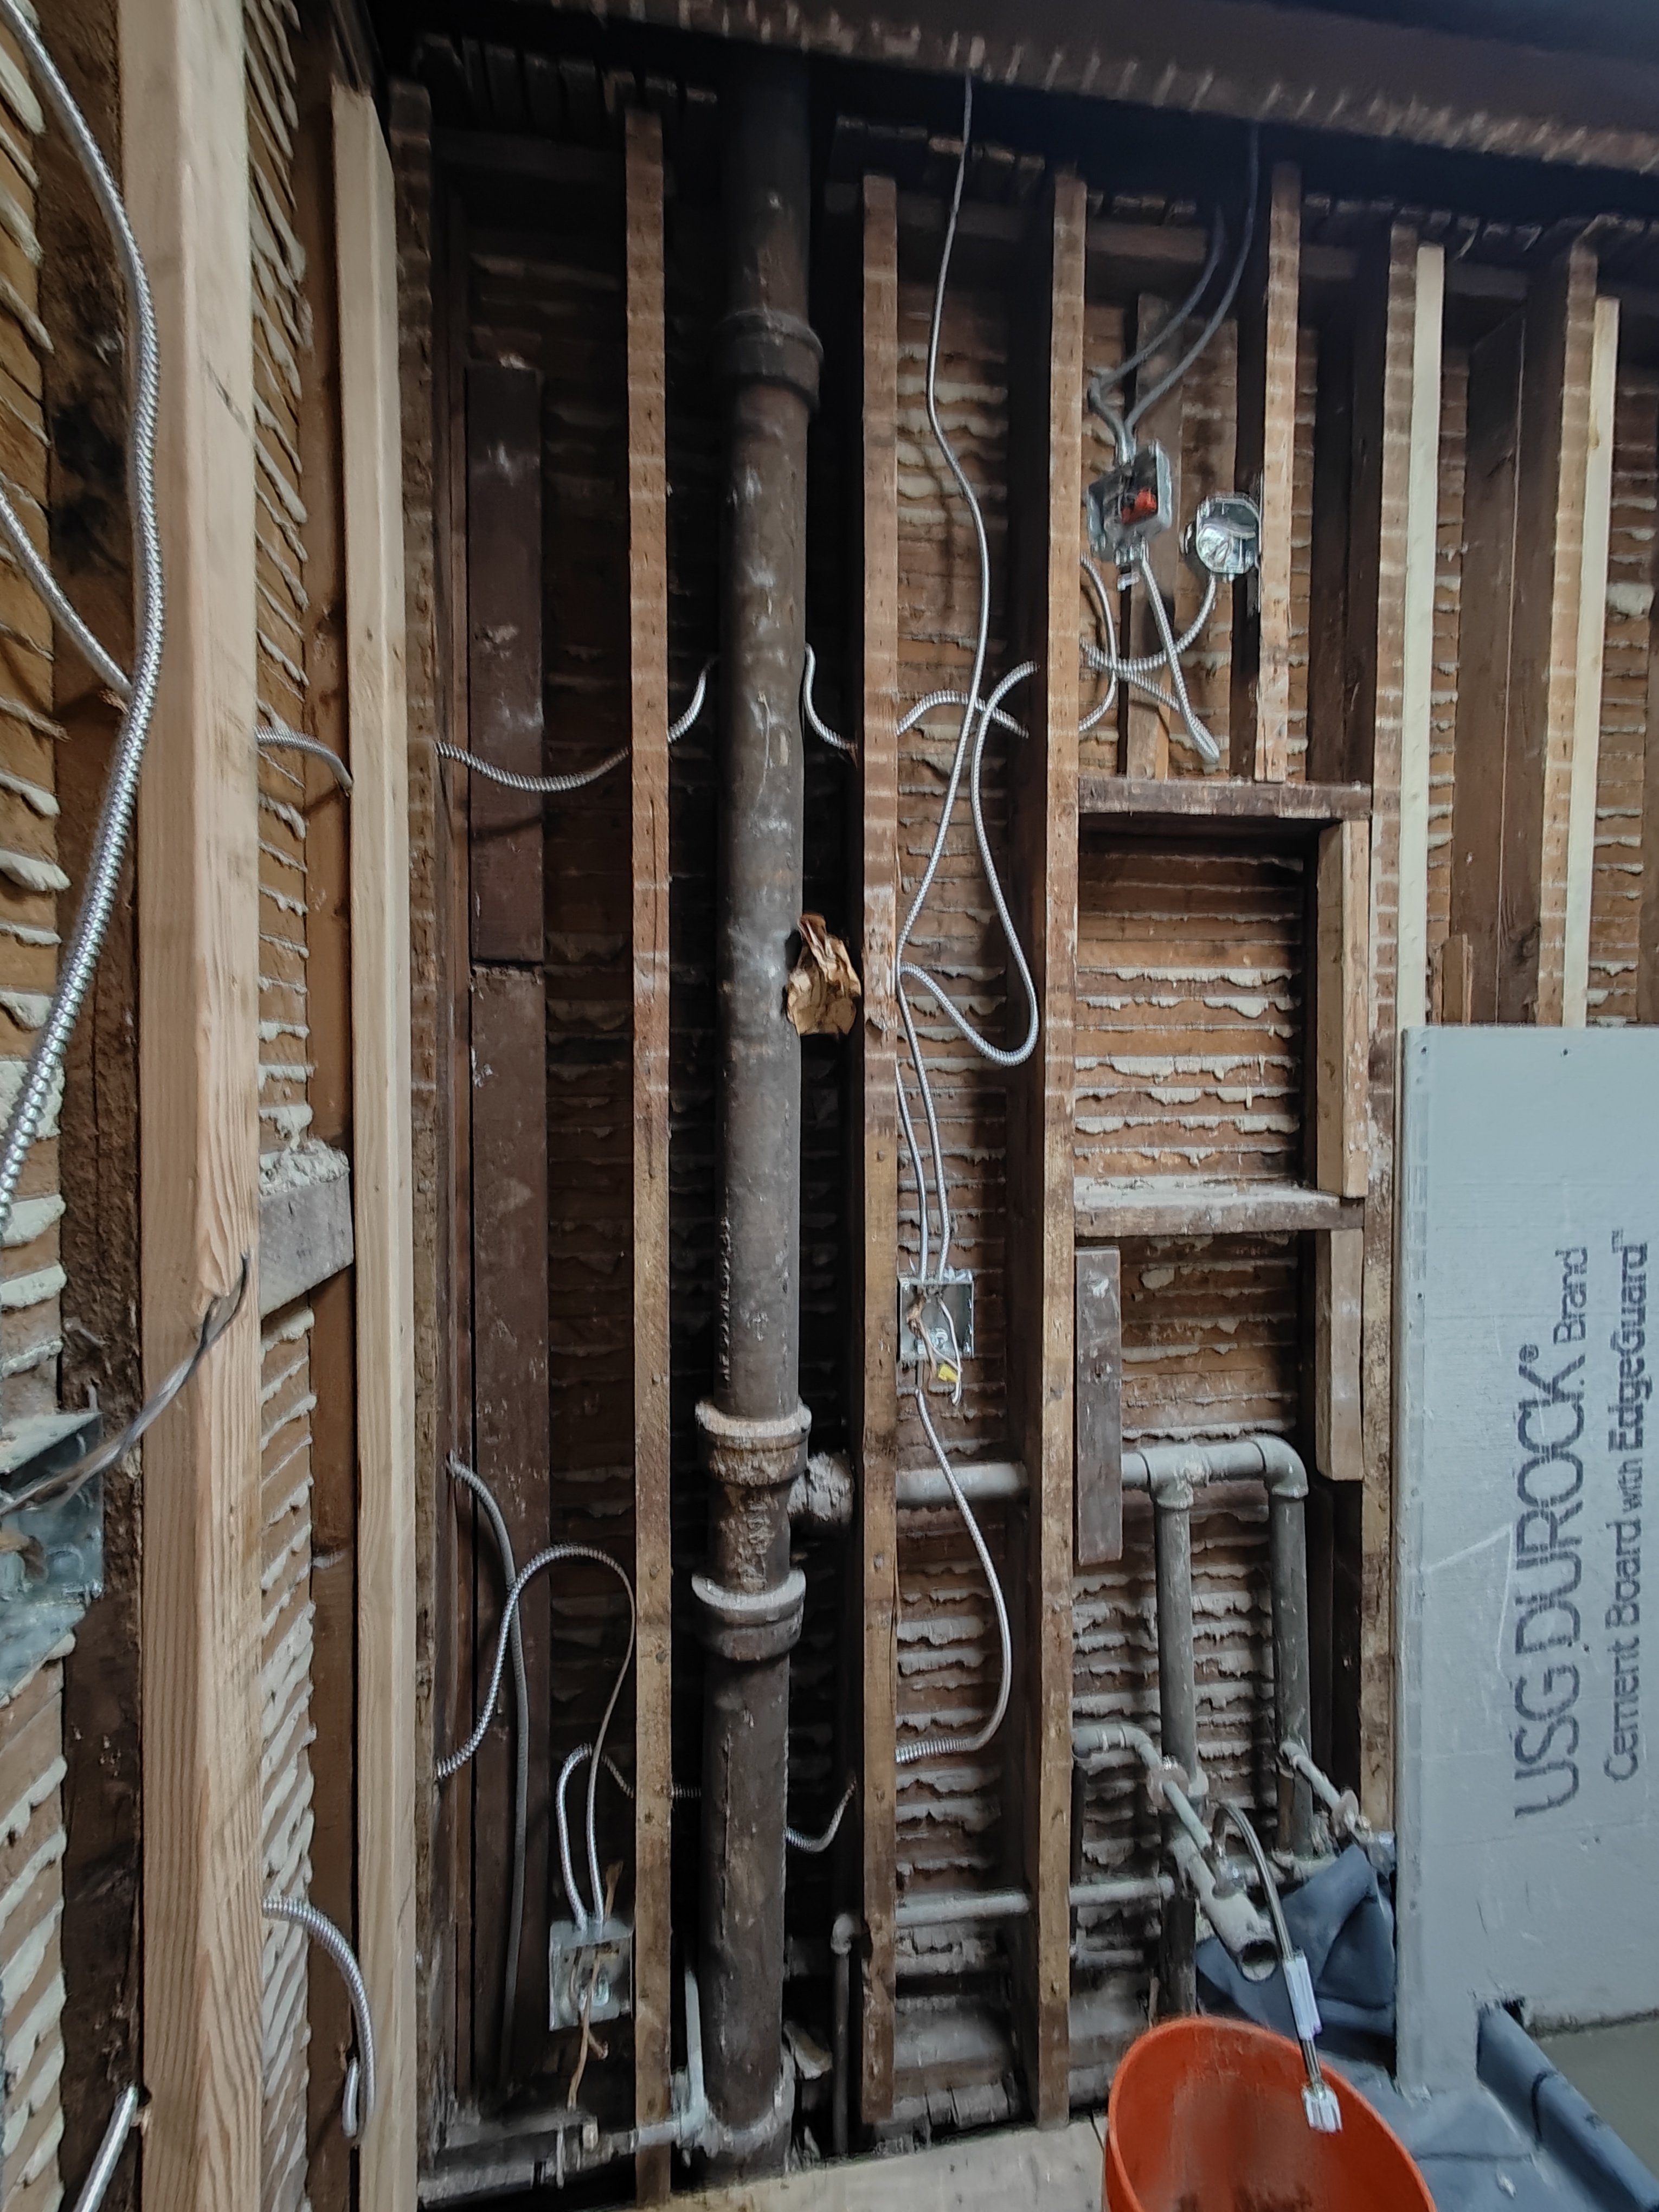
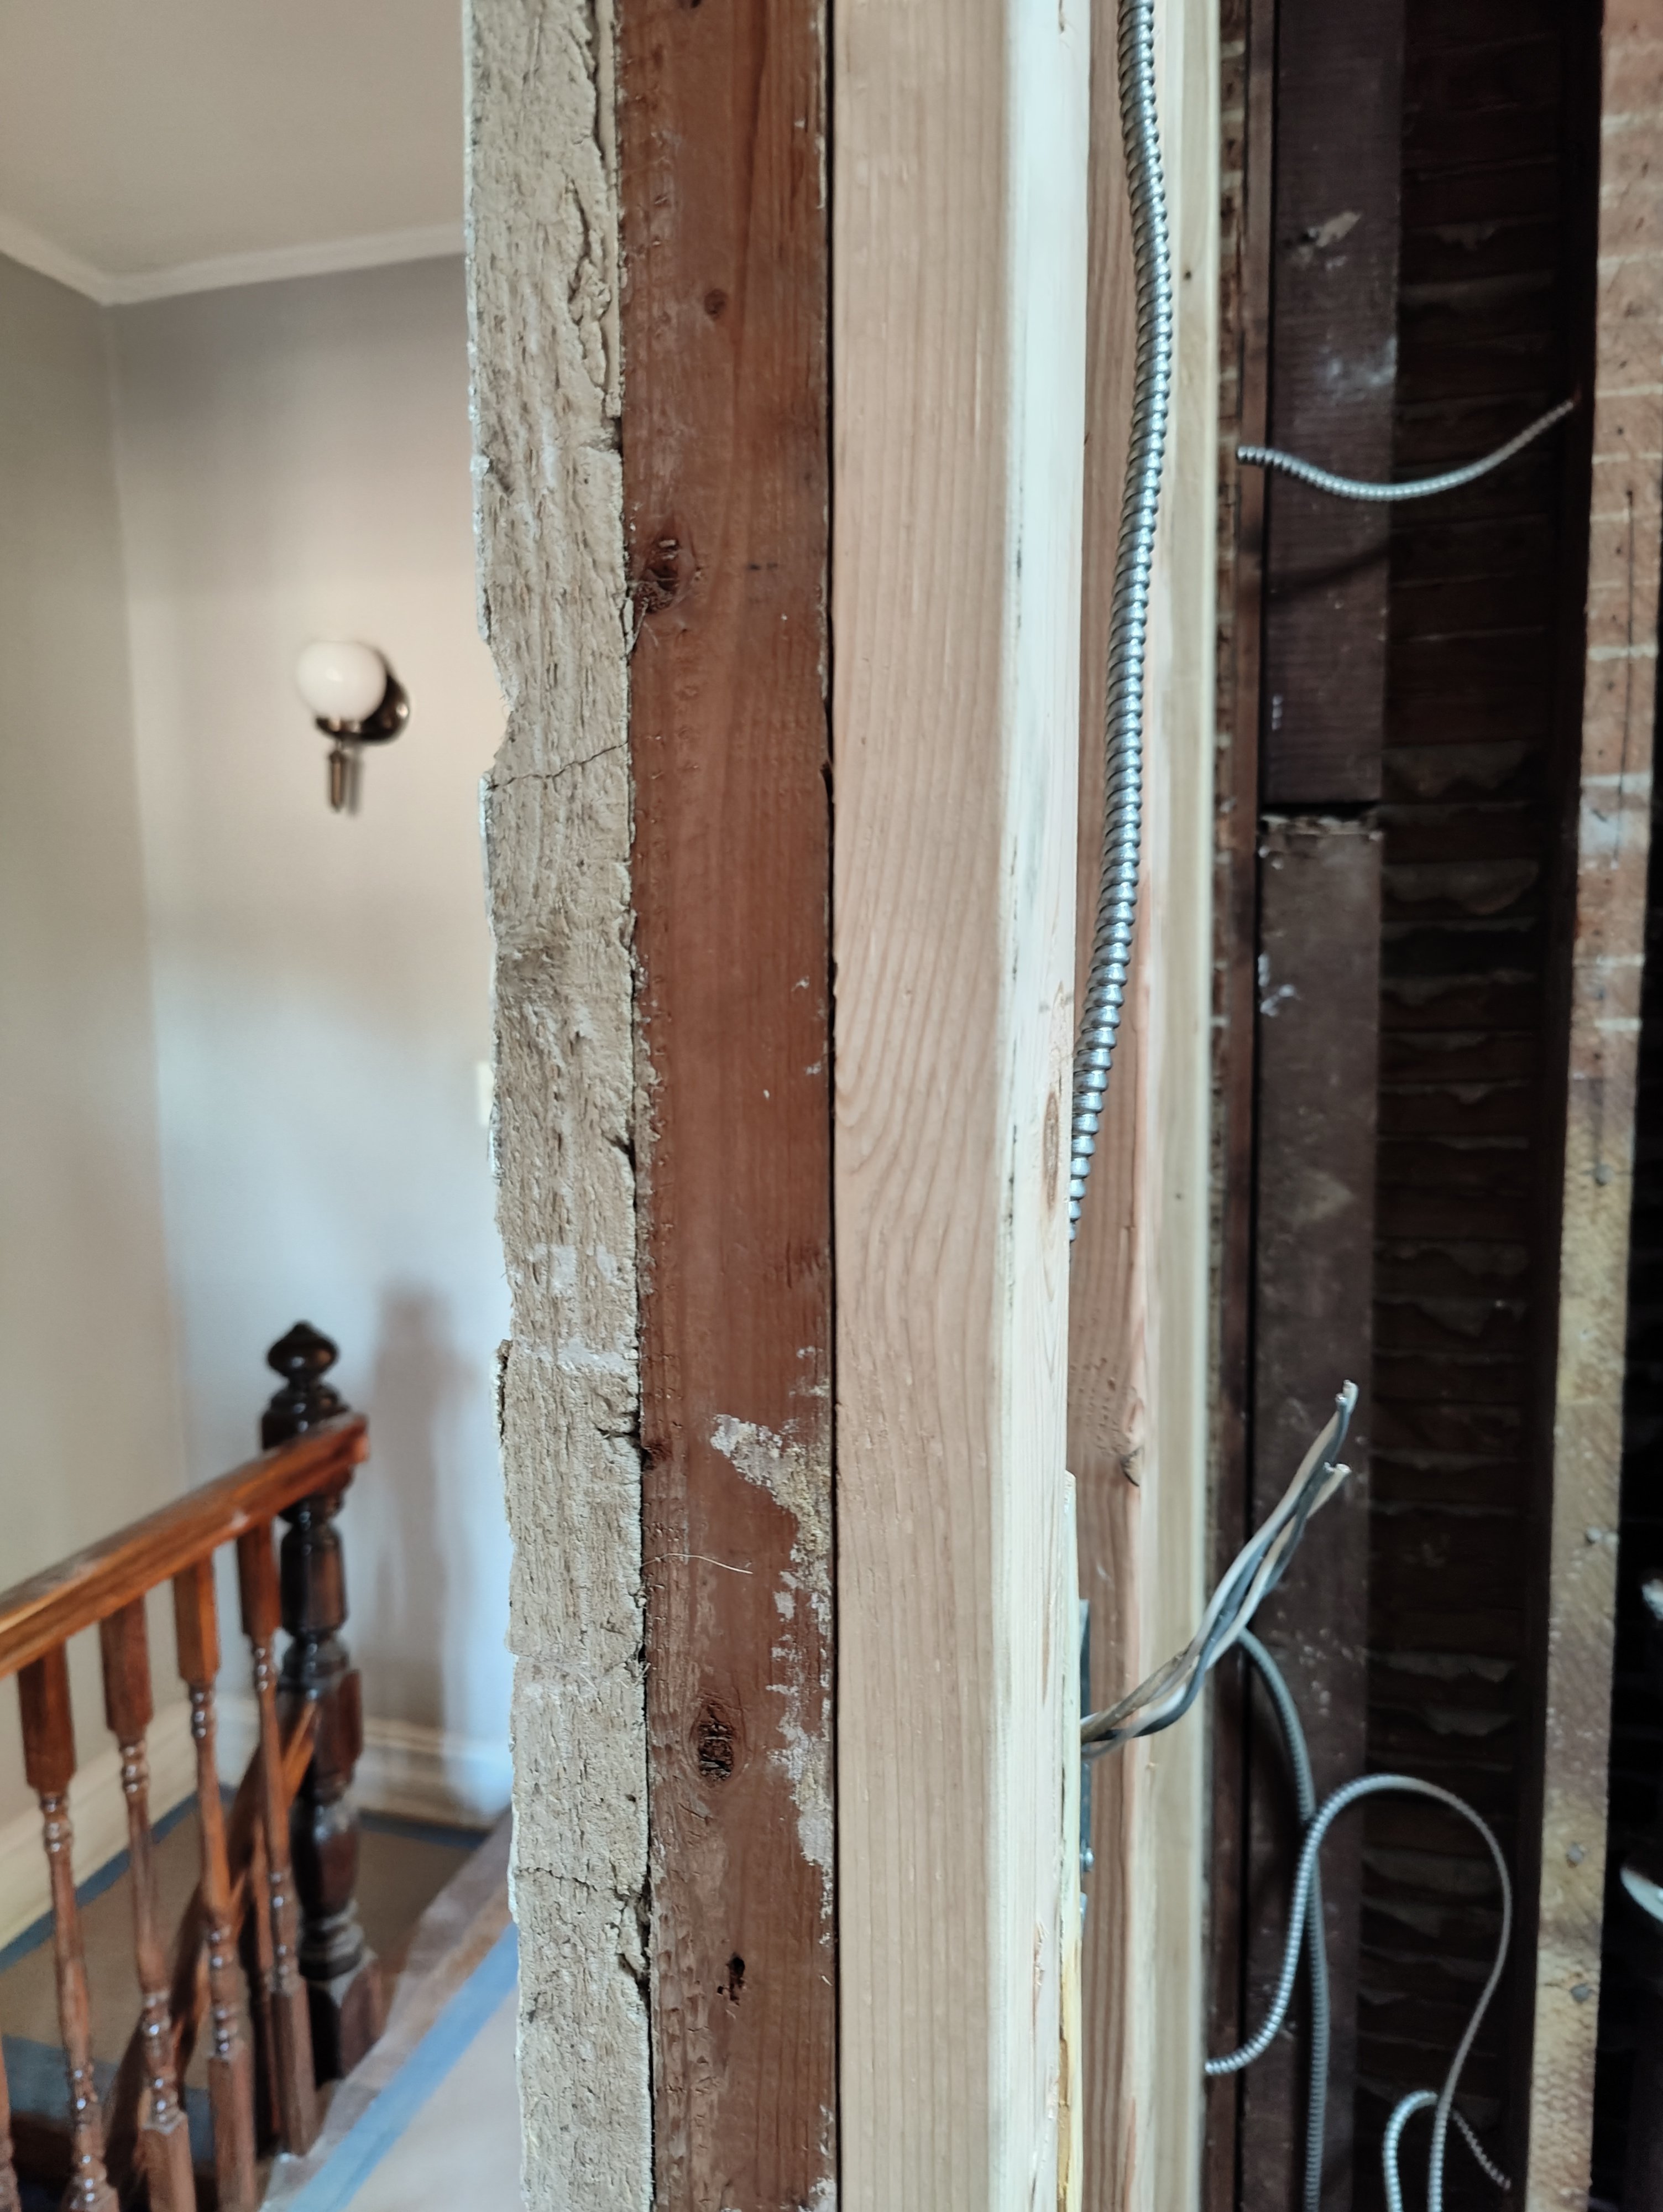
A relevant question is, need to drill about 1 1/2" hole through the wall. After renovation, the outer part of wall is still plaster wall, made by stacking up horizontal wood strips, with plaster spread between layers, and a plaster finish covering on the outside.
Does anyone have experience drilling through this type of wall?
 0
0 -
a screwdriver and oscillating tool is probably the best way to cut through plaster on wood lath. use an old screwdriver and hammer to tap the outline of the hole you need somewhat gently and break out the plaster then use the oscillating tool to cut the lath. if you do it too violently you'll break the part of the plaster that is keyed between the lath and then the plaster will come loose. if you use a different type of saw to cut the lath it is best to cut almost all the way through one side then cut through the other side then cut the last of the first side. that keeps the saw from grabbing the lath and shaking it around when you cut the second side.
1 -
I will check if the washer already has a built-in air break, in that case I wouldn't add a second one
0 -
A carbide or diamond hole saw works for the plaster, also for wood if you go slowly. Dirt cheap at Harbor Frieght.
 Bob "hot rod" Rohr
trainer for Caleffi NA
Living the hydronic dream0 -
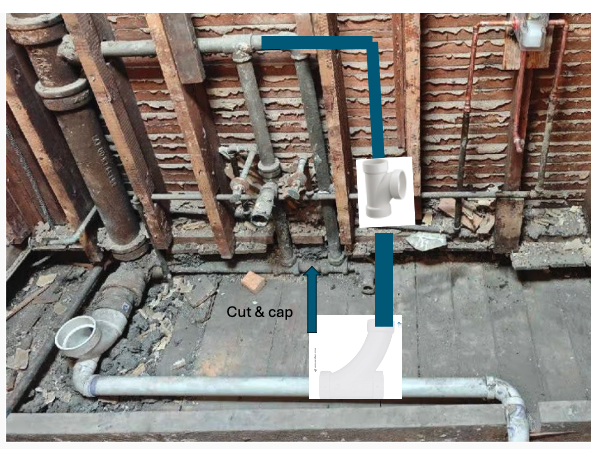
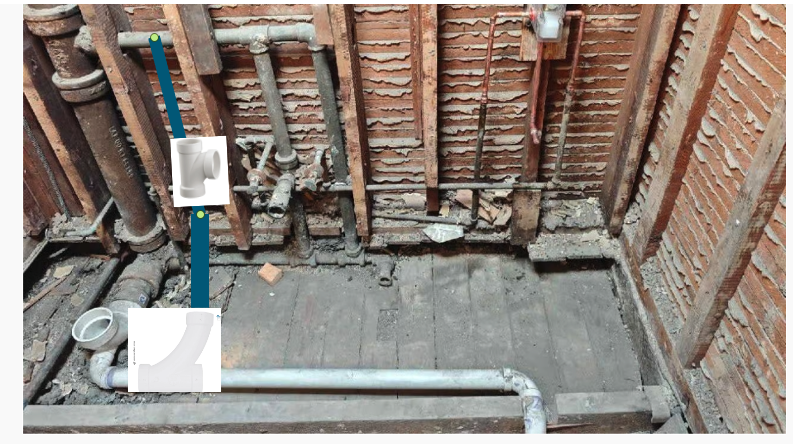
Here is an option.
Cut a 2" combo into the shower trap arm. turn up into the wall, then about 8" above the floor a 2 X 1-1/2 san tee.
2" facing out for the washer trap, 1-1/2" up, tie into the 1-1/2' horizontal circuit ventcircuit vent
Technically the vertical should increase 1 size when you wet vent, but this would work fine for a washer drain.
Now you vent your shower properly and have a 2" washer drain. Without messing with the CI soil pipe.
It could be two stud spaces to the right, 1st pic, if that helps. Cut off the last right ell on the horizontal 1-1/2 vent couple the new pvc vent on there. Then remove piping below to the tee in the floor. A Fernco cap on the 1-1/2 where you cut it.
Looks like that was an old tub drain and vent?
 Bob "hot rod" Rohr
trainer for Caleffi NA
Living the hydronic dream0 -
No…do not pipe it like that. Too much chance of drain issues with the toilet and the high velocity discharge from the washing machine.
I believe the original post does not want to demo the new bathroom.
The washing machine. Where is it going to be placed if not in the newly renovated bathroom? Next is where I mentioned above on where to discharge the unit. That would be the cast iron stack pictured above.
0 -
I can't imagine that the copper is connecting to steel. More likely threaded brass. I could be wrong
Miss Hall's School service mechanic, greenhouse manager, teacher, dog walker and designated driver
0 -
around here there is still lots of galvanized supply around.
 1
1 -
I believe the OP has already closed in the walls and floor!
1 -
it's planned in the bedroom right behind the wall
there's some hope to do the cutting from the lower floor ceiling.. in that way in the bathroom i only need to open part of the USG DUROCK cement board (11 posts earlier).. but access is still challenge which is why i asked if reinforced rubber hose can be used to substitute pvc
0 -
Rubber re-enforced hose for a sewage drain is not recommended. Only the hose supplied by the manufacturer as a drain to a properly installed house drain meant to receive the discharge of a washing machine. You seem to be looking for short cuts. There are none here. You need to do this properly.
 1
1 -
I personally have never run across threaded copper plumbing of any kind I have run across threaded brass. I misspoke when I said of any kind. Of course I've seen used and adaptors But never tees elbows nipples etc.
Miss Hall's School service mechanic, greenhouse manager, teacher, dog walker and designated driver
0 -
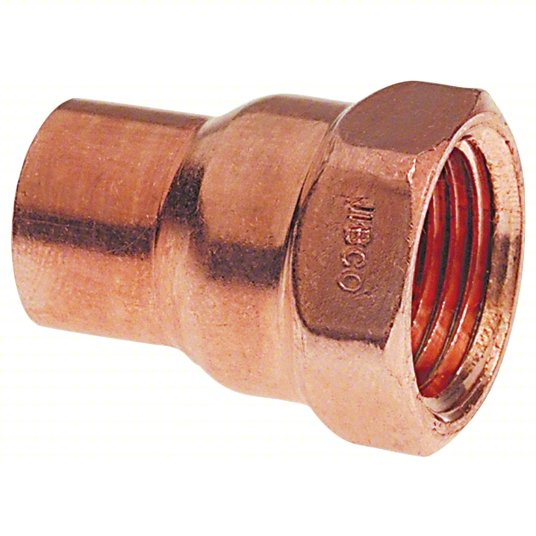
Hi @Grallert , I was just going from the somewhat fuzzy picture of the piping early in this thread, but it looks just like galvanized steel transitioning to copper via a copper female adapter, as pictured above. I've seen people do this around here, and it always either leaks or plugs up with rust. If it were exposed and accessible, maybe it could be left alone for a bit. But being inside of a wall is a guarantee of problems that will be unpleasant to fix. 😈
Yours, Larry
0


Categories
- All Categories
- 87.6K THE MAIN WALL
- 3.3K A-C, Heat Pumps & Refrigeration
- 59 Biomass
- 429 Carbon Monoxide Awareness
- 124 Chimneys & Flues
- 2.2K Domestic Hot Water
- 5.9K Gas Heating
- 119 Geothermal
- 168 Indoor-Air Quality
- 3.8K Oil Heating
- 78 Pipe Deterioration
- 1K Plumbing
- 6.6K Radiant Heating
- 394 Solar
- 16K Strictly Steam
- 3.5K Thermostats and Controls
- 56 Water Quality
- 51 Industry Classes
- 50 Job Opportunities
- 18 Recall Announcements