Welcome! Here are the website rules, as well as some tips for using this forum.
Need to contact us? Visit https://heatinghelp.com/contact-us/.
Click here to Find a Contractor in your area.
If our community has helped you, please consider making a contribution to support this website. Thanks!
Eastman 20371?
Options

neals
Member Posts: 66
Total newbie here, but trying to get up to speed via the excellent "We Got Steam Heat" book. My mother-in-law's living room radiator air vent just failed, and all the hardware store had left in stock was this cheap "Eastman part #20371" -- which admittedly looks just like the one that died.
Does anyone recognize this and know how it compares to other vents? It's not listed in the Gill & Pajek balancing guide.
Does anyone recognize this and know how it compares to other vents? It's not listed in the Gill & Pajek balancing guide.
0
Comments
-
that should get you by,
but,
what was the failure?
known to beat dead horses0 -
The venting capacity is the same as the “Watts SV” in the chart—it is exactly the same ****.
The failure is likely because these vents are very failure-prone by nature. I have seen them split down the side in less than a season of use!1 -
Thanks for the quick reply! This info is great.
So if I'm reading the chart right there's less airflow in this thing than a Gorton or Maid O Mist 5? So much for supporting my local businesses, and this explains why it takes so long to heat up.The failure mode was spewing steam into the room. (Fortunately I had turned down the pressuretrol from the "knucklehead" 10 PSI it was at down to 4 the night before.). I suppose it's possible it cracked, I wrecked the body pretty badly getting it off so any forensic evidence was lost.0 -
ok, now dial the Ptrol the rest of the way down,neals said:The failure mode was spewing steam into the room. (Fortunately I had turned down the pressuretrol from the "knucklehead" 10 PSI it was at down to 4 the night before.). I suppose it's possible it cracked, I wrecked the body pretty badly getting it off so any forensic evidence was lost.
you don't want any pressure higher than 2psi, lower when we get there, like 1.5.
post a picture of the Ptrol,
any idea if the pigtail(s) is clear ?
known to beat dead horses 2
2 -
Hang on a bit, I didn't expect such fast turnaround on a forum!1
-
BTW - for some of these vents 3 PSI is the max they can handle and could be damaged by the pressure you had, and maybe even the 4 PSI you have now. Even more reason to dial it down.2
-
 Here is pressuretrol, but...
 ...there's this thing too. It looks to me like this is the "cut in" for want of a better name. So if I go down to 2 on the pressuretrol they might get in a catfight. Maybe I should turn this down too?
I'm afraid to make major adjustments, this house is 100 years old (though some days it seems more like 500).0 -
The gray box is your primary pressuretrol, the other “clear” one is the manual-reset secondary. You can drop the gray box setting a bit more, just not all the way or it may not reset/turn back on at pressure drop, and also pull the cover off of it. There will be a white wheel in there on the switch—set it to “1”.neals said:Here is pressuretrol, but......there's this thing too. It looks to me like this is the "cut in" for want of a better name. So if I go down to 2 on the pressuretrol they might get in a catfight. Maybe I should turn this down too?
I'm afraid to make major adjustments, this house is 100 years old (though some days it seems more like 500).1 -
1st picture with the clear front and red button is a manual reset, high limit Ptrol, you should probably set that one back up to 10, this would only shut off if the primary Ptrol messes up.
The solid grey cover is your primary operating Ptrol, the scale on the front is your cutout, leave it set as is, that just under the 2, inside the cover is a white differential wheel, it should be set to 1,
Set like this the boiler should operate up to 2 psi, shut off, and come back on at 1 psi.
Post another picture showing all your controls, including the boiler and the piping up the ceiling, one big general picture.known to beat dead horses
 3
3 -
Ok, gray box open, white dial set to 1, screw set to just under 2:

 0
0 -
General setup:

 0
0 -
Also, if some vents can't take more than 3 PSI shouldn't I have the backup pressuretrol set to 3? Or is that not enough wiggle room?0
-
The manual-reset pressuretrol is the “uh oh” unit, you do not want it too low or even a transient pressure spike can make it trip and then you have no heat whatsoever until it is manually reset. If you keep the pigtails clean, it should never come into play. I would not set to 10psi- leave it at 5-6.
I have found that vents will survive short-term operation at higher pressures than 3psi, but prolonged “operation“ (I use that term loosely here) in that condition will kill them, especially the alcohol-filled flavors. Your system will hit the limit pressure once and then the manual reset tells you that something is wrong before worse happens.1 -
Great, I'll leave it set a bit over 5.
I'll admit I don't know what a pigtail is, must not have gotten far enough in the book yet. But whatever it is I'm sure it isn't clean.0 -
neals said:Great, I'll leave it set a bit over 5.
I'll admit I don't know what a pigtail is, must not have gotten far enough in the book yet. But whatever it is I'm sure it isn't clean. This is the pigtail. The other pressuretrol and gauge should have one too. They like to collect gunk and clog up, then the controls have no idea what is going on (like me!!)
yours appear to be brass which is good! They still should be checked before each season, but brass is much less troublesome than steel. Checking/Cleaning requires disconnecting the wires to be able to spin the pressuretrol off. You should be able to blow air through the pigtail into the boiler. If clogged, poking a zip tie through has worked well for me. Be sure to prime the loop with water before threading the pressuretrol back on (with some thread sealant/tape, of course!). 2
2 -
Ptrol looks ok/good, could dial down the main just a bit more, 1.5 ish.
The riser out of the boiler looks like it is sized down to the header? kinda not correct, but, you're not complaining about noise or hammering, right?
ideally a second gage would be on the other Ptrol so you would know if one or the other pigtail was clogging, as it is now the operating pigtail could get clogged, and the gage would see the clogged side, not what the boiler is doing.
if the new vents scream and whistle you need to think about checking the pigtail under the operating Ptrol, and then the other one also, but it's up so high it's less likely to be trouble.
2 Gages would say so.
Is that water in the sightglass dirty?
does it bounce much, >1", when the boiler is firing ?known to beat dead horses2 -
Ah, "pigtail" for the curl?
This boiler is only a year old, could it already be gunked up?0 -
No hammering, right. So hopefully it's OK.The second gauge you recommend would somehow screw on to the same fitting as the big red-button pressuretrol?I'll see what the new vents do when it finally gets cold tonight, it's been oddly warm all week in NYC. Same for the sightglass bouncing.Sightglass is fairly rusty, but it's always been that way. I was warned not to dump water to clear it (this was routine with old boiler, a bucket per week) as chlorates from tap supply will vastly shorten the new boiler lifespan.0
-
While you are in the basement and reading the steam book, look for steam main air vents. There are pictures in the book and you will recognize them.
Post pictures of them here also for more info.
Always good to make points with the MIL.") 0
0 -
if you add the 2nd gage, pipe it like your first, a tee and nipple on top of the pigtail, under the big red-button pressuretrol, keep it all brass.
You should buy a lower pressure gage, 0-3, or, 0-5, either at a local supply house, or supplyhouse.com , then you can really see your operating pressures.
On that dirty water, ideally it would be clean(er), and I'm not sure about your whole chlorides thing there, I would consider skimming / draining and refilling,
but if it's not bouncing bad,
and until a local guy jumps in and confirms or condemns NYC water, let it be.
Do you see a skim port?
a high pipe at or slightly above normal water line, where you would drain surface water(not from the bottom), I don't from your pictures.known to beat dead horses0 -
Sadly, basement has pegboard covering up mains, which I intend to tear down some day but certainly not tonight.JUGHNE said:While you are in the basement and reading the steam book, look for steam main air vents. There are pictures in the book and you will recognize them. Post pictures of them here also for more info.
I don't doubt they're untouched since oil conversion from coal in late 60s.0 -
I have learned that with the MIL point system, it is doubly more important if she can bake and cook.
") 0
0 -
Unfortunately the bad news I have for you is the boiler is not piped properly, your header is only 2” inch. You have what appears to be an EG50 or EG55. If it’s an EG50 you need a minimum of a 2-1/2” inch header, if it’s an EG55 you need a minimum of a 3” header. If your having unstable water line, spitting air vents or short cycling of the burner I’d check on the near boiler piping, as you could be making wet steam which kill vents.DL Mechanical LLC Heating, Cooling and Plumbing 732-266-5386
NJ Master HVACR Lic# 4630
Specializing in Steam Heating, Serving the residents of New Jersey
https://heatinghelp.com/find-a-contractor/detail/dl-mechanical-llc
https://m.facebook.com/DL-Mechanical-LLC-315309995326627/?ref=content_filter
I cannot force people to spend money, I can only suggest how to spend it wisely.......1 -
I've been watching sightglass while the boiler has been firing since 11:11 and the level has varied between where it is and that line of gunk you see just above it:
 I don't see a skim port, but maybe you will:
 0
0 -
Is there a plug behind the fiberglass circle next to the sight glass?0
-
It's too hot right now to dig in there but I'll check later.0
-
manual says there is , , ,
but can it come out now ?
that water is dirty,
and that floating scum layer wants to be skimmed,
and you need that skim port plug opened and a nipple extended to do this, you would cap the nipple after, or add a valve and plug,
with that scum on top, the boiler boils wet,
and the steam has to struggle to break that surface,
and this wet steam carries up thru the piping,
this is something to look into further
https://www.weil-mclain.com/sites/default/files/field-file/EG Boiler Manual.pdf
it's all in hereknown to beat dead horses0 -
You can just about see the plug thru the fiberglass.
Just cut around it with a knife and show us.0 -
In a pinch you can try skimming from the top of the top port of the sight glass but it's less effective than a proper skim port. You would need to remove the plug at the bottom of the sight glass.
 https://www.youtube.com/watch?v=lO2oR9JhF0M
This one shows installing a blowdown on the bottom tapping: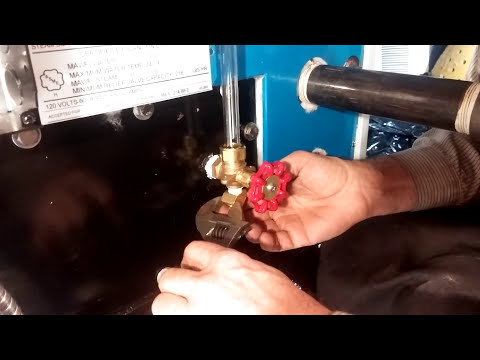 https://www.youtube.com/watch?v=_z8v1YOQcM4&t=215s 0
 -
Ok, I've cut the insulation:
 I think I'll need a pro to do this, though -- I don't even have a wrench that will fit that, much less the knowledge of how to install a proper steam-proof fitting.0
 -
Dan_NJ, if I do the sightglass skim do I shut off both valves before opening the bottom? And then what?
What keeps the auto-refill from just making up the water as it comes out forever? Do I have to turn that off too? And how do I know when I'm done?
My mother-in-law had a weekly routine where she would dump out a bucket of rusty water. The installer told her to stop doing that with this unit, because that's too much fresh water intake and will corrode the boiler in just a few years.0 -
You would shut the bottom valve on the sight glass, keep the top valve open, turn off the auto feed and remove the 1/4" plug from bottom of the lower sight glass. Then feed very slowly using manual feed valve. Water will stream down once it gets to the level of the top sight glass tapping.
Check out the two videos, they show it pretty well. I did this when i didn't have a working skim port and it worked OK.1 -
That sounds like a good plan, I'll give it a try. How do I know when I've skimmed enough?
Also, I assume these are the feed valves, with manual on the right?
0 -
Since this thing hasn't been used much this year, what about simply draining the whole thing and refilling? Or would that cause other problems?0
-
Feed valves yes - Auto feed in your picture is turned on on the left, manual feed is on the right and turned off.
Hard to say when you've skimmed enough, give it an hour or two skimming very slowly - a stream no thicker than a pencil - then put it all back as it was and run it to boiling to drive out the oxygen in all that new water, and make some steam if you need heat")
You can come back and do it again at a later time, usually you need to do it more than once.1 -
Thank you! This is going to be hard to pull off given the geometry, you can see how the sight glass is perfectly aligned with the drain valve so getting a bucket in there is challenging. Clearly I should do the blowdown thing eventually, but there's no way my local hardware store has those fittings.
I assume I should do this with the boiler cooled down to avoid thermal shock from all that new water?0 -
You can wait till it's not been running for a while, IDK how much risk there is from thermal shock since you're gonna be sending in a very small volume of water.
You may be able to find a 1/4" street 45 and 1/4" valve of some kind locally. If not you can always order them. I used a brass bar stock street 45 and one of these so I can put a hose on it and put the bucket wherever:
https://www.supplyhouse.com/Dahl-521-61-04-1-4-MIP-x-Male-Hose-Straight-Hose-and-Boiler-Drain-Valve-Lead-Free-Brass1 -
Ok, I'm headed off to the plumbing supply store now. Thank you!0
-
Plumbing supply store closed. Rather than negotiate NY public transit on a weekend in the COVID era (or stand there holding a bucket at an odd angle for two hours) I'm going to try again when they open on Monday morning. Thank you all for your help!0
-
YW, I really like that Dahl valve since it's all metal construction. The first one I had had a plastic handle that was cool to the touch but started to break down over time.0


Categories
- All Categories
- 87.7K THE MAIN WALL
- 3.3K A-C, Heat Pumps & Refrigeration
- 59 Biomass
- 430 Carbon Monoxide Awareness
- 128 Chimneys & Flues
- 2.2K Domestic Hot Water
- 5.9K Gas Heating
- 121 Geothermal
- 170 Indoor-Air Quality
- 3.8K Oil Heating
- 79 Pipe Deterioration
- 1.1K Plumbing
- 6.6K Radiant Heating
- 396 Solar
- 16K Strictly Steam
- 3.5K Thermostats and Controls
- 56 Water Quality
- 51 Industry Classes
- 51 Job Opportunities
- 17 Recall Announcements