Water loss in steam system

New issue related to a boiler in a house that my daughter bought last year. (Link to prior issue/post below).
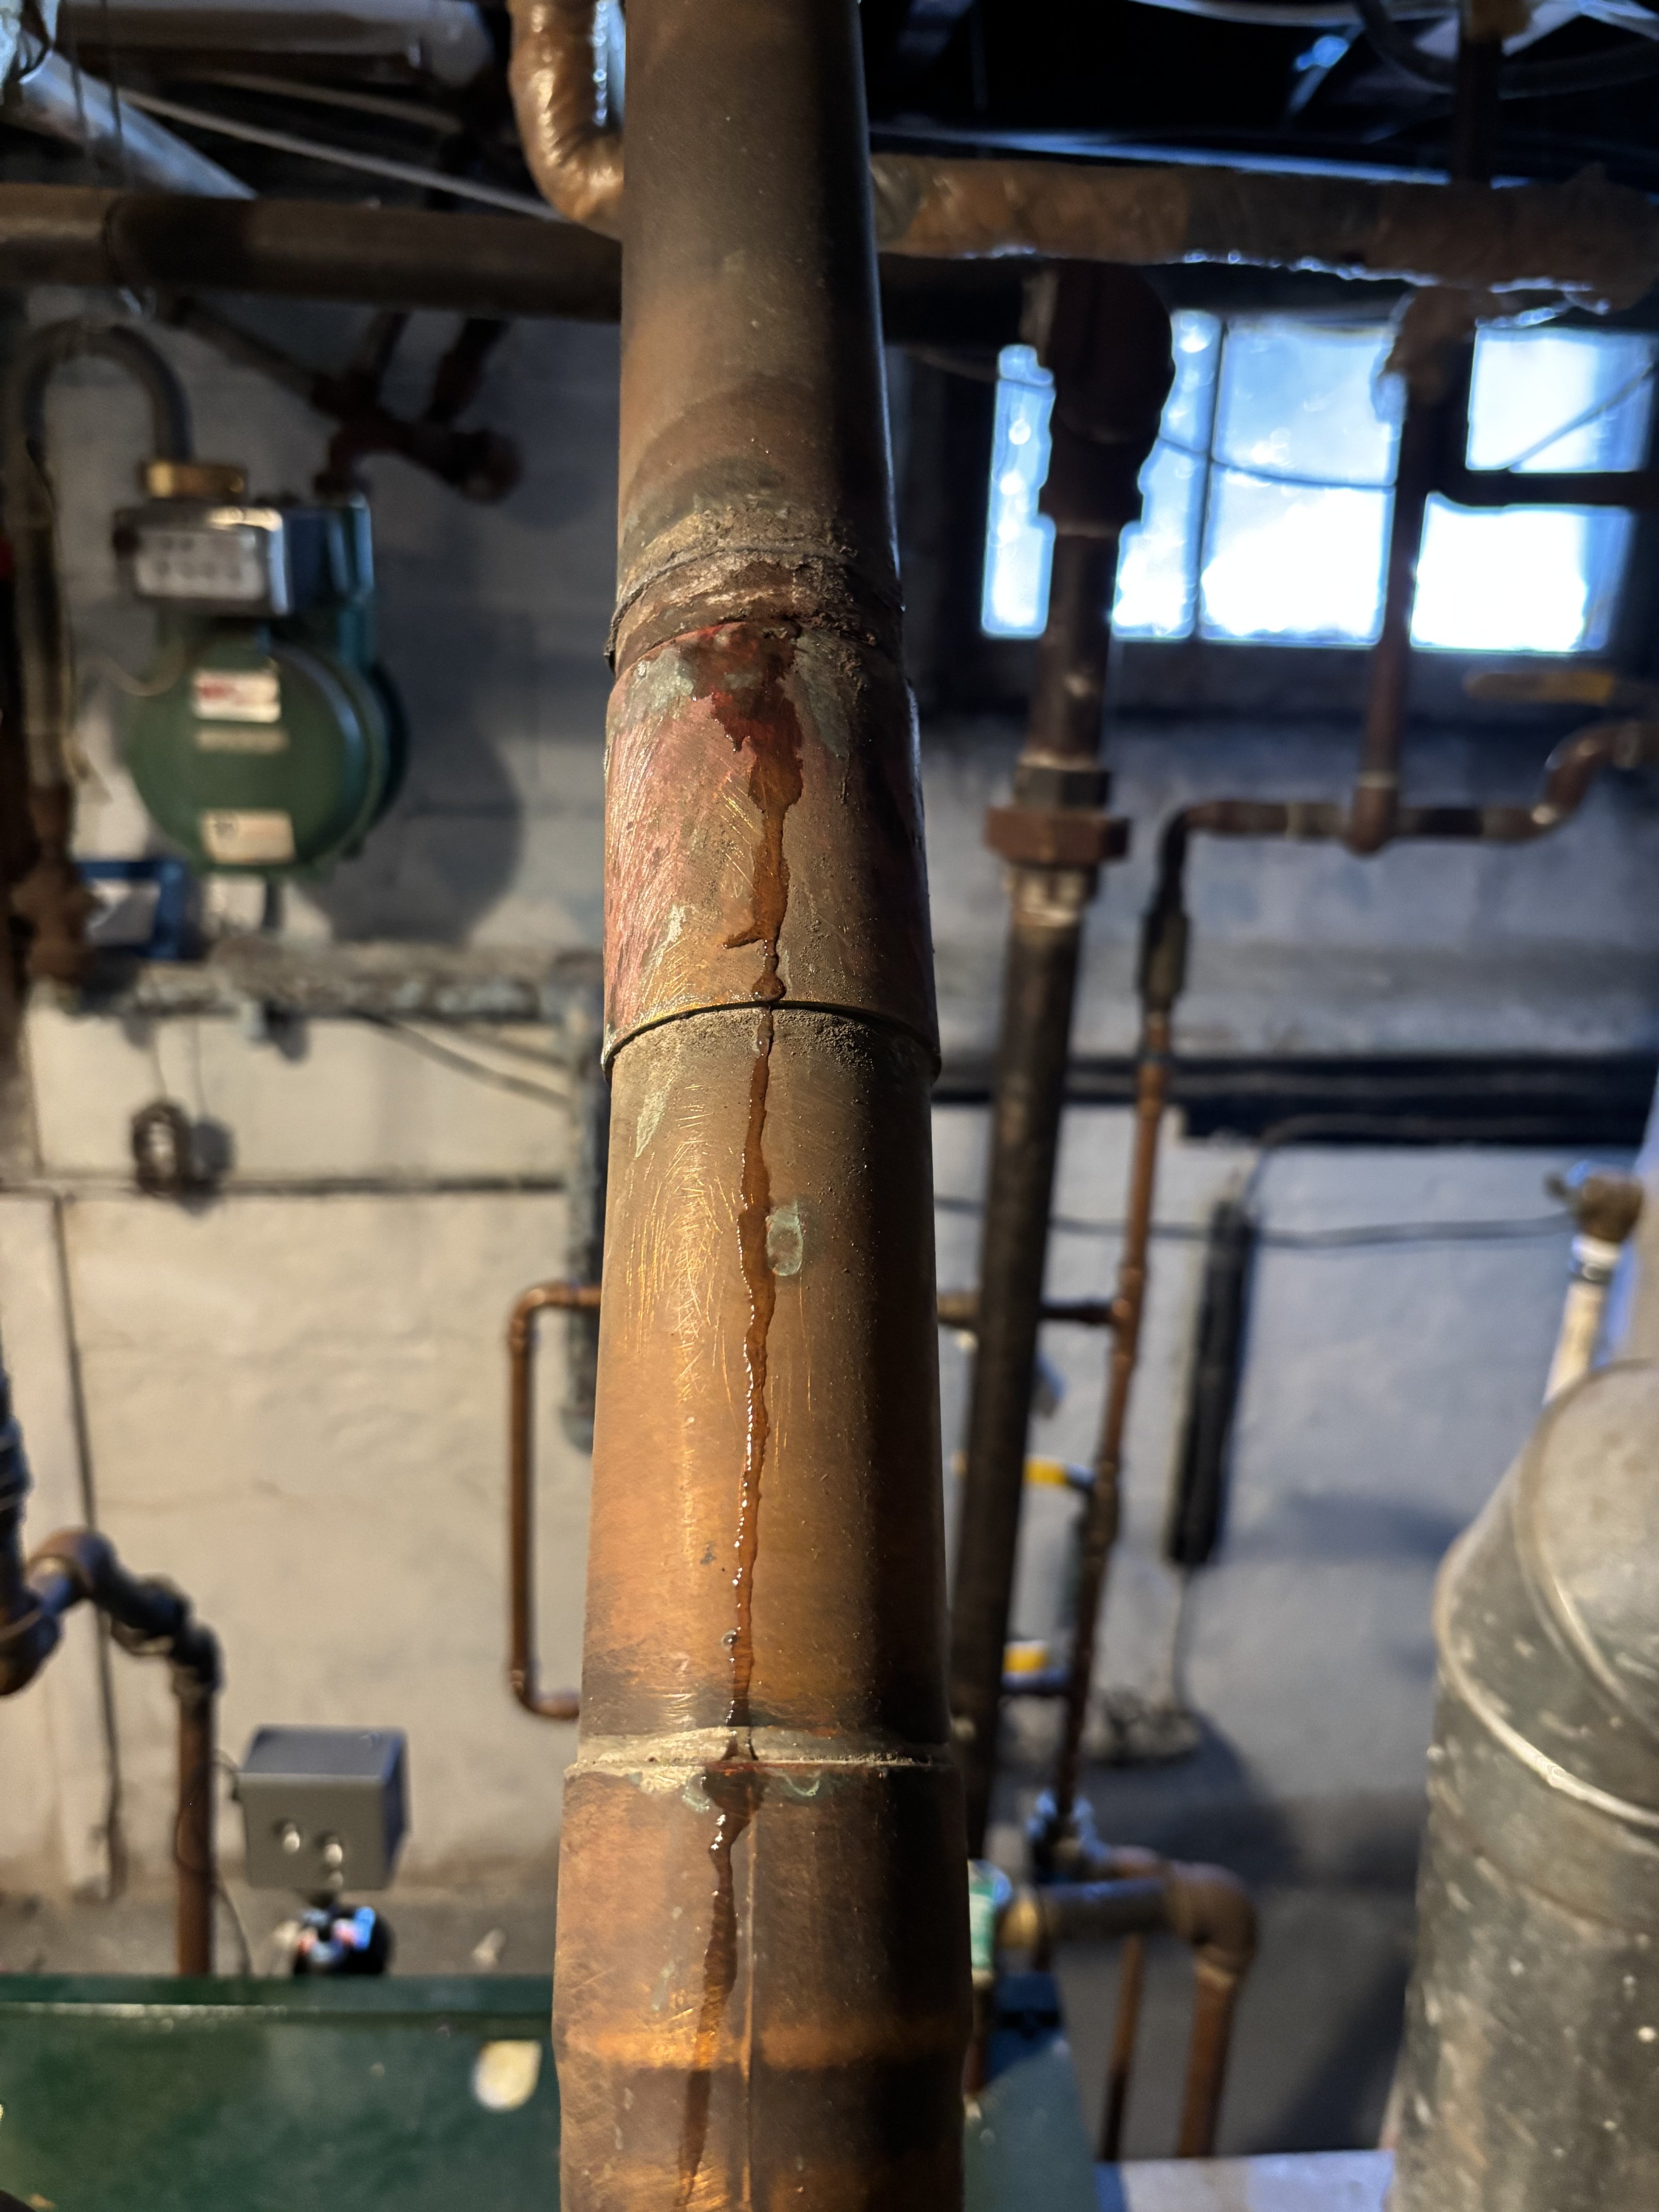
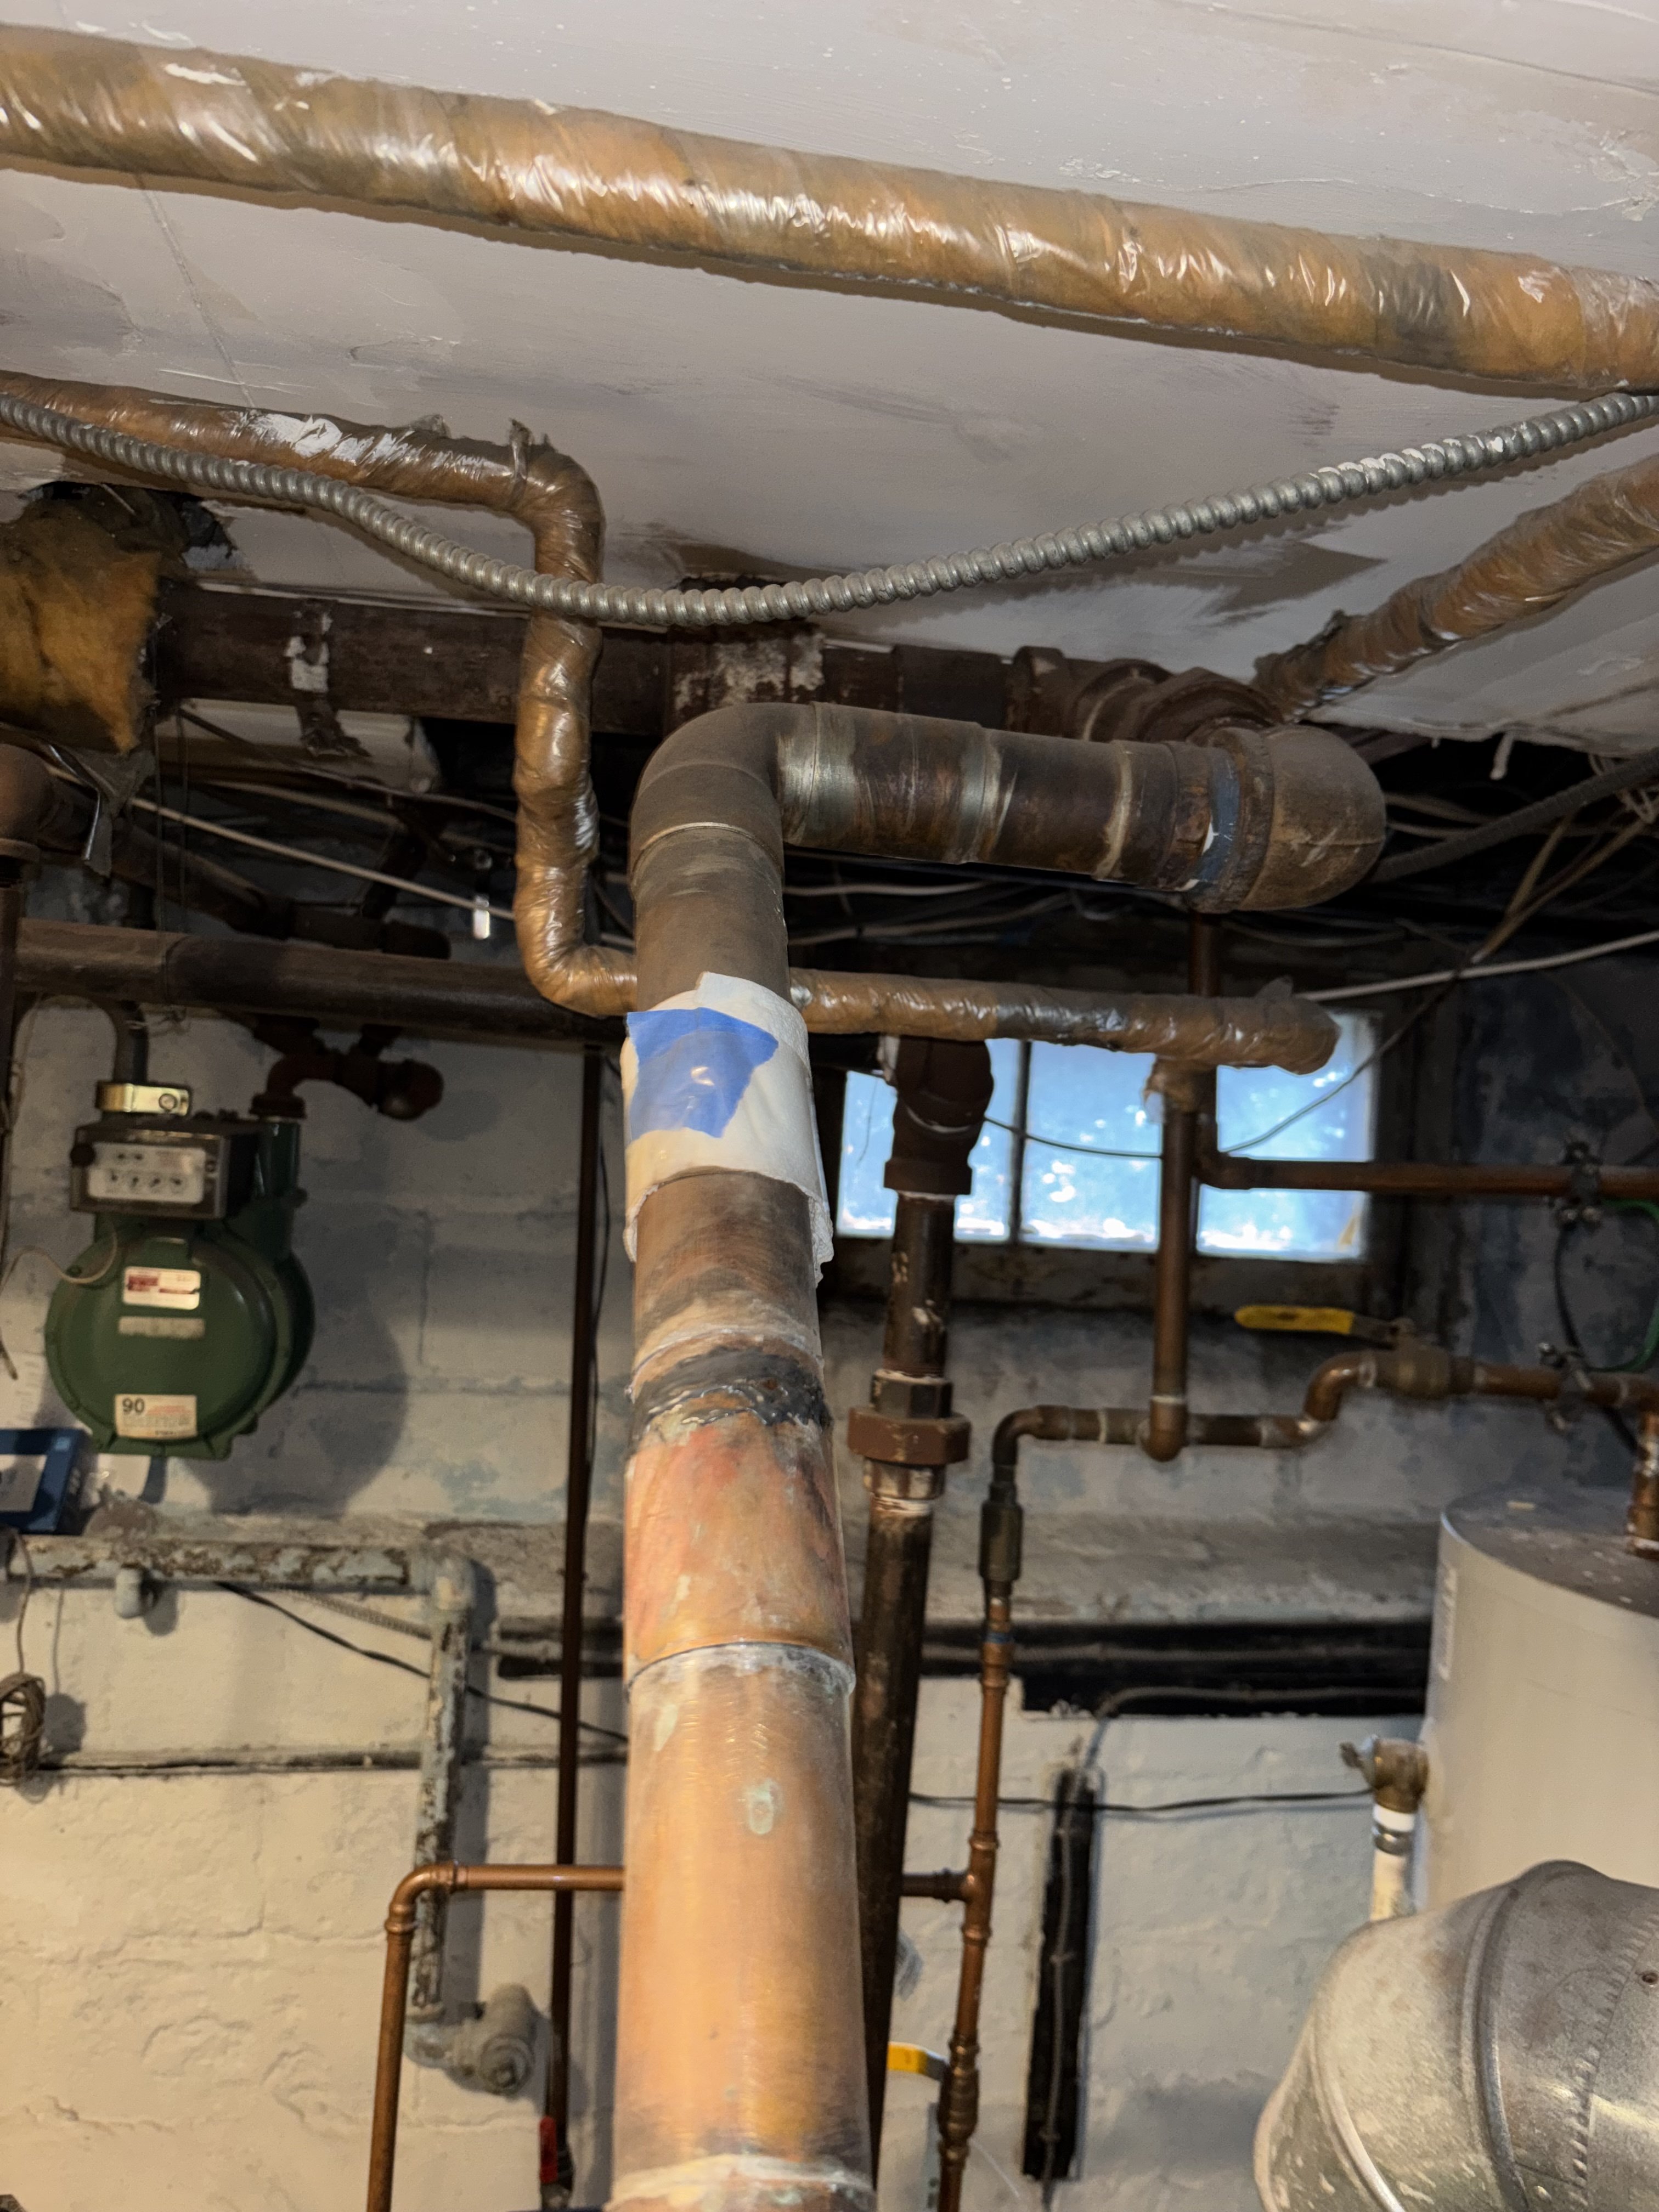
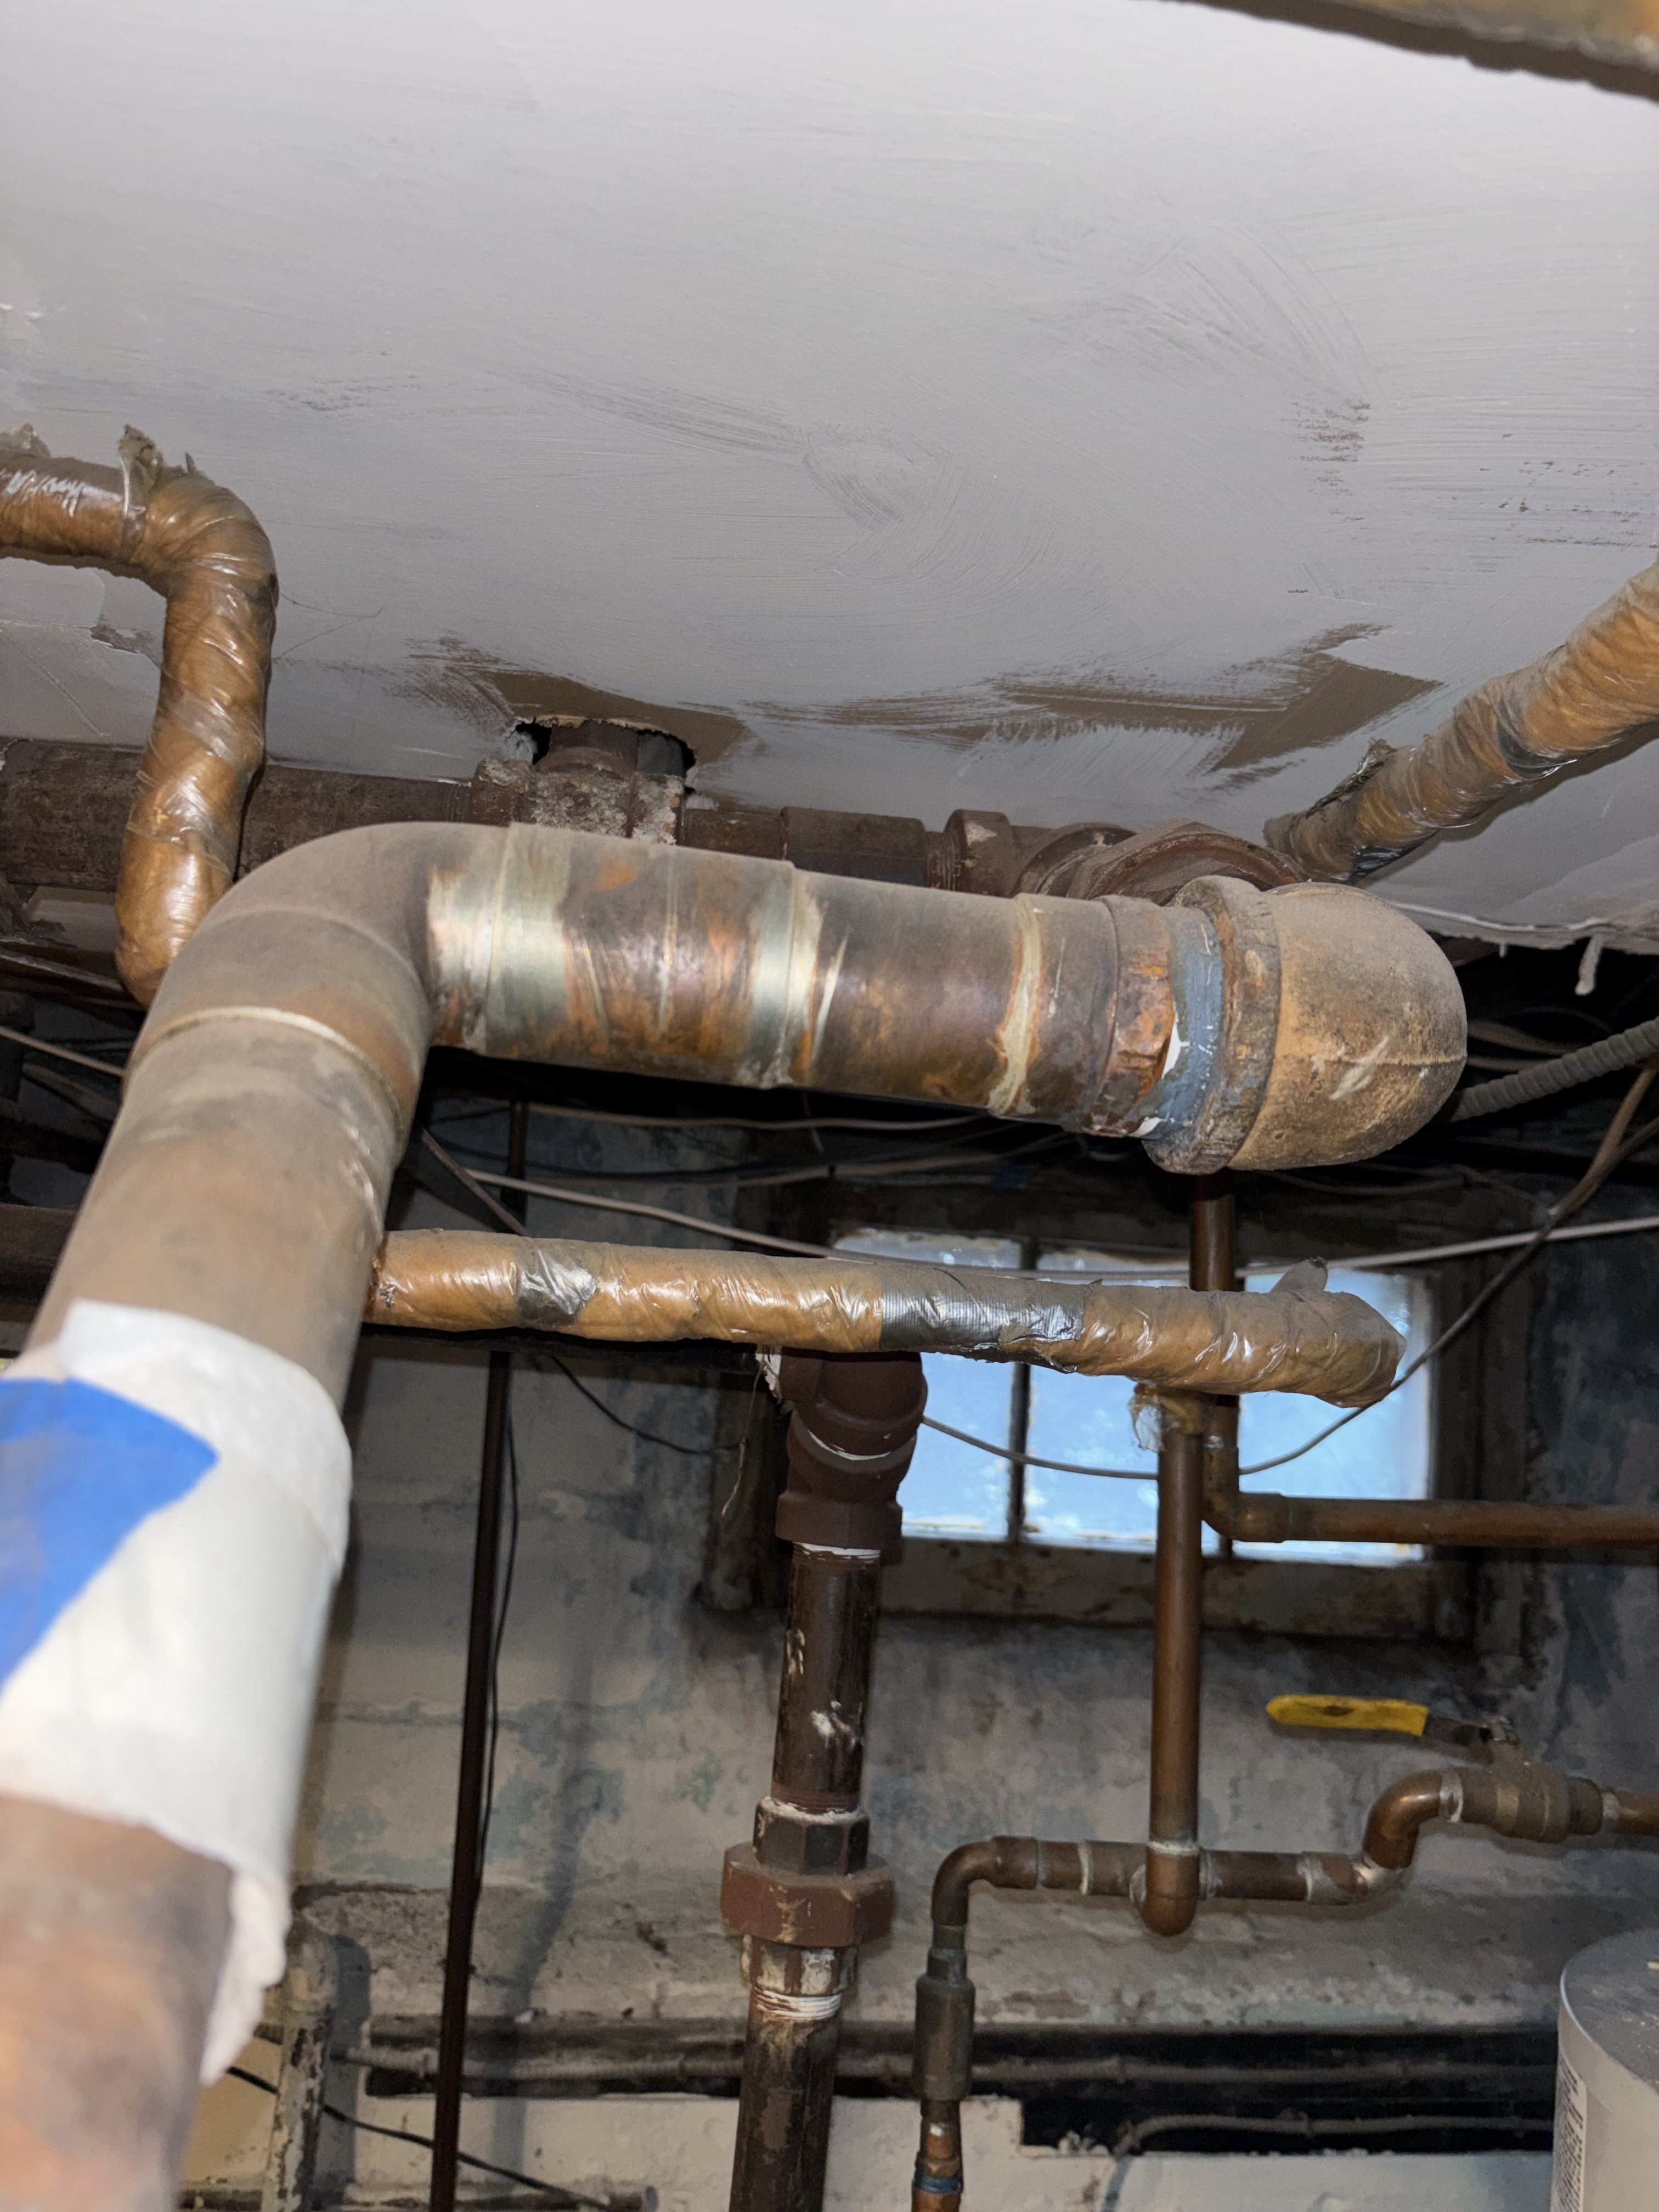
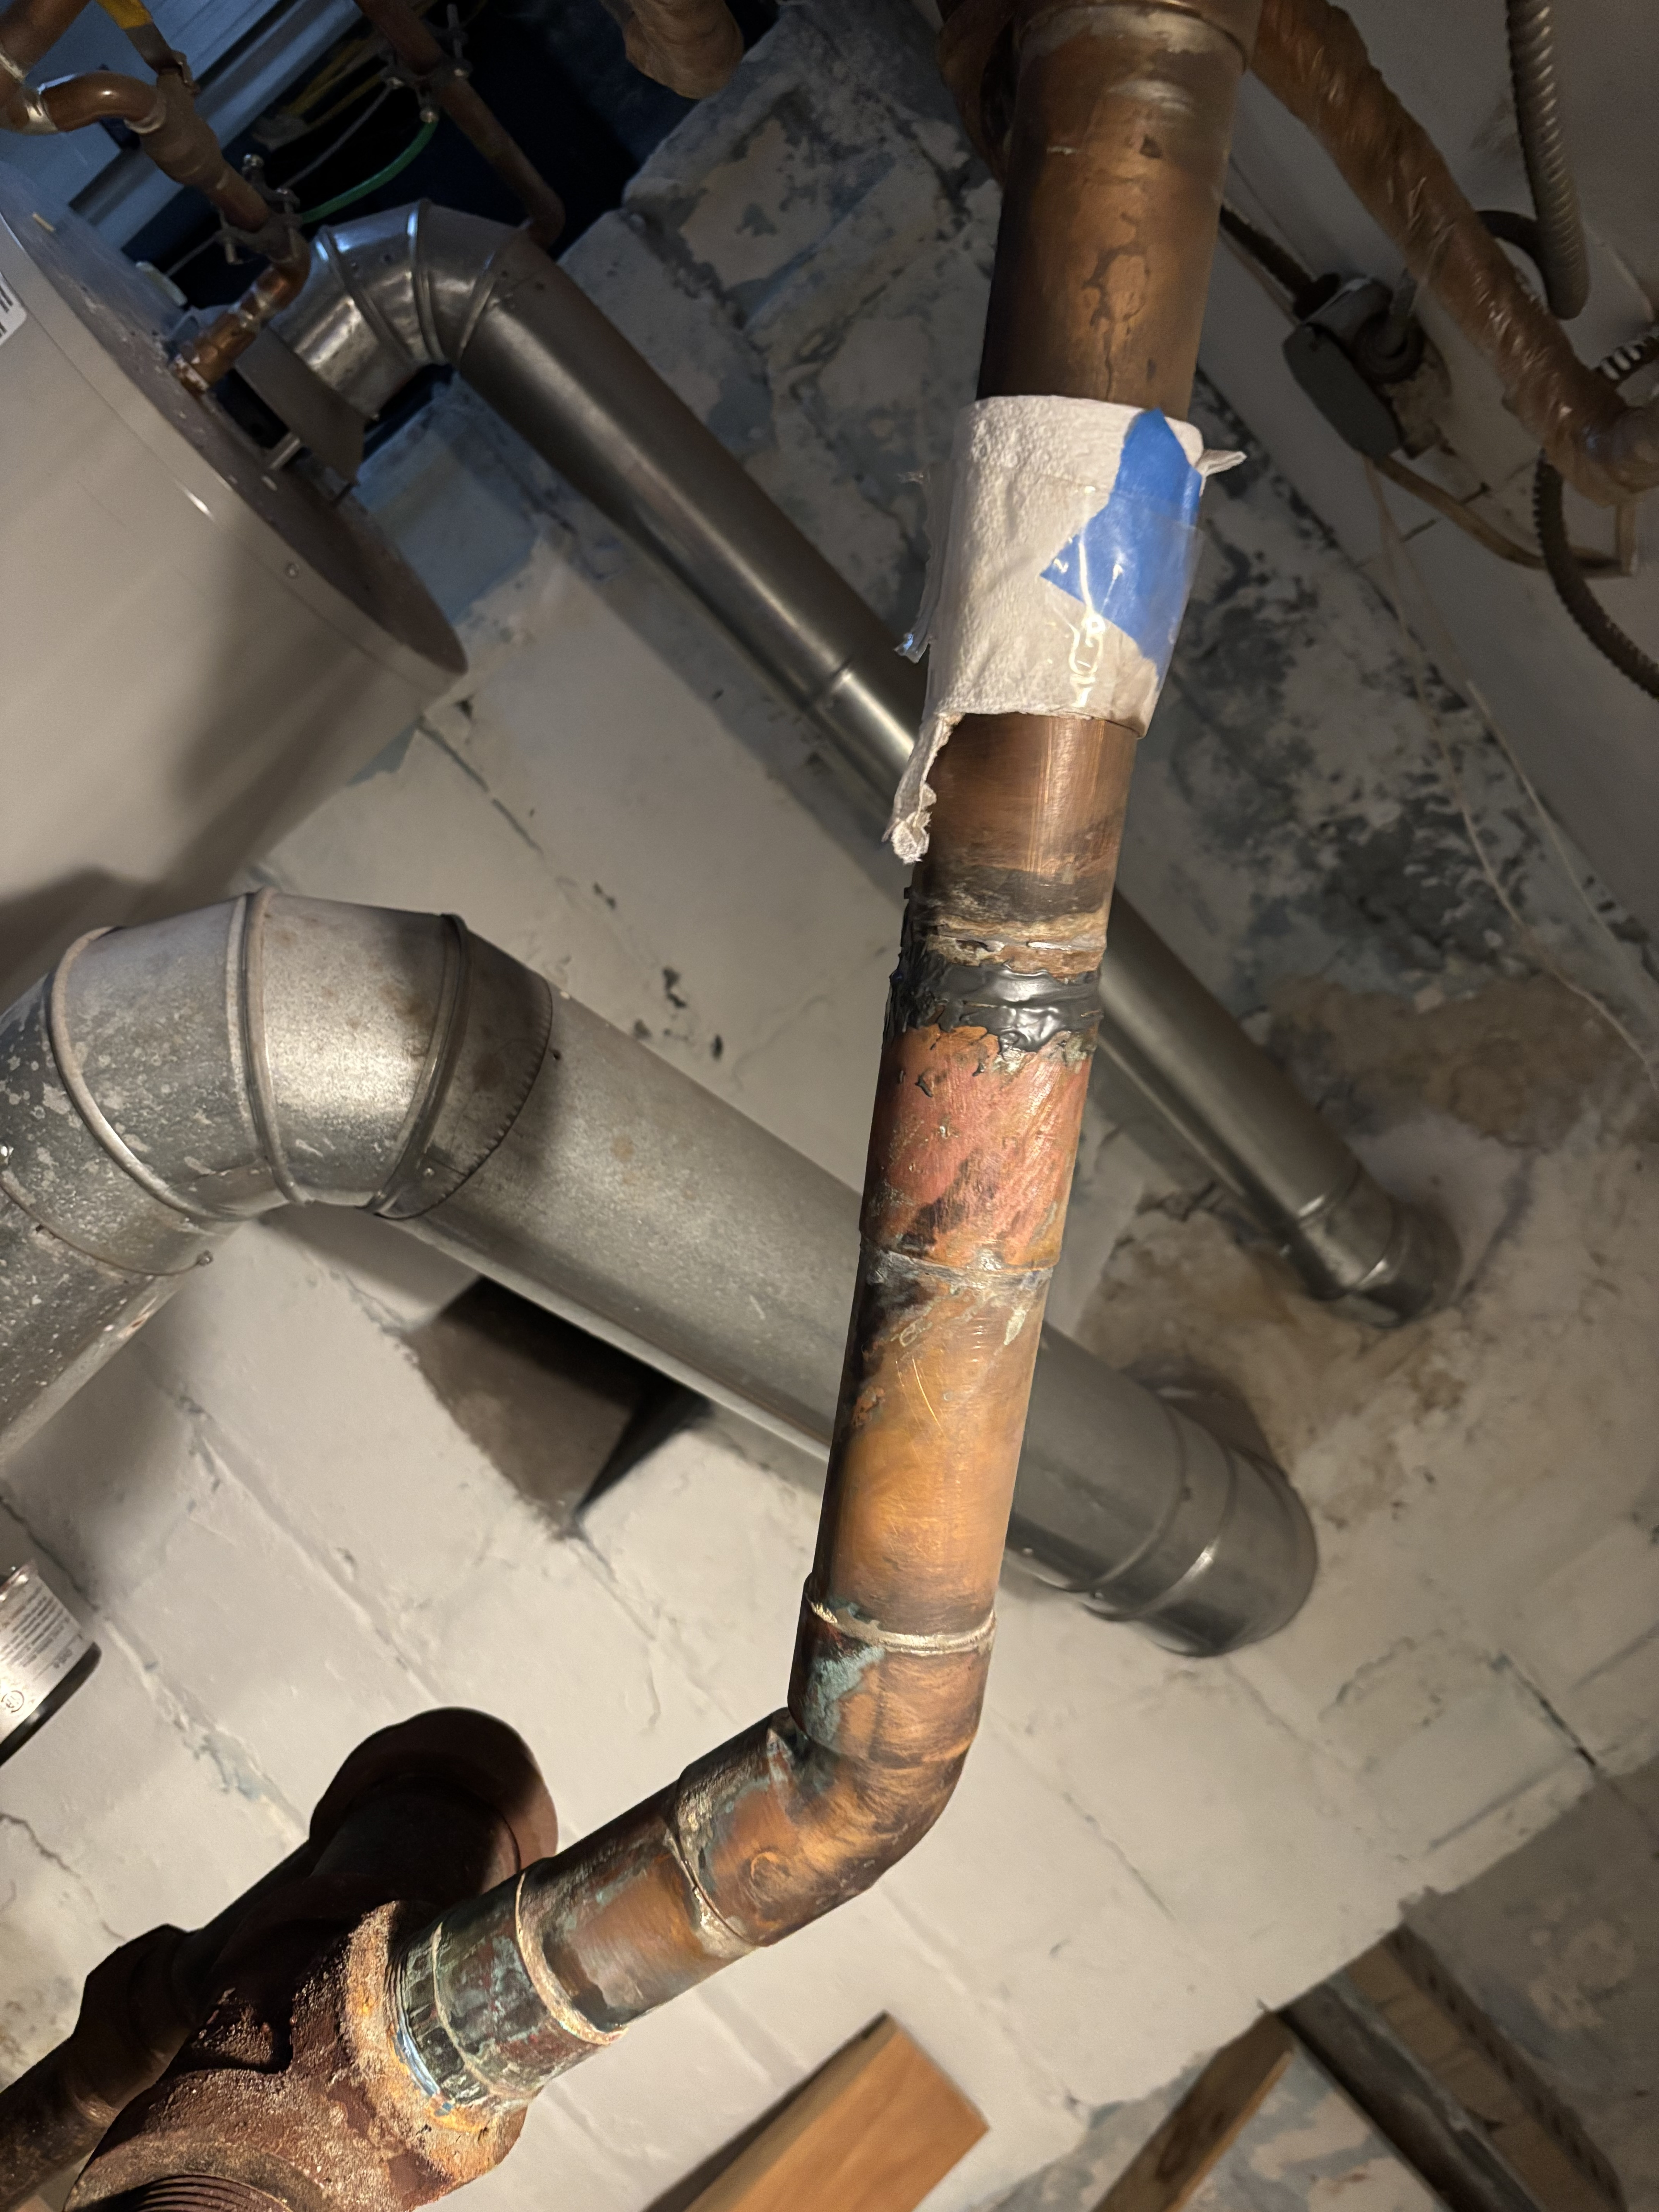
Have now realized the system is losing what seems to be a lot of water. One week in February it took 3 or 4 gallons. All the valves and vents seem fine and no obvious leaks in the dry return or the near boiler piping. Boiler is only 1 year old, so I did not suspect that it was cracked but figured I would over fill with water just to check. Boiler was fine, but water started to leak from the (bad, bad, bad) copper piping above the header (see pic).
I would have expected to see steam leaking from there, but there is nothing obvious. After trying multiple things to detect the steam I ended up wrapping some clear, heavy plastic around the joint and could see water droplets forming underneath. So steam is escaping. I presume the hot pipe is causing it to evaporate as soon as it escapes.
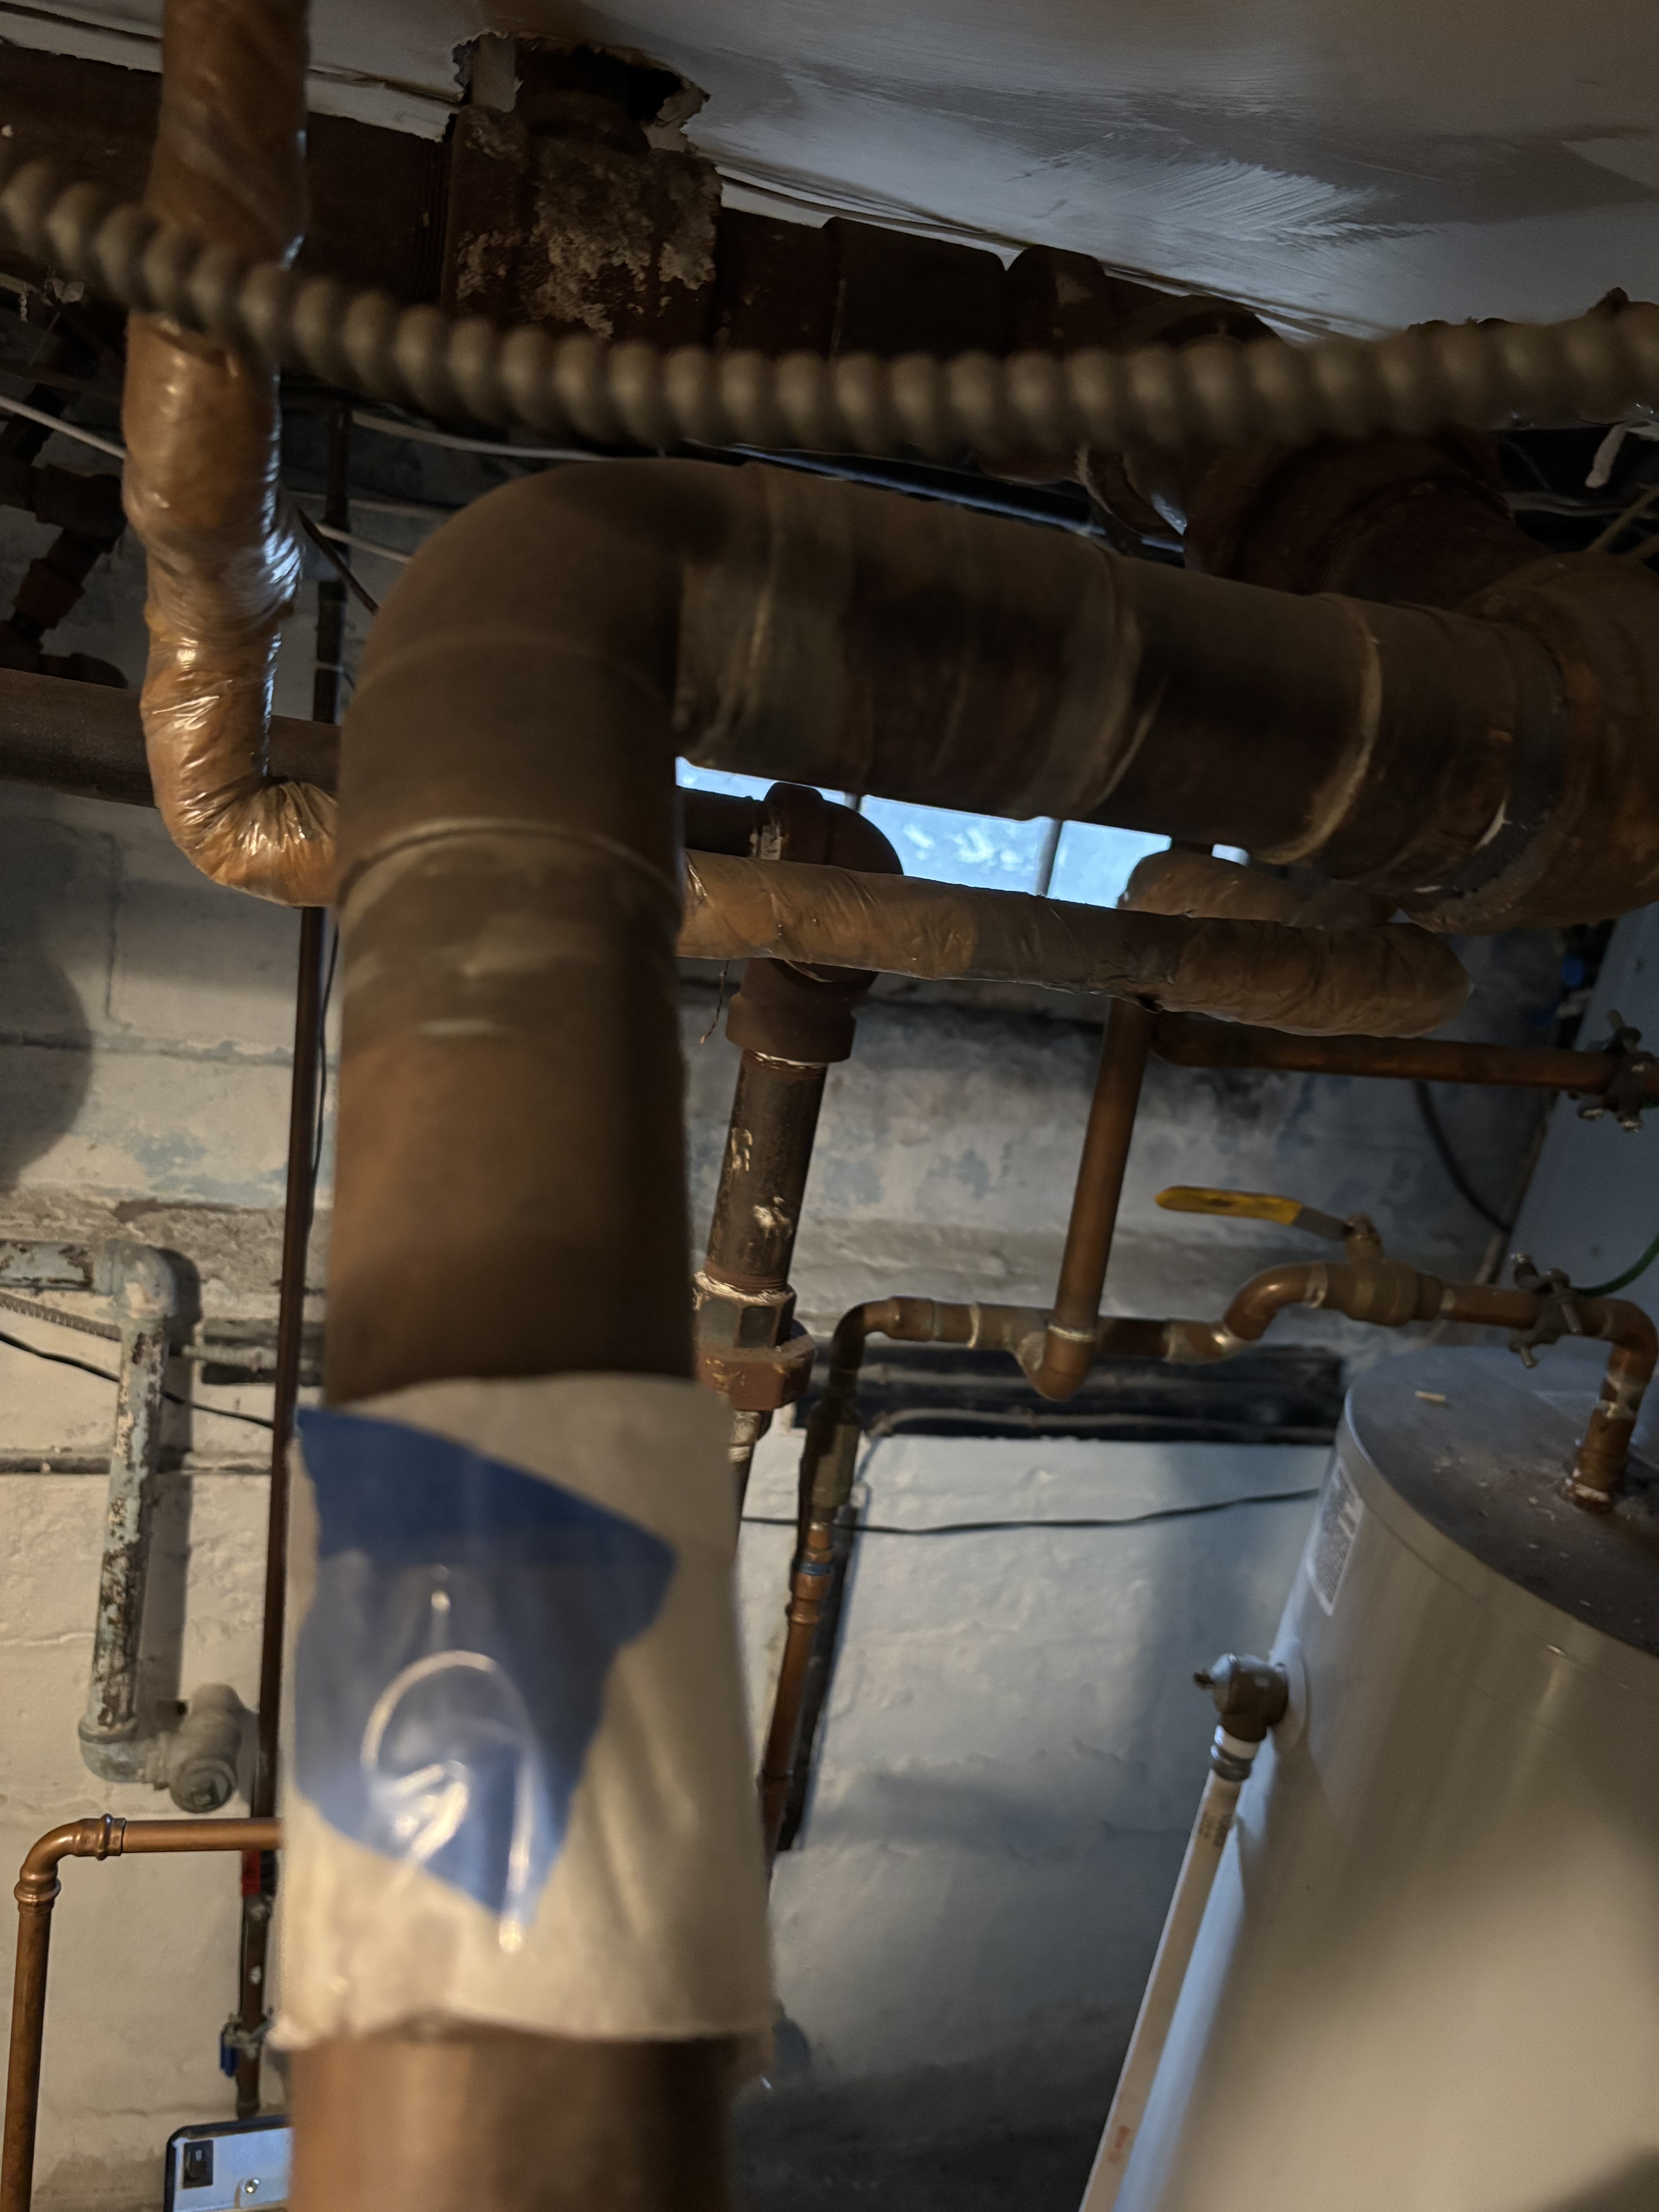
The correct answer is to replace that copper with threaded pipe, but not sure that is in her budget at the moment. So two questions.....
1) Is there a way to plug up that leak in the meantime?
2) Is there a better way to detect leaks like this? Not sure is there are others
Comments
-
Finally we have an example of why you don't use copper on steam lines! Thank you, thank you!
If it cheers you up any, I'd bet that that one leak may account for almost all of your lost water…
Which doesn't help you any.
You might try cleaning the pipe thoroughly and using this stuff:
I've found that sometimes it works… and sometimes it doesn't.
Br. Jamie, osb
Building superintendent/caretaker, 7200 sq. ft. historic house museum with dependencies in New England 1
1 -
It looks like that coupling has slopped right out of or off of the pipe. You could try lifting the piping up at see if you can expose more of the piping. Clean what's visible flux and pull back together and resolder. That would be my first approach as a temporary fix.
Miss Hall's School service mechanic, greenhouse manager, teacher, dog walker and designated driver
0 -
If that was in my house, I'd pull it apart, clean all of it very well and solder it back together. In my case, I may even try to braze it using 15%silphos, but not everyone has that option.
It's a straight run with no turns and I'm betting it was soldered very poorly.
That's based on what I see in that picture.
I'm almost afraid to ask though, what does the rest of the piping and boiler look like? That could easily be a deal breaker.
Single pipe 392sqft system with an EG-40 rated for 325sqft and it's silent and balanced at all times.
0 -
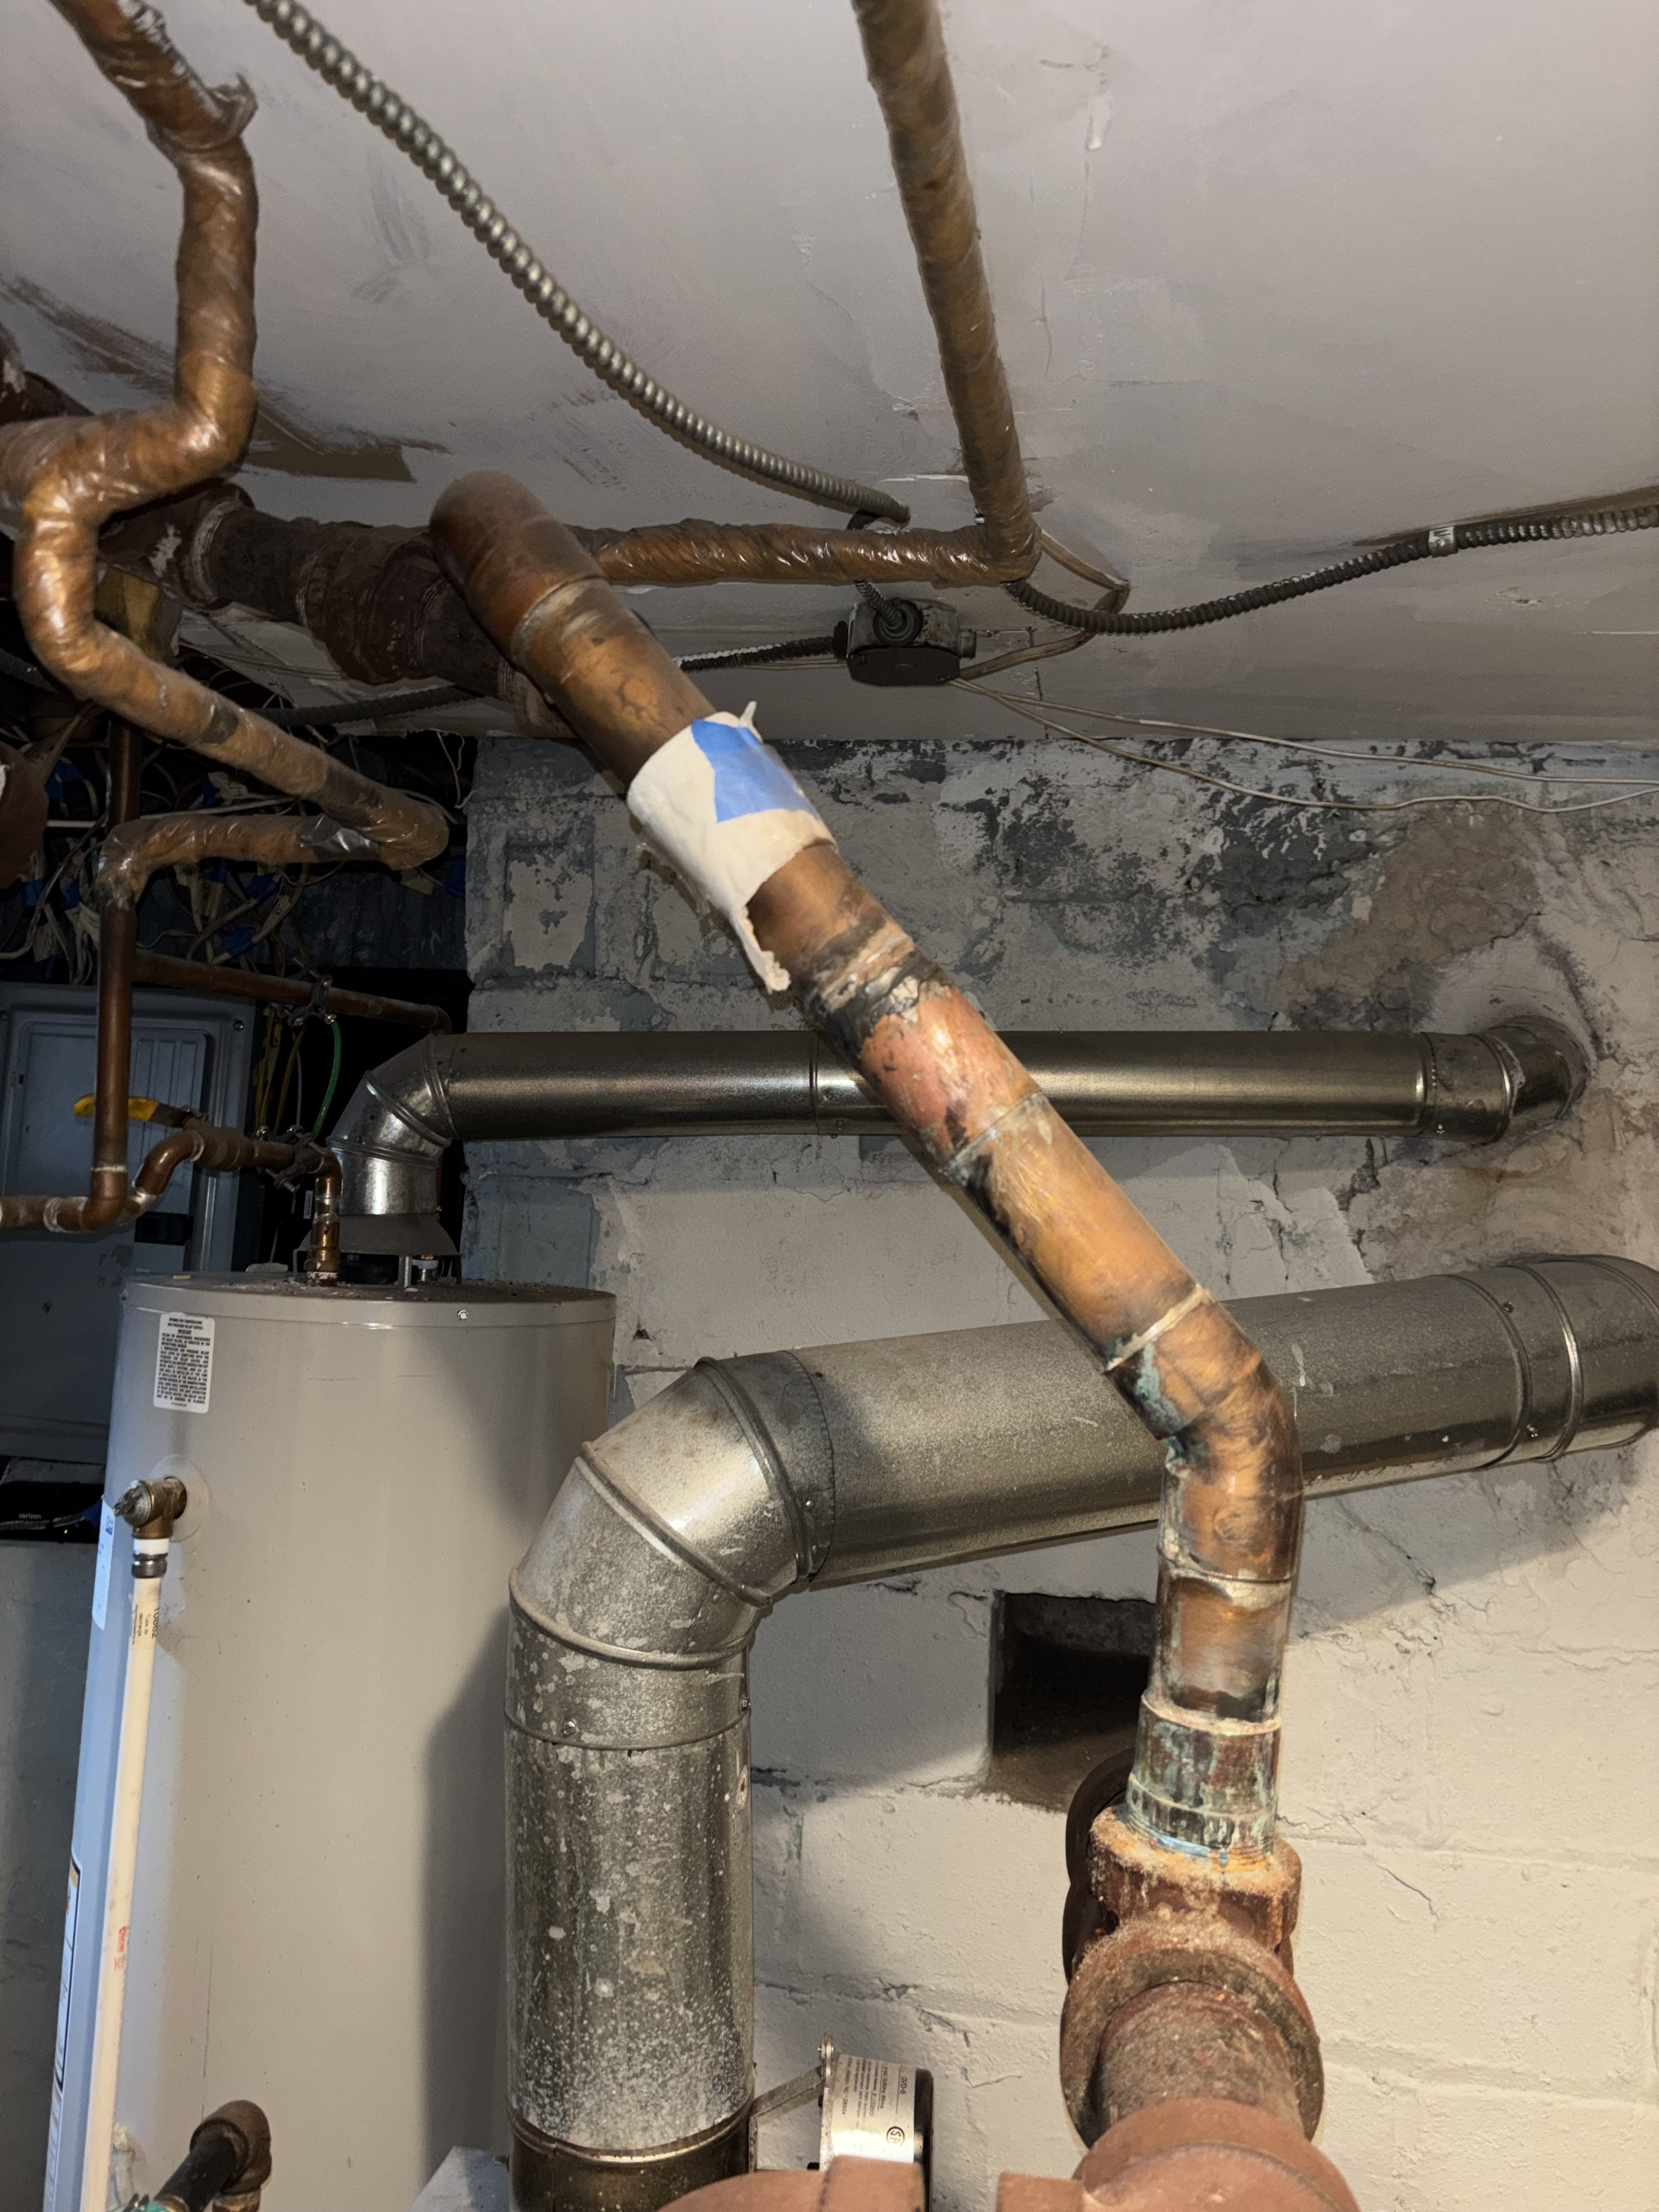
What is the chance that you can post a picture from further back so we can see all the near boiler piping? perhaps from more than one side and from more than one level.
You may be able to get the corrective work don for free from the installing contractor: I might send the installing company an email or a registered letter asking about their policy regarding warranties on materials and workmanship for poor-quality work from a job completed three years ago that appears to have been installed incorrectly. I would also ask whether their business insurance policy includes Completed Operations Liability coverage.
When you send the letter or email, let them know that you have documents showing that the installation was not completed according to the manufacturer’s instructions or to accepted industry standards.
If the first letter does not receive a favorable response, a second letter should be sent by certified mail with return receipt requested. This ensures that someone at the company signs for the letter and provides proof that it was received.
[Your Name]
[Your Address]
[City, State, ZIP]
[Email Address]
[Phone Number]
[Date][Contractor/Company Name]
[Company Address]
[City, State, ZIP]Subject: Notice of Defective Installation and Request for Remedy
Dear [Contractor/Company Name],
I am writing regarding work your company performed at my property located at [property address] on or about [installation date]. Evidence now indicates that the installation was not completed in accordance with the manufacturer’s installation instructions or accepted industry standards.
Although the original workmanship warranty period has expired, the deficiencies appear to stem from improper installation rather than normal wear or maintenance issues. I have documentation supporting these findings, including photographs and relevant manufacturer specifications.
Because of these concerns, I request that your company provide the following within fourteen (14) days of receipt of this letter:
- A written response acknowledging this notice of defective installation.
- Your proposed plan to inspect and remedy the installation deficiencies.
- Confirmation of whether your business insurance policy includes Products–Completed Operations Liability coverage, and if so, the name of the insurance carrier and applicable claim contact information.
Please understand that this letter serves as a formal notice of a potential claim arising from defective workmanship. If the matter cannot be resolved directly, I may pursue other available remedies, including submitting a claim to your insurer or pursuing other legal avenues.
I hope we can resolve this matter promptly and professionally. Please contact me at your earliest convenience to arrange an inspection or discuss corrective action.
Sincerely,
[Your Name]
If you are interested in trying to get what you already paid for… a properly installed steam boiler
Hope this helps
Edward Young Retired
After you make that expensive repair and you still have the same problem, What will you check next?
 1
1 -
Yeah that solder job was a horrific textbook example of a cold solder joint. I agree. Clean it with appropriate abrasive, flux it, and resolder it. Probably will need a lot of BTU in the torch and MAP gas would probably be a bare minimum.
0 -
Use Iron pipe & fittings. Make sure there are swing joints. With so little to look at, it is hard to know what is going on there. …and Just because there were some copper steam pipes existing from the previous incorrectly installed boiler, does not mean that this three year old boiler can be connected without using the proper installation parts and procedures. (if your friend jumps off of a bridge…)
Edward Young Retired
After you make that expensive repair and you still have the same problem, What will you check next?
 1
1 -
Since this was installed for a previous homeowner, I would steer away from this kind of letter that could be perceived as a bit threatening. The copper looks like the connection from header to steam main from other thread and may be EXACTLY what the previous homeowner wanted to pay for during installation. The repair is relatively quick. Cut out bad joint and install new. Would it be better to repipe in black pipe? Of course, but when there is a budget...you get it functional if you cant repipe yourself. The boiler installation looks reasonably well done in pics from the other thread. Its a lot better near boiler piping than is often posted on this site.
 0
0 -
This was an AI answer if I ever heard one @4GenPlumber.
The letter is to be used AFTER the email was unsuccessful. Put that in your CPU and DEBUG it
I took a look at some photos from another discussion. It appears was installed with iron fitting and threaded pipe with very good design. The only copper pipe was on the return and some of that return looks like it is dry. What part of the return is leaking? The dry part, or the wet part below the water line? I still believe there may be some benefit from contacting the installer.
Edward Young Retired
After you make that expensive repair and you still have the same problem, What will you check next?
-1 -
AI? Nope, just me. I have just had plenty of customers who I have recommended specific work and they have denied it. Then new homeowner buys the house and says something like, "If you were the contractor why didnt you..." and the answer is invariably, because they didnt want me to…I am sure who ever installed that boiler would repair the solder joint because they obviously know what they are doing from the install, but claiming they didnt follow manufacturer’s specs is probably going to put them off. Im not sure if we are looking at different pics, but I can clearly see a copper×male adapter into the header. I guess more pics would be helpful though.
0 -
Please send more photos. Think there is some confusion over photos from your home vs your daughter's home.
0 -
There is a reason I don't like sweating copper, I'm no good at it! This is what all my solder joints would look like.
The quick/cheaper fix is to have someone take apart those copper joints, clean and resolder. It will help for now….but the thermal expansion of the copper will eventually make the joint fail again. Might be a year…or 10. Long term fix is black iron pipe.
And steam leaks are a bit tricky. We think of steam like a pot of boiling water sending tons of water vapor up into the air. In a closed boiler system the water vapor is designed so it drops out and what we have left is "dry steam". There is a lot less water content in it so we don't see steam billowing from leaks in pipes.
A good way to find leaks is with a mirror. The hot (invisible) steam will hit the cool mirror and it will fog it up. Go around and check all the elbows, valves and vents. But I bet that failed solder joint is the big one.
0 -
After seeing the rest of the installation. I happen to agree. That looks like a great job.
Edward Young Retired
After you make that expensive repair and you still have the same problem, What will you check next?
0 -
Apologies for delay in getting back to your questions….
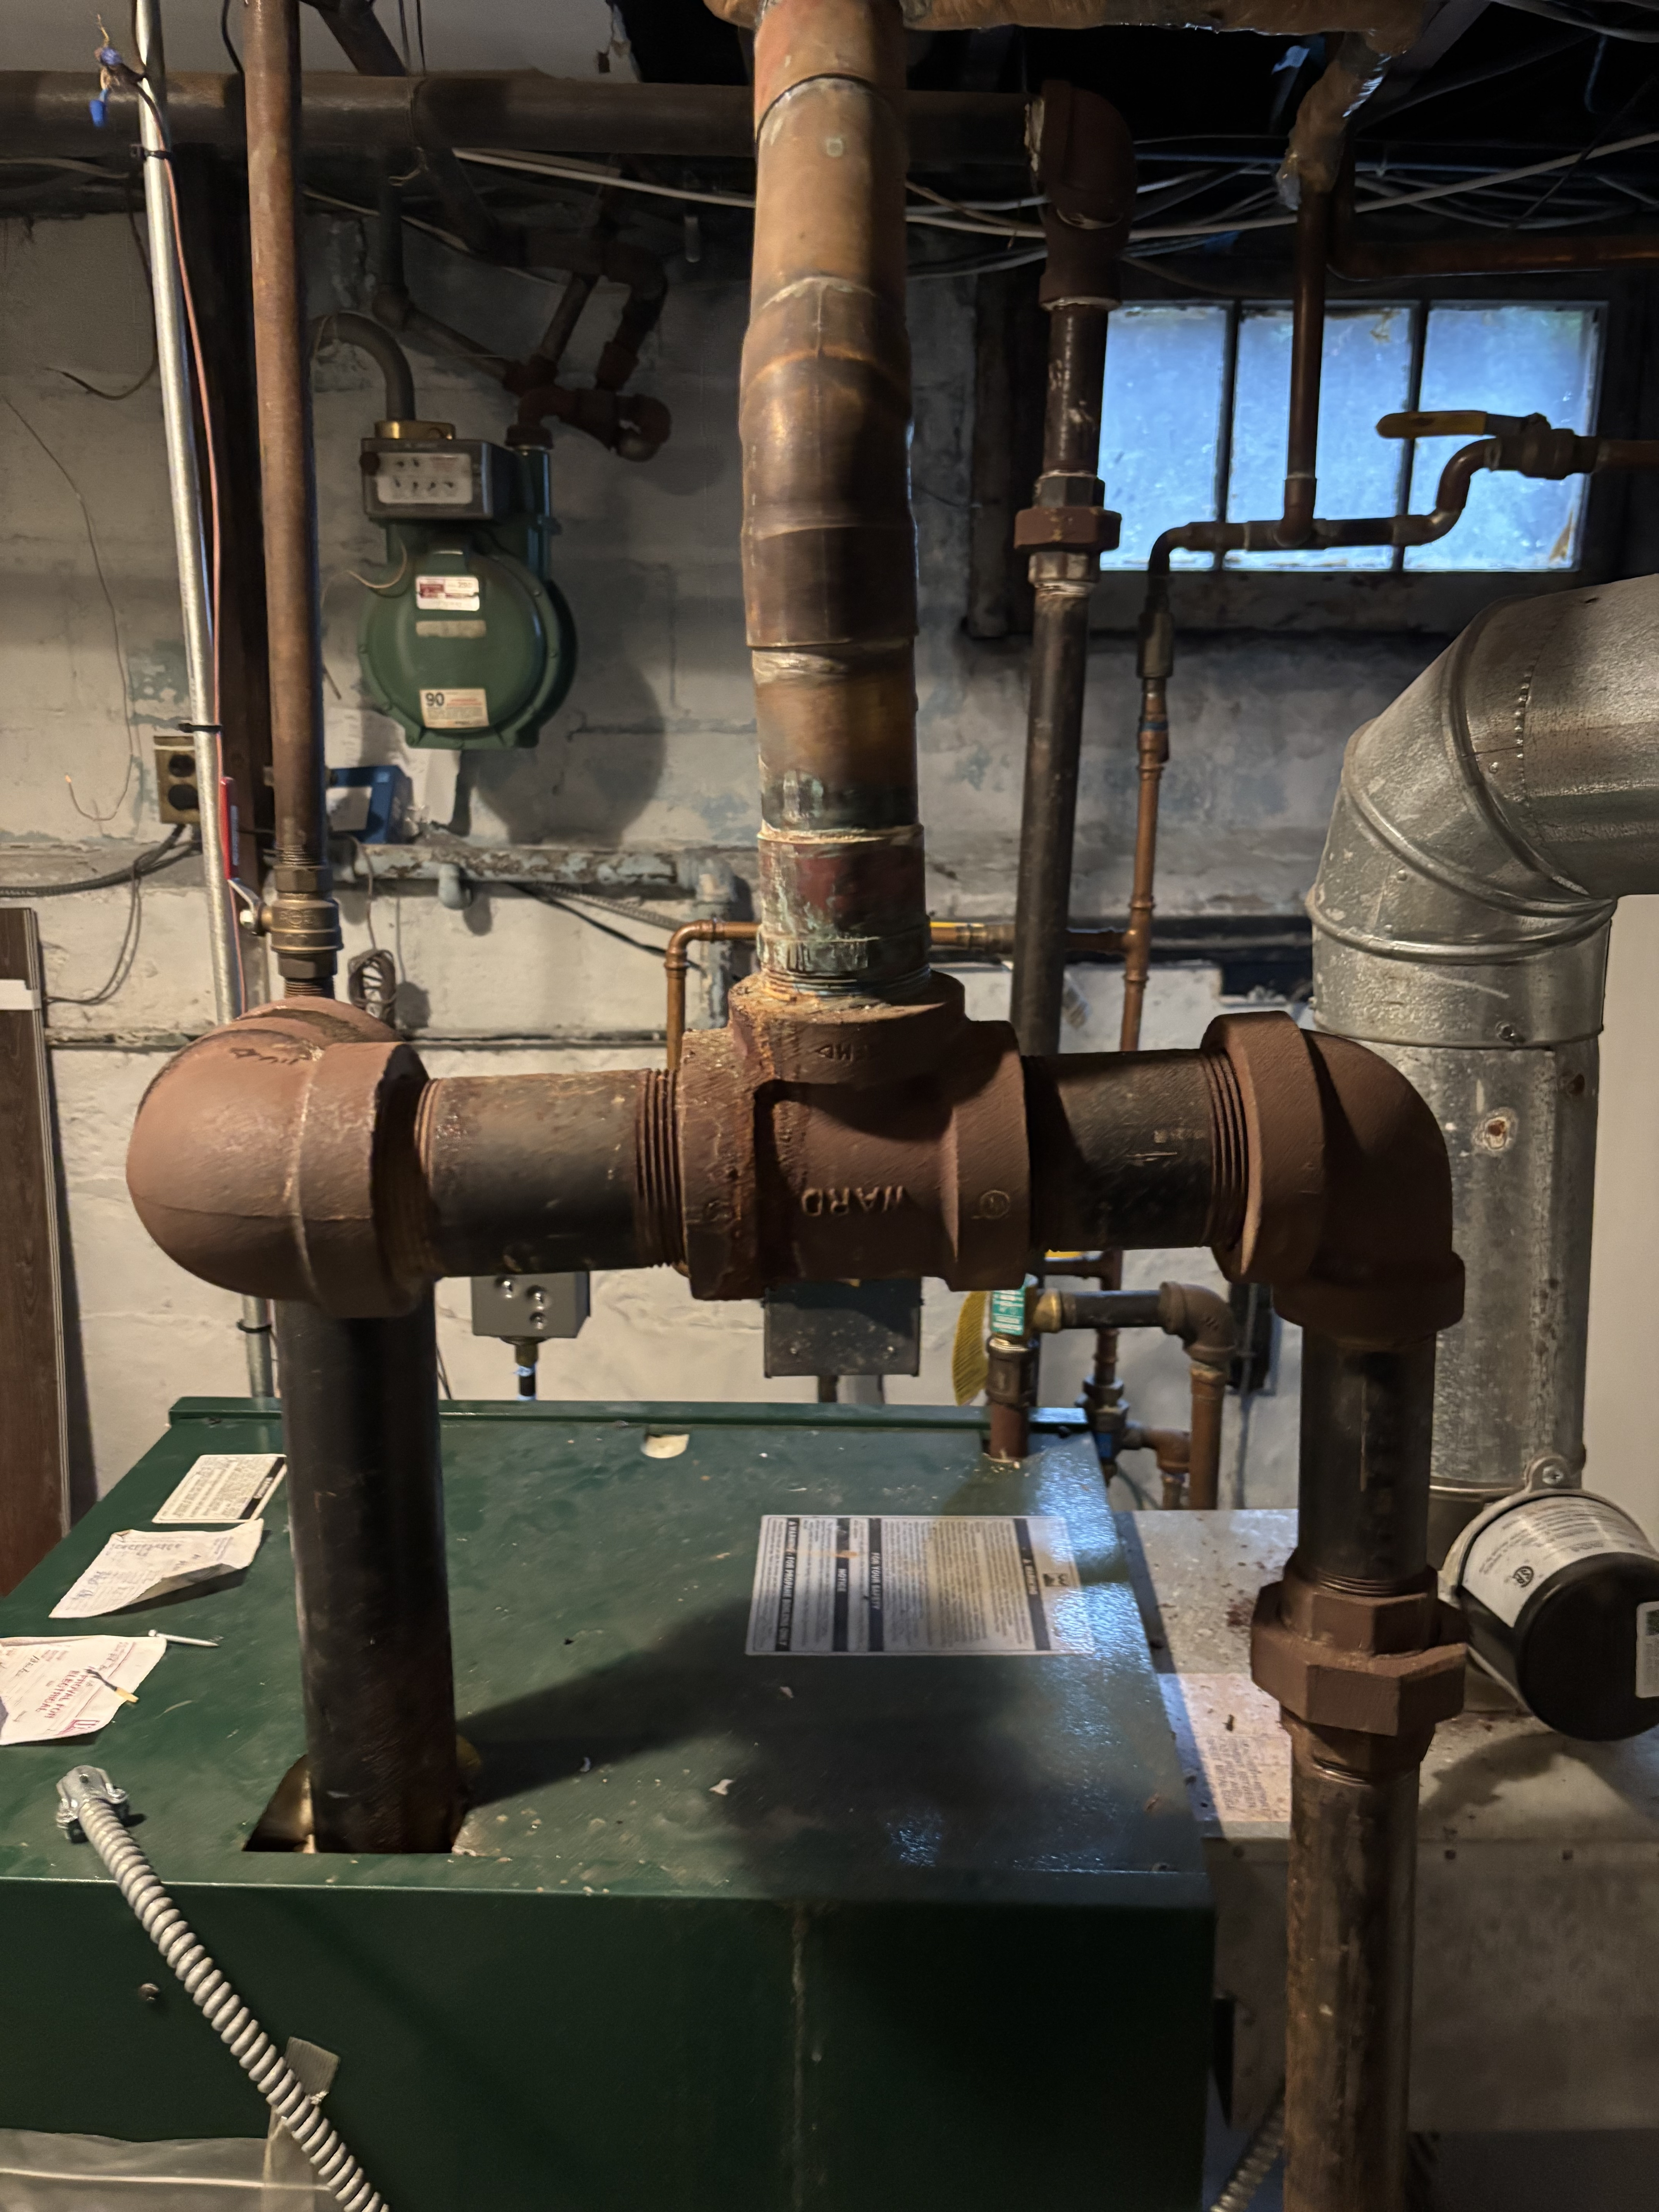
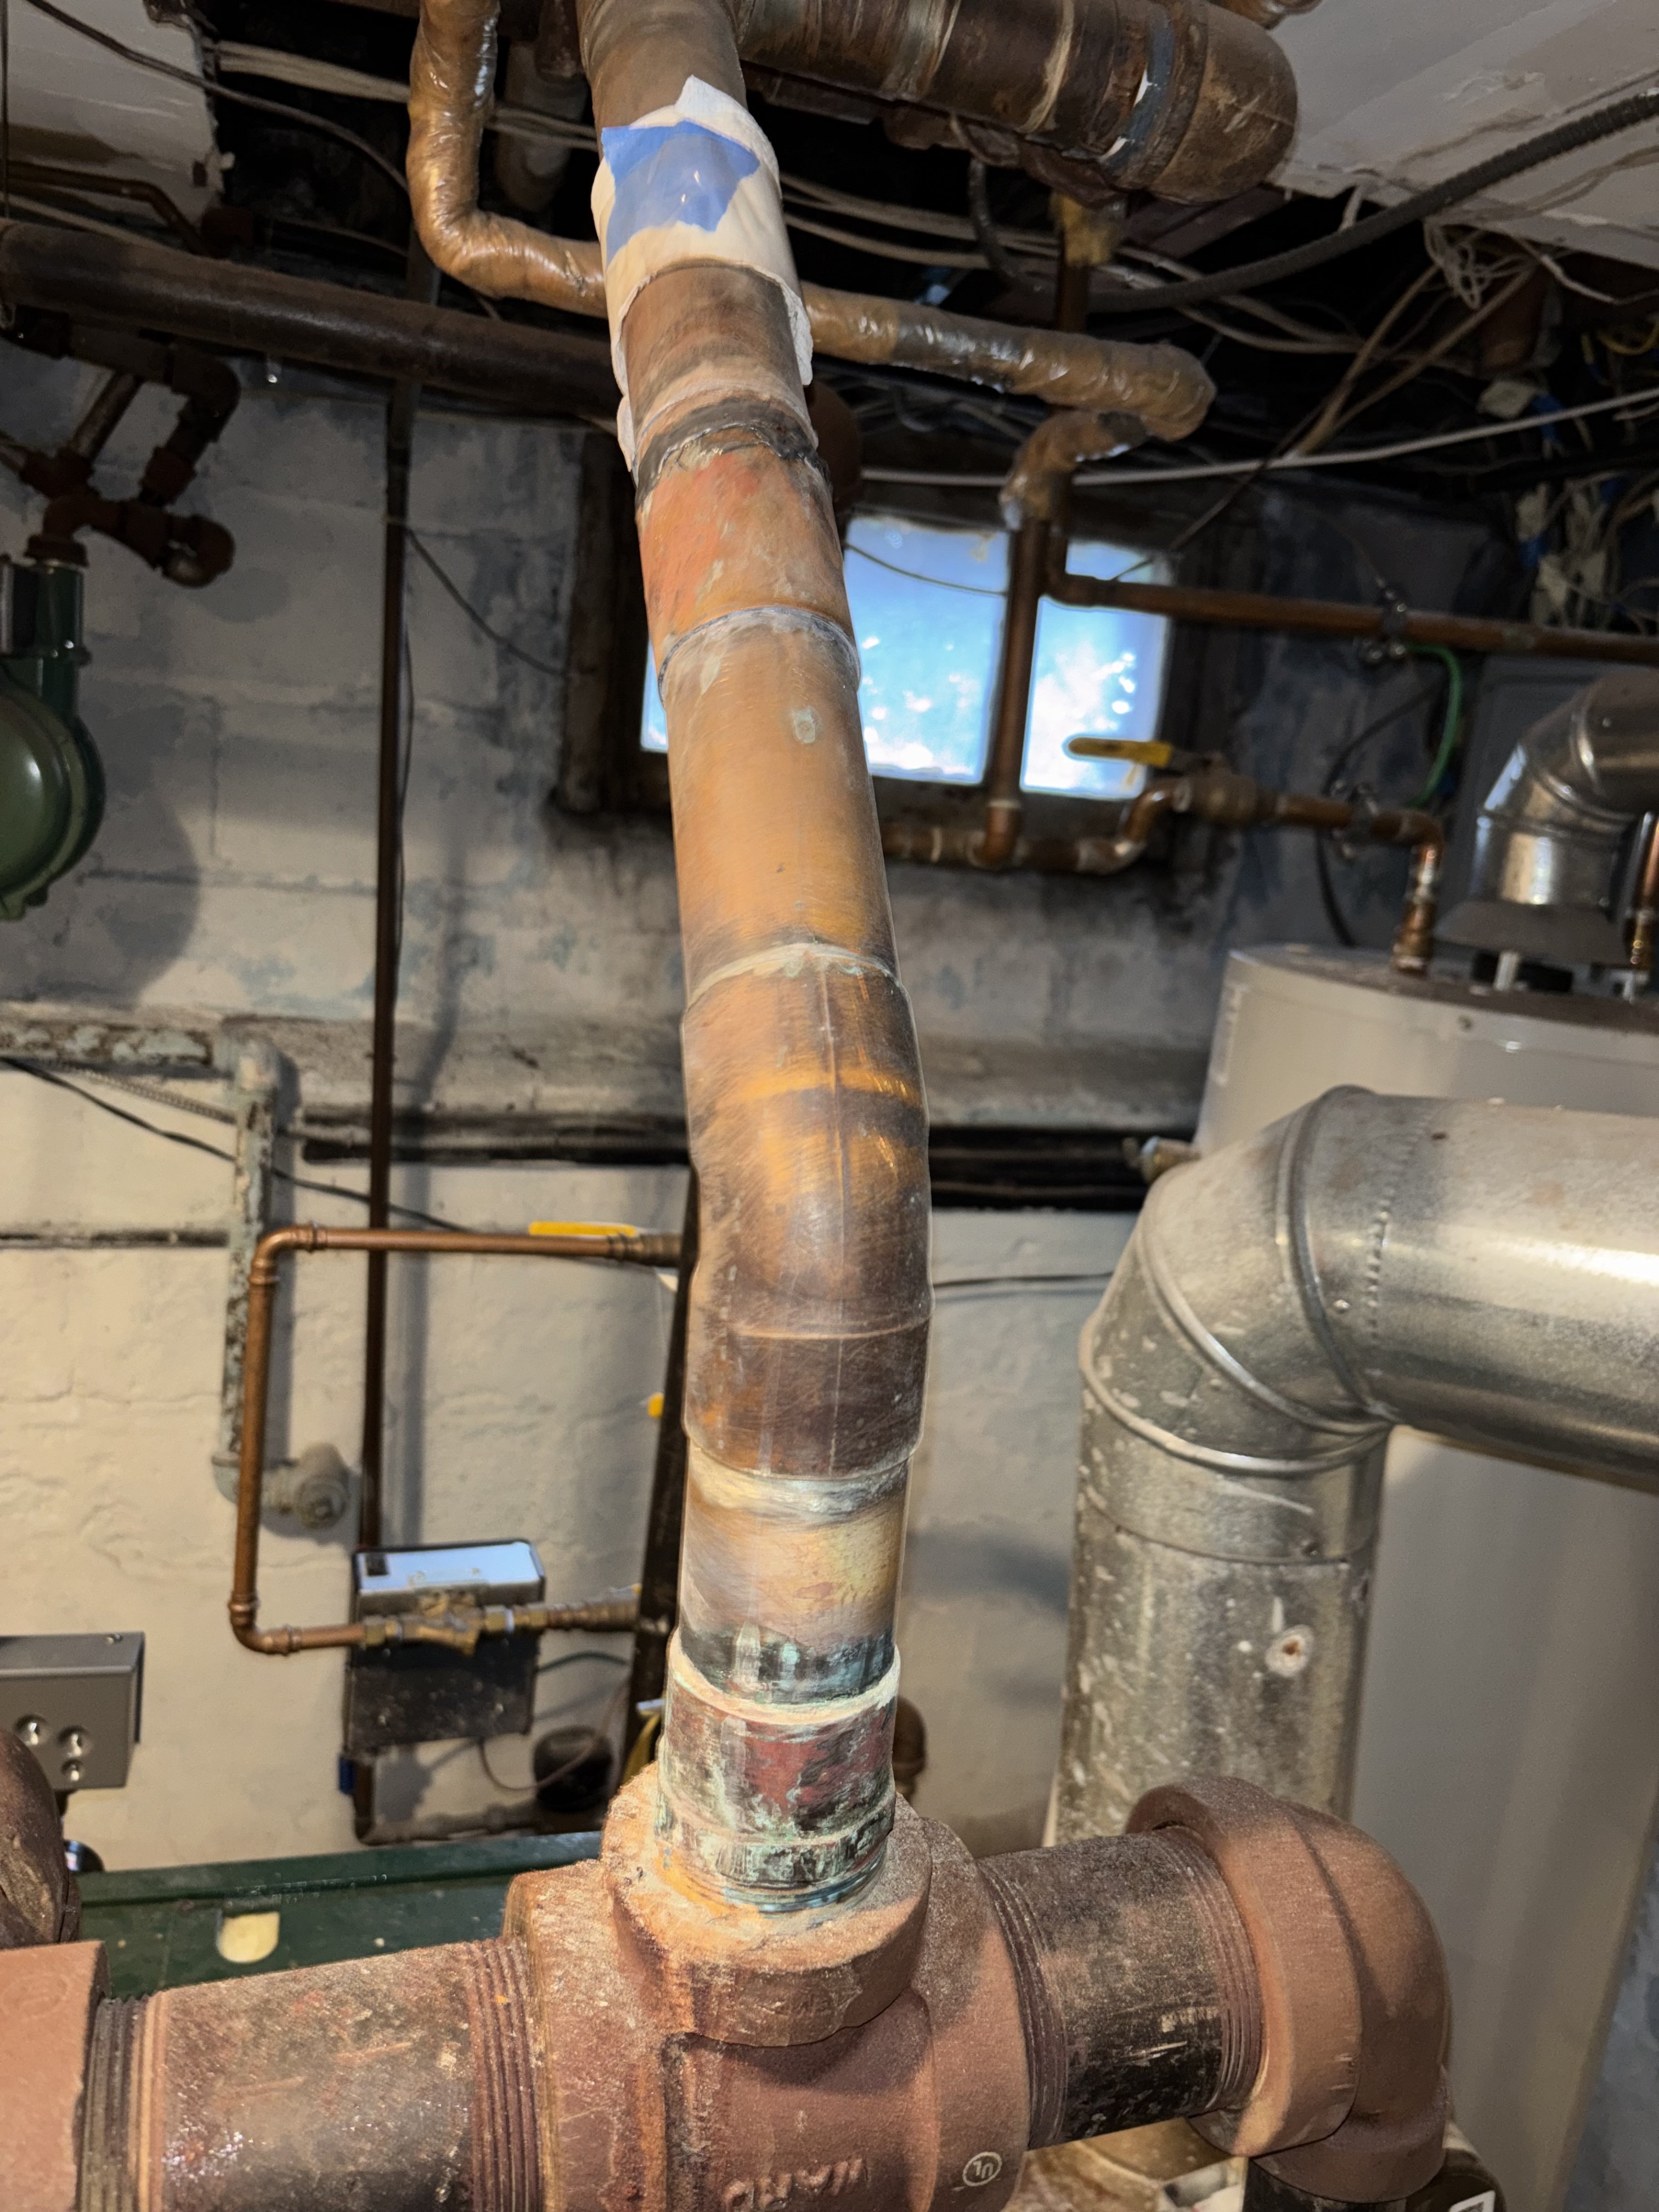
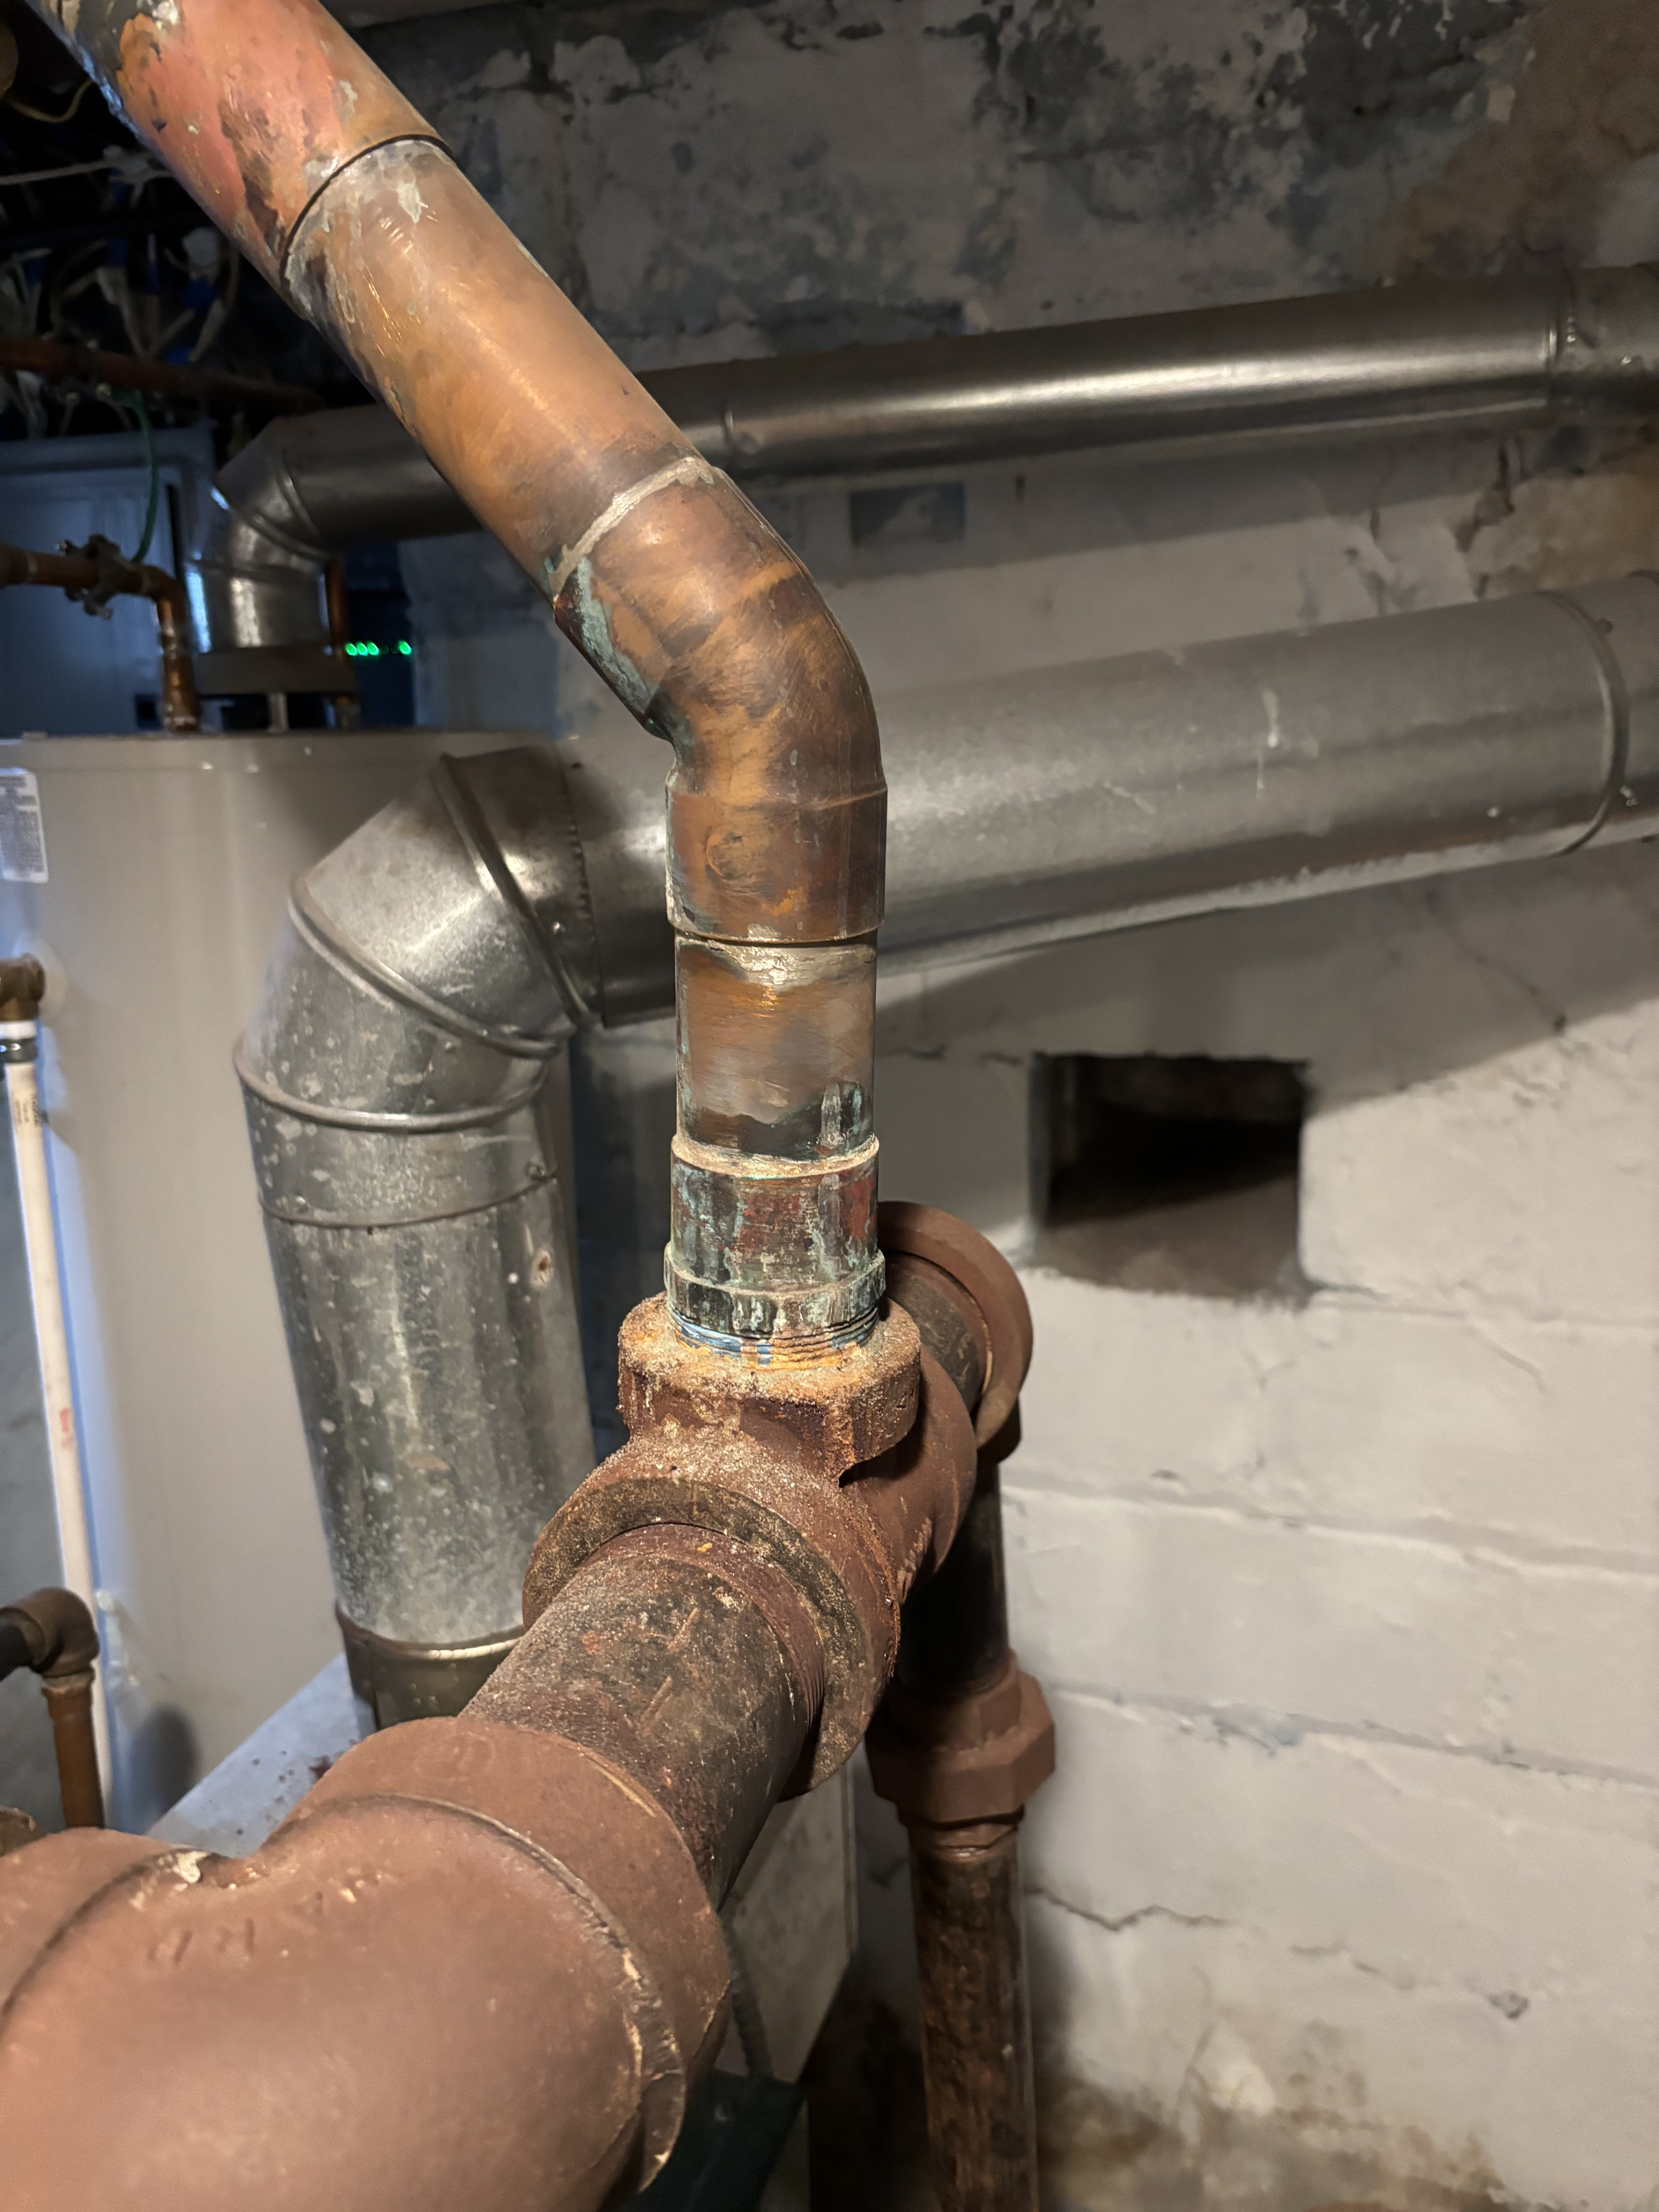
I have attached a better photo. You should be able to make out that the header is iron, the transitions to copper and then back to iron. I can get more/better next time I am over there.
I am comfortable with soldering 1/2 and 3/4 water lines, but this is probably beyond my paygrade. I did try cleaning it and applying JB Weld - not sure if that was a bad idea or not.
I am also perplexed by trying to test for the leak. Overfilling the boiler is cumbersome and I tried the mirror approach with no luck.
For what it's worth, permits recorded with the town show the prior boiler installed less than 10 years ago and the current one last year. So I suspect there had been a leak that caused permature failure.
0 -
With that record of boiler failures — that may not be your only leak. Keep looking!
Br. Jamie, osb
Building superintendent/caretaker, 7200 sq. ft. historic house museum with dependencies in New England 1
1 -
Where is the better pic?
1 -
Apologies… Attached.
 0
0


Categories
- All Categories
- 87.7K THE MAIN WALL
- 3.3K A-C, Heat Pumps & Refrigeration
- 59 Biomass
- 430 Carbon Monoxide Awareness
- 129 Chimneys & Flues
- 2.2K Domestic Hot Water
- 5.9K Gas Heating
- 122 Geothermal
- 170 Indoor-Air Quality
- 3.8K Oil Heating
- 79 Pipe Deterioration
- 1.1K Plumbing
- 6.6K Radiant Heating
- 396 Solar
- 16K Strictly Steam
- 3.5K Thermostats and Controls
- 56 Water Quality
- 51 Industry Classes
- 51 Job Opportunities
- 17 Recall Announcements