How drain boiler for repair?

Dumb newbie question yeah, but to drain my Weil-McLain WGO-3 oil boiler in order to do some installations on the near-boiler piping, I figure I shut off the ball valves on the return and supply and also on the cold water feed to isolate the boiler, then open the drain at the bottom of the boiler (with hose attached). But don't I also need to open something up to provide air as it drains (like taking your finger off a straw with water in it)? What should I open?
For the record, after doing the work I figure I'd like to flush the boiler, which I figure would just mean (with the boiler now empty) then opening the cold water fill valve with the drain open and letting it run a while? Then would the cold water first circulate around the whole boiler and then out the drain? (The boiler would still be isolated from house lines.)
And after the installations I'd like to add cleaner and inhibitor to the entire system (probably Sentinel brand, which WM recommends although there might be a business partnership thing going on there). I figure that's done after the system is filled again and purged of air, you just run the system to get the stuff circulated…?
But my main question is the first one.
Comments
-
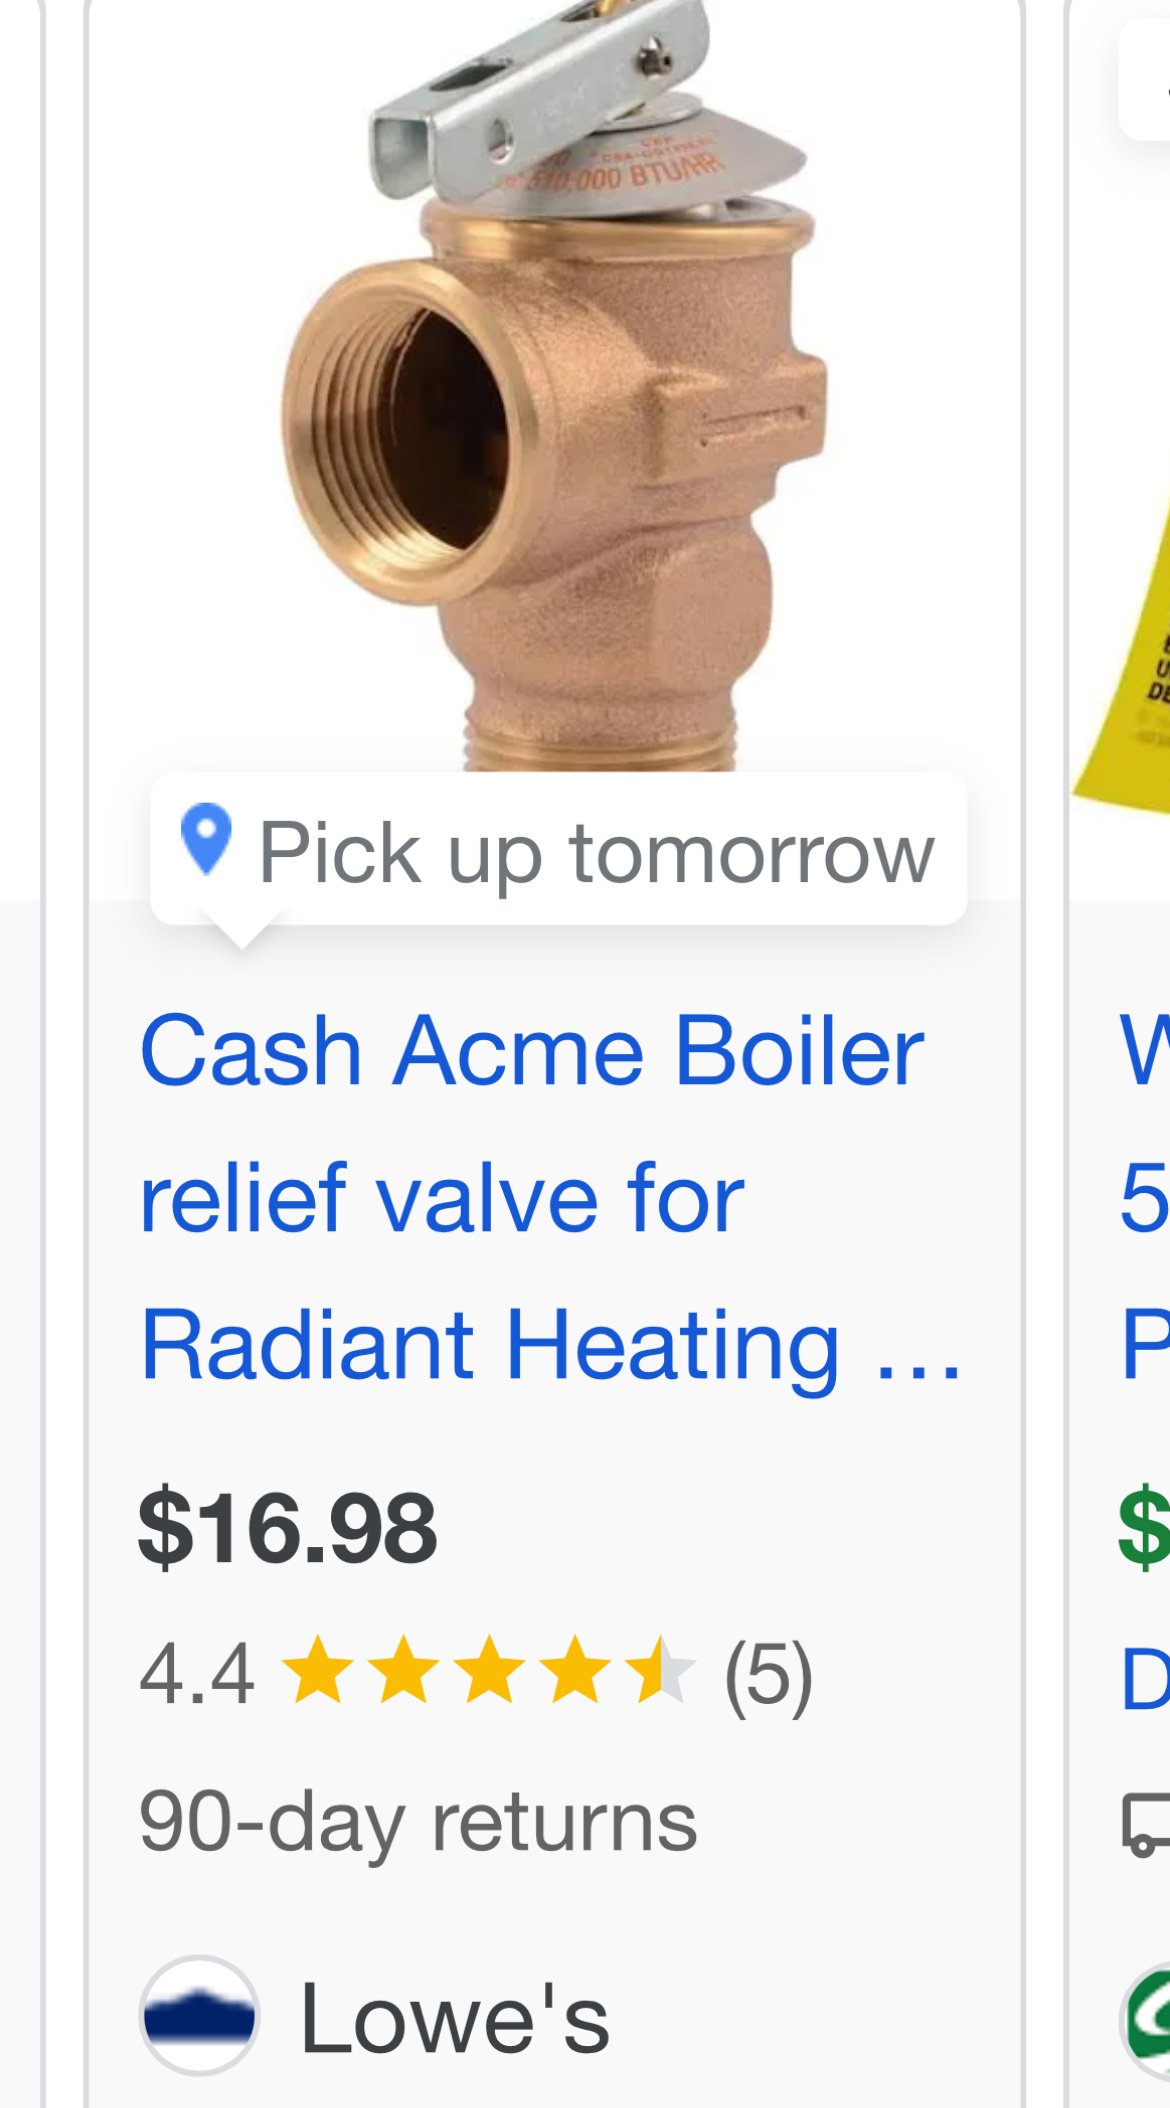
Yes you have the sequence right. You could lift the lever on the boiler relief valve but some time they will leak after you refill if they haven't been opened in a while. If you have an air vent on the boiler that is another option.
The third way is to shut your valves and drain the water. It will probably stop when it is in a vacuum. Then unscrew the relief valve as you should have 0 boiler pressure.
0 -
@EBEBRATT-Ed thanks , problem solved by you. In fact, re your first option, I should be checking the relief valve once a year anyway, right? (I guess with a spare one on hand in case it doesn't seat after.) So I could check the relief valve under pressure just to see if it works and then close it (and see if it seats) and drain to zero pressure and either open the relief valve again to fully drain, or, as in the third option, now just unscrew it (or replace it if it didn't seat!) Unscrewing it then rather than reopening it seems like the better idea so that I don't give it two chances to leak, except then there's the extra step of unscrewing the downspout fittings.
When you say "air vent" I do have a Hy-Vent up top, is that what you mean, and if so do you mean just unscrew it (after draining to zero pressure) and then screw it back later? If so, no problem, in fact that seems a lot easier than unscrewing the relief valve what with the downspout fittings and all. I'm guessing that if this is what you mean, that's the go-to for you pros when you need to drain the boiler, just loosen the Hy-Vent? And if so what I guess I'd do is check the relief valve under pressure just to check, but if it works and reseats forget about it and go to the drain and Hy-Vent option ...
0 -
IIWM, I would open and close the relief valve under pressure several times.
This would flush the valve seat. Then when you close it, let it snap shut by the spring.
If it drips for an extended time, you than change it.
0 -
The auto air vent will let air in if it sees a vacuum as long as the cap is loose. Those can get dirt in the seat and start leaking too.
0 -
How old is the boiler/ relief valve? a new relief valve is cheap insurance
 Bob "hot rod" Rohr
trainer for Caleffi NA
Living the hydronic dream 1
1 -
If the auto air vent leaks you can close the cap to stop it.
0 -
What installations are you doing on the near boiler piping?
0 -
@mattmia2 good advice. It makes sense to me now that the Hy-Vent lets in air when it senses vacuum. I thought maybe it would be a one-way valve because you don't want air in the system, but I guess since the system is always pressurized that wouldn't be a problem!
@hot_rod the relief valve went new in last fall.
Hi @HVACNUT thanks for asking what I would install but you might wish you didn't. 😉 I will probably start a new thread on the proposed installs, but for now here we go:
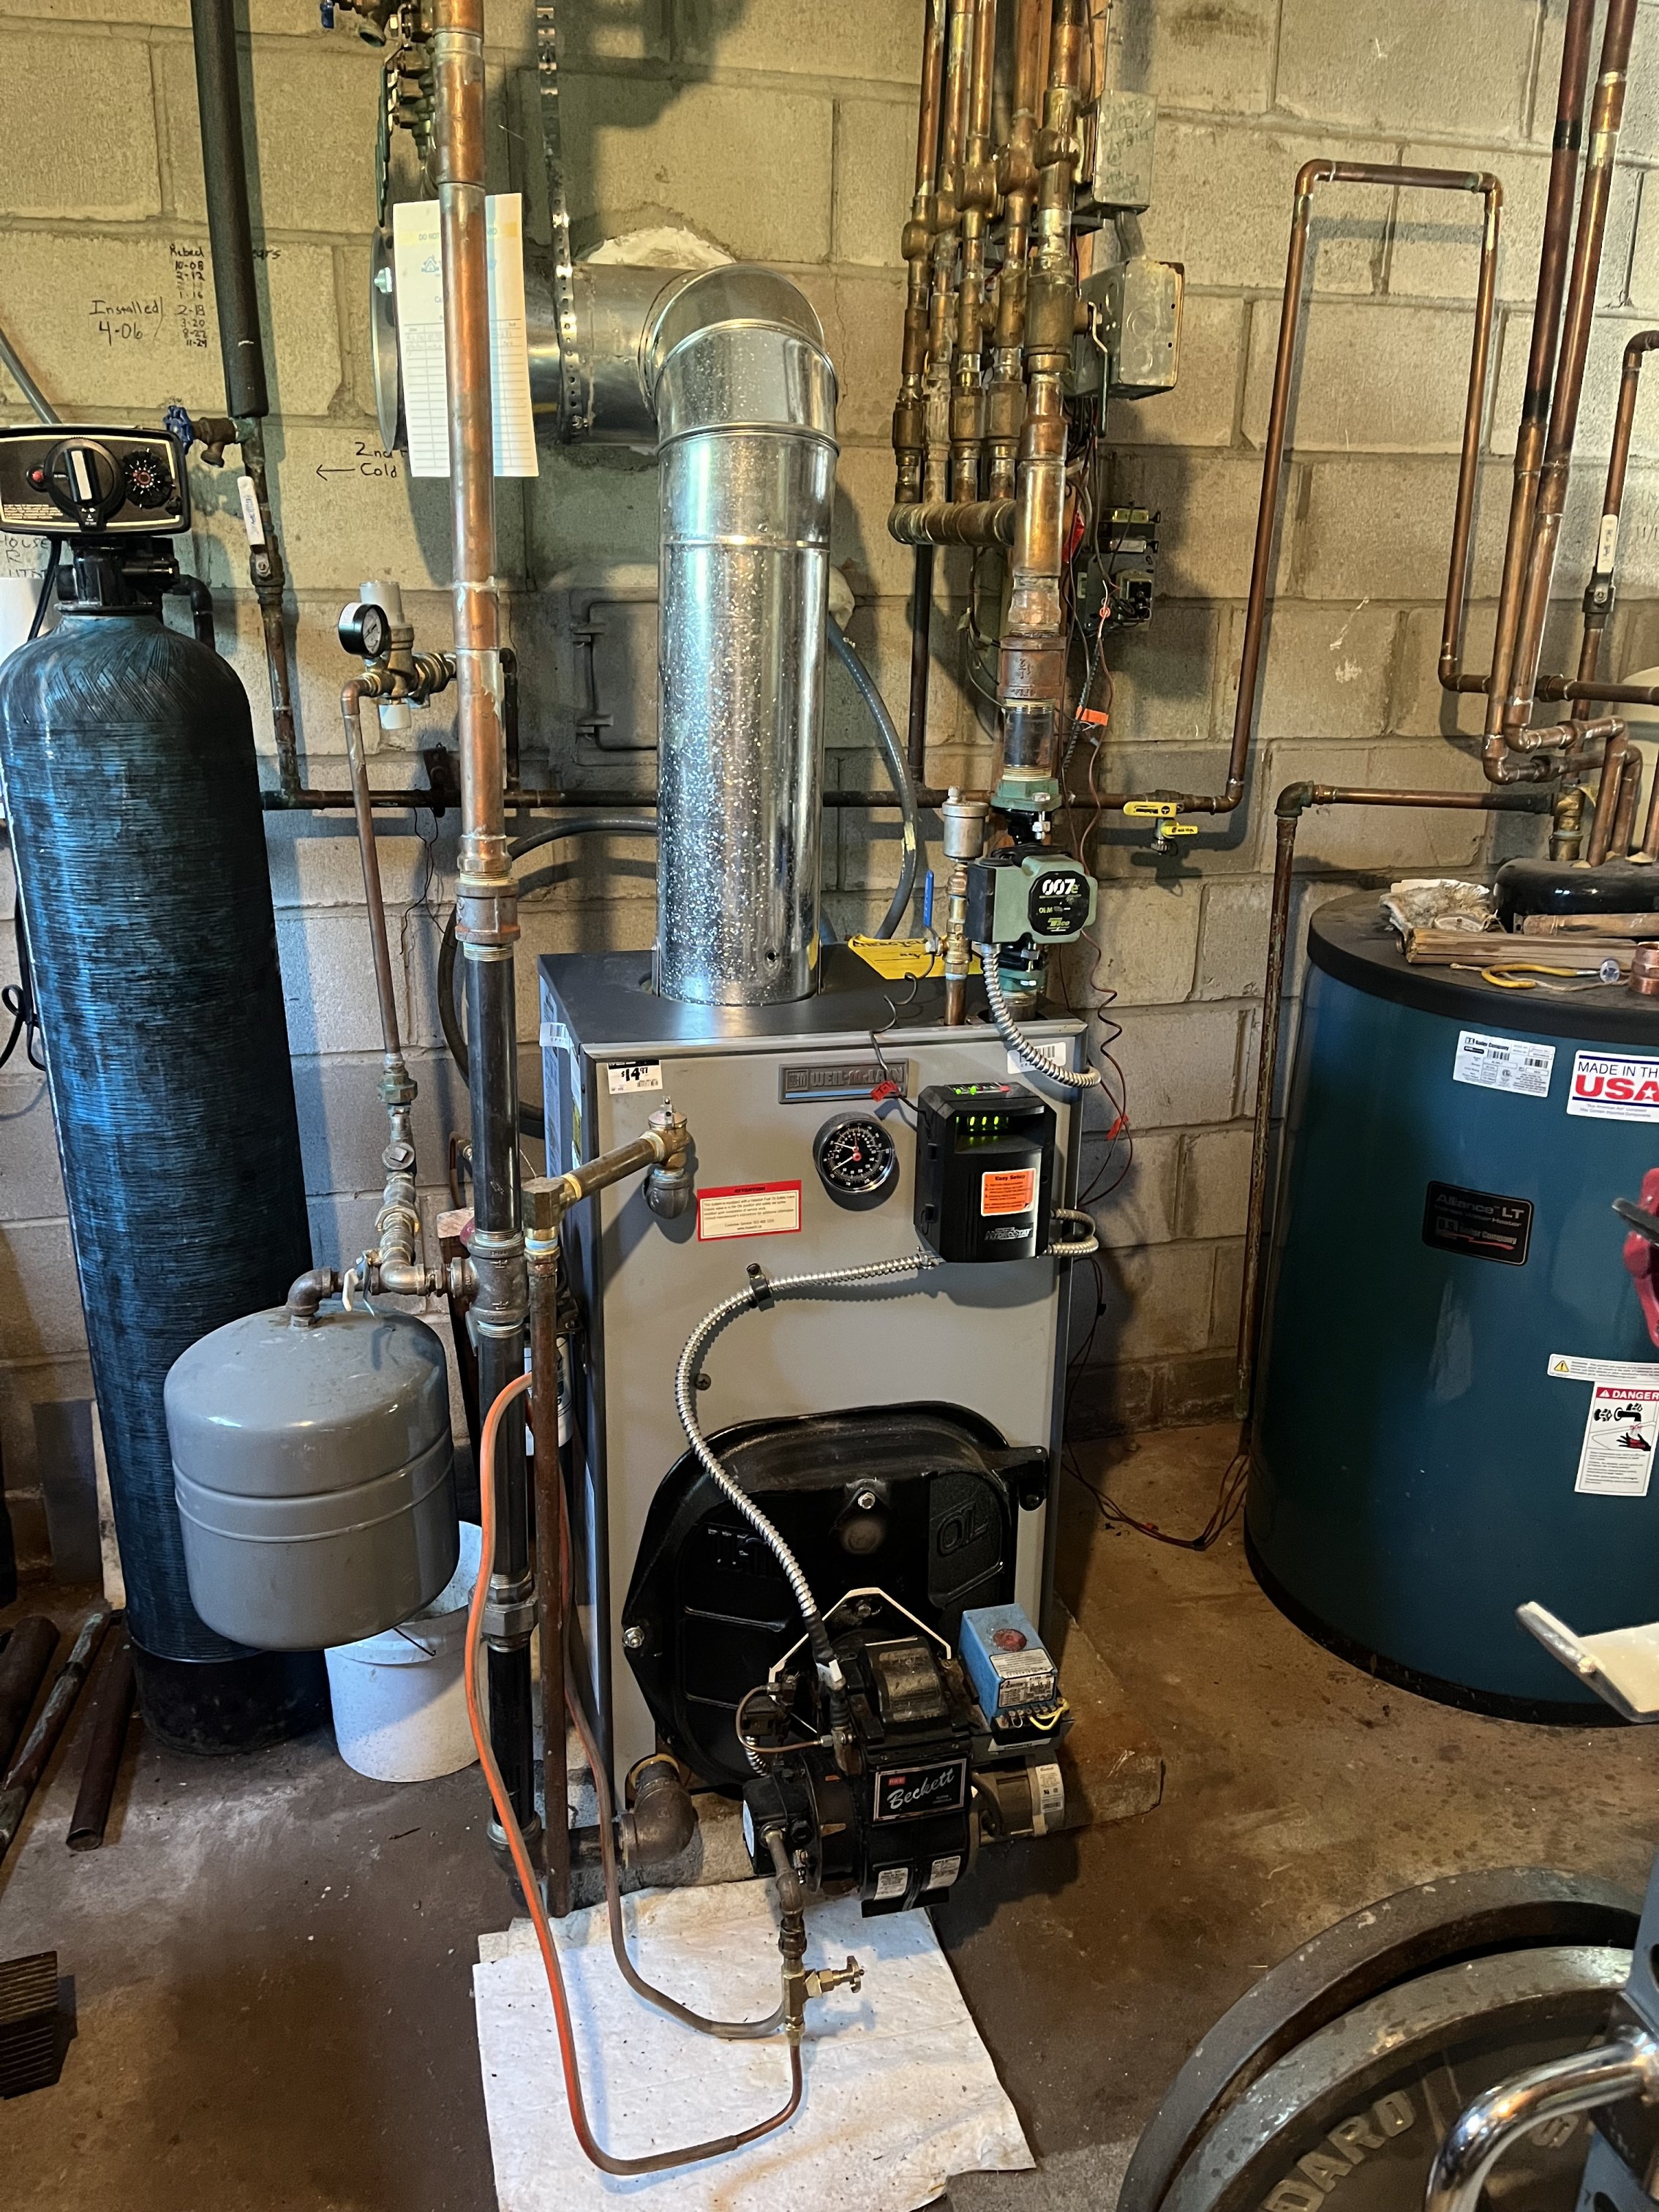
So this is a WM WGO-3 I put in myself last fall which was only possible with the help of folks on this forum (including but not limited to you, @mattmia2, @EBEBRATT-Ed, @hot_rod and @JUGHNE who have posted in this thread, also @EdTheHeaterMan too of course, and many others). I stopped last fall without adding anything more because cold weather was coming and everything takes me twelve times as long as it would you due to learning curves, etc.
But I would like to:
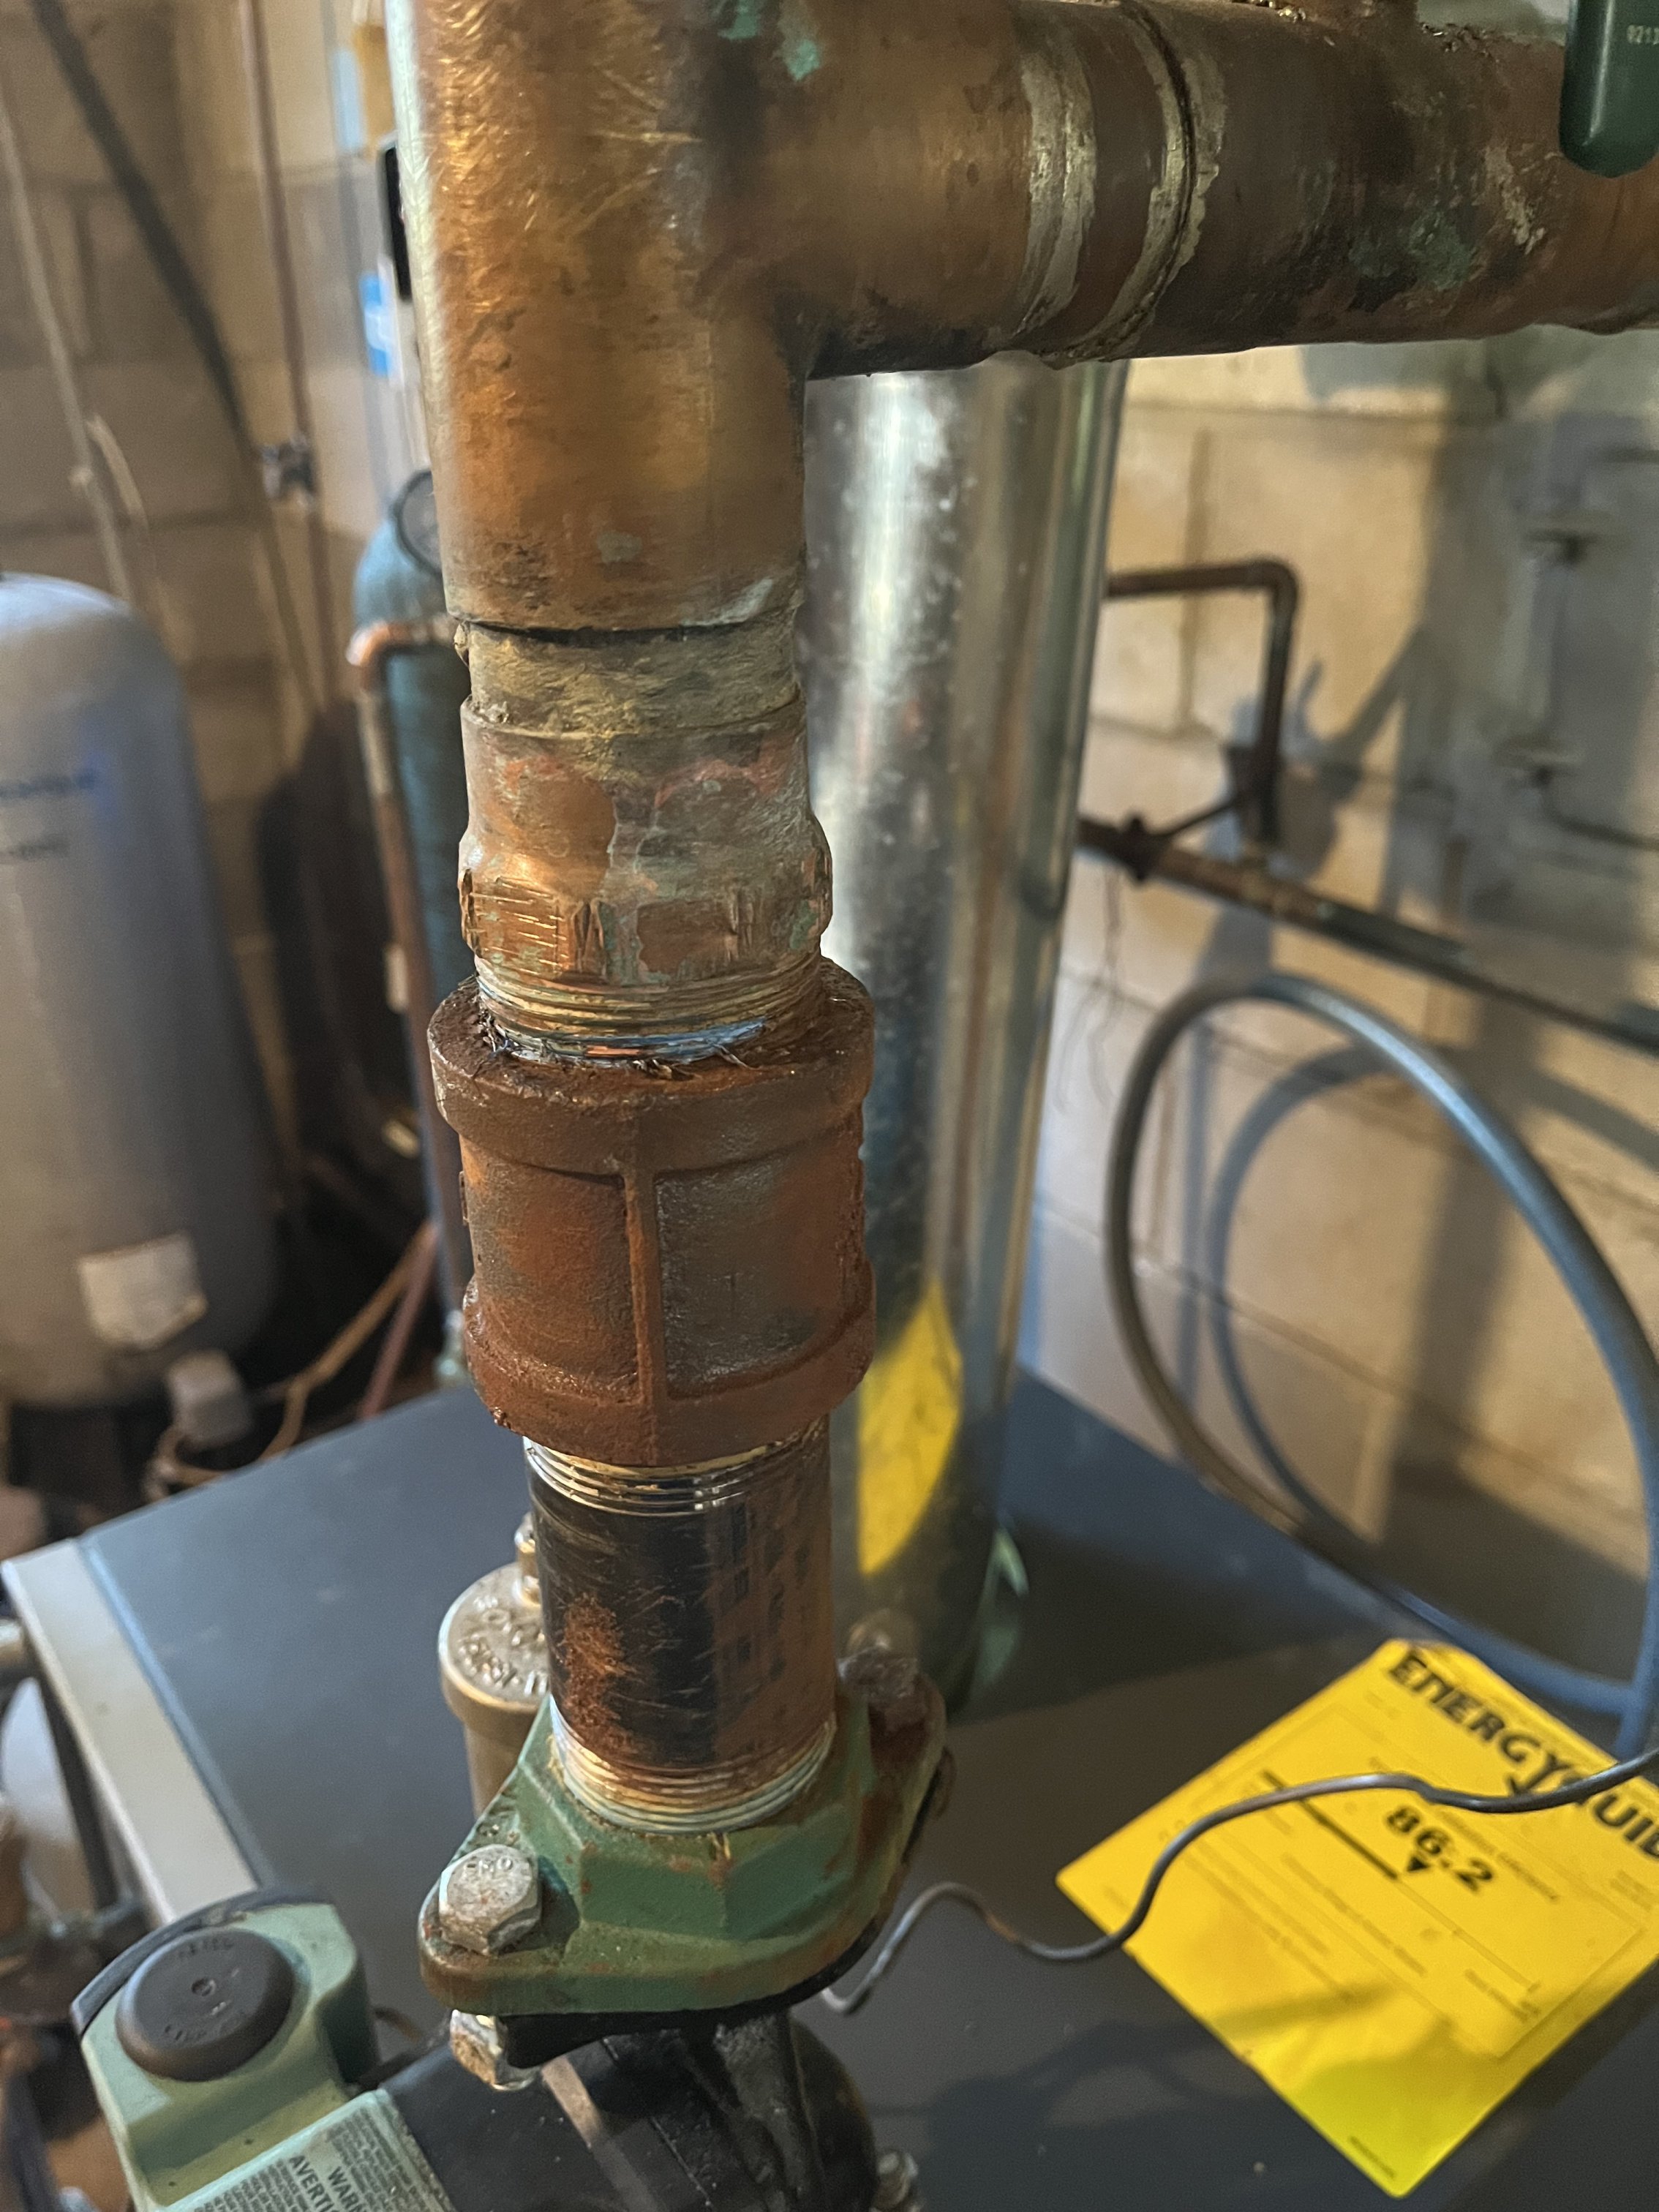
- Replace a 1-1/4" adaptor (copper above, iron below) from the original system, that is leaking on the supply side between the circulator and the manifold above it to the four zones. This makes me nervous because I could not unsolder it in the fall (it just wouldn't come off) and it is still leaking and there is no leeway for a mistake because there is only a tiny nipple between it and the complicated manifold. I think it was mattmia who suggested I cut grooves on either side and peel it off, and I like that idea, but for just this fitting I think I might swallow my pride and hire a plumber, because there is no room for screwing up.
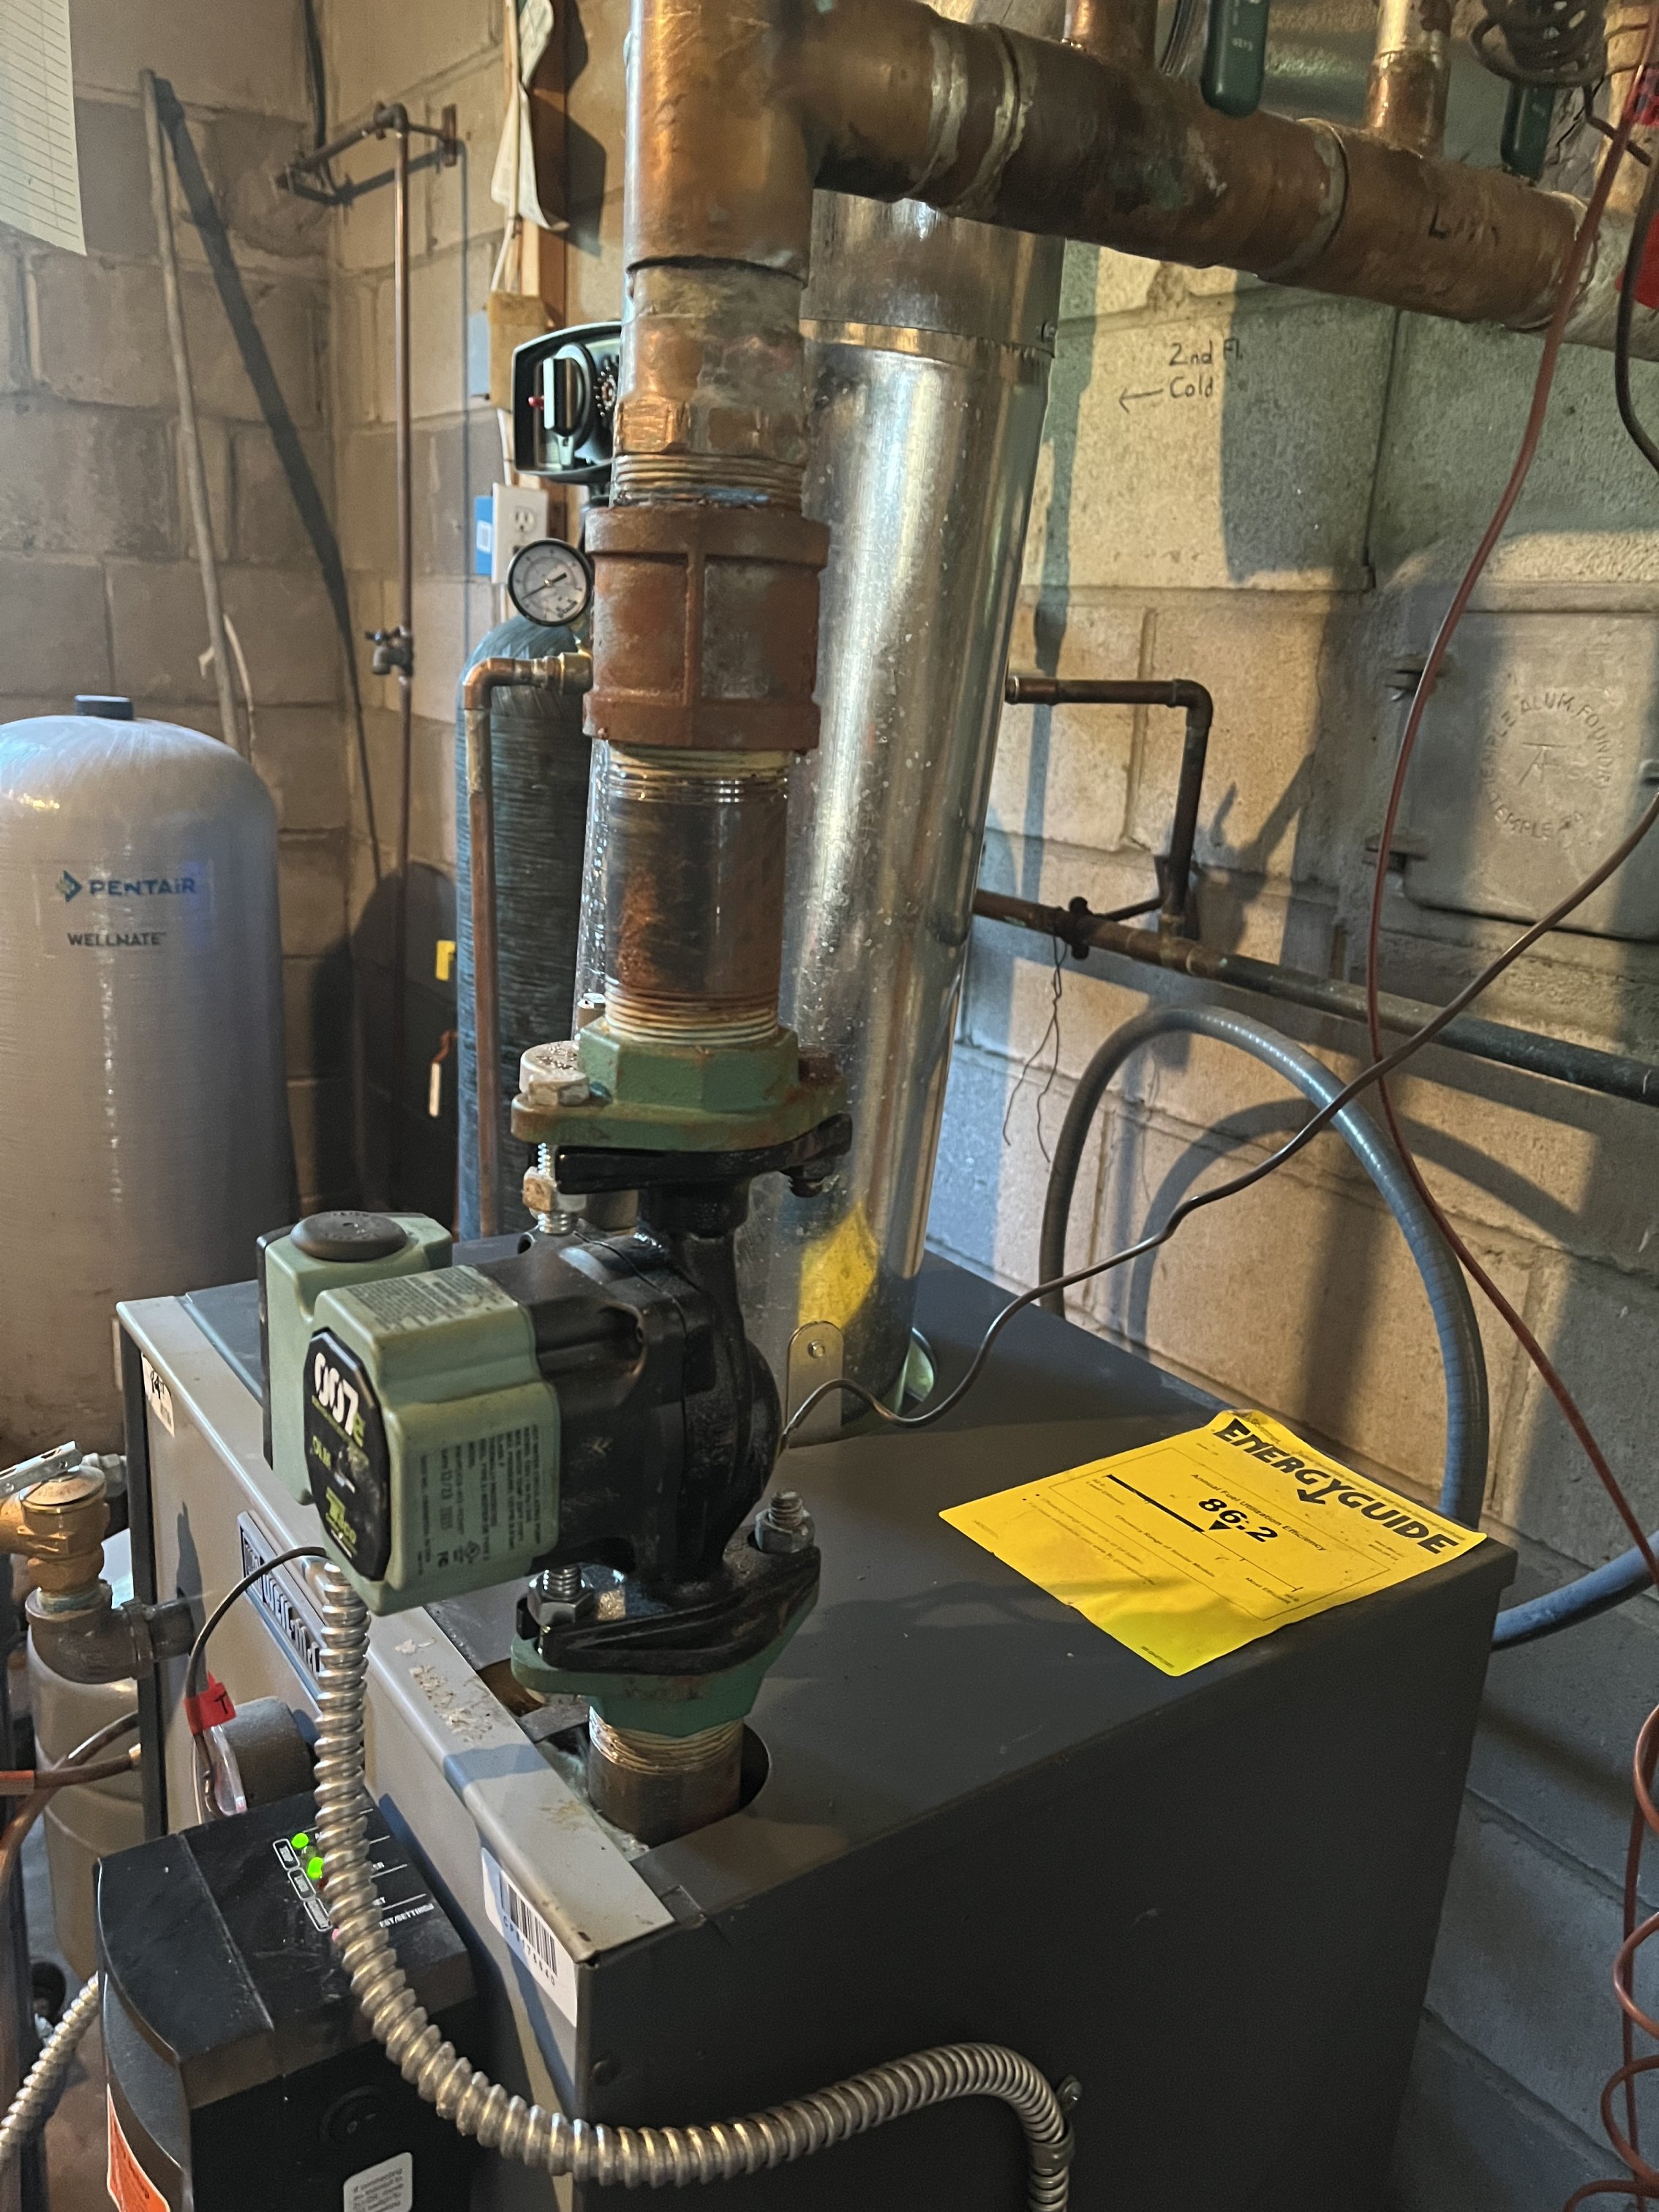
- Put in either a combi microbubble air separator/ dirt thing between circulator and supply tapping, or separate air separator there and dirt thing on return side. (See picture, very little space to put this thing plus circ, I think hot_rod suggested putting in a horizontal loop to fit both circ. and separator. Am considering putting the circ back on the return side where it was originally, then the air separator would fit in perfectly where the circ now is. (EDIT: OOPS, the Caleffi Discal and probably the other companies says best place is on suction side of circ, so the latter is not an option), and I put the circ where it is when EdTheHeaterMan pointed out that the WM has an internal configuration that helps to separate air but for this the circ must go on supply, but if I put in the air separator I figure that'll take care of air?)
- Put in a low water cutoff somewhere, not sure where it should go, will consult WM manual. The Hydrostat 3250 that came with the boiler has an integral LWCO but after a month the light that shows the cutoff is operational started going off intermittently, mostly it's off, so I don't trust it. EdTheHeaterMan described last fall a simple troubleshooting thing which I will try, but I figure redundancy would be good. I have never had a LWCO on the system before.
- Possibly a single ball valve/drain combination on the return between the zone cutoff ball valves and the return tapping so I can drain at only one spot when purging four valves, this was suggested by EdTheHeater as a convenience.
- Replace the old Carlin primary control with a newer 60200 which has been sitting around in my basement.
- Flush and clean system and put in inhibitor, probably Sentinel which is what WM recommends.
NOTE on photos: 1) I know the oil lines look squirrely and you would never install them so wavy for a customer, but I reused the old ones and I'm the customer and I can live with the look. 2) I know the oil lines and Tigerloop etc. could go on the other side of the boiler and I could use flexible braided lines, but I'd rather not use those.
The photos are
1) The leaking adaptor
2) Where I'd have to squeeze the air separator
3) Whole shebang, squirrely oil lines and all
 0
0 -
You have to be careful with putting auto air vents on the suction side of a circulator. If the system has enough resistance the suction side can go in to vacuum and pull air in. It rarely is a problem on pressurized systems but is why you can't use auto vents on direct hot water loops off of steam boilers because the system is always in a vacuum.
0 -
Thanks @mattmia2.
Here's an EDIT to my last long post: Caleffi says install their air separator on suction side of circ., and I assume it's the same for other companies, so my idea of putting the circ. on the return side so I could fit the separator on the supply wouldn't work.
0 -
You want the air separator at the hottest point and lowest pressure, that is where the lowest solubility of air in the water is so where the most air comes out of soultion.
That is between the boiler outlet and the suction side of the circulator.
The expansion tank should also connect there although your system likely has little resistance in the boiler or the system so putting the expansion tank in the "wrong" spot likely won't make much of a difference. There is an idronics on this if you want more detail.
0 -
@mattmia2 yup looks like I'd be stuck with trying to squeeze the air separator and the circulator there between the supply outlet and the copper adaptor up top. Do you now the idronics # offhand for that? A quick look I didn't see something just on expansion tanks, but I might have missed it. Don't take any time looking that up, I found a Caleffi video on it anyway.
@hot_rod or anyone else: This leak I have at the adaptor on the supply side is tiny, I got through all winter with it, I just ran the system for an hour to get the pressure up and see no water. My main concern is that it is introducing a small amount of air into the system over time. Would an air separator mitigate air from such tiny leaks? (I want to put one in anyway). I note that any air that goes into this leak would take at least one pass through the system before hitting the separator, which would be mounted on the supply below the adaptor.
0 -
1
-
To understand why you don't want to change the circulator location you will want to look at this video
But you don't need to sit thru the entire video. You need to look at the point of no pressure change explanation that starts an time stamp 22:00. Once you understand how a closed system that has no way to let air in or out and how the pump on a closed system, that is completely filled with water will operate in relationship the location of the compression or expansion tank. You can stop at about time stamp 34:00 (so about 12 minutes)
Dan touches on Boyle's Law about gases dissolve in liquids and the relationship that it has to temperature and pressure in the liquid. Basically it states the the higher the pressure the more gas can be dissolved in a liquid, and the lower the temperature the more gasses can be dissolved in a liquid. I like to think of is as the reverse of relative humidity. There are water molecules dissolved in the air and when the air temperature gets too cold for the amount of water vapor there is, it starts turn into liquid water at what we call the due point Water can hold air dissolved in it the same way.
So there are air pockets in your closed system stuck in different high points of the system and if you drop the temperature and raise the pressure that air will be absorbed into the water. If you increase the temperature and lower the pressure, the air will be released.

Think about where the highest temperature is located. It is in the boiler, where the flame is heating the water. Think of where the lowest pressure is located? It is on the inlet of the pump.
Now if you can locate the inlet of the pump as close as you can to the hottest water, you will create the lowest pressure and highest temperature at the same place. The top of the boiler! Weil McLain makes that boiler with an air scoop at the top of the boiler to collect all that separated air. And they have a hole in the boiler just where you need it. And you already have a vent there.
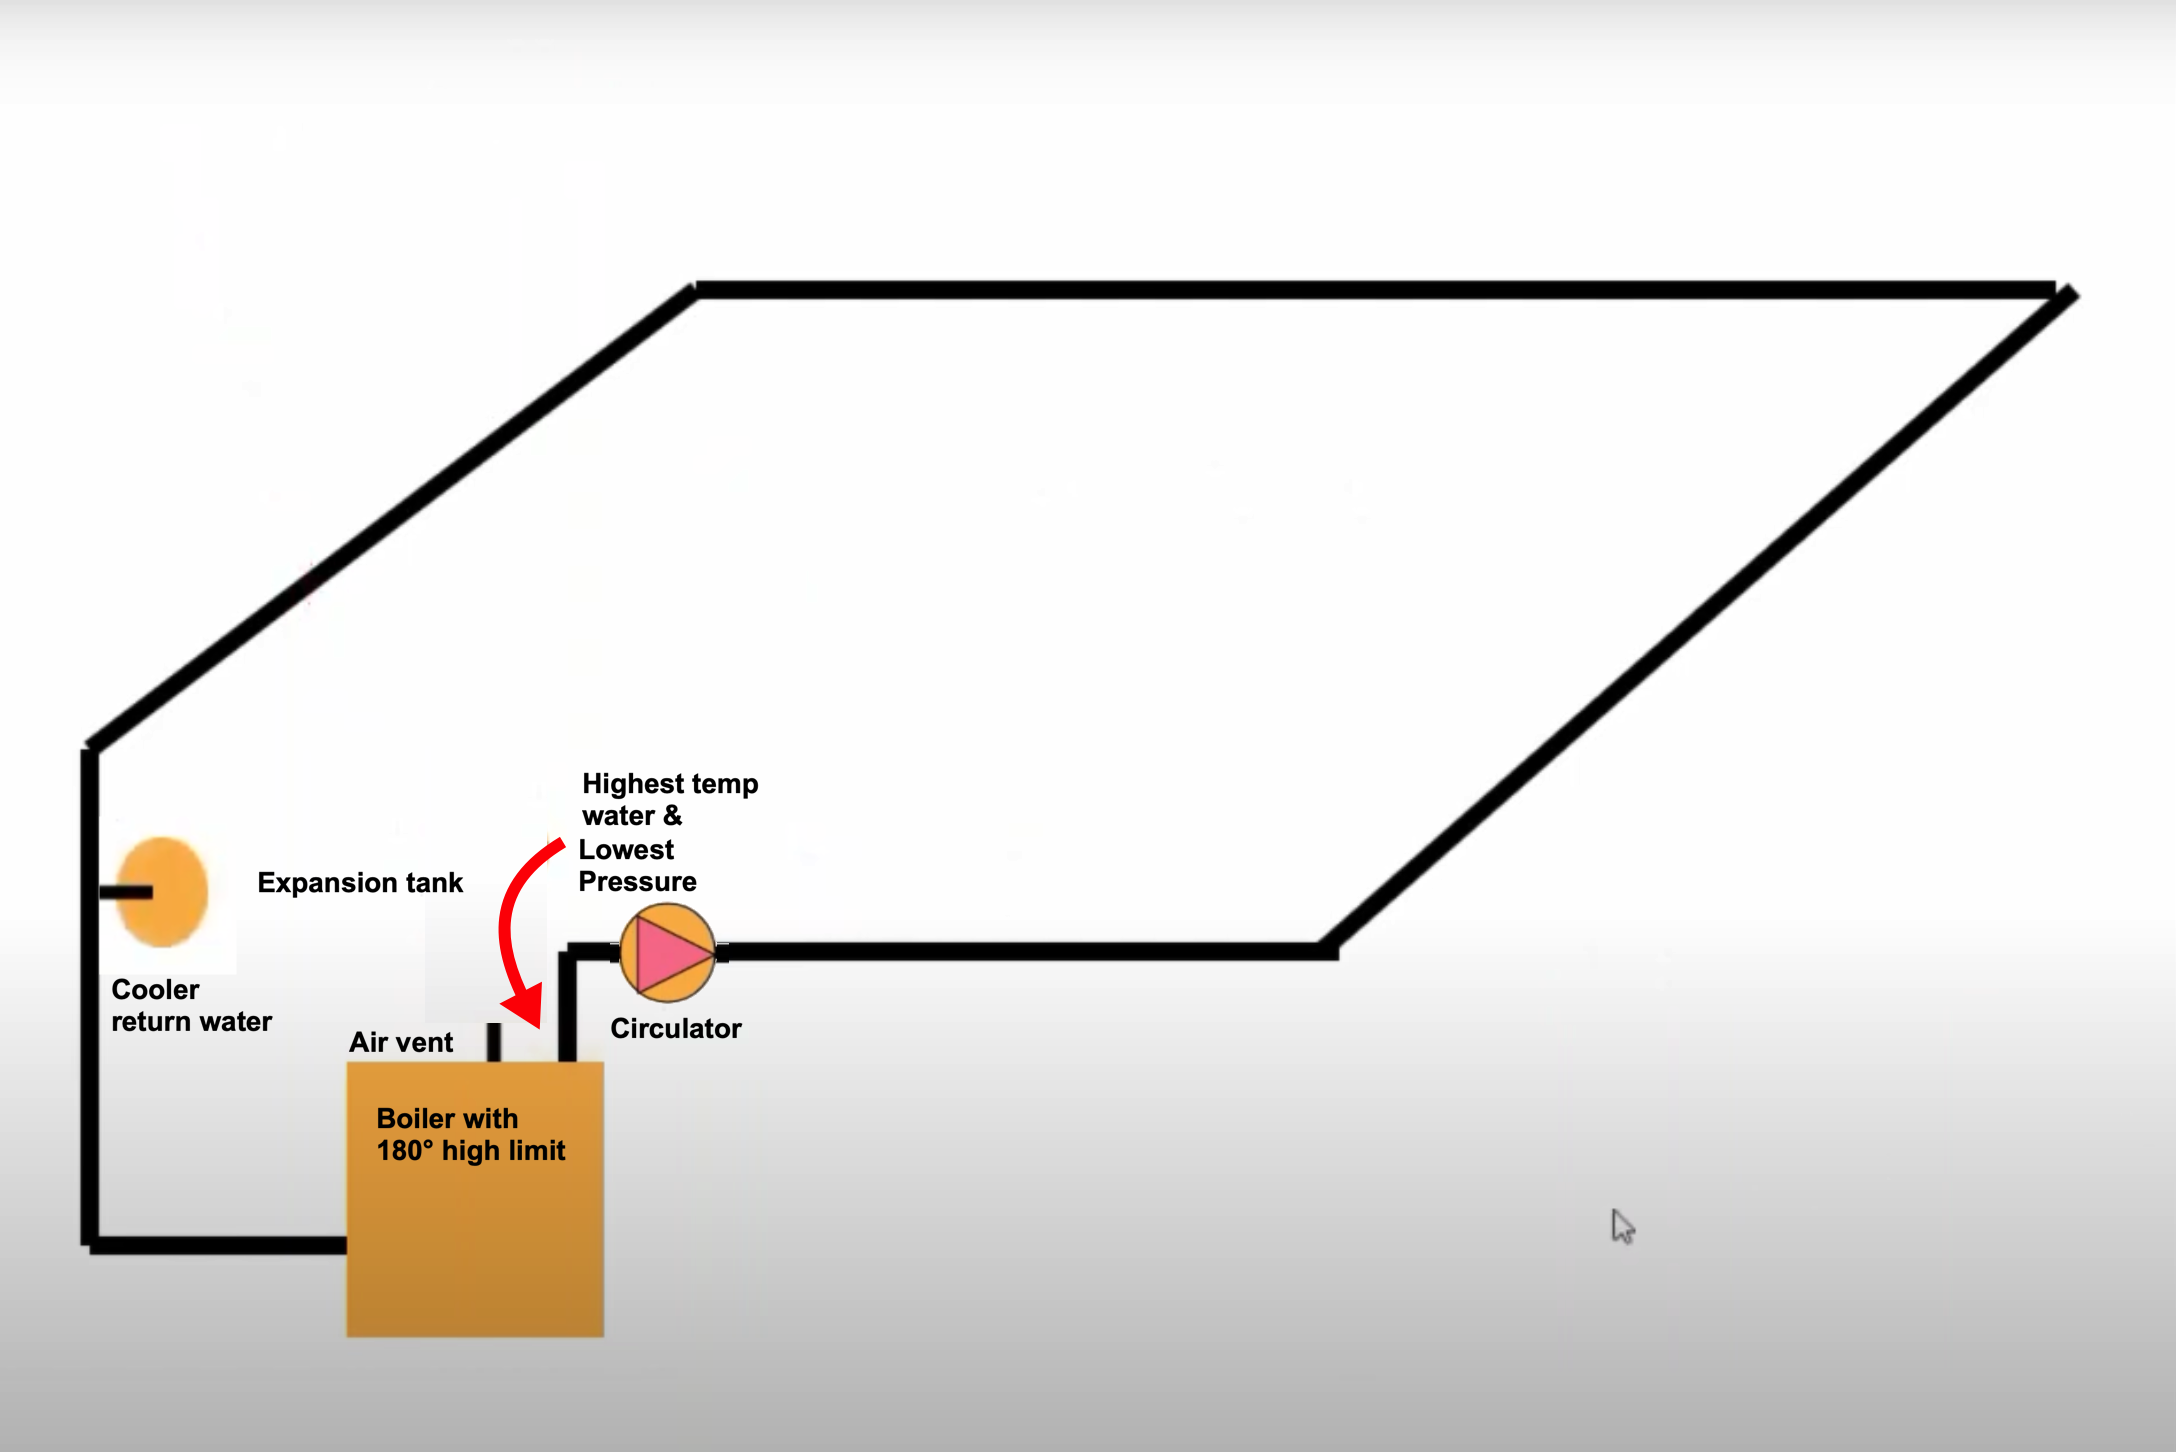
You already have …existing …the way you piped the system …a natural air eliminator. Now you want to put the pump on the return side and create the problem you already solved. Then to correct that problem you create, you can add an air separator to solve the problem (you don’t currently have). Why would you do that?
Next, About the magnetic dirt separator, I have installed hundreds of boilers in my career, and I have never used one of those. And many of my boiler jobs are still operating from when I was 30 years old. That is over 30 years of operation without a Dirt Mag. You really only need that if you have one of those new ModCon boilers with the aluminum or stainless steel heat exchangers with the tiny water passages that may get clogged by a small amount of dirt from an old cast iron radiator system. Again you don't have the equipment that requires that DirtMag. Don't fix what ain’t broke.
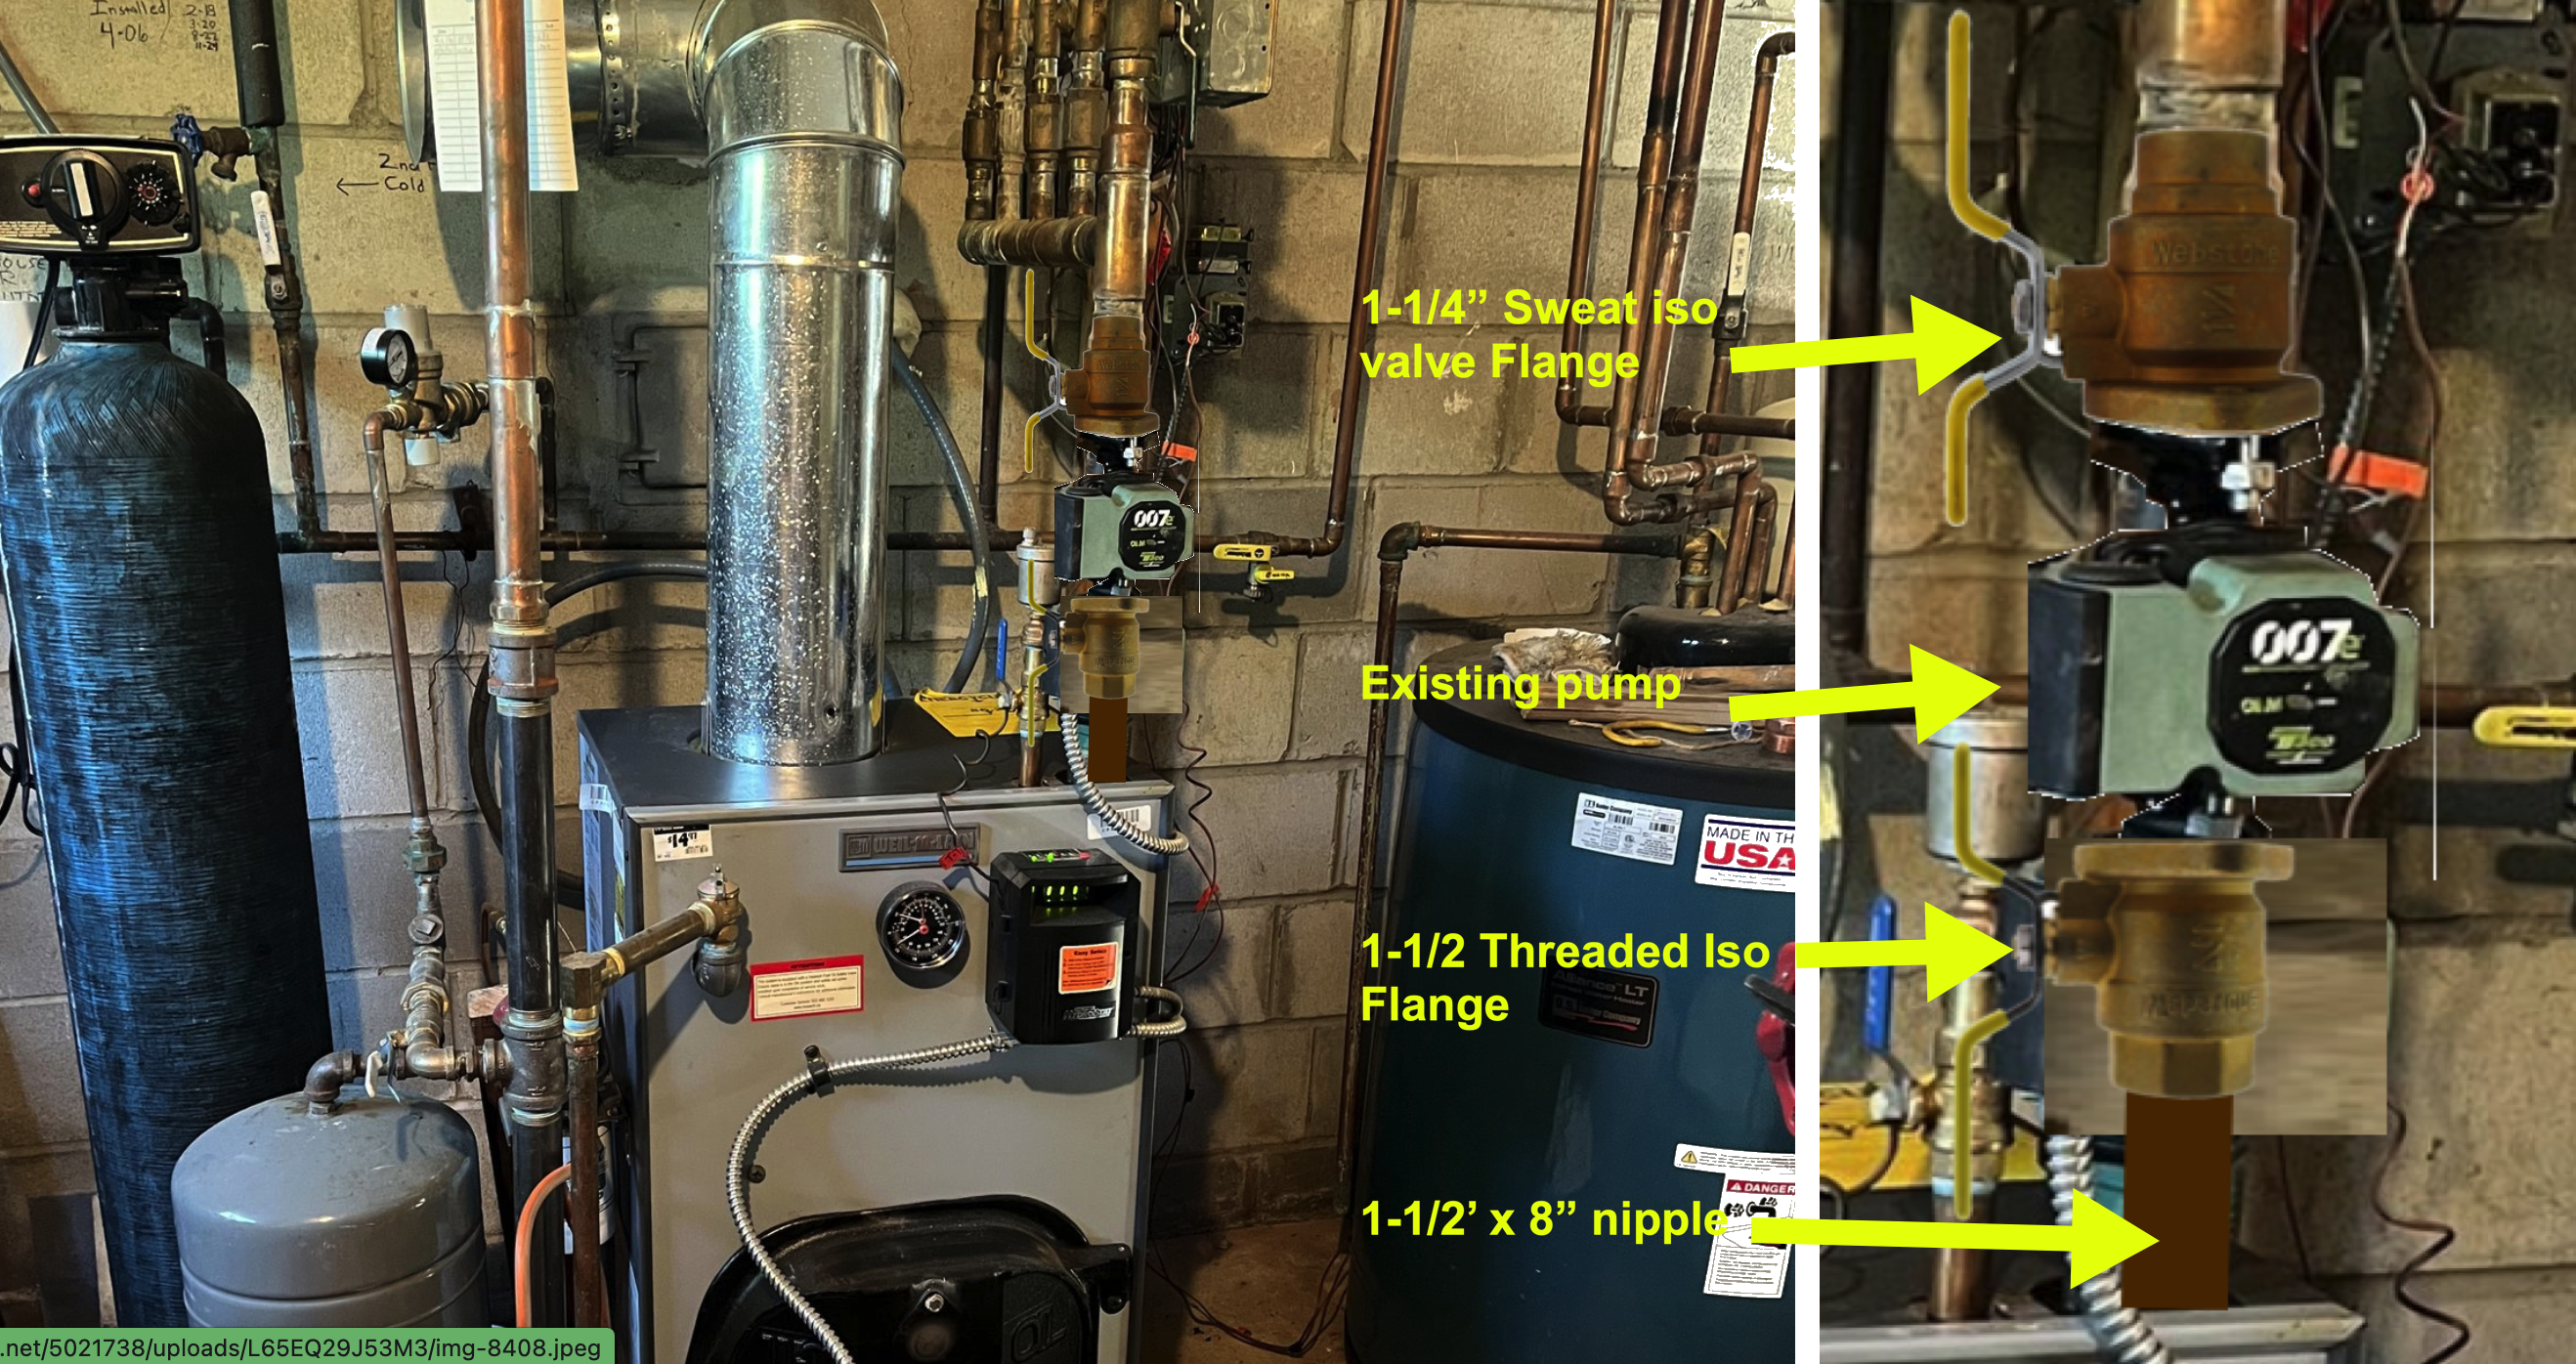
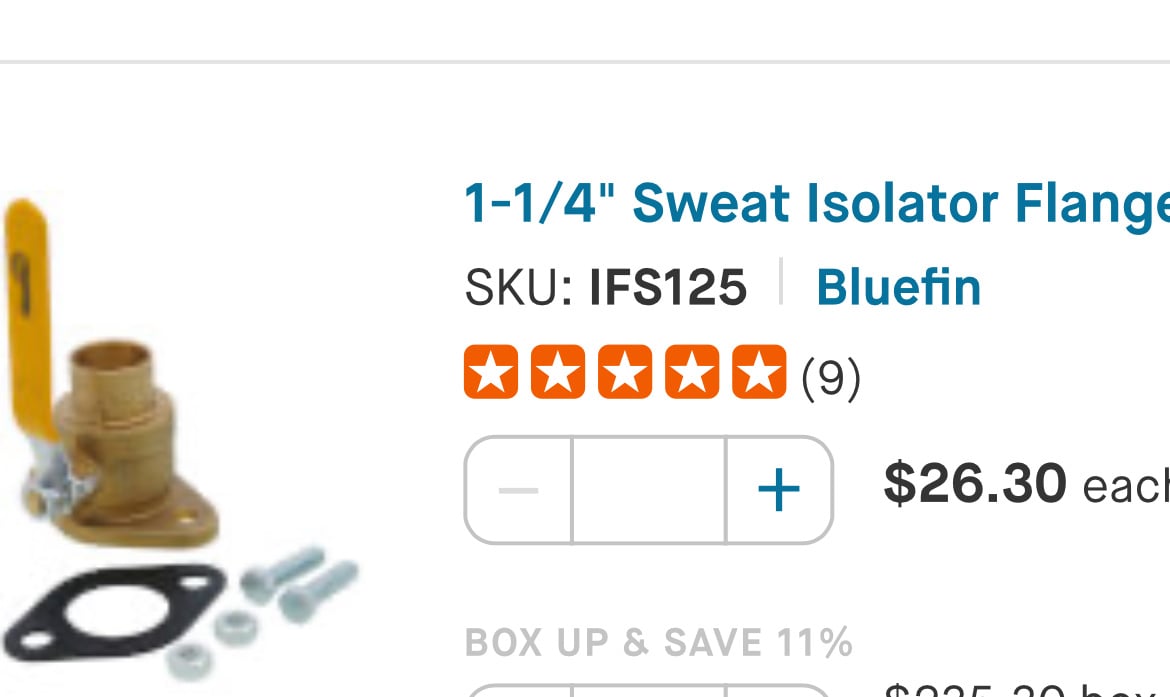
Finally, you have a small drip from one fitting. Is the sweat connection leaking or the threaded connection leaking? If it is the sweat connection, and your torch tip is too small, you will not get the copper to stay hot enough all the way around the fitting to melt all the solder on that fitting at the same time. You need a bigger torch tip. If you are leaking at the threaded section, then I might suggest that you purchase isolation flanges and repipe the threaded fittings from the copper to thread adapter, all the way to the boiler. See the photograph and purchase the proper size valves and fittings to get the isolation flanges to work for you.
Edward Young Retired
After you make that expensive repair and you still have the same problem, What will you check next?
0 -
@seized123 said: "This leak I have at the adaptor on the supply side is tiny, I got through all winter with it, I just ran the system for an hour to get the pressure up and see no water. My main concern is that it is introducing a small amount of air into the system over time. Would an air separator mitigate air from such tiny leaks? (I want to put one in anyway). I note that any air that goes into this leak would take at least one pass through the system before hitting the separator, which would be mounted on the supply below the adaptor."
There is no air going into that leak. Remember high pressure goes to low pressure. if anything is leaking from that piping connection, it is water at 15 PSI or there about leaking to the room air pressure which is zero pressure on a gauge. If the water stops leaking at a higher temperature, it is because the material around that leak has expanded as a result of the higher temperature. When that material cools down and contracts, the leak will start to drip again. Never the other way.
I believe you are confusing oxygen with air. There is a phenomenon where oxygen might find its way through a permeable membrane (like non-barrier PEX tubing) by the process of osmosis. This happens on a molecular level and not through a breach or leak in the system like you have at one fitting.
I like to think of it in simple terms I can understand, like pressure. Oxygen is a gas that usually travels in pairs so we call it O
2Now when you have oxygen do its work on something like iron or steel and cause it to turn to rust, (Iron Oxide) then that oxygen is gone and is no longer available to make more rust. In the great outdoors, this is not a problem because there is plenty of oxygen being created by the rain forests all over the world, and the daisies in your back yard. So the rust keeps happening until all the steel or iron is melted or corroded or rusted away.Inside a boiler system that oxygen does not get replaced. Once the dissolved oxygen in the water has its way with the steel and iron parts of the system, that O
2is gone forever and that water becomes inert. That water can no longer rust anything in the closed system. The O2is gone. This creates a kind of low pressure in regards to oxygen, and only the oxygen.So the oxygen pressure on the inside of the closed system is very low, near zero %. And the oxygen pressure out in the atmosphere is still a little over 20%. So that molecular pressure is low on the inside of the closed system and if there is a permeable membrane, like non barrier PEX somewhere in the system, that higher pressure O
2will migrate thru the PEX into the system and replenish the lower pressure oxygen and the non ferrous metals will have more oxygen to cause more rust and oxidation. This is why we use oxygen barrier PEX on closed systemsBut your leak is water out only, not air in as you have indicated in your query.
Edward Young Retired
After you make that expensive repair and you still have the same problem, What will you check next?
0 -
@EdTheHeaterMan I just glanced at your posts, and will now read them more closely. But I just happened upon where you say the leak is not admitting air, because of the pressure. Of course! Now I see! (The fact that that never even occurred to me shows that, unlike my hydronic system, my head is both leaking something and admitting air.) I will probably leave that adaptor alone. I think I can stand to lose a drop of water every month or so.
For all the advice you have given me now and in the past, if I owned a brewery I would give it to you.
I'll now read those posts more closely.

 2
2 -
You should fix it because the corrosion on that joint will creep and grow at that joint but it isn't adding enough fresh water to cause noticeable internal system corrosion.
0 -
@mattmia2 that clarifies that while the leak is not itself admitting oxygen as Ed points out there will be makeup water coming in with fresh oxygen, but as you say that won't be enough to cause noticeable corrosion. It also clarifies that I should still fix the leak, though. Still debating whether to attempt your suggestion (last fall) to file/cut/grind two slits, then heat the adaptor and peel, or to hire a plumber. A compromise would be to try it myself, and then call the plumber if it doesn't work (only worry with that plan is that I screw up the nipple by oversawing or distorting it while peeling, creating another problem).
After Ed's posts above, I'm thinking I don't need an air separator or dirtmag thing.
0 -
"If it is the sweat connection, and your torch tip is too small, you will not get the copper to stay hot enough all the way around the fitting to melt all the solder on that fitting at the same time. You need a bigger torch tip."
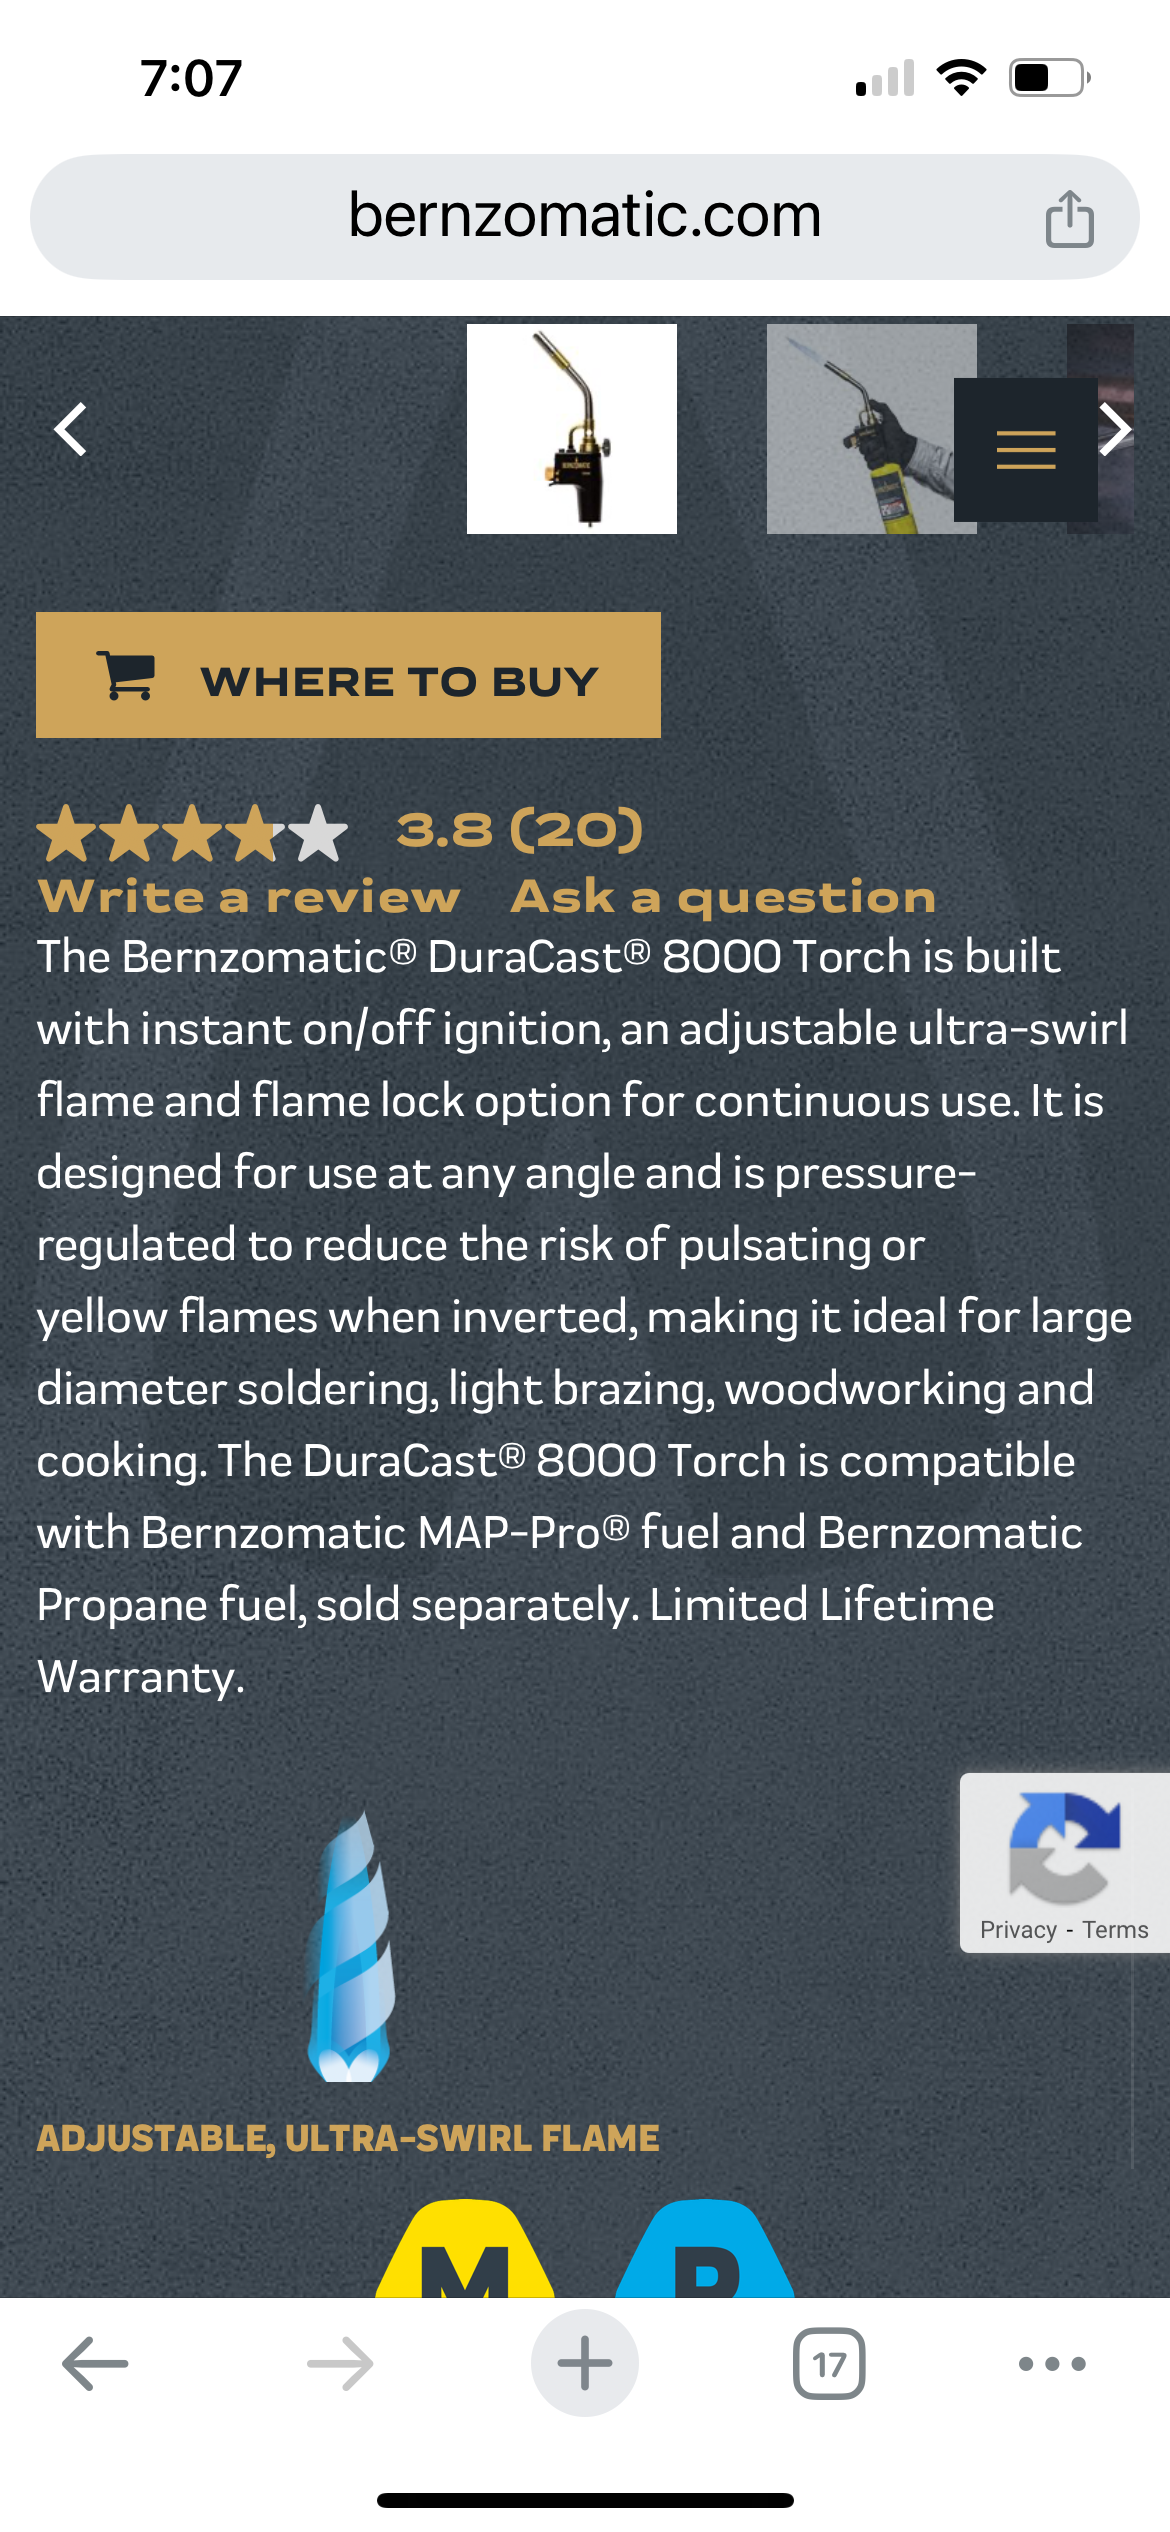
Any recommendations for what kind of bigger torch tip for my homeowner DIY Mapp gas cartridge that would be good for larger fittings like this one? I remember last year in my plumbing class we used B tanks and the difference was huge, but I'd rather not buy a B tank. Can I get similar results with Mapp but with bigger tip? (A quick look on Google shows they have tips that are more than a hundred or even hundreds of dollars. But if it's not too expensive and a whole lot better, I would go with the old idea that I'm saving so much money doing DIY that it justifies a decent amount of tool purchase dollars.)
0 -
you can use 2 torches, one from each side. just wrap the tee in a wet rag so you don't screw up that joint.
if you have fintube i wouldn't worry about the dirt separator or adding more air elimination.
0 -
what cap?
1 -
@mattmia2 I could try that. Wet rag, yes, I really don't want to mess up any fittings above the adaptor.
Just realized I have a second cheap torch tip on an old propane cartridge, so I have two. Seems like that might work for unsoldering, but would be awkward (without a helper) for soldering so I'd still like to look into a hotter tip.
0 -
in top of the circ, and maybe get a sweat or press iso valve to get rid if all those transition fittings
an air purger, like a Discal, goes at the hottest point in the system, right after the boiler, for best performance. Circ can be on either side
Its the expansion tank that you want on the inlet side of the circ
Bob "hot rod" Rohr
trainer for Caleffi NA
Living the hydronic dream0 -
on the auto air vent.
0 -
(1) Its 1.50" not 1.25" supply out the top of the boiler.
Esthetically, it won't make a difference. No offense. You should have room before the water heater gets in the way.
0 -
0
-
soldering is easier than desoldering, you can move the torch around and flow it when soldering. when desoldering it has to all be melted but not burned when you slip it off
0 -
Having trouble editing.
Pipe it in Black until the separator. You can go to copper after that, but secure it with hangers to the ceiling joists.
0 -
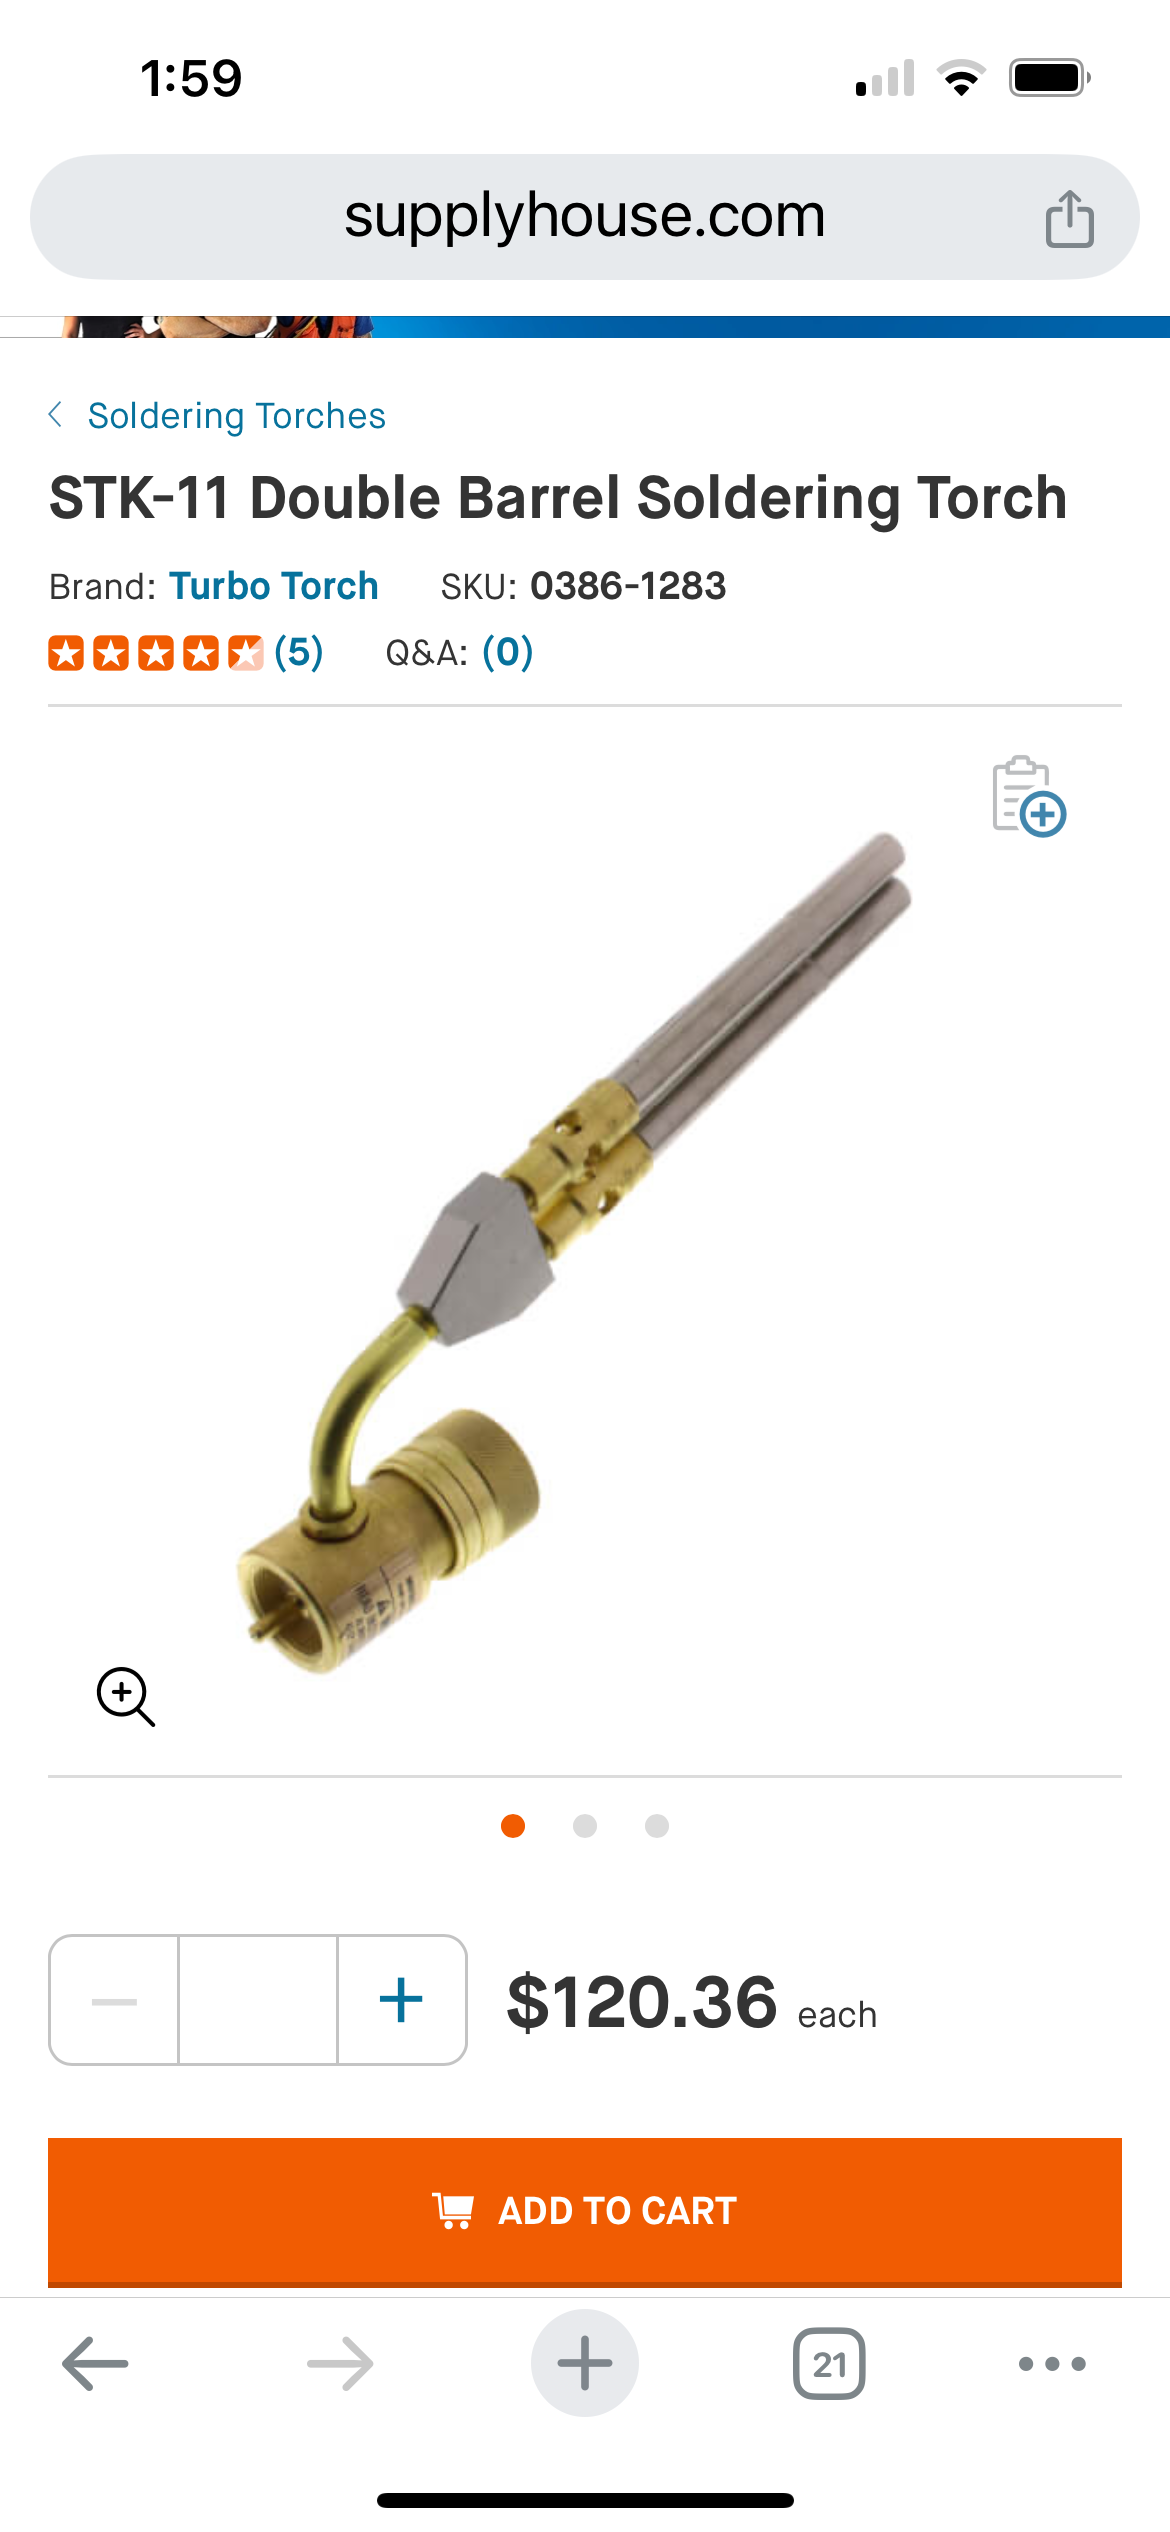
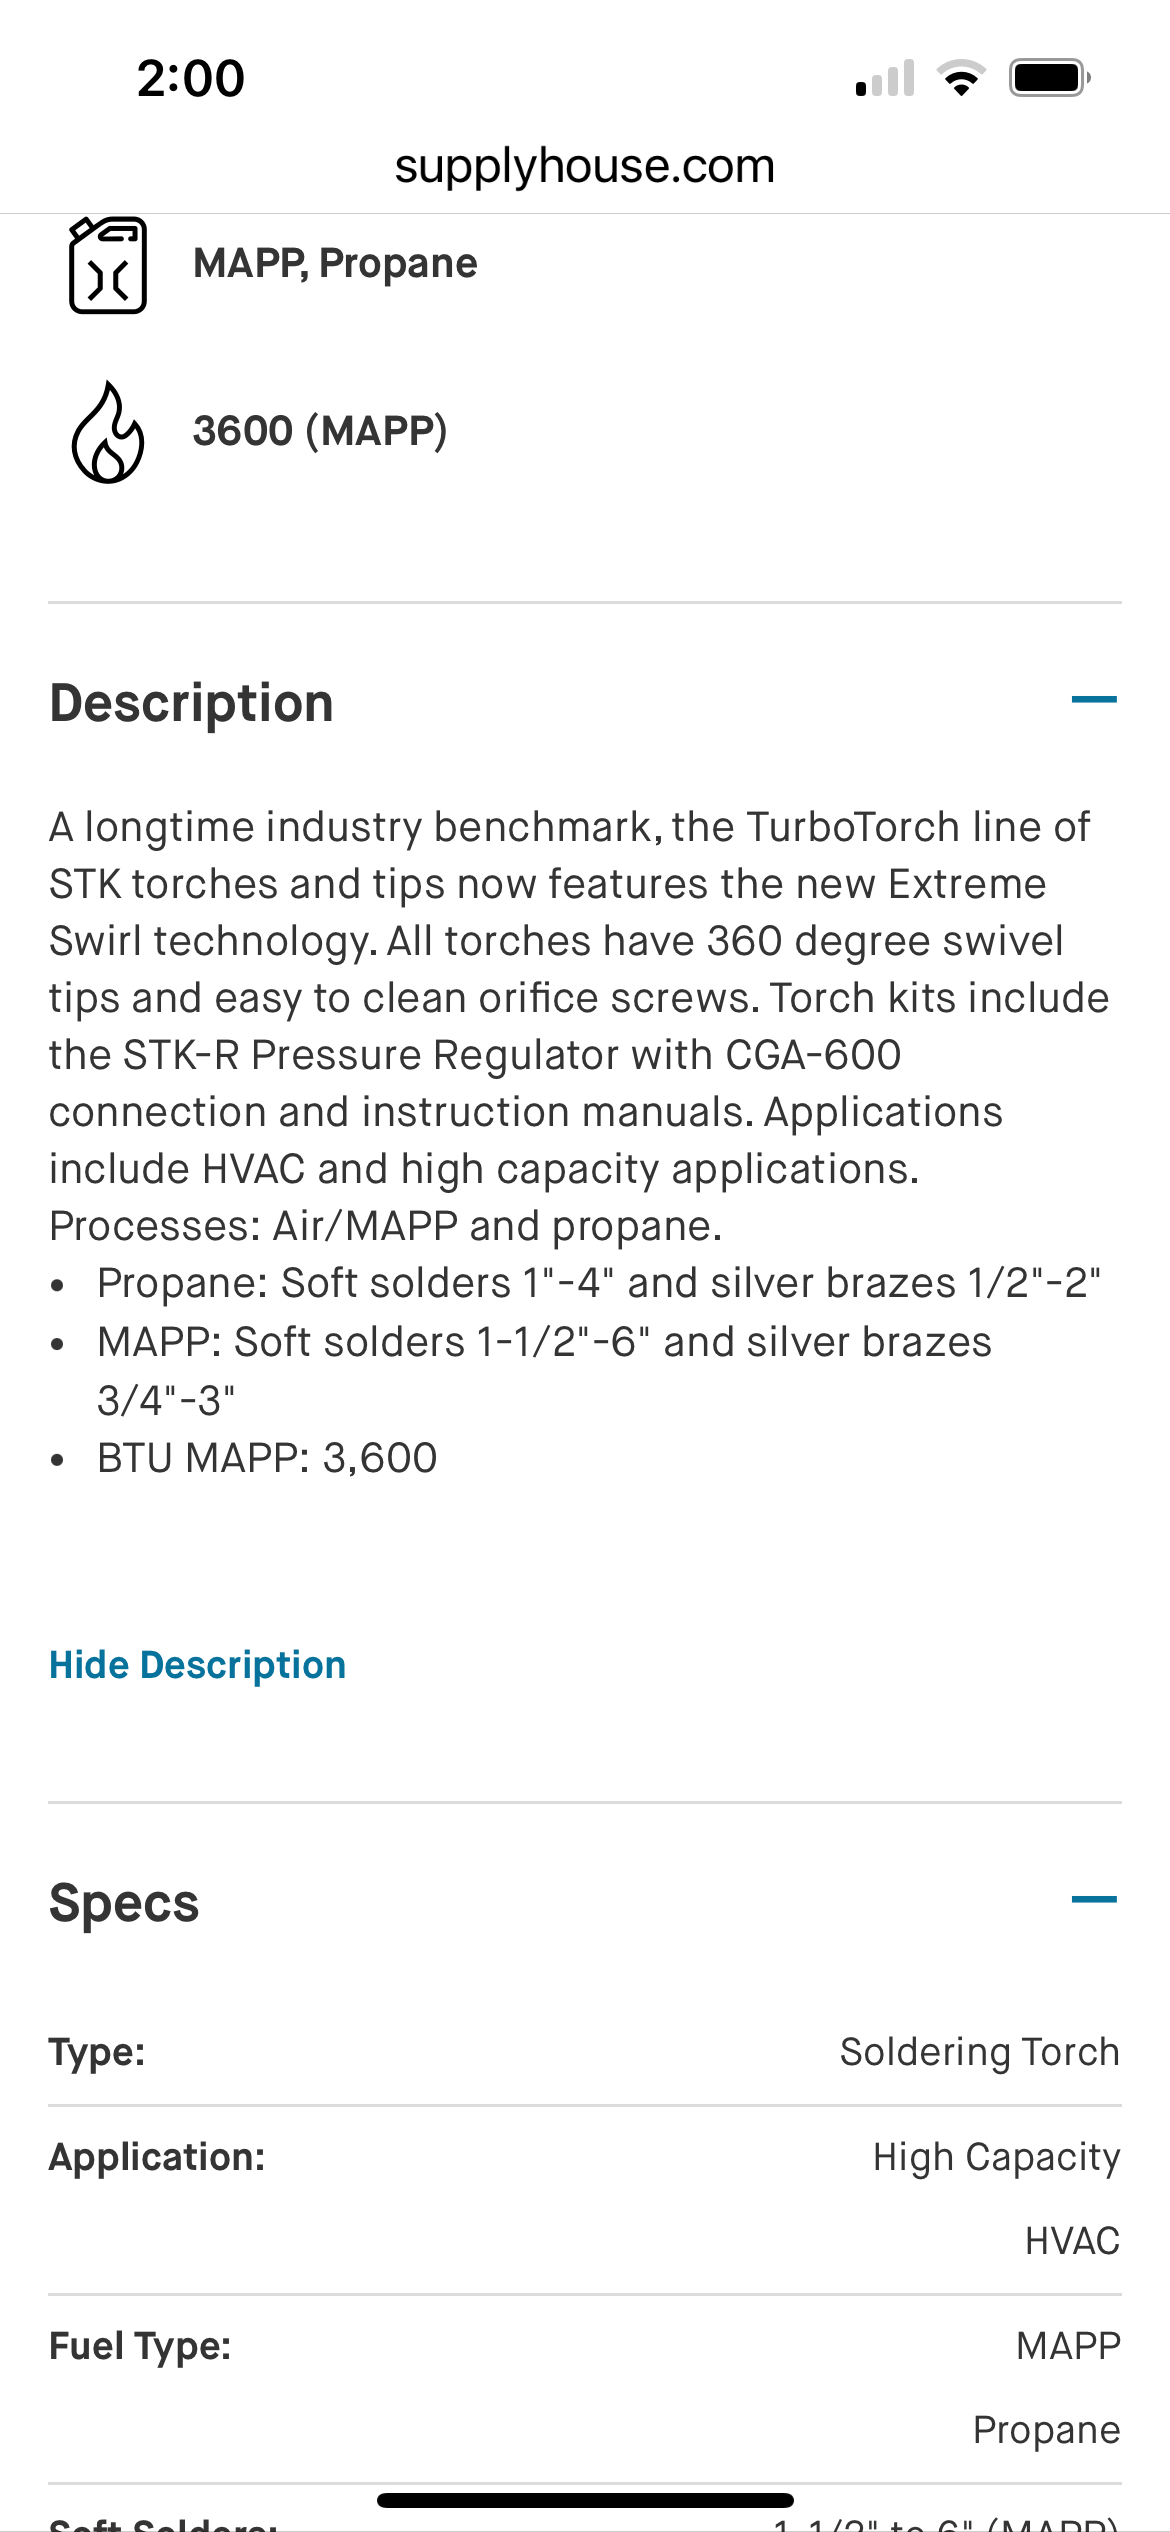
Thought of getting this for the 1-1/2 inch copper. Anybody use it?
 0
0 -
i assumed that was what you were using.
0 -
This one is their hottest tip, which I assume I didn’t get with my base model. They claim it’s good for larger copper pipe, but who knows.
0 -
Edward Young Retired
After you make that expensive repair and you still have the same problem, What will you check next?
1 -
Two torches and a helper with a hammer and a set of plumber's pliers you can get that fitting apart.
Edward Young Retired
After you make that expensive repair and you still have the same problem, What will you check next?
0 -
To be clear, you're removing the piece of copper below the Tee?
Is the manifold supported? It should be if you're going to pull that apart.
With a secure manifold, remove the circulator. The black nipple and circulator flange is a good hand grab to twist once the joint unsweats. Don't jerk it back and forth. That will oval out the fitting. Twist.
I would also put heat paste around the othe 2 joints on the Tee, so they don't become leakers as well. Have a 1.5" wire brush ready to clean the inside of the Tee while its hot. A little brush, a little flux. More heat, more brush, more flux. When its cool, get in there with steel wool.
0 -
It is the male adapter that is leaking, they don't need to disturb the tee.
0 -
Wow, these comments are amazingly helpful. I called a highly recommended plumber on Monday that I've never used (haven't had one since mine retired) to ask about him doing this, but since then I have been injected by you guys with more half-courage to try it myself. Today I did speak with him and it was great in that he didn't seem annoyed that I'm some jerk DIYer, didn't seem to blink an eye when I said maybe I'd like to think about it a few more days and still might try it myself, and, best of all, seemed to have no problem with doing DIY rescue if/when I screw it up! He also said an option is for him to do it while I watch to know how to do it next time! My old plumber was a great guy but tied himself in knots to avoid showing me how to do anything (which, yes, I can understand).
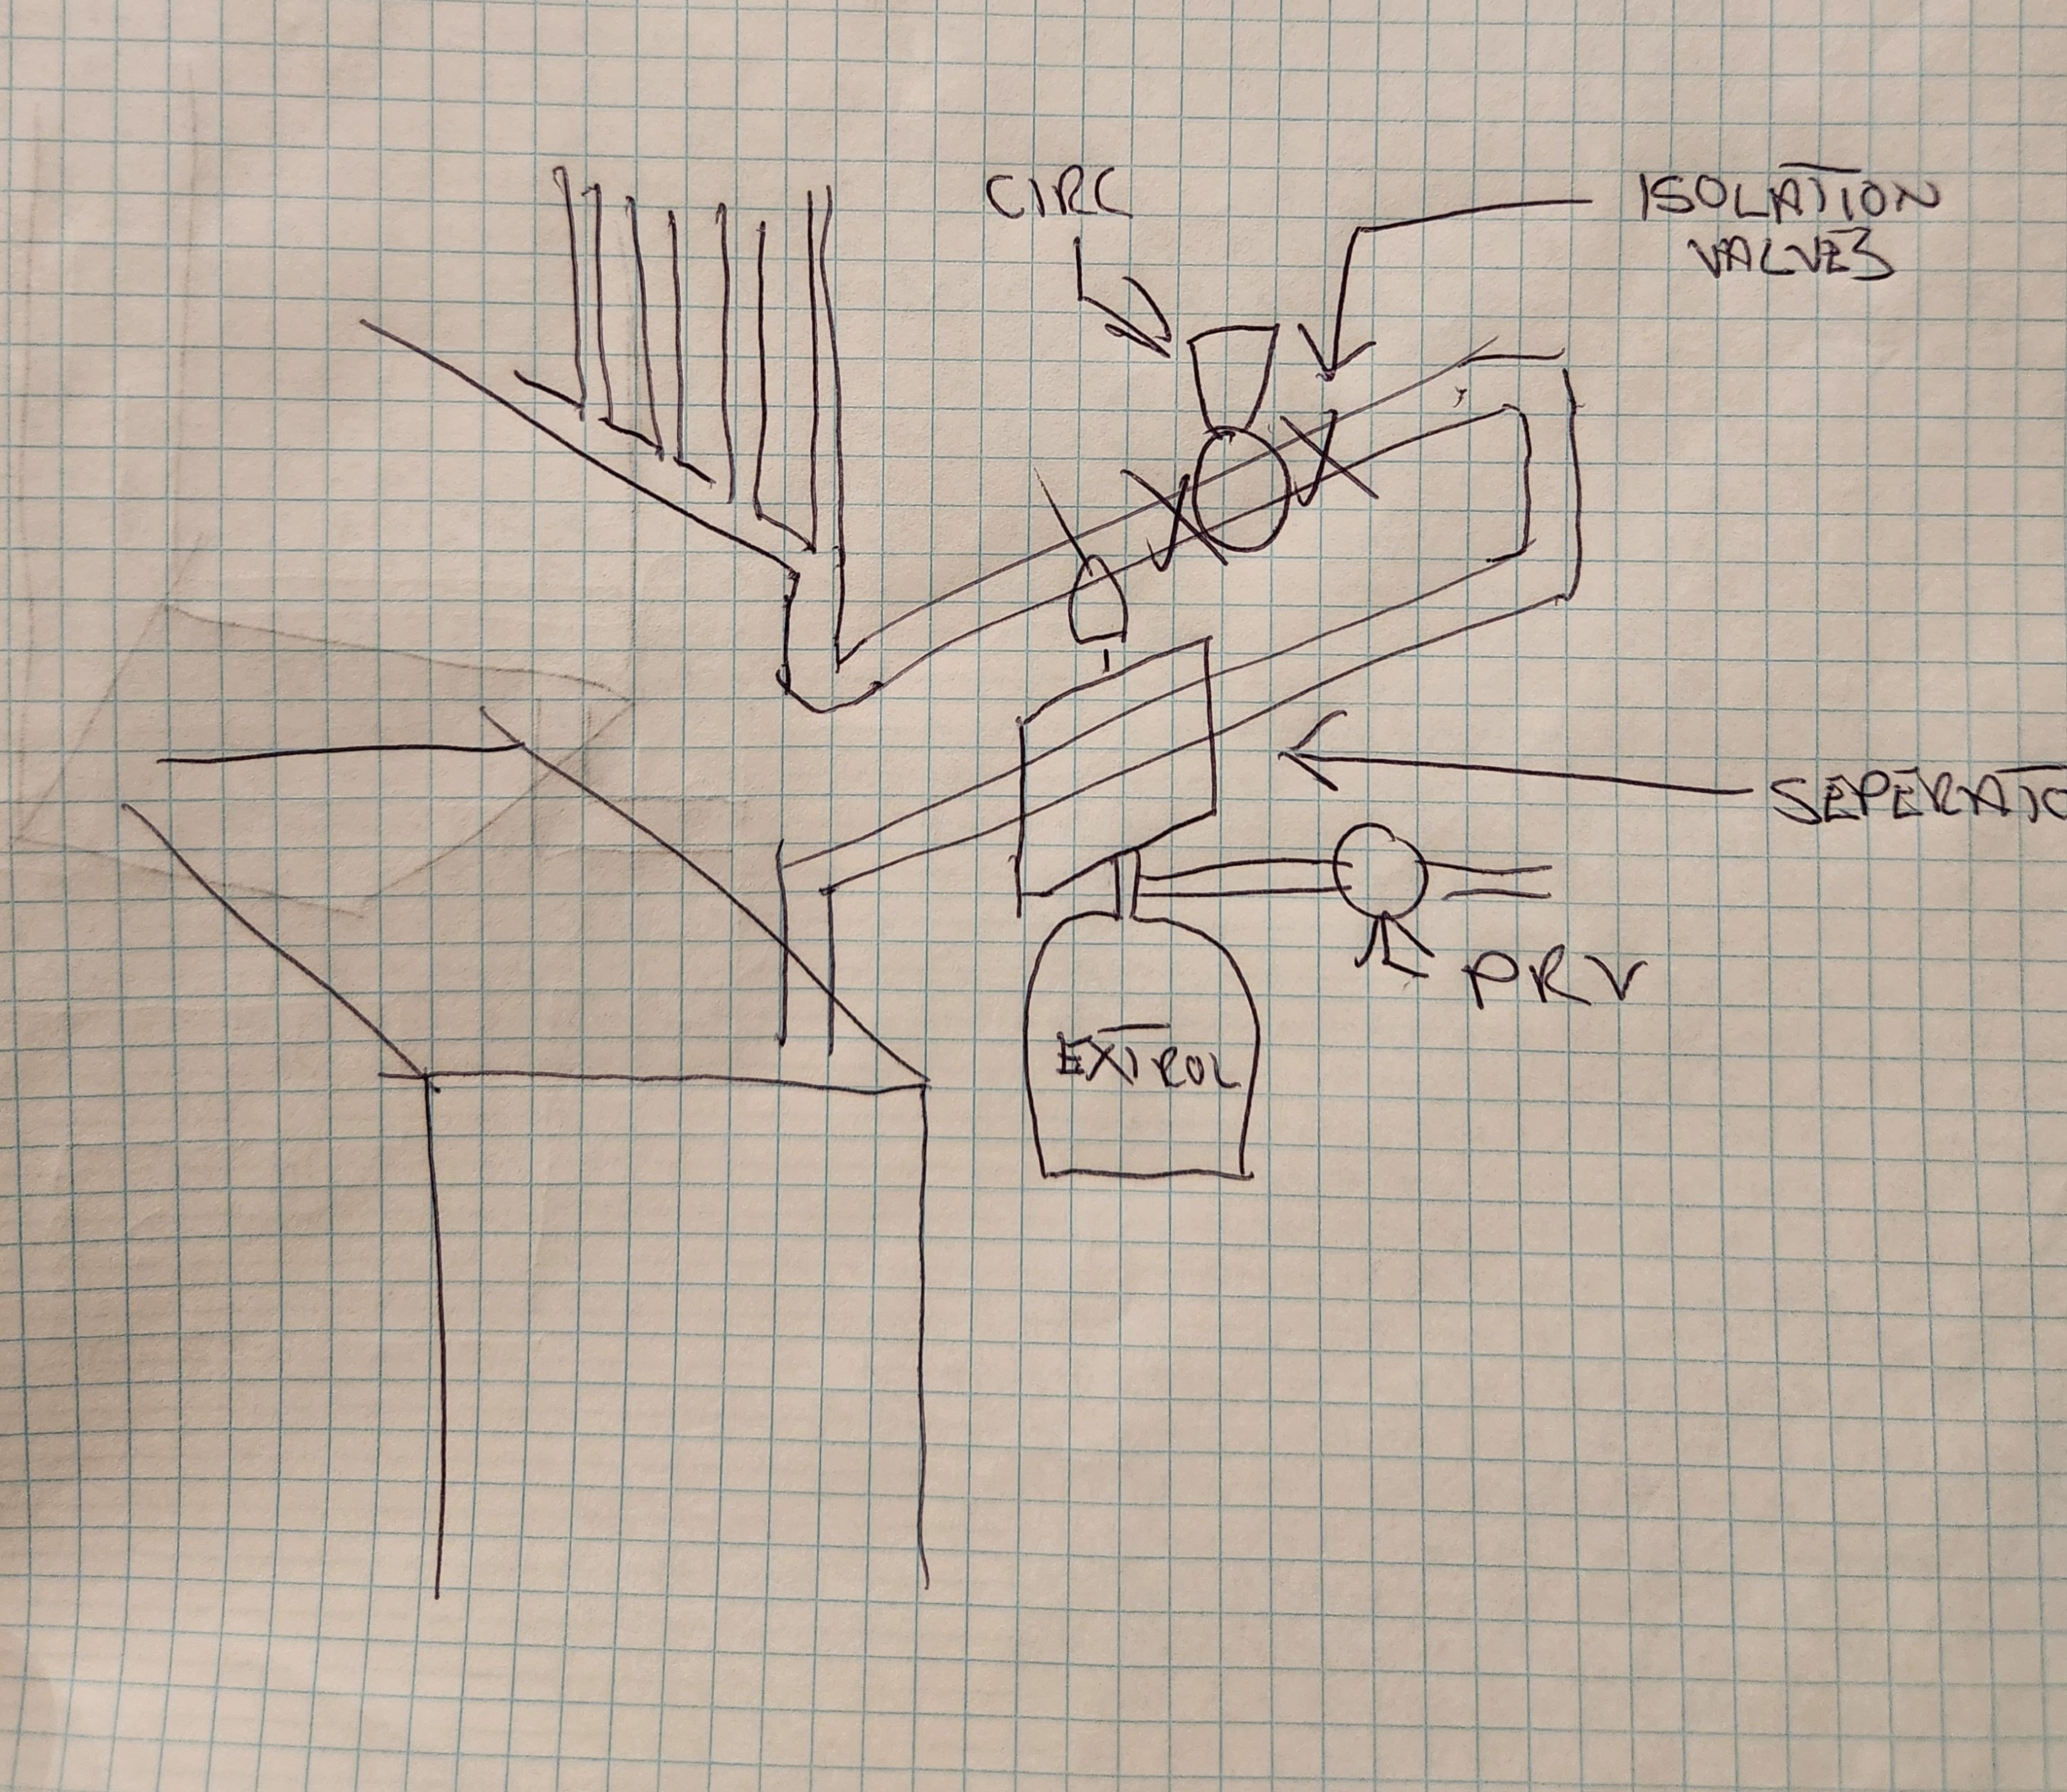
@HVACNUT: HEAT PASTE! Never heard of it, but I want some, I'm getting some, I want a truckload of it, for everything. Thanks for the diagram, yeah, I forgot it's 1-1/2", and the configuration you drew is what I was thinking about doing after a suggestion last fall (maybe by you). But now @EdTheHeaterMan has successfully convinced me maybe I don't really need a microbubble separator (especially since WM has some air separation stuff built in), and that sounds good to me. As for the DirtMag he says maybe I don't need that either, but there was a lot of black sludge at the bottom of my old boiler (though after 22 years) and I know our water has high TDS and maybe iron and who knows what else, so I can research if a DirtMag would help, again following my motto: "Put it off until spring (and then procrastinate some more)"; I would have to drain the boiler again to put it in, but what the heck. Also I want to put in cleaners, treatments etc. (Rhomar, Fernox, Sentinel) but that's a whole other bunch of research for the future, and maybe draining the boiler again.
But meanwhile there's still the leak to deal with:
Letting the system cool I see that the bigger leak appears to be between the threaded coupling and the adaptor, and there is a also a tiny leak at the top of the adaptor. I am pondering going another winter with it in case I don't get my act together before cooler weather, but as @mattmia2 points out it has to get changed sometime because corrosion will increase.
@hot_rod, great suggestion to use a sweat iso flange on the top to avoid the extra fittings, I didn't even think of that.
@HVACNUT: "With a secure manifold, remove the circulator. The black nipple and circulator flange is a good hand grab to twist once the joint unsweats. Don't jerk it back and forth. That will oval out the fitting. Twist."
This is awesome and I never thought of it and could have tried it last fall. Using the pipe for leverage seems like a game changer to me; sticking a wrench into the open bottom of the adaptor and twisting or hitting it with a hammer, although maybe the more usual way, seems like more possibility of distorting the tiny nipple or the tee. I could even try a pipe wrench on the iron pipe for more leverage, but would have to make sure of no lateral movement so as not to distort the tee or nipple. I do see how leaving the lower pipe on the adaptor might suck away heat, but still I like this idea a lot. The manifold is probably fairly secure up and down because five zones come out of it up top, but I could add a strap. However I don't see a way to secure it from the twisting motion; when I twist the fitting with all that leverage, I'd worry about it loosening or breaking something on the manifold … but don't see how I can secure it against that.
Also HVACNUT: "To be clear, you're removing the piece of copper below the Tee?" which brings up another decision point. Actually last fall I tried to remove just the adaptor and leave the tiny nipple. So I have a choice (wondering what you guys would do):
- Put heat paste between the tiny nipple and the tee then try to unsolder the adaptor from the nipple and leave the nipple, using HVACNUT's idea of using the iron pipe to twist. Advantage: If it still doesn't unsolder I could go to @mattmia2's idea from last fall of cutting two slits in the adaptor, heating, peeling the adaptor off. (I guess if I heated it to cherry red it would get softer? … But could it also "weld" to the nipple making my problem worse?) Disadvantage: I'd still be stuck with that undesirable short nipple. I guess also that despite the heat paste the nipple could still come loose too, but if it came out cleanly, so much the better.
- Put heat paste on the top edge of the adaptor and apply the torch to the tee, hoping to get the stupid tiny nipple out. Advantage: No more small nipple, and I could put in a decent length length of 1-1/2" copper down to a sweat iso flange like hot_rod suggested. Disadvantage: (To me this is a big disadvantage): If the nipple won't unsolder but my attempts cause it to distort and/or leak (which is what I think happened last fall to the adaptor) now I have to deal with a stuck and leaking tiny nipple in a tee that leads to a complicated manifold. Getting that nipple out by cutting and prying without hurting the tee seems a lot worse than trying to externally cut and peel off the adaptor off if I had to.
Edit: Oh yes @mattmia2 you were right, that is the torch tip I have. It's their hottest one, and didn't help me get that 1-1/2" fitting off. Pondering whether a Turbo Torch T504 would be worth it, to use alone or with another torch. I do have an old weaker propane torch and tip, maybe that plus the TS8000 I have would work.
0 -
Thinking of getting this for soldering/unsoldering the 1-1/2”. (Possible it could be too hot?)
 0
0 -
That male adapter doesn't have a lot of mass, it shouldn't be hard to get it hot enough with like a ts8000 if you take the black fitting off. It is if you ovalize and seize it that might be more of a problem.(I am not an expert on desoldering, i have seized stuff up trying to desolder it and didn't quite know why.)
If it isn't coming off, I'd file the 2 sides until you file through the copper to the solder and heat it up and peel it off. Be careful not to heat it so much that you start bending the pipe.
If it is free just the weight of the iron pipe pieces will pull it off or pull it off if you wiggle it a little.
I'd wrap the bottom branch of the tee in a wet rag, doesn't have to be super wet, to keep the solder in the tee from melting.
cherry red is way too hot, if you heat it that much it is likely to start seizing together and you will have to cut and peel. cherry is around 1000f, solder melts at about 350f to 500f depending on the alloy.
If the system is copper fin tube the sludge is from the boiler itself. The dirtmag could go in the return, it doesn't have to be in the supply. They make both horizontal and vertical versions.
0 -
@mattmia2 good advice. I really like the file and peel idea. Except now I'm thinking of trying to desolder the tiny nipple from inside the tee rather than the adapter from the nipple. Reason: if I solder on a new adapter I'll still be stuck with the tiny nipple, but on the other hand if I can get the nipple out cleanly then I can just insert a longer length of 1-1/2" copper into the tee and go straight down to a sweat isolation valve above the circulator as suggested by @hot_rod, with the added benefit that then I can custom cut the copper to length to go right to the iso valve, whereas with threaded pipe I have less flexibility lengthwise.
But the downside is that trying to get that nipple out of the tee makes me more nervous than trying to get the adaptor off the nipple; if the nipple didn't desolder cleanly I'd have to cut internal slots and try to peel it internally without damaging the tee, which somehow sounds worse than peeling off the adapter. Haven't decided yet, input welcome.
The TS8000 didn't do it last fall, so I might still spring for the double headed monster pictured above. (But maybe then I'd have to be careful about too much heat. Thanks for the tip that cherry red is no good.) I thought I'd rather keep the iron pipe on to use it for leverage to twist, maybe with a pipe wrench on it that I could also bang down on with a hammer, but I plan to buy WetRag heat paste and I could slather that over the iron pipe just below the adaptor and all over the tee etc., unless you think that even with heat paste the iron pipe might still be too much of a heat sink.
Yes, fin tube baseboard, so maybe DirtMag and chemical treatment.
0


Categories
- All Categories
- 87.7K THE MAIN WALL
- 3.3K A-C, Heat Pumps & Refrigeration
- 59 Biomass
- 430 Carbon Monoxide Awareness
- 127 Chimneys & Flues
- 2.2K Domestic Hot Water
- 5.9K Gas Heating
- 121 Geothermal
- 170 Indoor-Air Quality
- 3.8K Oil Heating
- 79 Pipe Deterioration
- 1.1K Plumbing
- 6.6K Radiant Heating
- 396 Solar
- 16K Strictly Steam
- 3.5K Thermostats and Controls
- 56 Water Quality
- 51 Industry Classes
- 51 Job Opportunities
- 17 Recall Announcements