Caleffi 553 fill valve paper gasket - alternative / reuse?

Due to it draining when it shouldn't, I am replacing a caleffi boiler backflow preventer (paper gasket) with a new body that came with o-rings (573100A). I assume that's compatible.
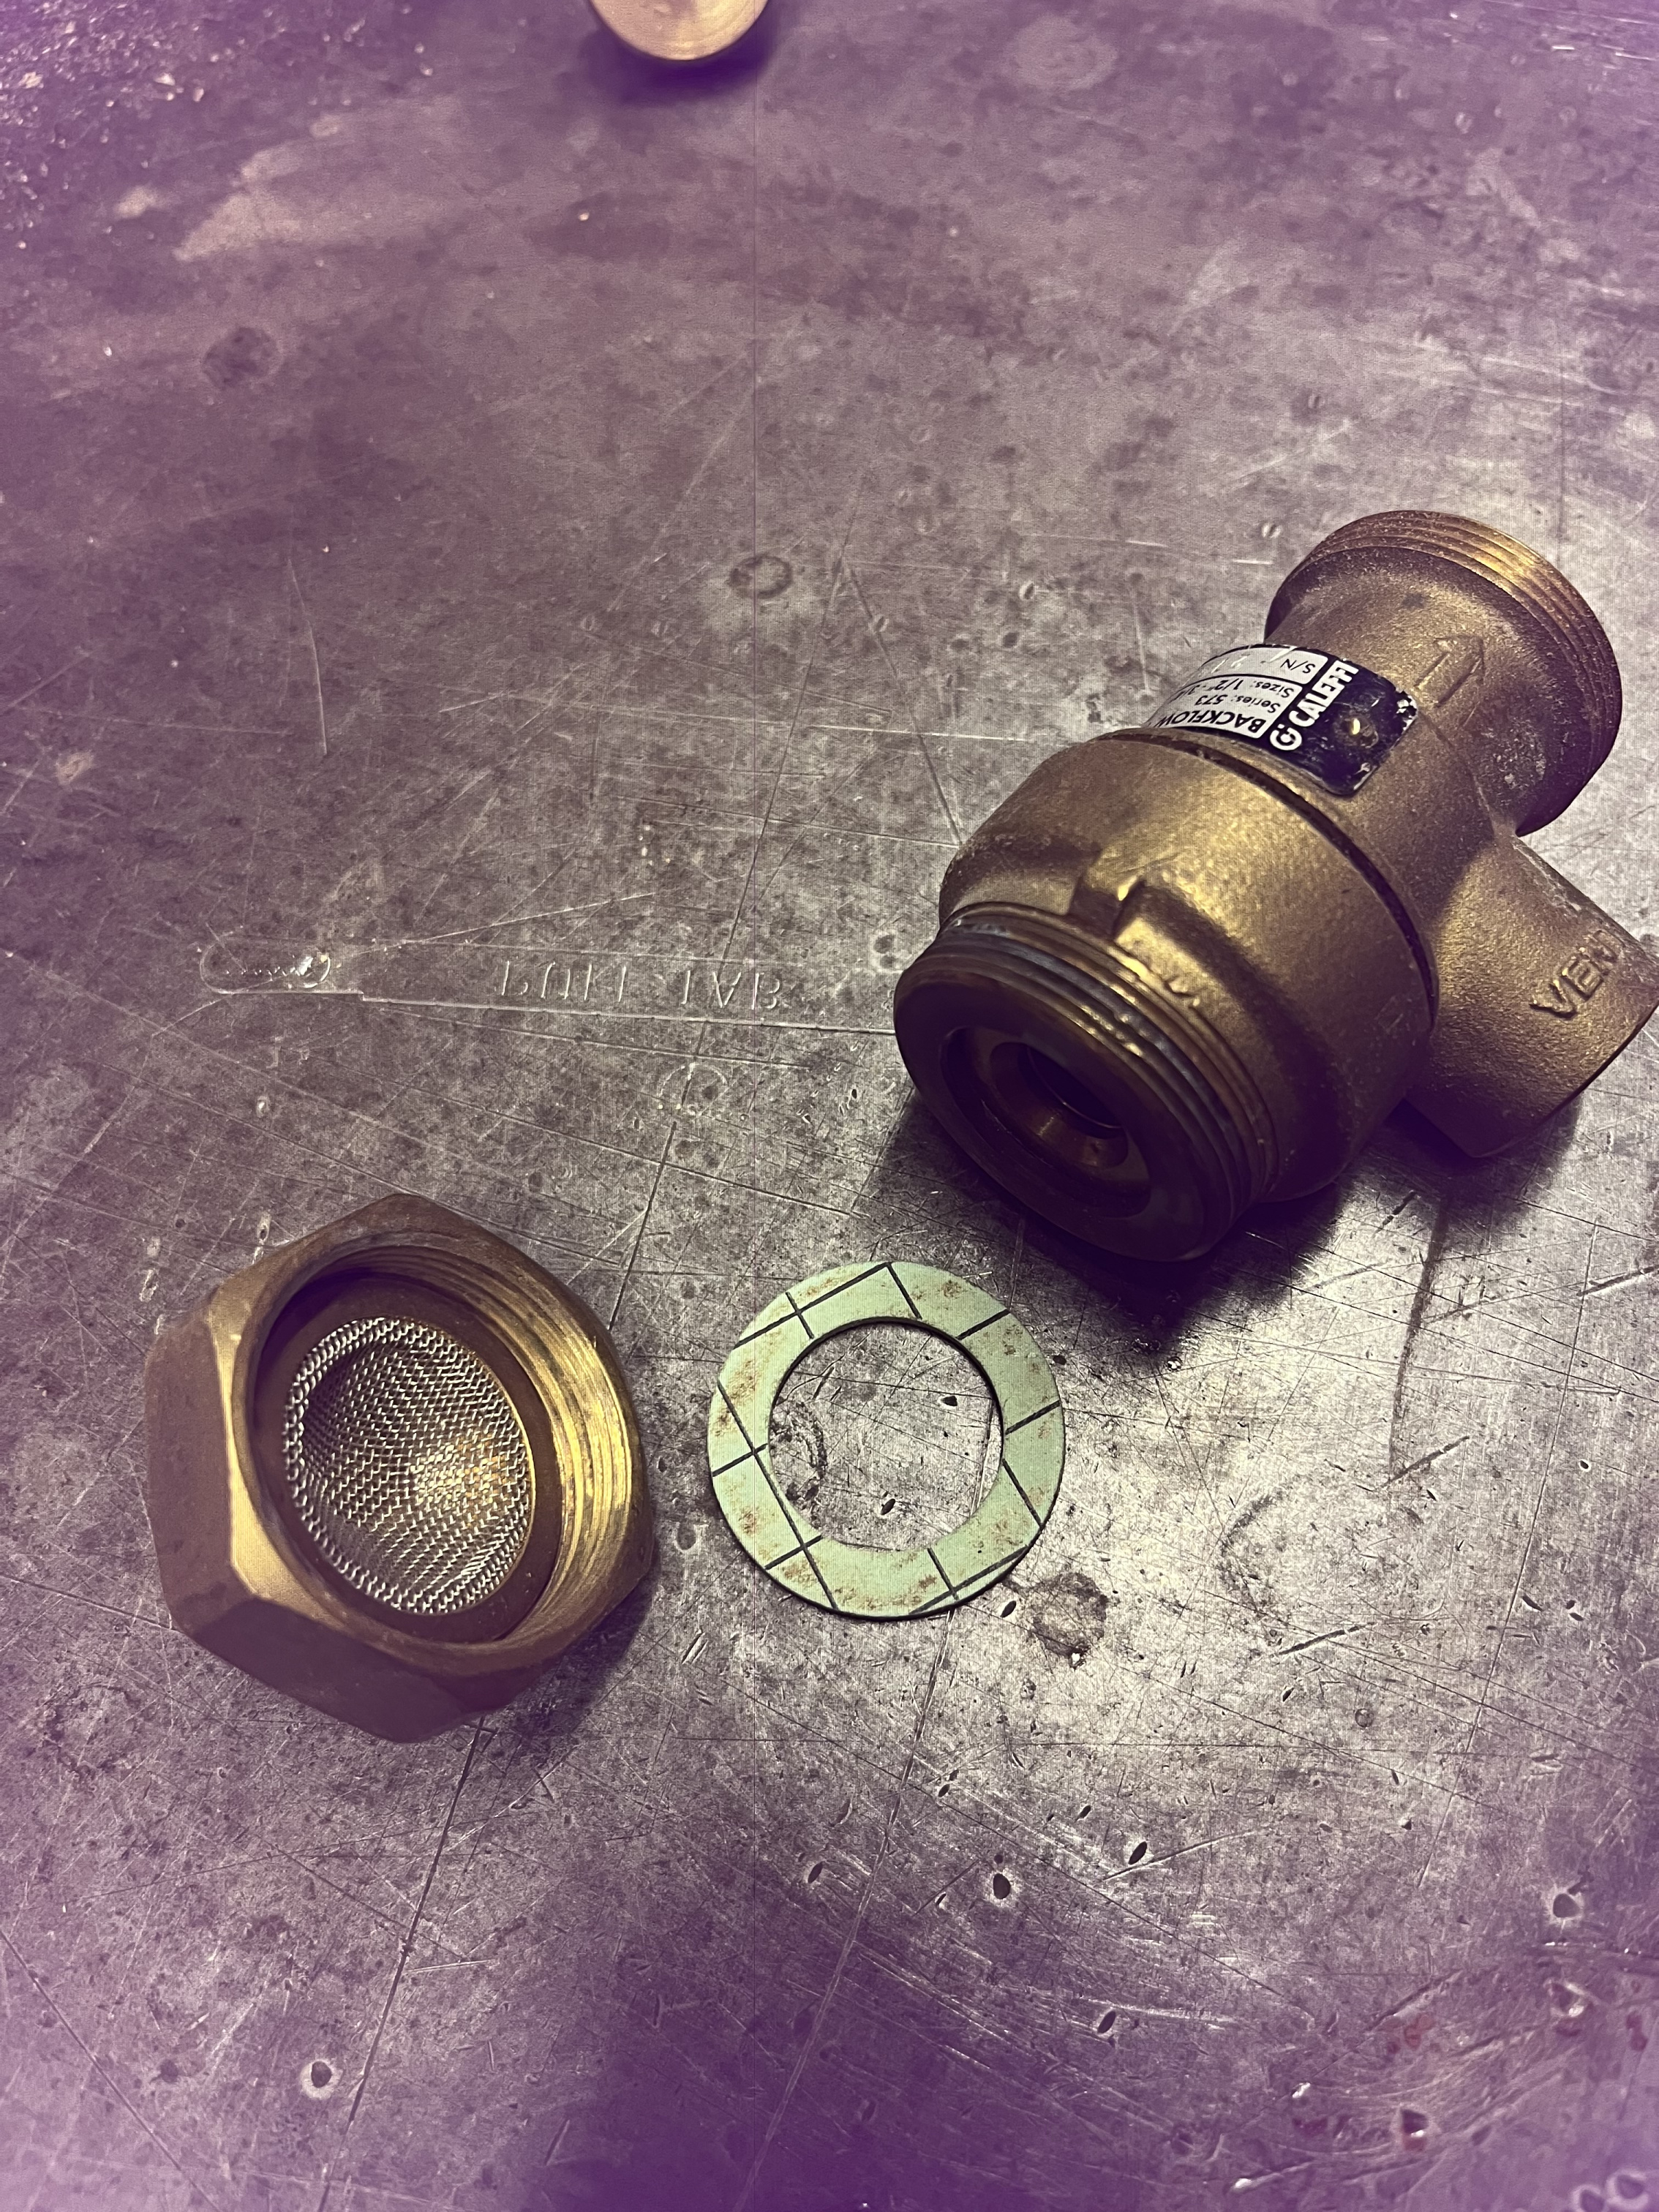
Unfortunately, in the process, I couldn't break the large nuts loose without twisting the Caleffi 553 series fill valve, so I removed its tail piece. Of course, there's a paper gasket here. I called a few local supply houses to no avail, and AI says Caleffi doesn't offer one without buying a fill valve rebuild kit… anyone know?
What are my best options here (would be great to have it together tonight)?
Comments
-
I talked with just about every local supply house and supplyhouse.com without success. A local one had some 3/4" caleffi gaskets, and I thought it would be 1/2", but I measure that tail piece OD at 0.95" and the ID about 0.56", so maybe the 3/4" would have worked… they're closed now. supplyhouse.com had R0001458 "3/4" Union AutoFill Washer", but there's no dimensions on it. and that would take a day or two to get here, at best.
I'm thinking I probably need to make my own gasket. I have some sheet EPDM roofing material and pvc roofing material (both probably about 1/16" thick), the auto parts store has a thinner make your own fiber gasket, and the hardware store says they have a poly, cork, and neoprene gasket material.
I feel the EPDM might be a little squishy, but maybe it's OK.
Any opinions on the best option of these materials for make-your own, and the best way to prep/clean the caleffi smooth surfaces?
Edit to add: AI is recommending red rubber packing instead of the above roofing EPDM and auto parts store products, due to strength and being attached to potable water.
0 -
you can get that fiber gasket material at auto parts
Is it this washer? I can drop one in the mail
 Bob "hot rod" Rohr
trainer for Caleffi NA
Living the hydronic dream0 -
you can buy them individually as well. i have a bag of them after a similar incident. i bought them from supplyhouse.com. any of those materials will work, it isn't at all a demanding application. some of those might be more reusable than others.
 1
-
@hot_rod - that's why I typically try to work with humans! AI told me the automotive gasket wasn't suitable, and so I got the red packing gasket material instead. Hopefully that works OK, as I need to get it together tonight.
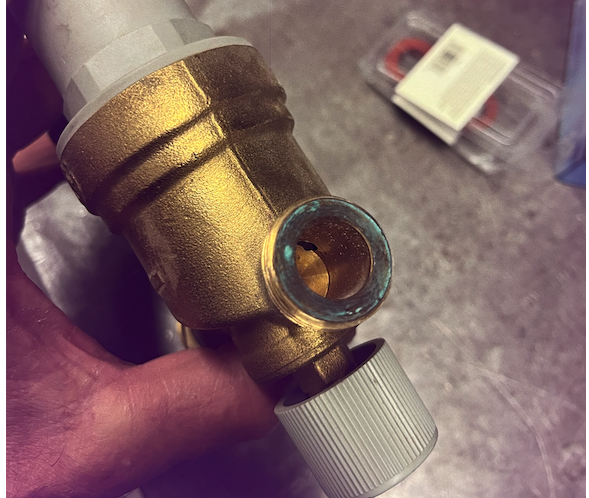
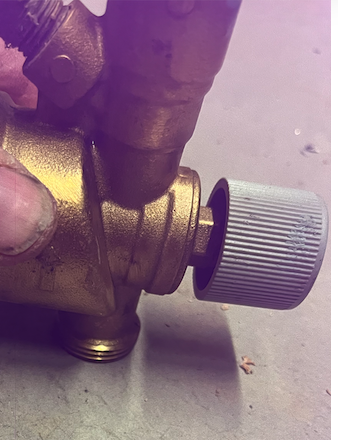
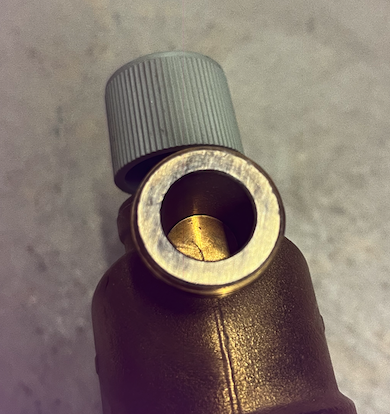
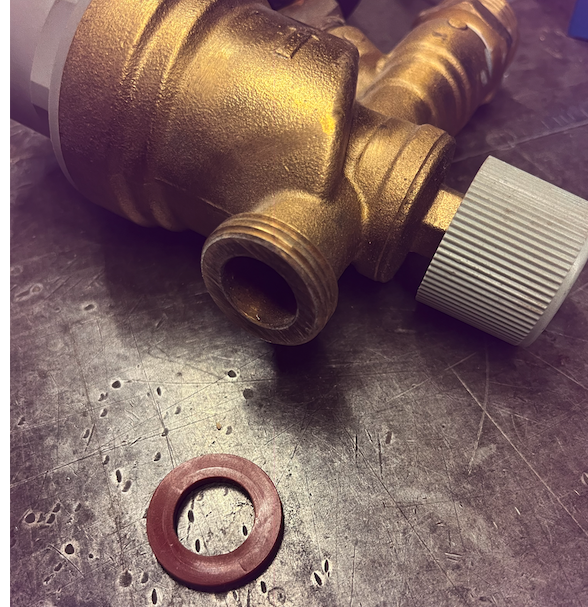
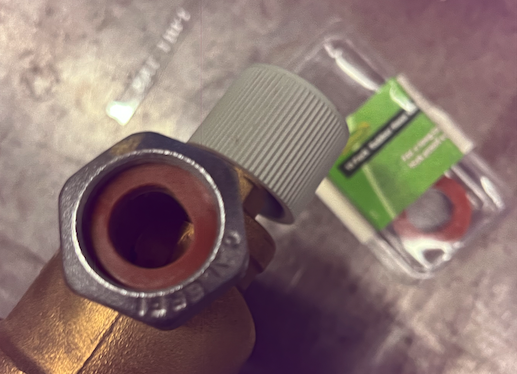
The needed gasket is the 553 (I believe 553642A) fill valve tailpiece gasket, not the gasket on the backflow preventer (the new backflow preventer body has the o-rings and I'll use that with my tail pieces). Below are a couple of pics of the fill valve gasket in need. Do you have those gaskets?
I tried to remove some of the gasket with green scotchbrite, to no avail. AI seems to think Acetone, denatured alcohol, and maybe 99% rubbing alcohol would work. Does that sound right?
@mattmia2 - Thanks! Any idea what part number that was for the fill valve gasket? Possibly this one?
https://www.supplyhouse.com/Caleffi-R0001458-3-4-Union-AutoFill-Washer
0 -
AI, eh? Right. Hard to say what will remove old gasket material. It depends on what the gasket was made of, and what, if anything, was used to secure it. Best bet is to find a scraper of softer metal and just peel it off…
You mention in your header about thinking about reusing. Ah, no. Maybe in a non-critical application, in a pich… but my rule in mechanical work is that gaskets are replead, in kind if possible, and o-rings are also replaced with the correct material. In a pinch to get something running right now, maybe — but plan to revisit and do it right.
Br. Jamie, osb
Building superintendent/caretaker, 7200 sq. ft. historic house museum with dependencies in New England0 -
side note, 3.12 should buy a bag of 15 gaskets
0 -
scrape it off with a razor blade
0 -
@mattmia2 the gasket you listed is for the backflow preventer. The new backflow preventer has the O-rings. It is the tail piece from the auto valve I need the fiber gasket. Razor blade can work for part of it, but there is a detent groove on the backflow preventer side of the tailpiece with gasket stuff down inside that groove appears to with the new O-ring.
I was wrong about there being a groove in the mating face. It was just part of the gasket that had been depressed, and once I got my reading glasses on, I could see that more clearly initially it looked like there was some brass material showing, but there was still more gasket on there than I thought.@Jamie Hall yeah, I didn’t put much stock of that fiber gasket, just didn’t know if someone would say they would smear a sealant or something on there. Not what I would typically move towards.
0 -
it shows like 6 other caleffi gaskets at the bottom of the supplyhouse.com page.
0 -
those are compression set fiber washers, one time use. It is best to replace it.
Razor knife, the sand paper to get the faces smooth. Rub it across a concrete floor works also.
Some brands use an EPDM washer instead of fiber. Water meter gaskets fit some of the connections.
A pic would show me exactly the one you need.
Bob "hot rod" Rohr
trainer for Caleffi NA
Living the hydronic dream0 -
Can you cut one out of a old shoe box and use lots of permatex?
Edward Young Retired
After you make that expensive repair and you still have the same problem, What will you check next?
1 -
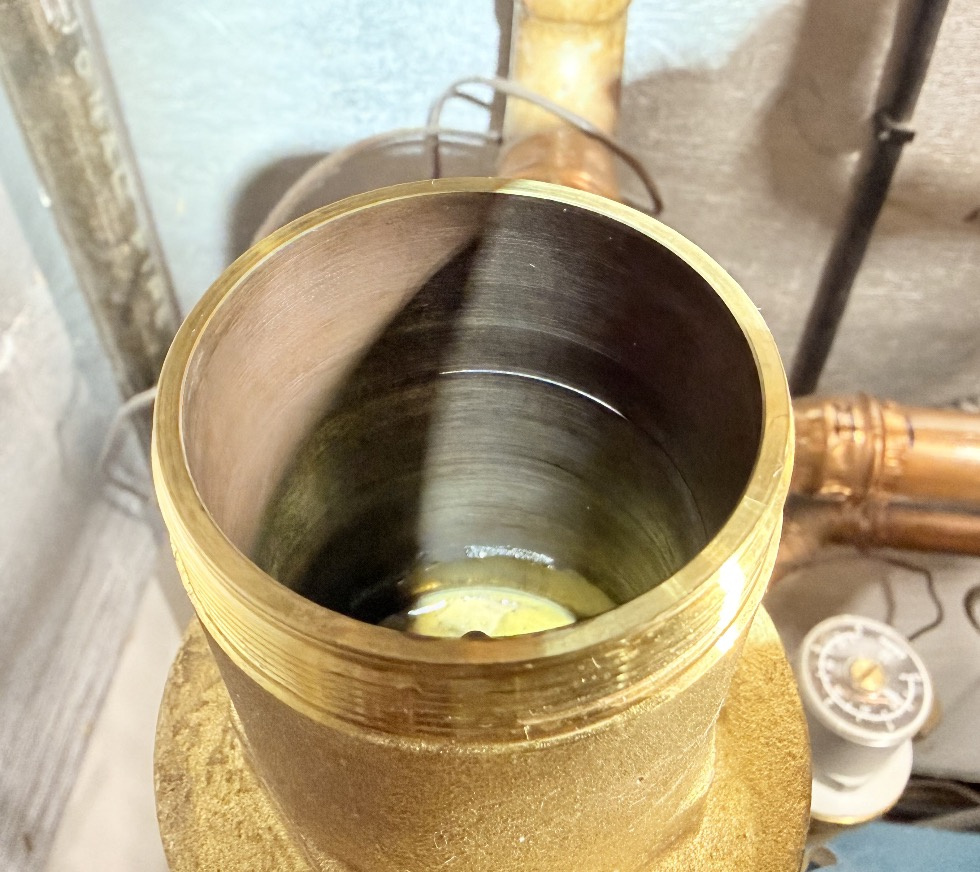
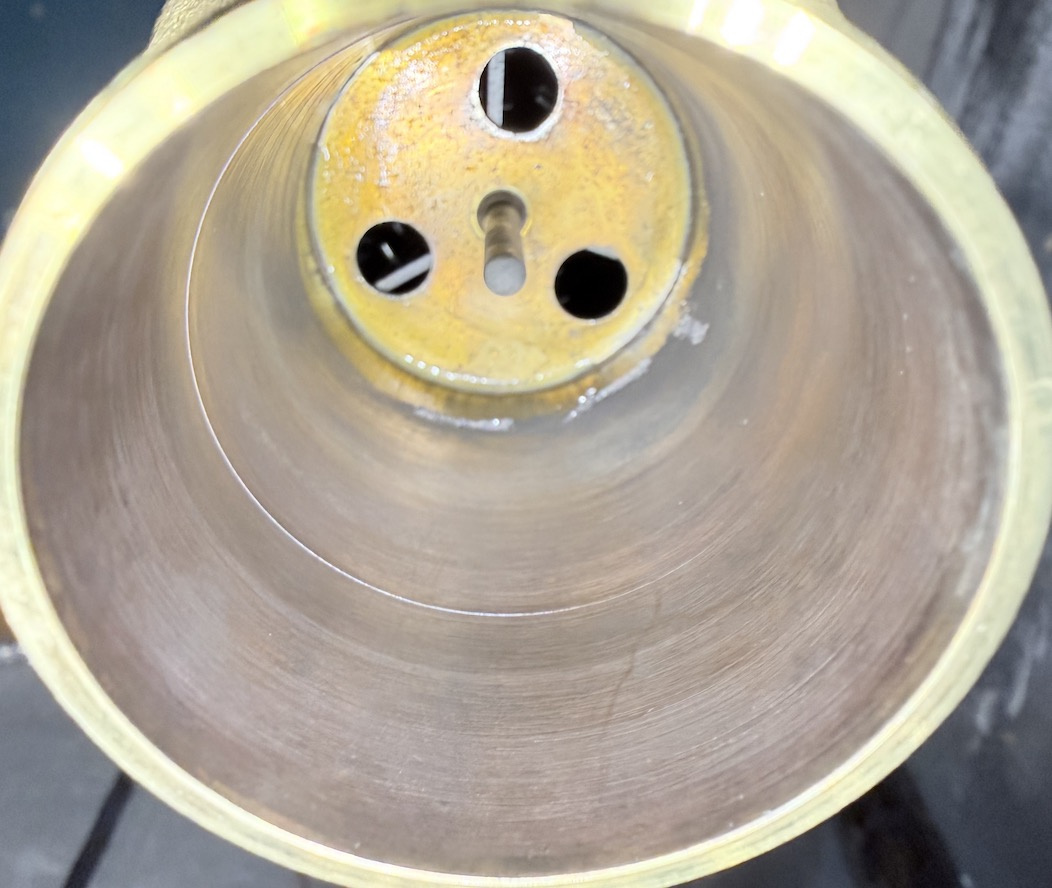
@hot_rod - oops, sorry dude! I thought I attached pics above… clearly not. They're attached below, now, along with pics of the inside of my discal… I've always has issues with large volumes of air in the system - so I'm not sure it has worked. I was replacing the float to see if it would address the issue. Do you know if this machined ridge on the inside is normal? I can call tech support tomorrow to find out, as well.
@mattmia2 - yeah, the issue is there is no part number to be found, and sizes for the various ones are not listed ;)
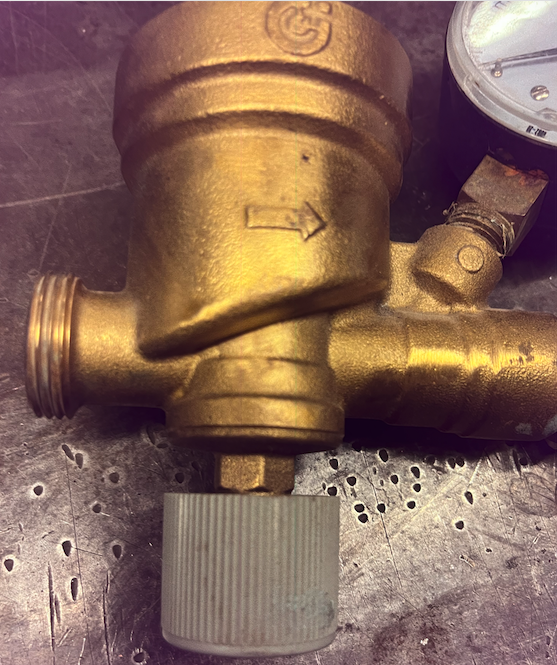
It's the gasket on the nut side of this with the arrow. The other 533 fill valve mating surface shown in the next pic.
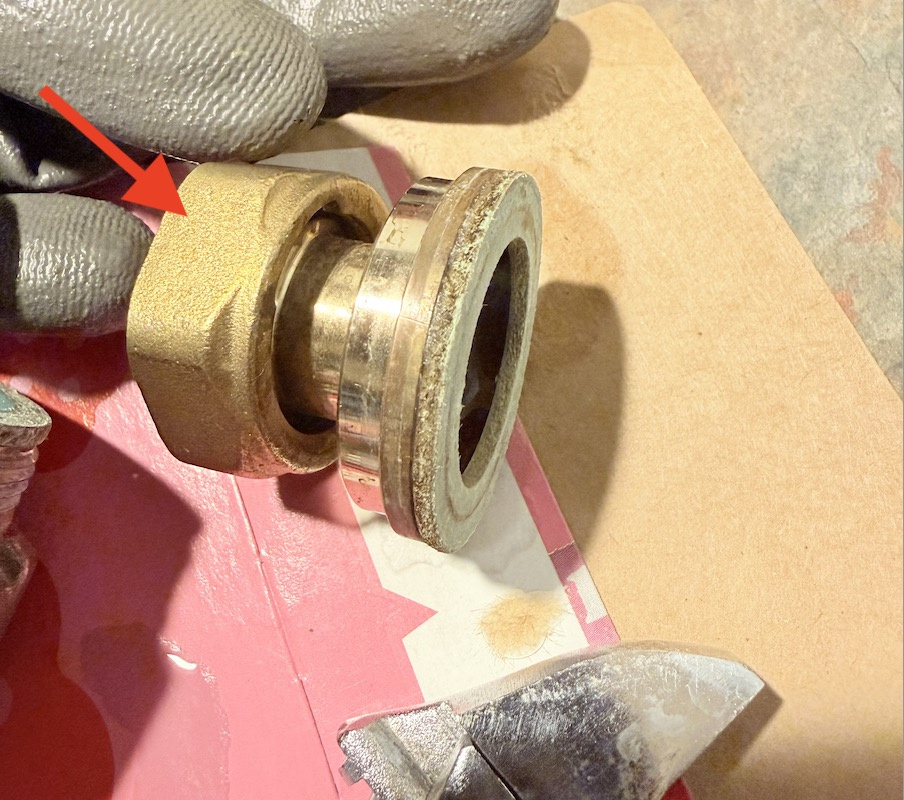
This is the other mating surface of the tailpiece:
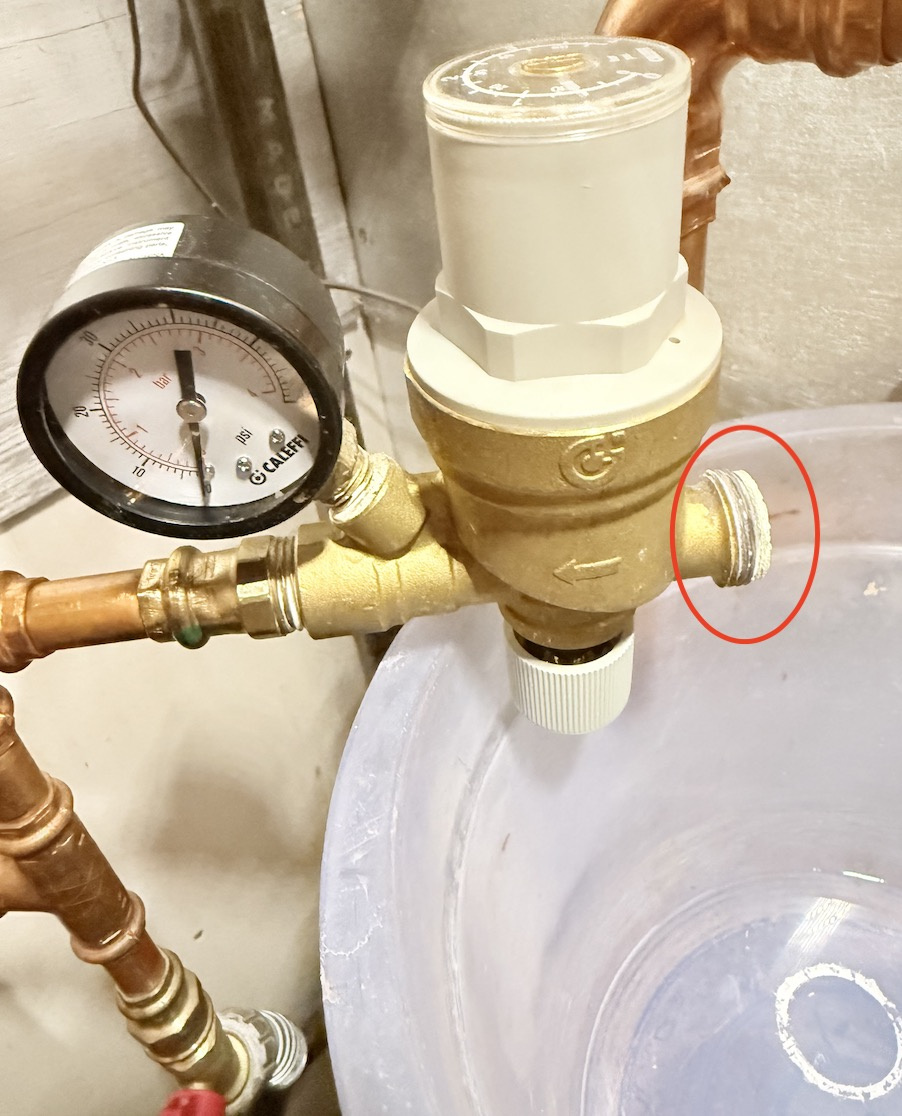
Here is that discal that doesn't seem to remove air. Is the ridge normal? Seems odd.
 0
-
the ridge is fine. it removes air by collecting air and the float dropping and opening the vent. the precision parts are in the cap. do you have the little cap over the vent loose so it can vent?
cardboard would probably work without permatex.
1 -
Here is a demo of a work around, takes two minutes.
Rub the face of the valve across a concrete floor. Or sandpaper on a counter top if you have one :)
A standard hose washer is a tad big, but it does go into the nut. I suppose you could trim the washer with a scissors.
i think the newer valves have a groove and o-ring in the tailpiece. This is a pex tailpiecs for the 573.
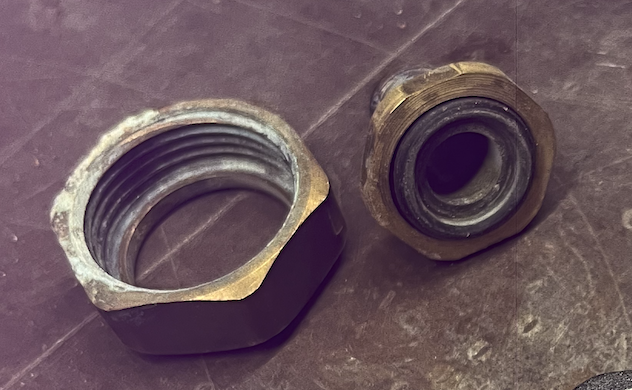
Just a machine groove in the body I suspect. There should be a composite media basket inside that chamber??
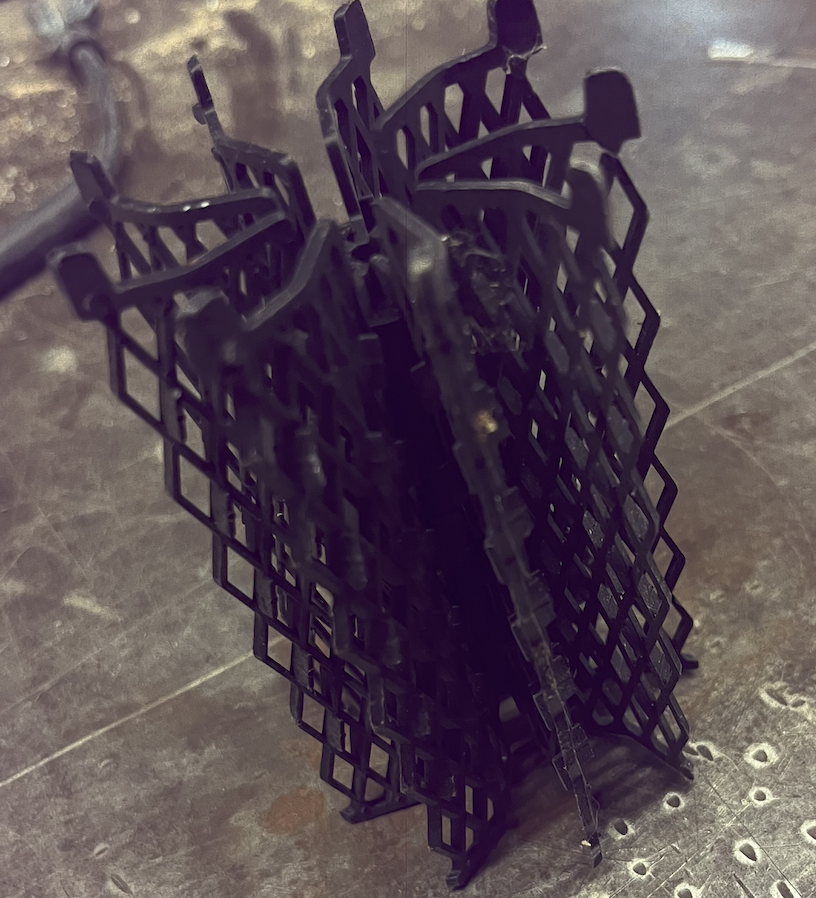
If it doesn't release air look at the bottom side of the vent cap. Make sure that needle valve is not stuck from flux, teflon tape shards, or hard water deposits. The float should move that needle up and down. It's possible the hinge is pinched the and not allowing the float to move also. Hold the cap upright in your hand, check the needle opens and closes as you move the float. A blast of air or water can dislodge anything stuck in the needle seat.
Pich the stainless wire together to remove float from cap and needle for cleaning.
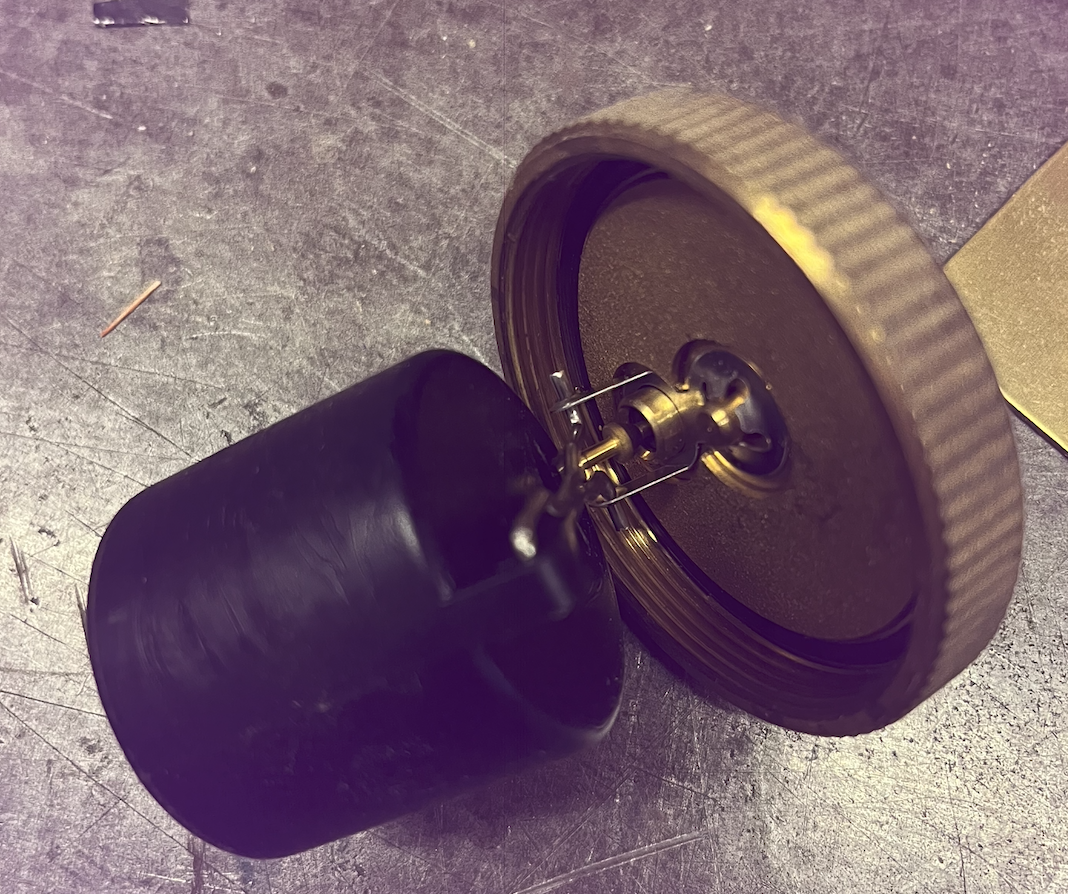
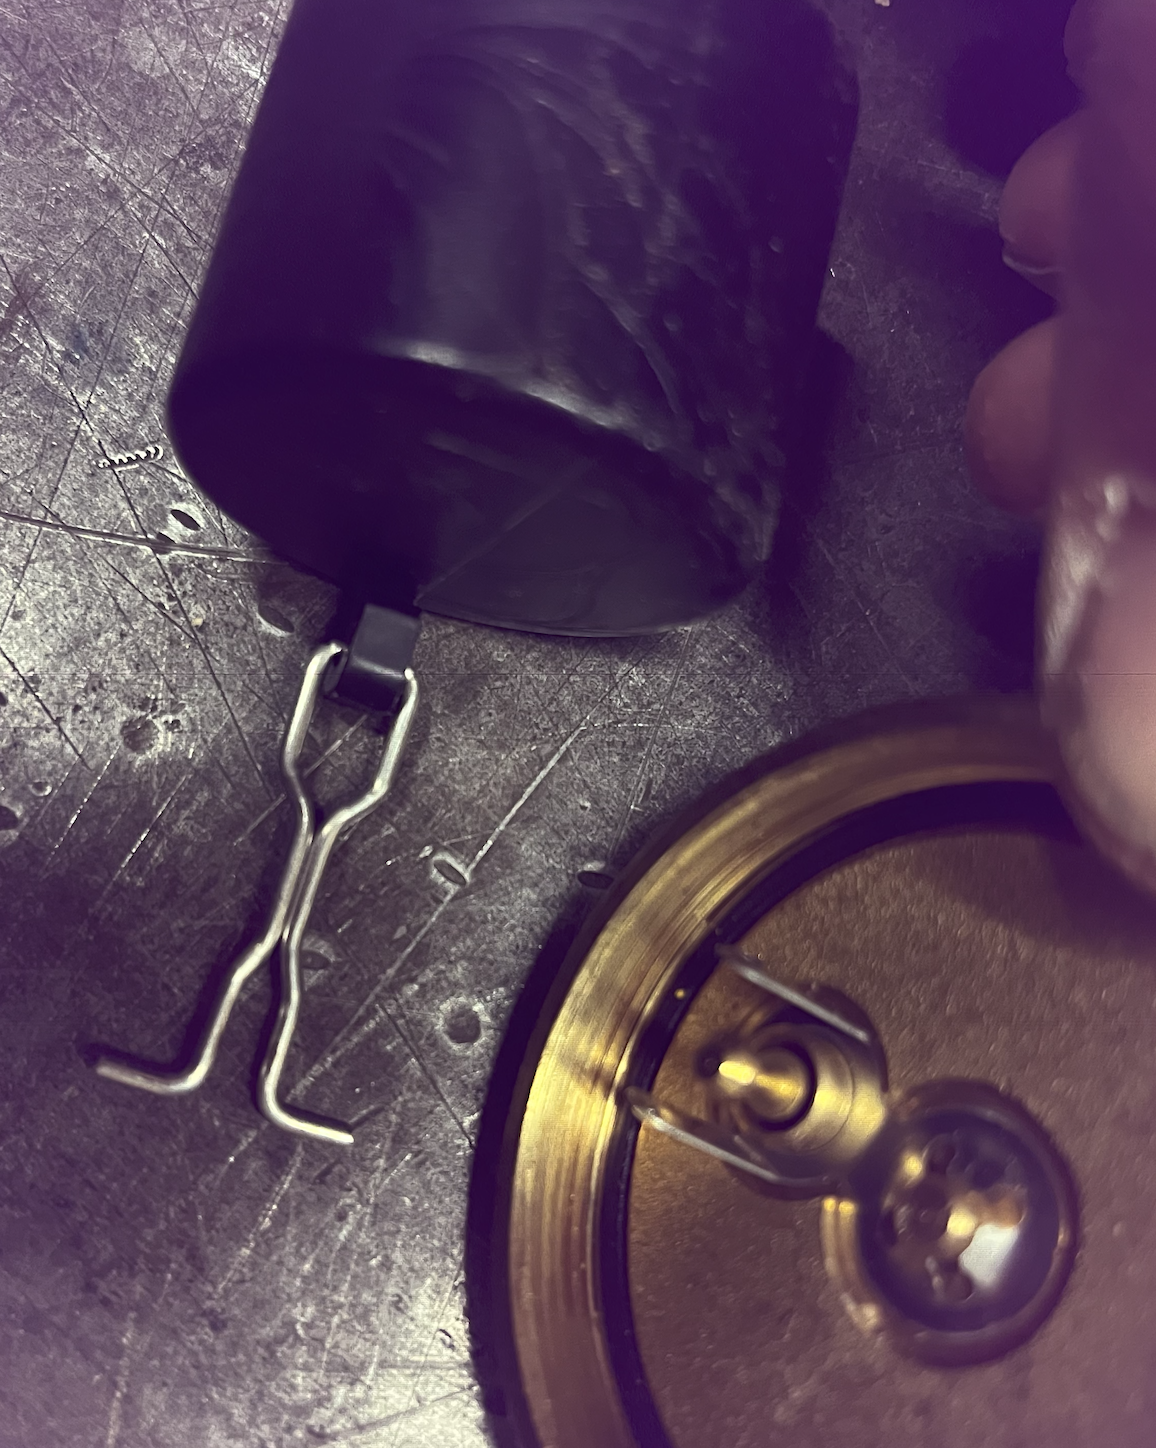 Bob "hot rod" Rohr
trainer for Caleffi NA
Living the hydronic dream1 -
In a pinch I've had good luck making a face gasket with several wraps of quality Teflon tape....
1 -
Hi All, crazy last day… apologies for the slow response - just coming up for air now.
First off, want to extend my gratitude to everyone here who has offered great in put and ideas. I always learn so much from you all. It's such an awesome forum.
I was able to get it back together, and because I had to do it the next day, I went to the one shop in the metro area that had some caleffi washers, and confirmed one of them was the right size, so I grabbed it. For posterity, the washer they had was R50058, and it matched the dimensions of the R0001458 tech support suggested with an OD of 15/16" and ID of 9/16".
@hot_rod - thank you for taking the time to put together and share all those photos. genuinely appreciated. Before you mentioned it, I would not have ever thought of rubbing it across smooth concrete. That's a great tip, and hopefully others will stumble across this thread and make use of that. I actually did get the gasket removed shortly before you posted this up. For posterity, I'll mention an alternative approach that worked well, below.
As to the discal, I do think the needle might have been stuck, but am not fully sure. What I can say is that I moved the float down and felt it pop a little. Now, this said, I did ask tech support if the different diameters in the bore were expected, and they weren't sure it would lead to an issue, but did say it shouldn't be like that. Given it hasn't functioned since it was installed 7 years ago, I asked if that part was warranty-able, and they said, no problem, we'll send you one. I figure no downside to that, given the history.
Unfortunately, after the issue I have a new issue, by which it seems I have to really crank up the psi on the fill valve to get it to fill to a lower pressure. I think something is sticking… even adjusting the PSI seemed a bit rough by comparison to normal. I'll call tech support to see if they can provide the rebuild kit number for it. I think I read there is one. I'm not sure if 7 years would be typical on a rebuild.
That bench has had some history, eh?
@mattmia2 - when I put the float in that bore (dry, because the system had been drained down), the float repeatedly caught on that lip caused by the two different diameters. The float has a fair bit of clearance, so maybe it's a not issue when floating. The cap had been loosened previously, but never had any moisture or sounds of air escaping. When I ordered the replacement float, I also ordered the cap that has the check valve in it, as they suggested it is a possible source of air getting into my system (and there was a lot). After I put the old hardware back in (and the needle seemed it might have been stuck), it did vent quite a bit of air out.
—Now, how did I remove my gasket goop? Keeping in mind some of the faces with gasket material were attached in-place, so the concrete trick wouldn't work:
Step 1: Razor blade off material (as suggested here - thanks!)
Step 2: Dip maroon scotchbrite in acetone, and rub off the remaining residue. Not as fast as Hot Rod's approach, but for parts that don't detach, it worked rather well.
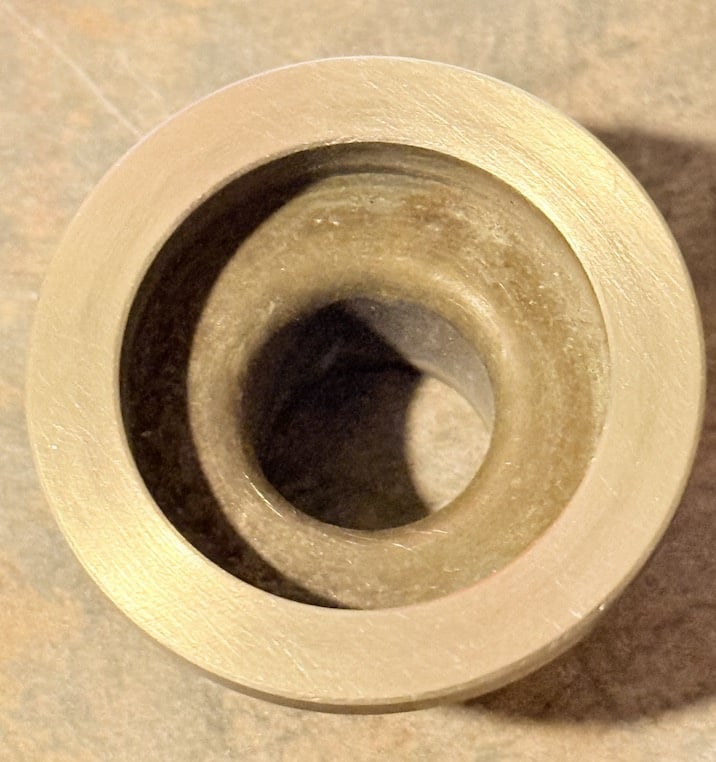
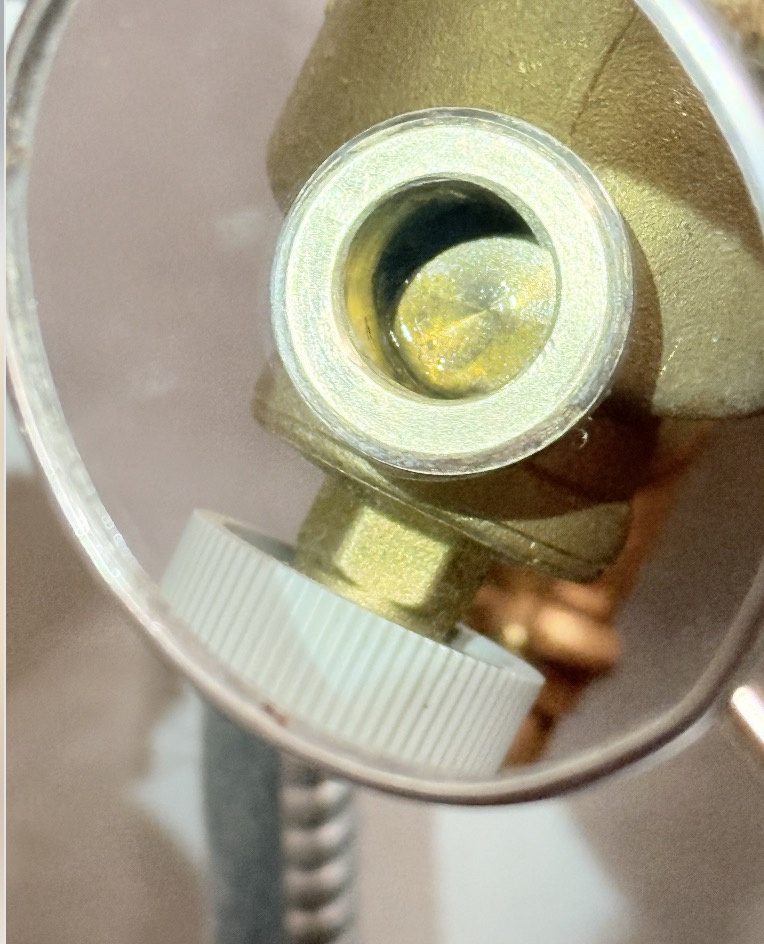
Now, had I not found that washer, the red packing rubber (from Lowes plumbing aisle) homemade washer was the direction I was going, but alas wasn't needed:
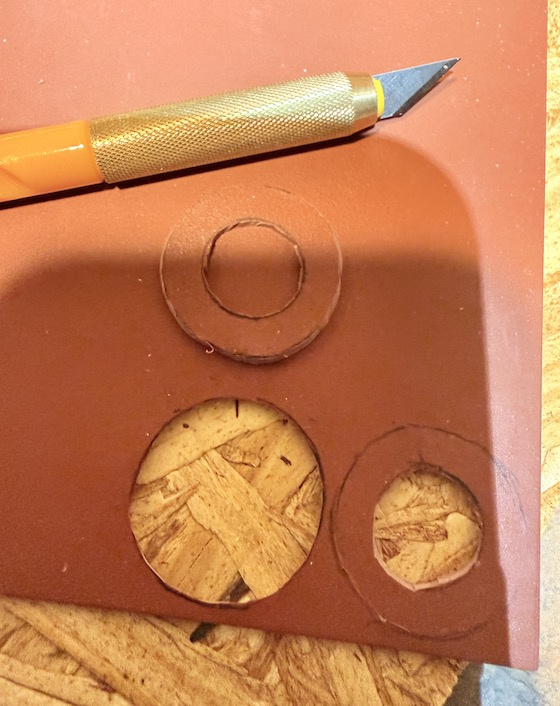 0
-
I keep that rainbow packing on the service van; it comes in 2 thicknesses. Besides face gaskets, we use it for shimming rocking toilets.
I was taught to punch it to size with sharpened pipe nipples.
1 -
The float vent on Discals has a solid plastic float that rides on a center pin. It has about 3/16" clearance all around, it cannot rub against the side.
You can hold a Discal horizontal, shake it and hear the float move up and down.
The pop or snap you hear when assembling the cap float lever is the needle valve snapping into that stainless arm on the float hinge. It needs to snap into place for the needle to be able to move with the float movement.:
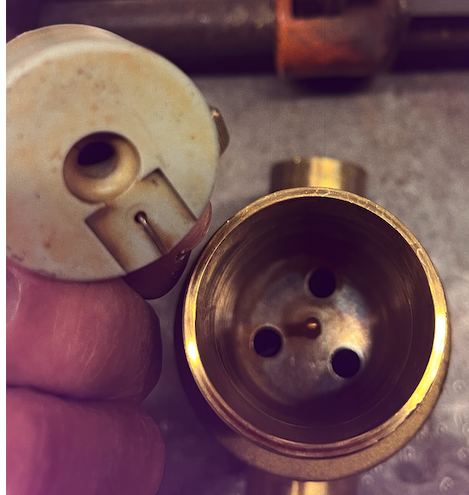
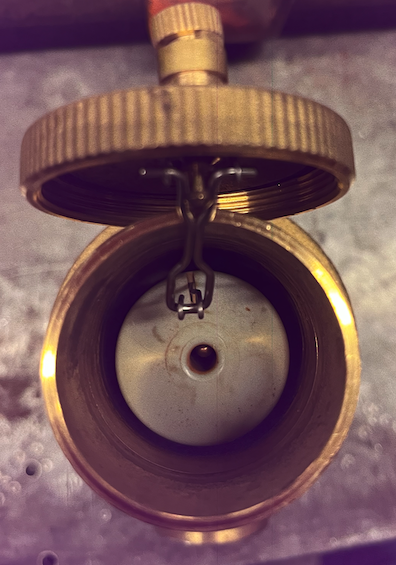
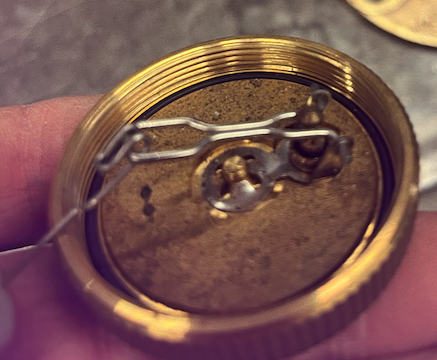
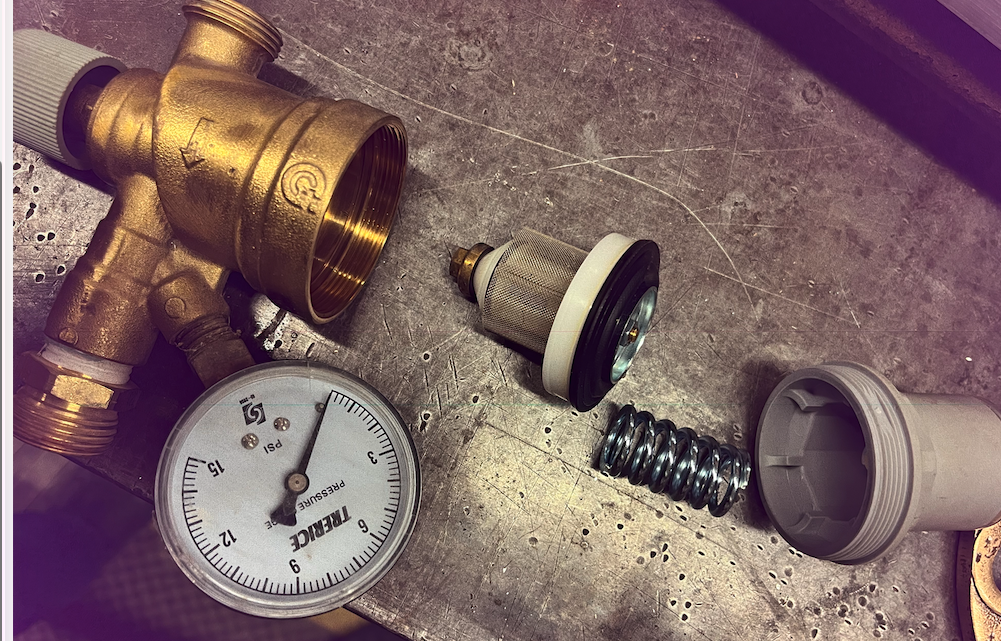
On the 573 fill valve. The working mechanism is very simple, a spring, diaphragm and shutoff valve. They are easy to disassemble ad clean. look for teflon or debris at the bottom shut off valve. I sometimes put a 15 psi gauge on it to check accuracy agaimnst the reading on top.,
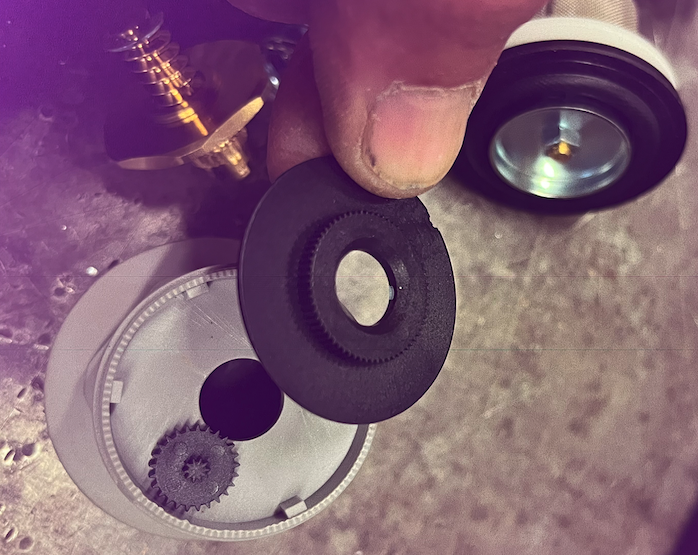
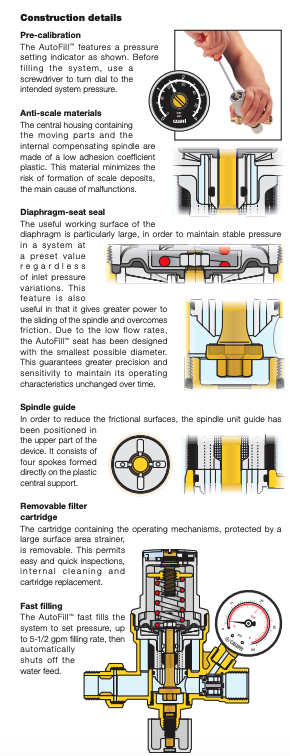
At the very top is a small gear train to make adjusting easy and accurate
Lastly the grey knob on the bottom is a shut off valve, it needs to be fully open to get 100% flow. It is not for adjusting pressure.
It will flow 5 gpm as log as the upstream pressure is 30 psi or more.
 Bob "hot rod" Rohr
trainer for Caleffi NA
Living the hydronic dream 1
-
@hot_rod - thanks so much for the instructional ride.
Interesting on the clearance in the discal… the float was definitely catching and not sliding easily on the pin, if that is what it was riding on. I'll look closer when I take the system down. I'll make sure the needle valve snaps into the arm as you've mentioned.
I can definitely take apart and clean the fill valve as you've shown. It is at 7 years… is getting near a typical rebuild due to a part failure, anyhow?
That valve has always required a higher screwdriver PSI setting than it has registered on the gauge. For instance, I might need to be set to something like 16 psi to get 12 on the gauge. However, now it's more exaggerated and coarser flow adjustment in operation, so hopefully the cleaning will alleviate the issue. I did notice intermittent hard mineral deposits on the body's intake to the valve, and cleaned out that. I expect I'll find more of that when I take it apart. I'll let you know how it goes
0 -
the life of the gaskets in that fill valve depends a whole lot on how much mainly chloride is in your water.
1 -
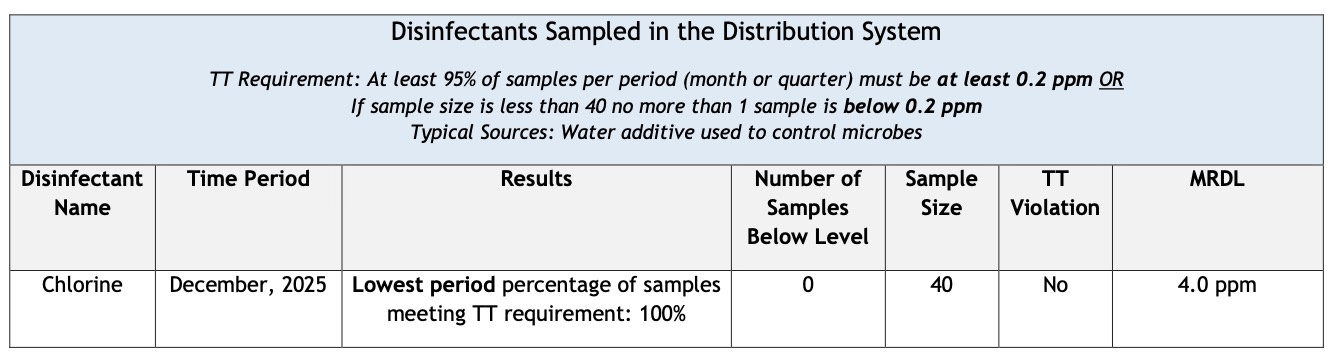
@mattmia2 - the only information I have around chlorine and other disinfectants are in the city water is below. For chlorine, it only seems to indicate it's above 0.2ppm and below the max limit (MRDL) of 4.0ppm. I have actual disinfectant byproduct levels, but don't think that helps us.
 0
-
i think but am not positive that the chlorine from the disinfectant and the chloride from road salt affect it
1



Categories
- All Categories
- 87.9K THE MAIN WALL
- 3.3K A-C, Heat Pumps & Refrigeration
- 60 Biomass
- 430 Carbon Monoxide Awareness
- 134 Chimneys & Flues
- 2.2K Domestic Hot Water
- 6K Gas Heating
- 124 Geothermal
- 170 Indoor-Air Quality
- 3.9K Oil Heating
- 80 Pipe Deterioration
- 1.1K Plumbing
- 6.7K Radiant Heating
- 397 Solar
- 16.1K Strictly Steam
- 3.5K Thermostats and Controls
- 56 Water Quality
- 51 Industry Classes
- 51 Job Opportunities
- 18 Recall Announcements