Low water cutoff not working after cleaning pigtail
Comments
-
especially not without first verifying the sight glass is actually currently freely connected to the inside of the boiler.
0 -
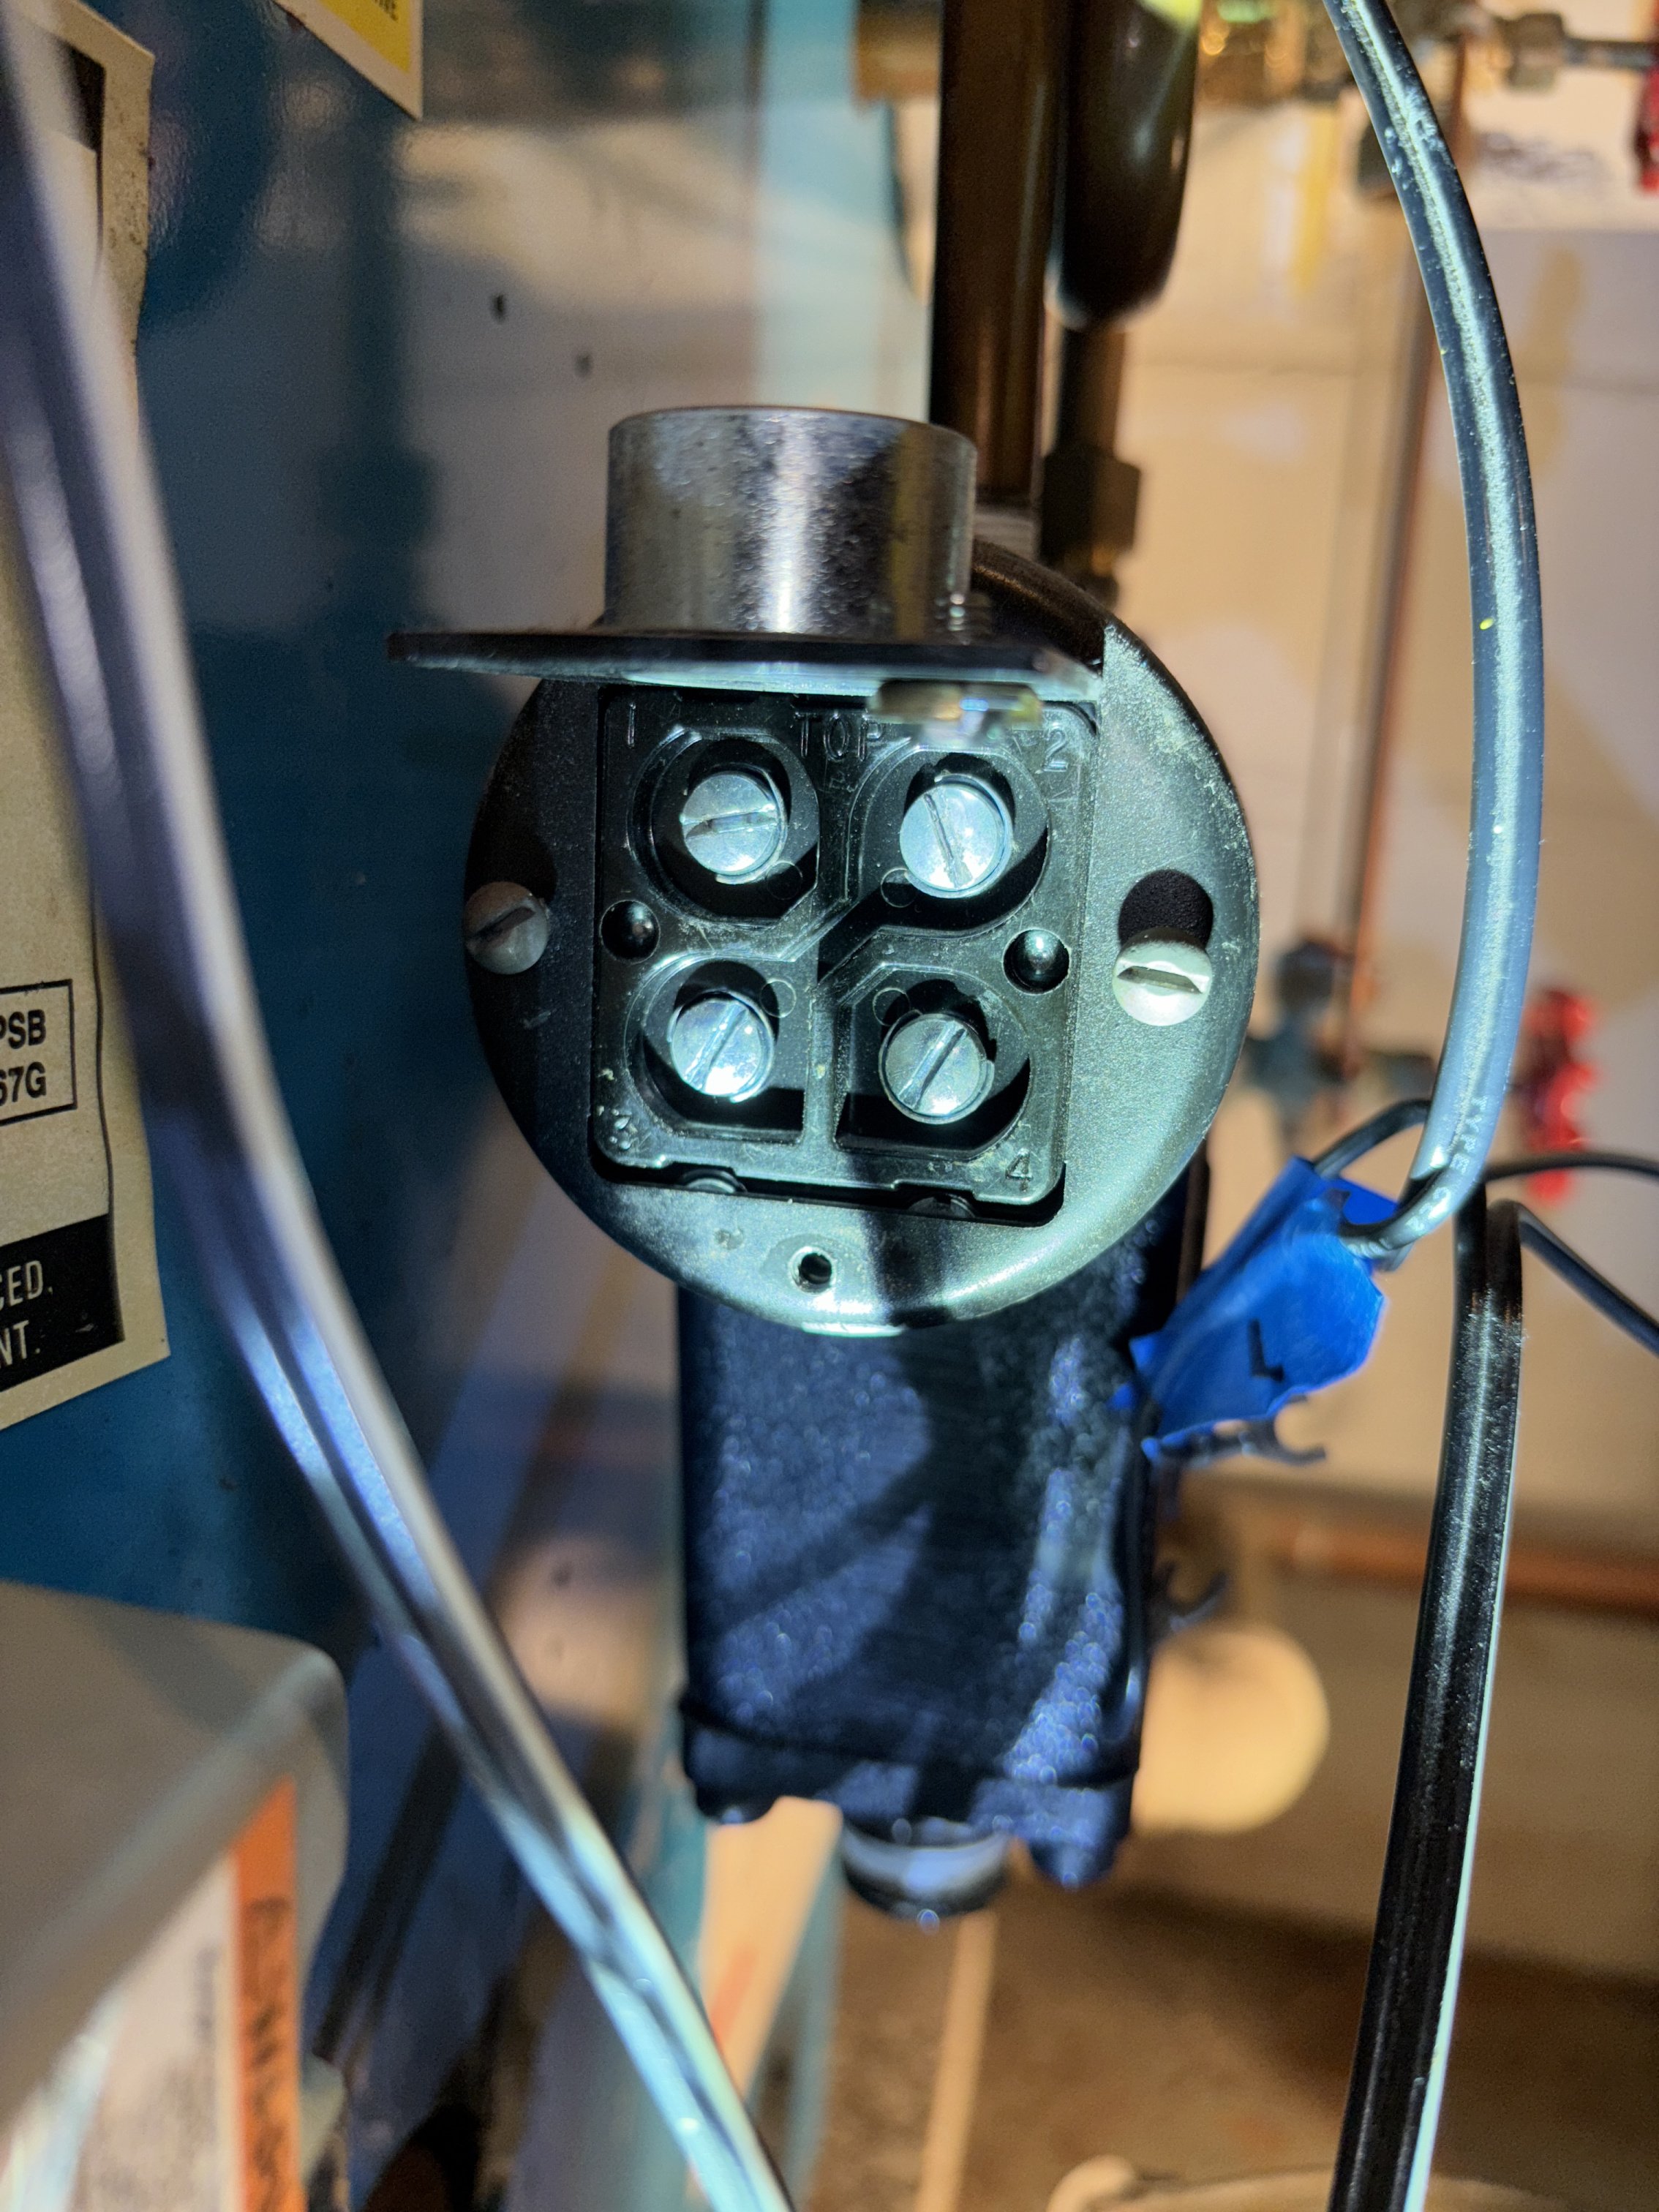
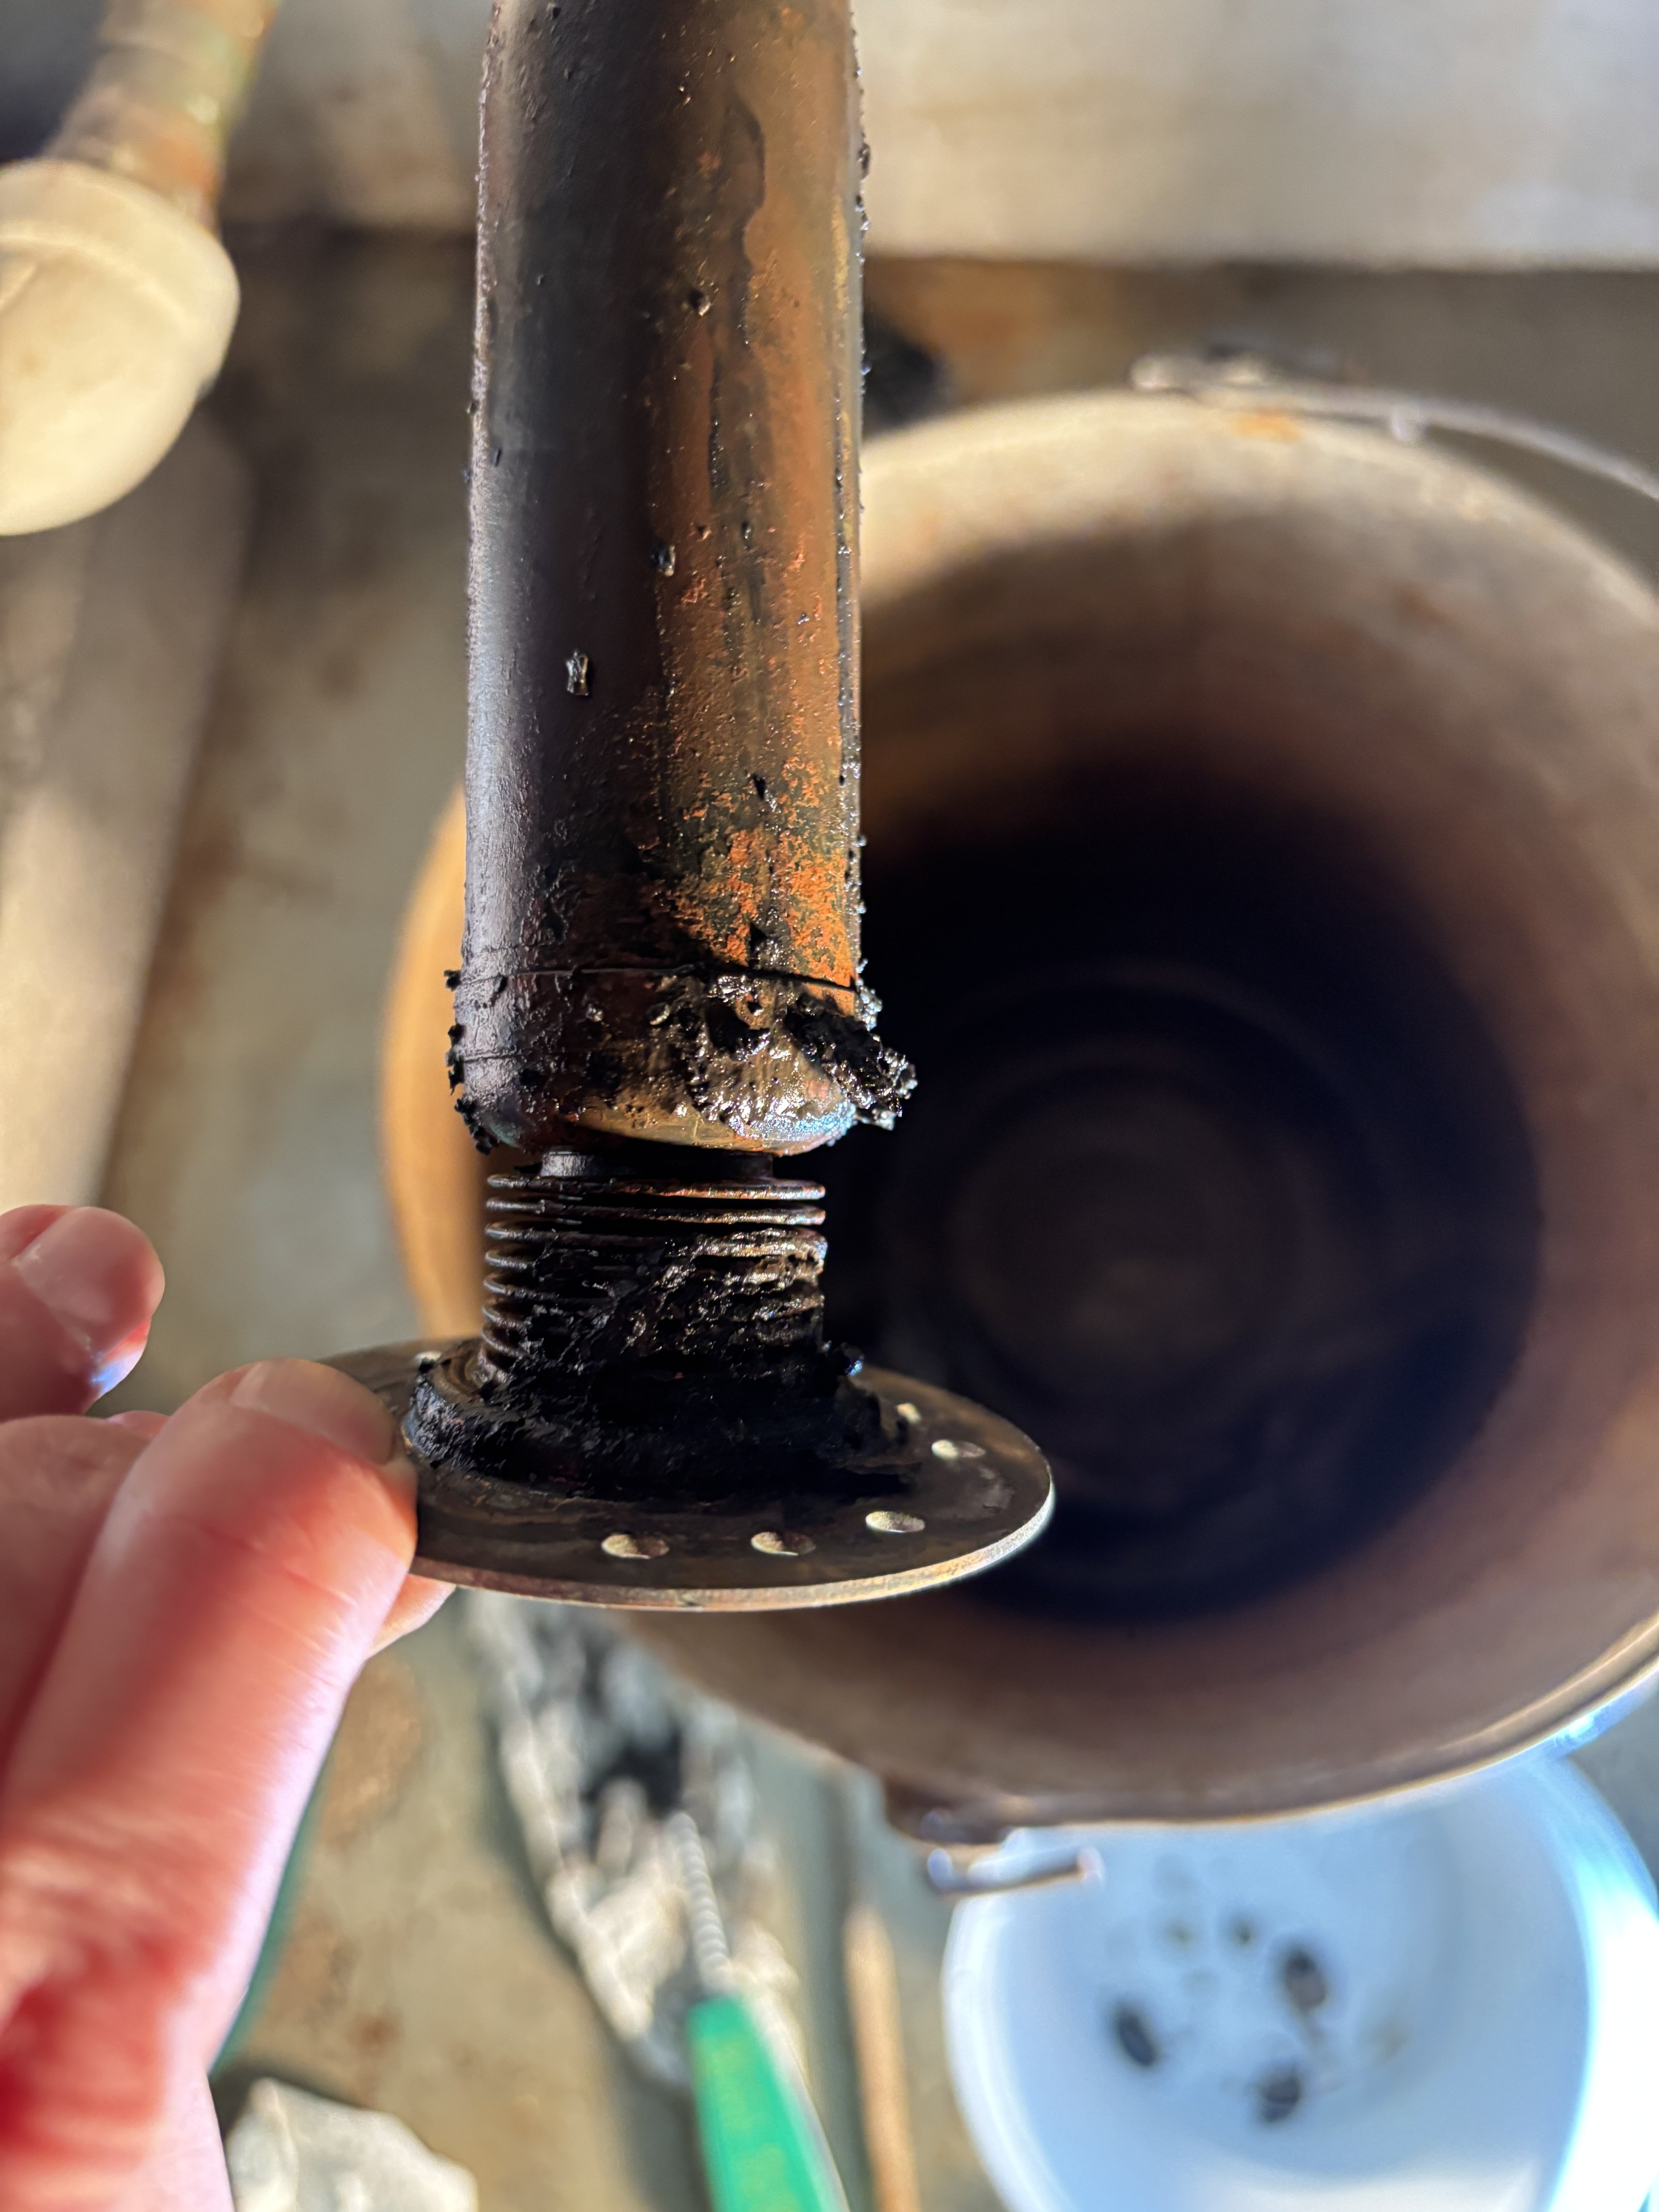
Hi all. Thanks for all the help!! I just took the ball valve off the dirt cap. Using a dowel to push up gently the float is moving freely. I then removed the wiring to the switch. The top two contacts were wired. The bottom two as I understand it are used if you have an automatic water feeder which I don’t have. So they’re not connected. Using a volt meter across the top contacts the impedance is always zero (short circuited) no matter if the float is up or down. However the bottom two contacts go from short to open circuited when the float is pushed up. Does it make sense that two contacts would go bad while the other two work? However, I have another problem. I touched the plug and it just fell off in my hands and it won’t thread back on. Can I still save this lwco or does it need to be replaced?
 0
0 -
Half the plug is still in there. if you can get it out by cutting a couple wedges almost to the threads and breaking that section out with a small chisel you can save it.
The float may not be falling enough to open the nc contacts. the no contacts may close before the nc contacts to call the feeder before it gets to the cutoff point.
0 -
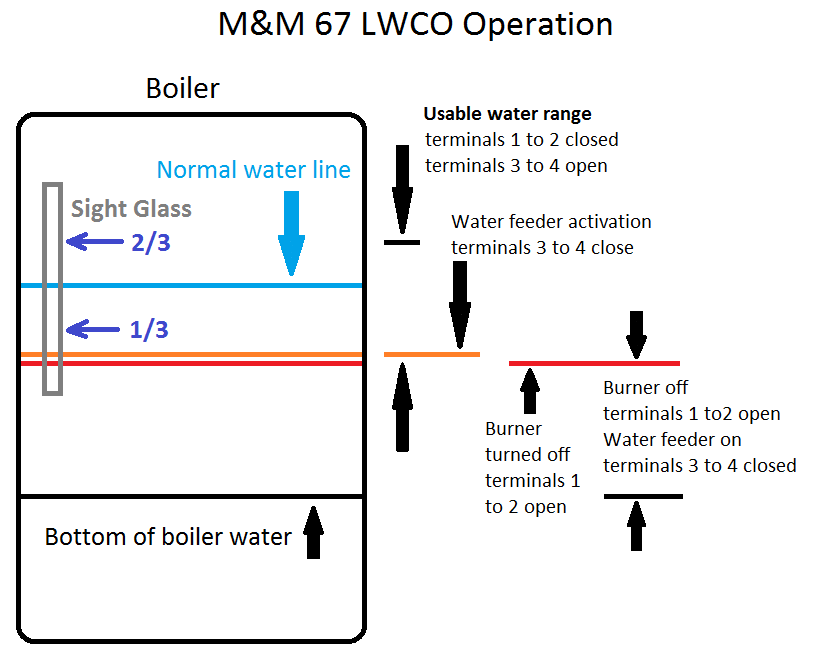
The switch has a Dead Band between water feed and burner cut off. The Dead Band (between the Red and Orange lines in the image below) provides an opportunity to feed water without shutting off the burner. If the float moved freely but does not drop far enough it may behave that way, can't get past the Dead Band. Or the contacts are bad. With the switch removed from the float linkage it can be better tested.
Well that sucks… A new 67 is expensive. Now you see that is why I only recommended removing the switch and the float. You may be able to clean up the 67's threads with a sharp pick, a thread file and do a final thread cleaning with a Tap or a thread chasing tool. To me messing with things that don't need messing with invites other issues. If you want to mess with other stuff than what is just actually needed to repair the issue do it in the Summer time. If you use a Tap or a thread chasing tool remove the float first so the float is not damaged.
 National - U.S. Gas Boiler 45+ Years Old
Steam 300 SQ. FT. - EDR 347
One Pipe System0 -
This is par for the course for me 😂Crazy thing was I just used my fingers to turn it. I didn’t even put a wrench in it. Thanks for the tips. I’ll try to get what’s left of the plug out. Can I get a replacement?
0 -
Is half the plug is still in there ??? Or did it rust away. If the other half is still in there does it leak ?. If it is still in there and does not leak, I would make that a summer project and move on with the main issue.
Edit: I originally assumed that was all that was left of it. It can be replaced I think it is a 3/8 inch thread.
National - U.S. Gas Boiler 45+ Years Old
Steam 300 SQ. FT. - EDR 347
One Pipe System0 -
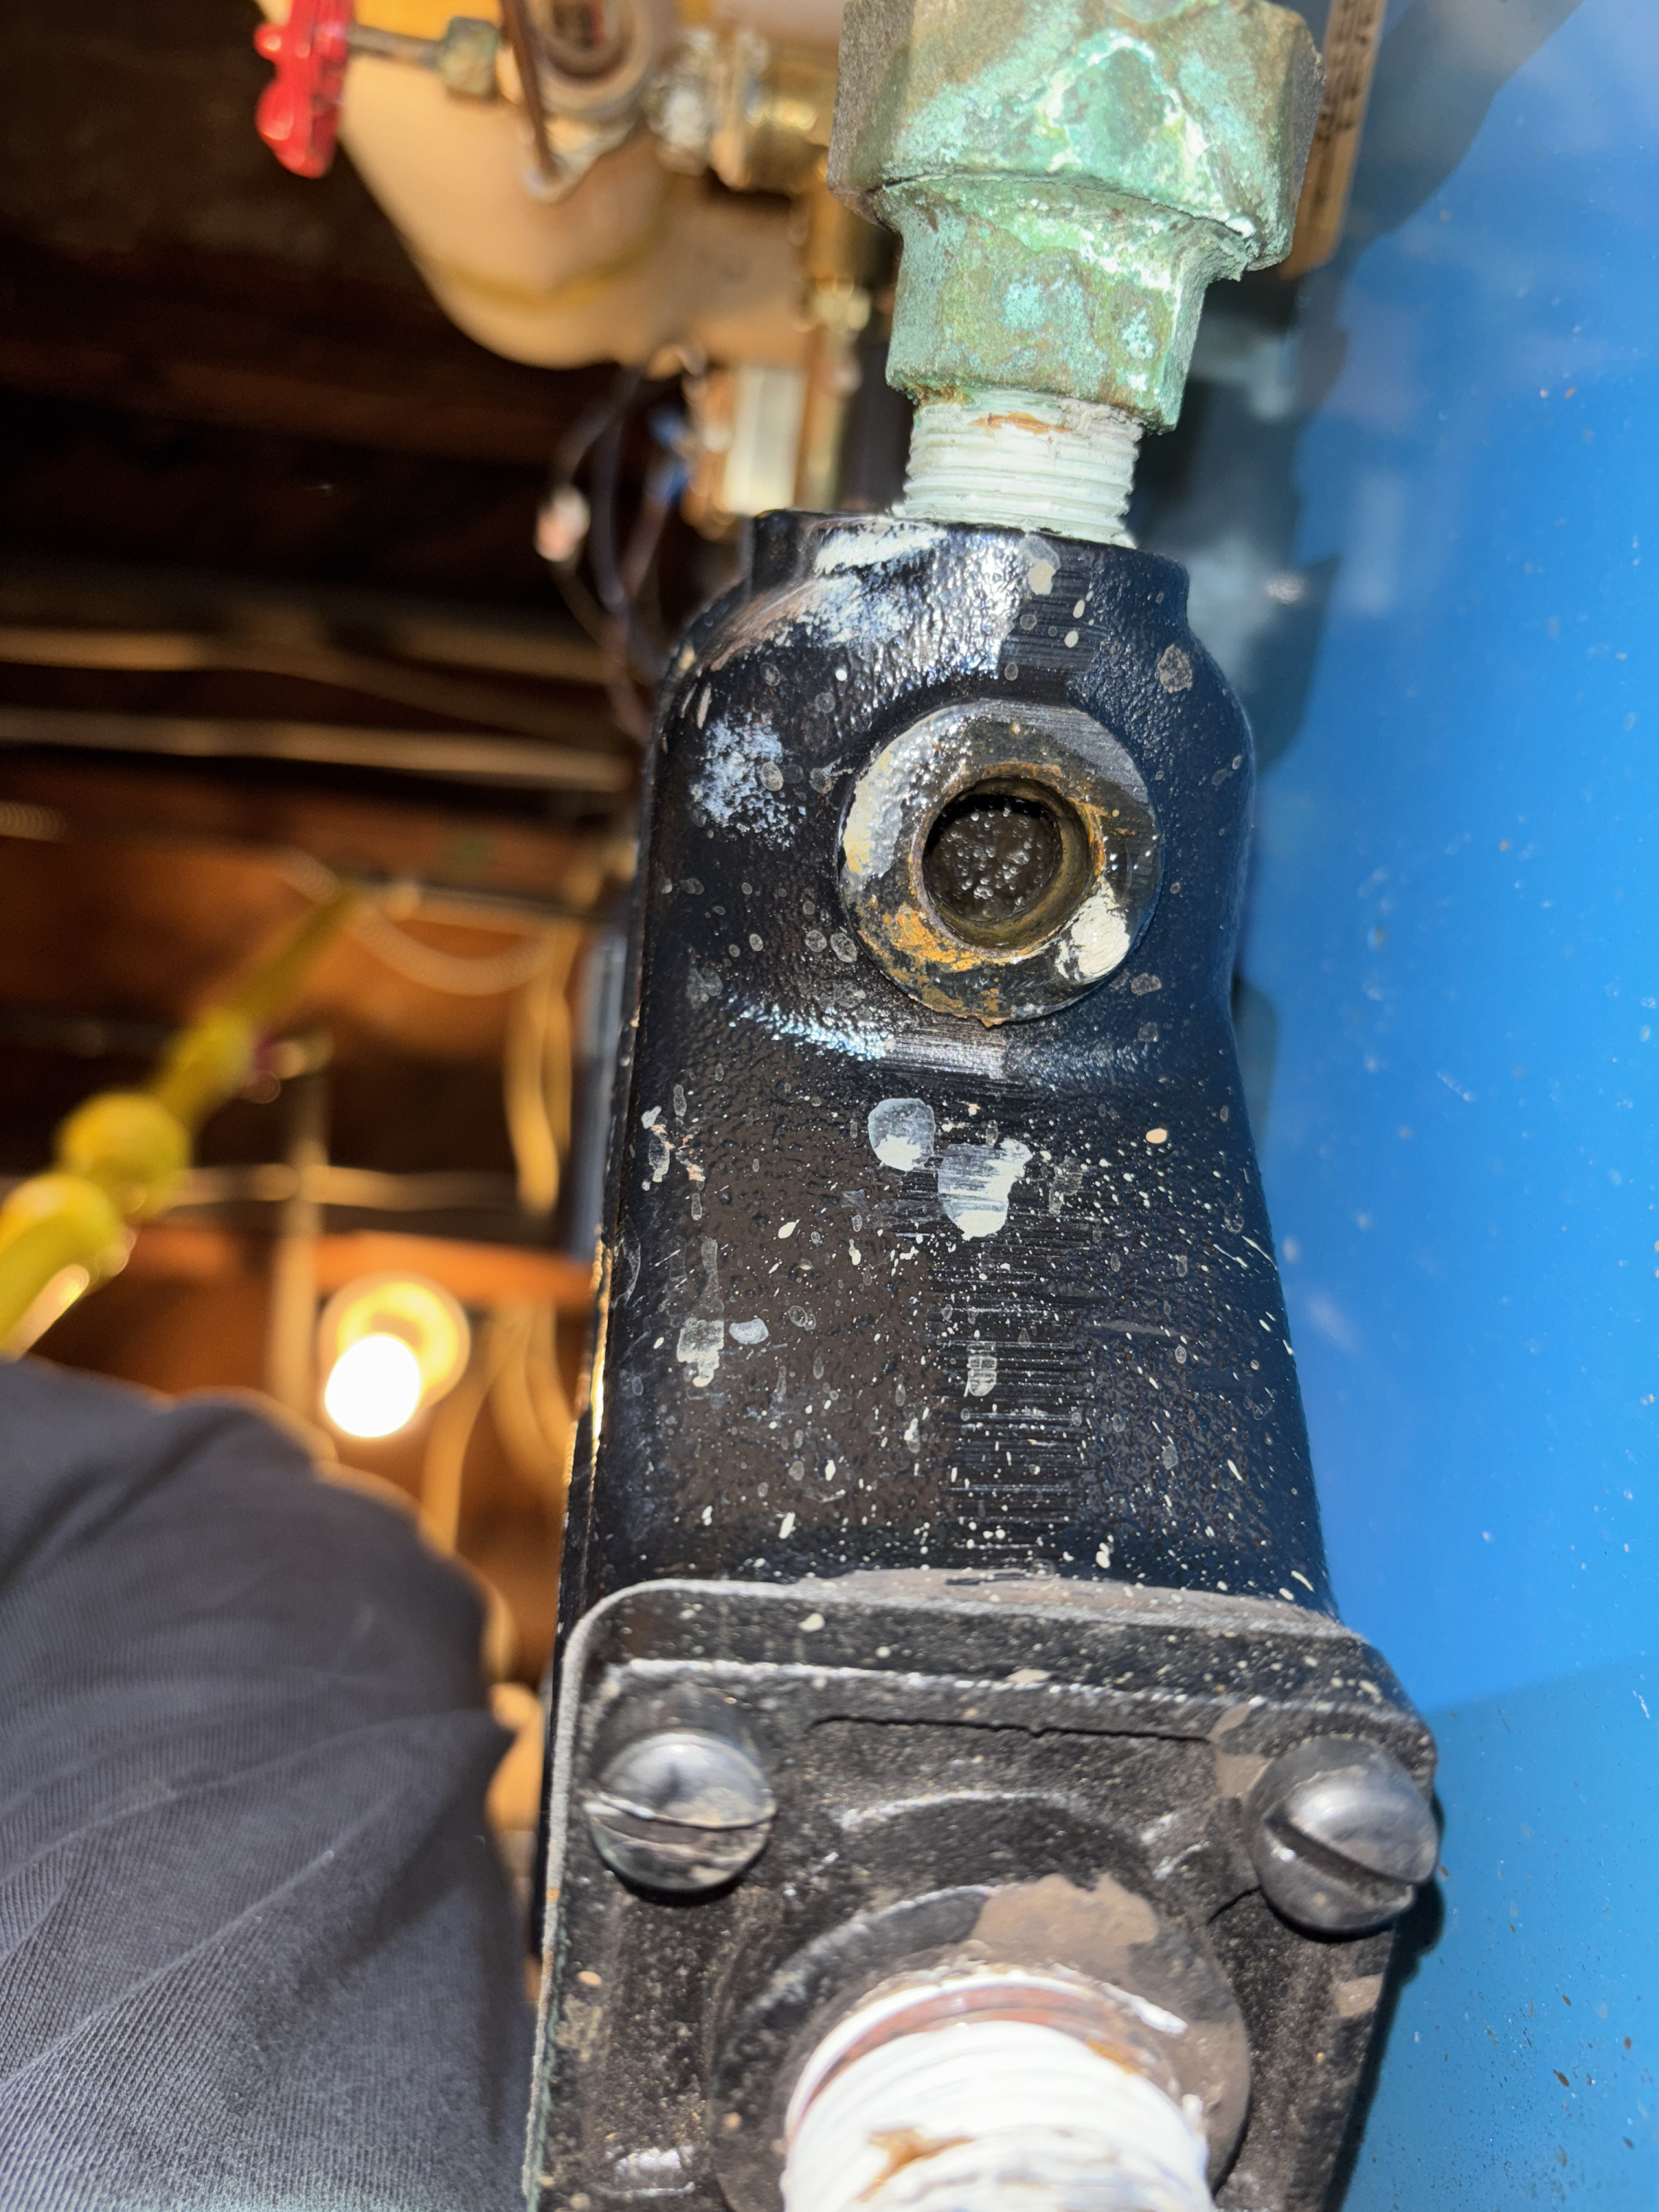
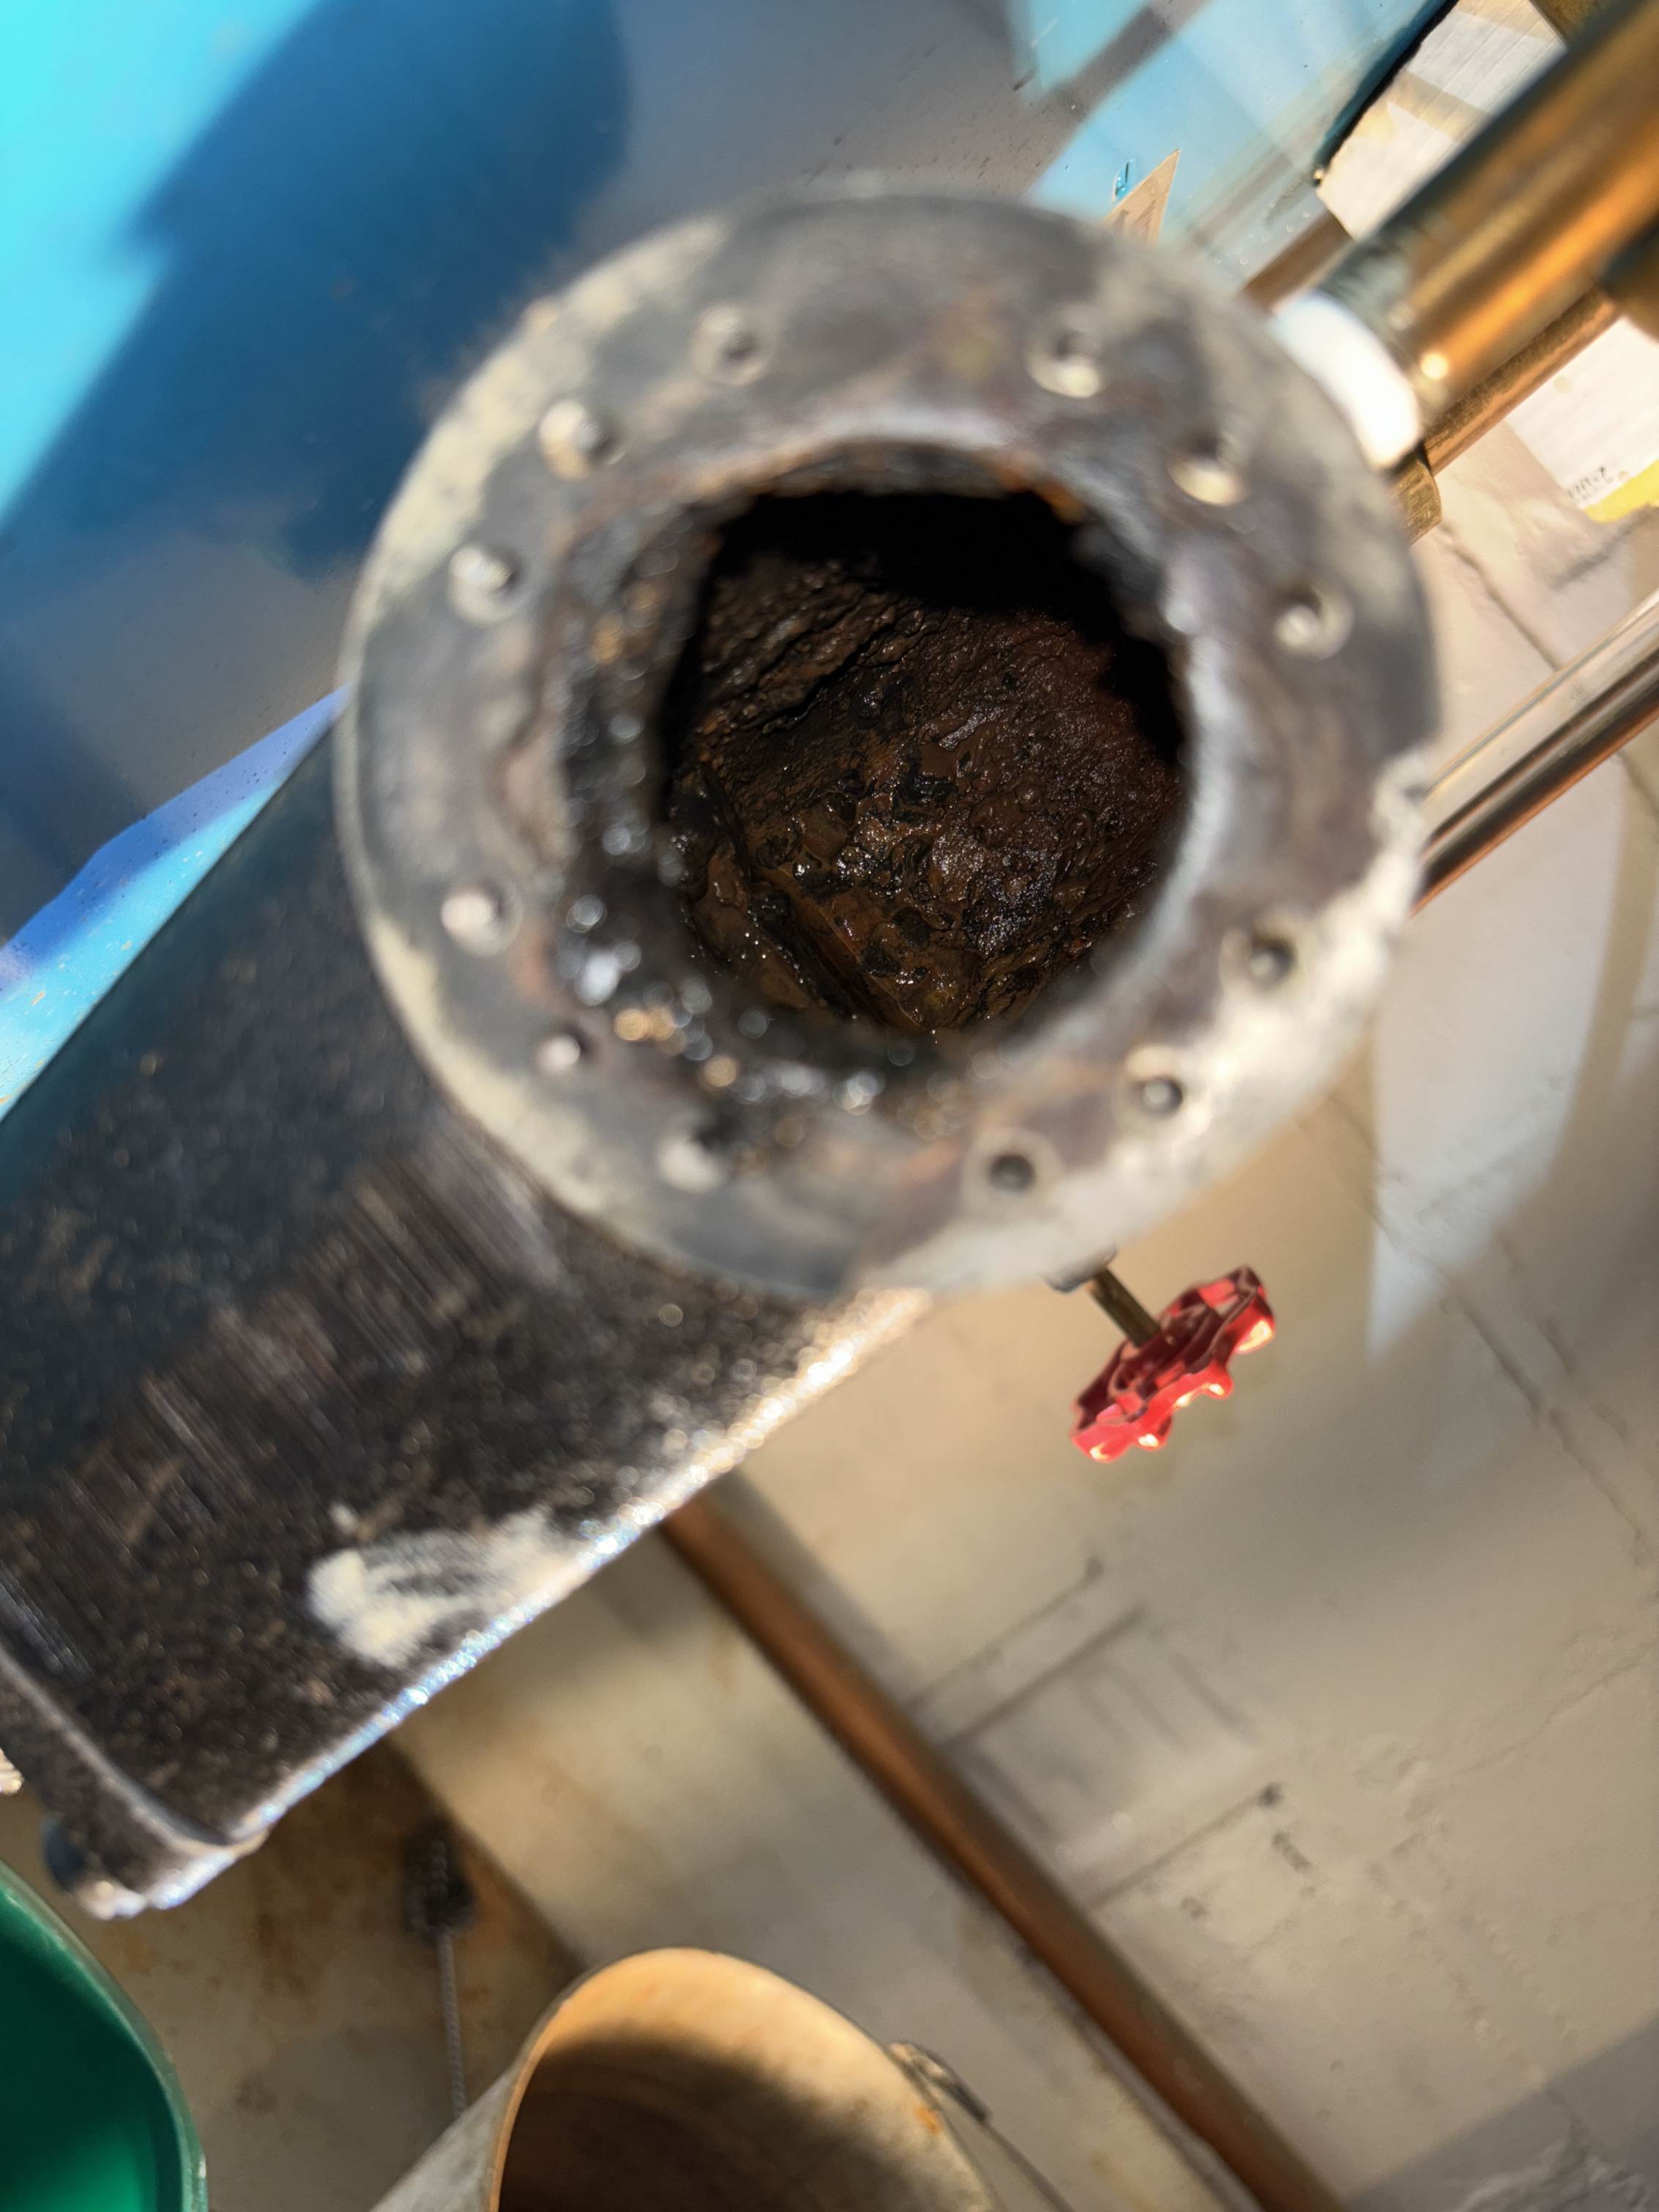
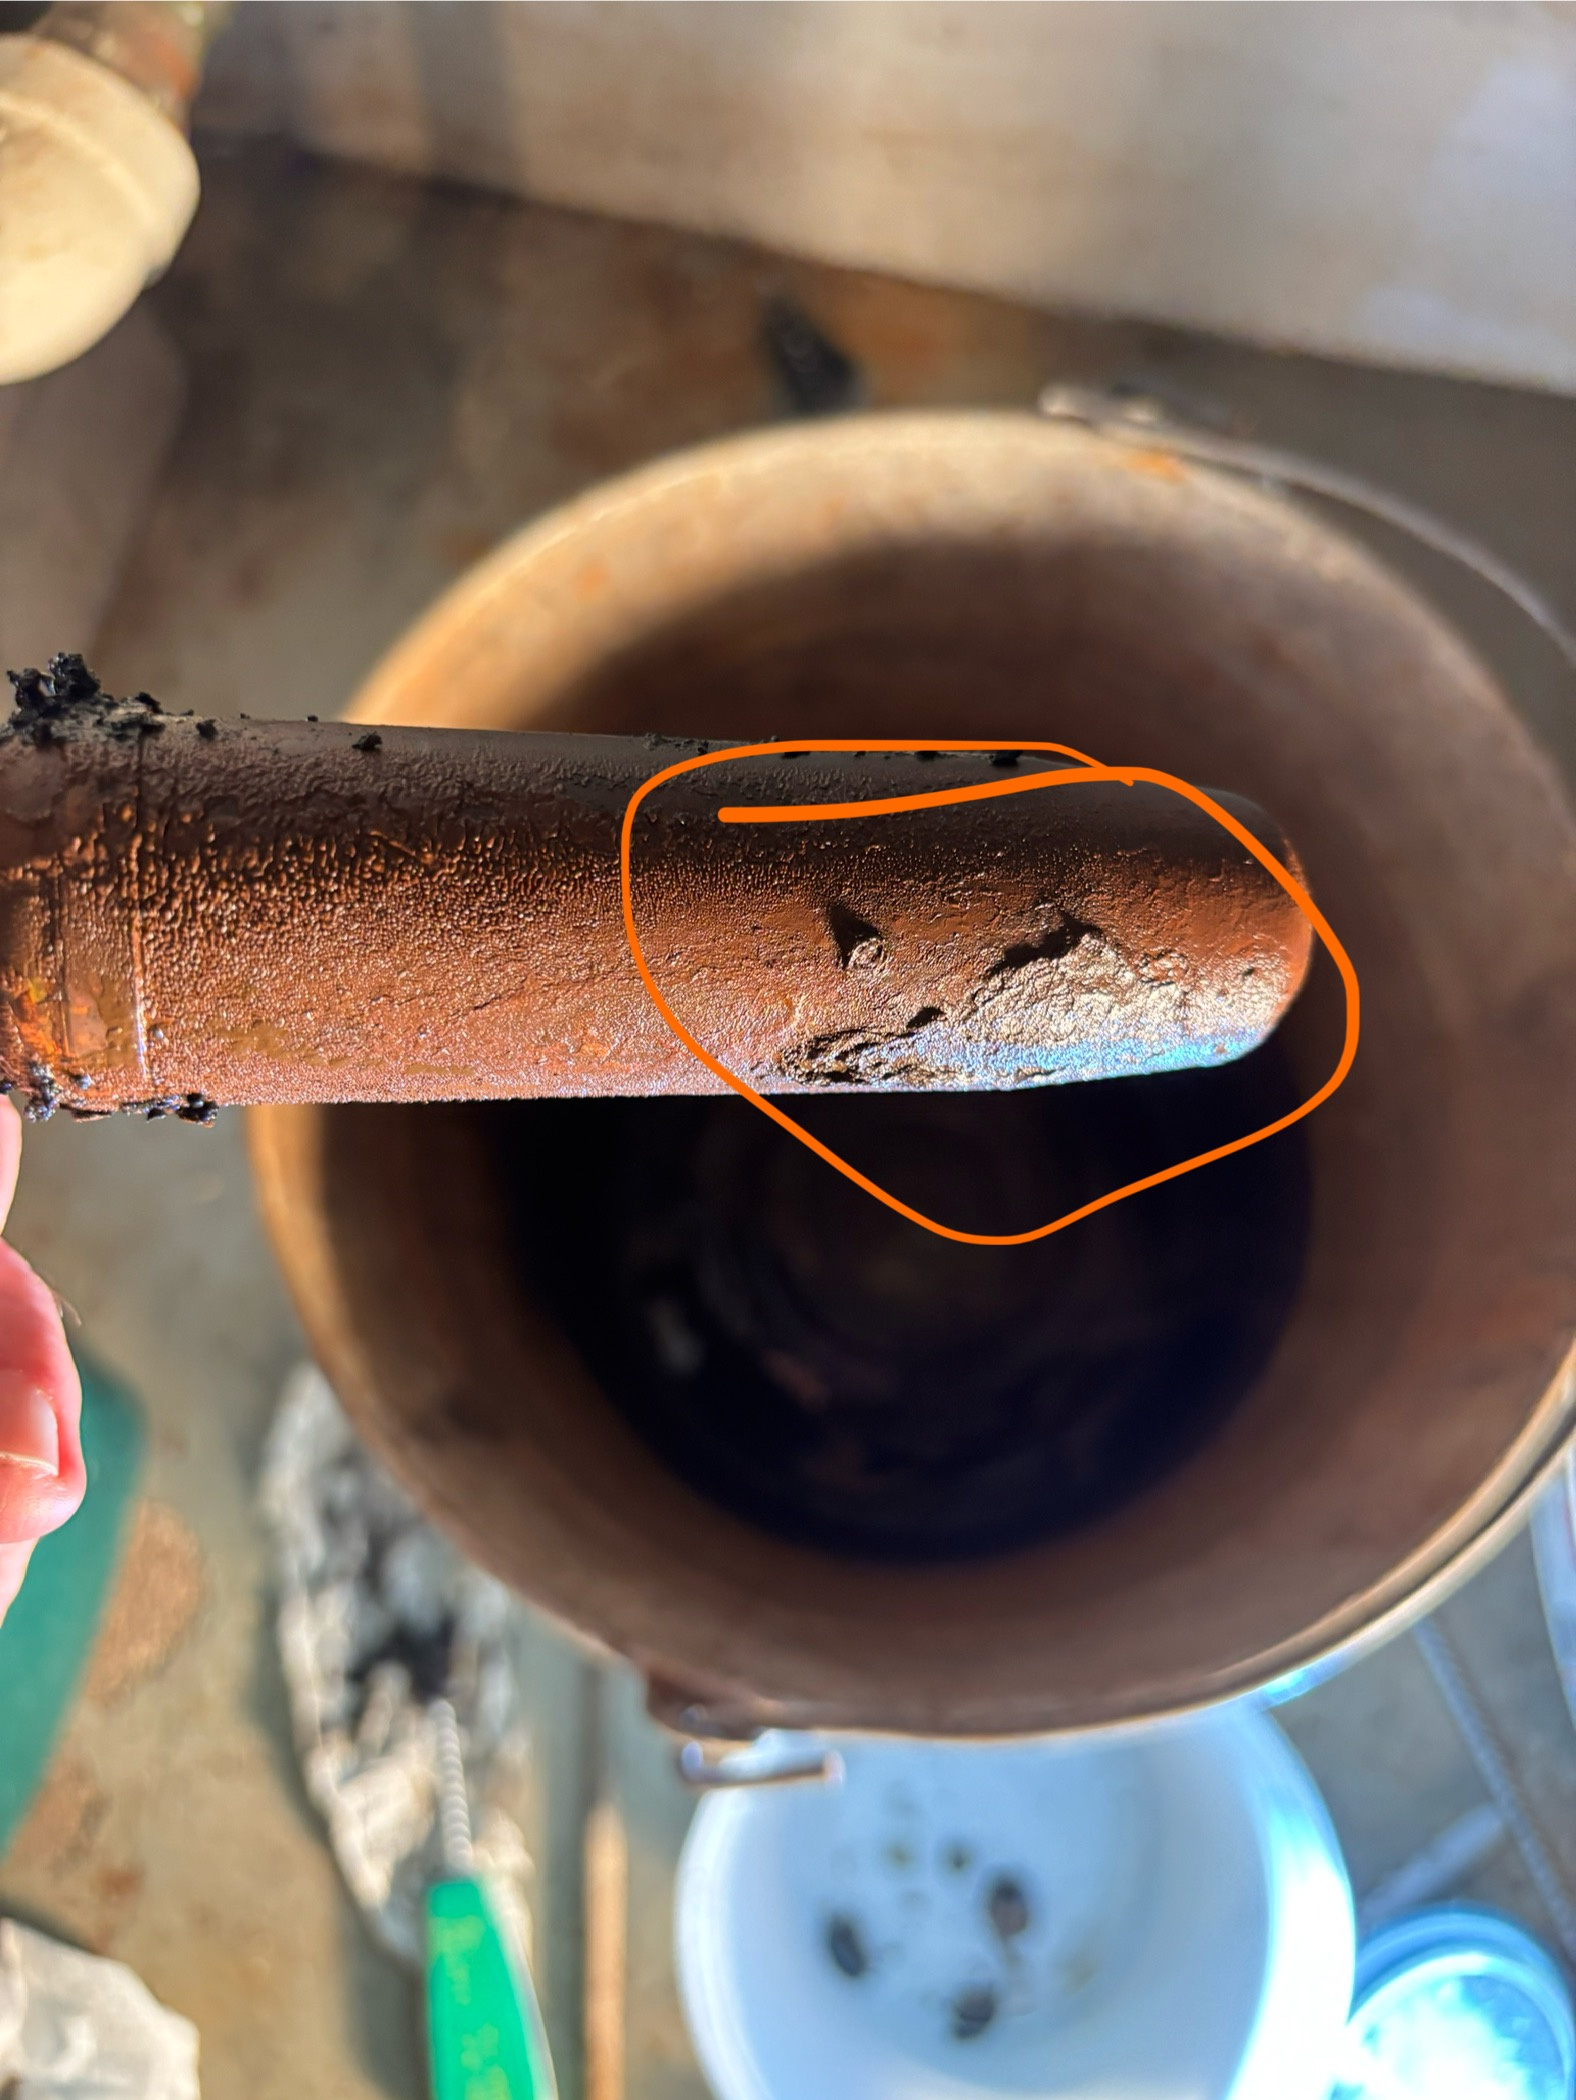
It seems like it rusted away. What’s left of the plug won’t thread on. I took a round wire brush and in an attempt to clean up the threads I turned the brush the same way as would loosen the plug. Feeling with my finger the threads seem ok. Tough area to get into between the boiler and the water heater. Here’s a picture of the threads.
 0
0 -
" What’s left of the plug won’t thread on " I would not expect it to since it is probably too wide, Pipe threads are tapered.
Not really seeing any threads in your picture.
National - U.S. Gas Boiler 45+ Years Old
Steam 300 SQ. FT. - EDR 347
One Pipe System0 -
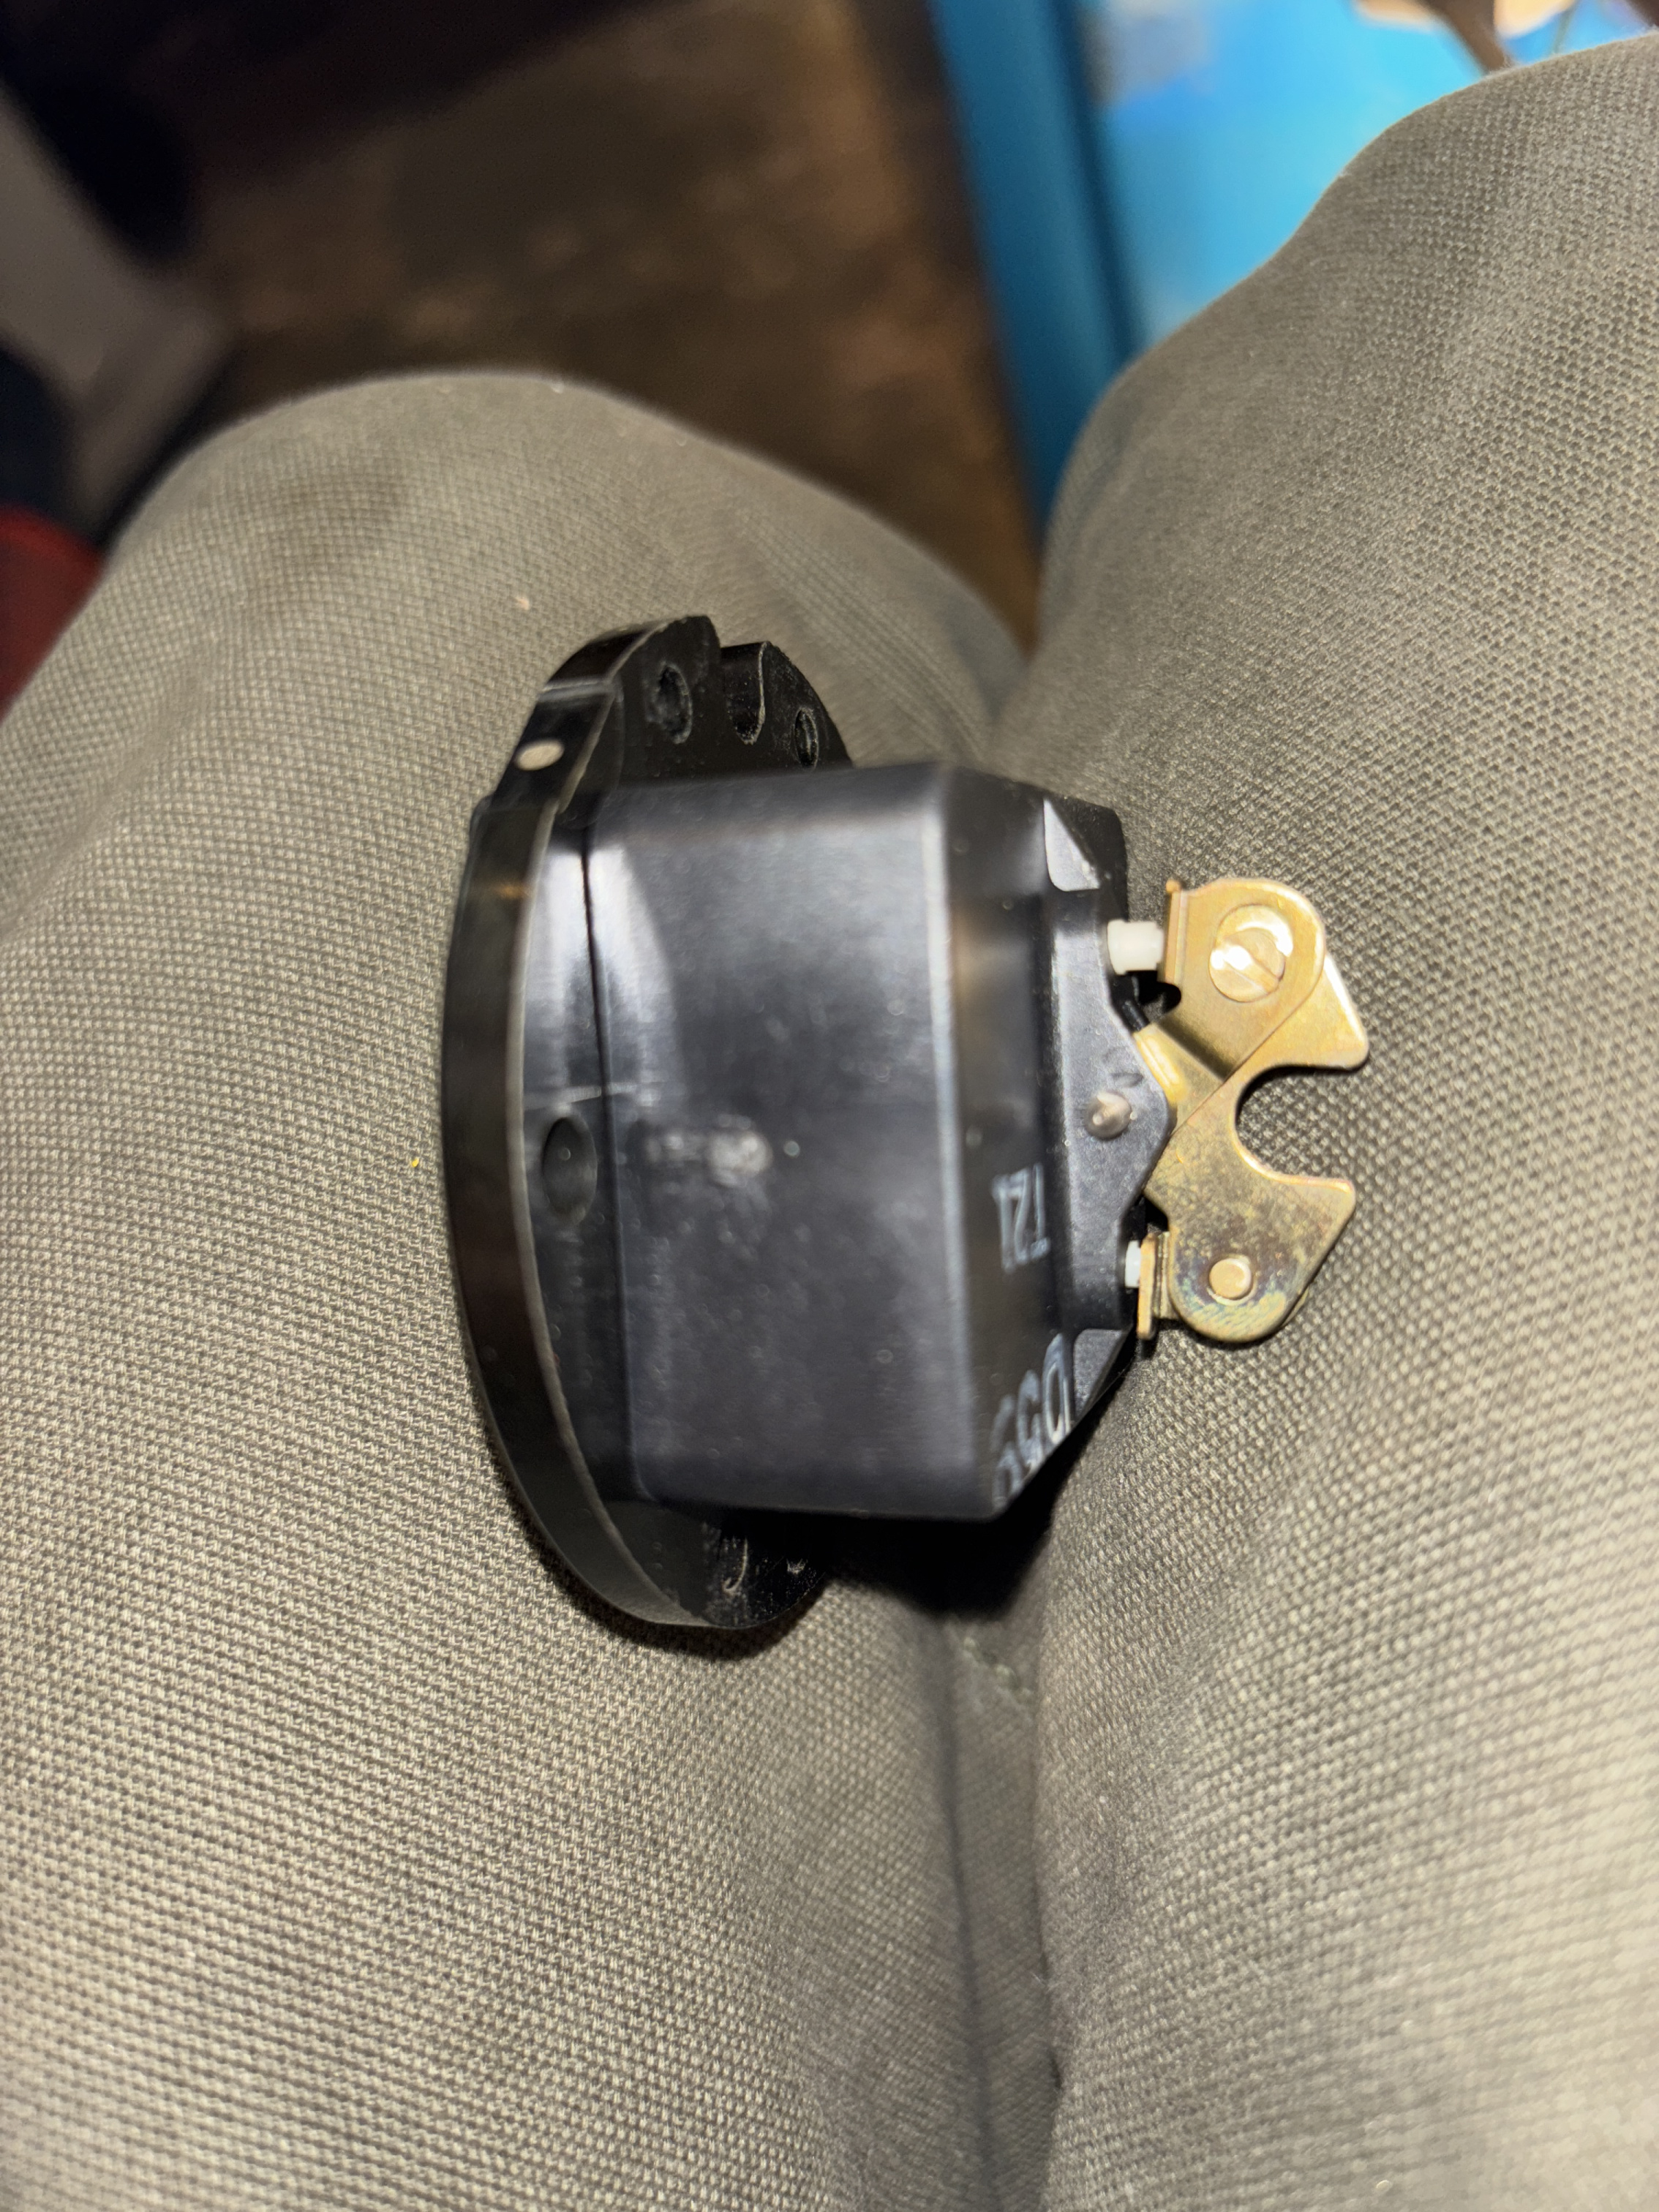
I kept moving forward hoping that I can get a plug. I took the switch out. Top contacts on back are open in up position and short when in down position. Float is out and doesn’t look too bad.
 0
0 -
Fix the plug issue before putting the float back in for good. You can temporally reassemble for testing, less screws. Carefully clean the sylphon or bellows so movement is not restricted by that. Clean that rust on the inside of housing, it may not take much to limit the float movement.
National - U.S. Gas Boiler 45+ Years Old
Steam 300 SQ. FT. - EDR 347
One Pipe System0 -
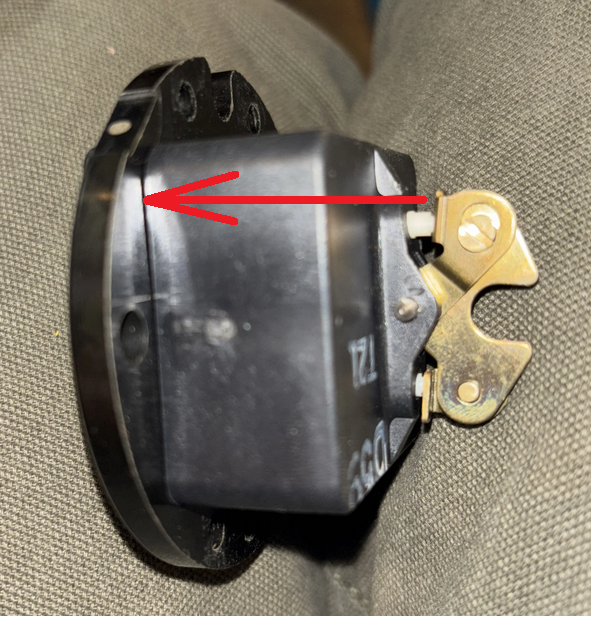
Is the switch housing secure, the gap at the Red arrow uniform and minimal ?
 National - U.S. Gas Boiler 45+ Years Old
Steam 300 SQ. FT. - EDR 347
One Pipe System0 -
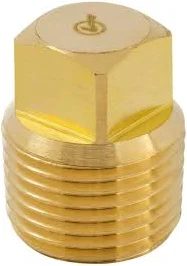
I don't remember what size that plug is 3/8" pipe thread (I think). But anyhow it is a standard pipe plug available at big box, hardware or plumbing supply store. Get a brass one if you can.
get a drill bit and drill a hole in what's left of the plug. If it was me I would take the whole thing off the boiler and go through everything. Doing it on the boiler is difficult.
You have a union on the bottom connection so there is no reason not to take it off the boiler. Then it will be easier to get the rest of the plug out. Drill it out a big as you can and pick the remaining threads out. You can get a 3/8 pipe tap if needed.
The switch the top two terminals are for the burner as you mentioned. Don't forget if the float is pushed up that pushes the switch lever down and, in that position, the top terminals should be "made"
 1
1 -
the rocker seems secure and there is no daylight between the white part and the metal in the rocker in either position.
0 -
There is a little bit of the rust between the bellows. I’m trying to carefully pick it out with my finger nail without damaging the bellows. There is also some rust on the float. I’m trying to not be too aggressive getting it off. It’s stuck on there pretty good.
 0
0 -
some citric acid might help loosen things up
1 -
If I recall correctly I uses a utility knife but the knife blade did not touch the float in any aggressive nature. Its a slow process.
National - U.S. Gas Boiler 45+ Years Old
Steam 300 SQ. FT. - EDR 347
One Pipe System1 -
Maybe soak it in vinegar
1 -
Well if it fell apart that easily, maybe it is better to find out now rather than in January. Hard to tell exactly what is going on in the picture. Although it looks like mud accumulation at the bottom of the hole in the picture.
To me it looks like the threads are either all gone or all filled up metal from the old plug. If there is nothing left of the 3/8 inch threads maybe it can be drilled out and tapped for 1/2 inch threads. With a 3/8 inch pipe plug you will know quickly.
 National - U.S. Gas Boiler 45+ Years Old
Steam 300 SQ. FT. - EDR 347
One Pipe System1 -
Latest update: I cleaned out the 67 and was able to screw in a new plug. The lwco switch is working again! However, the new gasket was leaking. I admittedly hadn’t tightened it enough. I took it all apart and then cranked down on the 4 screws that hold the bracket that holds down the gasket to the lwco. Tightened them in a cross cross manner. Then I put back on the switch bracket and tightened those 4 screws tight, again in a likewise criss cross manner. The gasket is still leaking a little bit. Any chance it will stop leaking with time? I tightened it down pretty good so not sure I can make it much tighter. I should add I cleaned off the old gasket with a razor blade.
0 -
permatex will stop the leak. you can see if you can stick a couple thousandths feeler gauge between the cover and the body with it tightened down. it shouldn't slip in there. i don't know about this, how thick the cover is, but i know sometimes you can warp the corners and make the gasket leak if you crank down too much on small parts like that.
0 -
The lwco body has 12 screw holes but i only took out 4 screws each on the hold down bracket and the bracket that holds the switch. Seems like I’m missing 4 screws that might help seal that gasket better.
0 -
If the gaskets two mating surfaces were thoroughly clean of the remnants of the old gasket, flat surfaces with no defects, and all the screws torqued equally without deforming the round metal plate(s) it should not leak.
A gasket sealer from an automotive parts store could be used.
I would not count on it self sealing over time and depending on where it is leaking switch contamination could be an issue. I'd try to identify the cause of it leaking.
The screws into the casting should not need to be crazy tight just snug. Too tight may deform the thin metal.
National - U.S. Gas Boiler 45+ Years Old
Steam 300 SQ. FT. - EDR 347
One Pipe System0 -
is the bottom gasket for the blowdown leaking or the one for the switch?
0 -
The other 4 holes are for the orientation of the round electrical box, the long screws.
National - U.S. Gas Boiler 45+ Years Old
Steam 300 SQ. FT. - EDR 347
One Pipe System1 -
Use some gasket cement. It will be a PITA to get off the next time but that won't be for a long time if you blow it down once in a while
0 -
The gasket may not be the leak. if the bellows was compromised during the cleaning, the steam or water can leak thru the crack in the bellows and be coming out thru the switch activator lever
Edward Young Retired
After you make that expensive repair and you still have the same problem, What will you check next?

 2
2 -
one for the switch ☹️
0 -
I didn’t go insanely tight but I definitely tightened it. Hope I didn’t warp it. Also hope it’s not the bellows leaking.
0 -
With good lighting and the switch only removed (all 8 screws into the casting still intact) you should be able to determine where the leak is.
National - U.S. Gas Boiler 45+ Years Old
Steam 300 SQ. FT. - EDR 347
One Pipe System0 -
fill the bellows/float with water and let it sit a while and see if it leaks out somewhere
cough safgard
0 -
When I cleaned out my 67 LWCO years 10-ish years ago because it was getting sticky….I too had a leak at the bottom when I put it back together. I just didn't clean it well enough. More wire brushing, scraping, etc until it was super clean fixed it. If it leaked after that I would have used some automotive gasket sealer like Permatex.
Also, now that I add Rectorseal 8-way to my boiler (8oz) and my PH is 10.5-ish, I have almost no corrosion in the boiler anymore, including the LWCO.
Prior to using 8-way the water would look like mud coming out of the LWCO when I did a weekly blow-down, no matter how clear the boiler water was in the site glass or the water coming out of the boiler drain. Now the LWCO drains clean even if it has been sitting for weeks or months.
Among other things, the 8-way raises the PH. Somewhere around 10 or so corrosion is significantly reduced.
1 -
Hey guys. I've been meaning to give an update for a while now. Cleaning it out did the trick. LWCO is working again! No leaks either. Want to say thanks for all the tips and help! Much appreciated!
1 -
Just curious.
So for the cost, time and effort would you recommend it to others that can do the work ?
National - U.S. Gas Boiler 45+ Years Old
Steam 300 SQ. FT. - EDR 347
One Pipe System0 -
Definitely. I had never done it before so I was a little leery of breaking the switch, but I was careful and took my time. All the tips you all sent really gave me confidence to attempt it.
1 -
Cost effective for a HO who can do the work himself.
Not so much for a contractor. Liability, call back if it doesn't work and MM recommends changing after 10 years. A contractor touches it and the boiler fails its not good. Plus do you want to pay a contractor to scrape out an old control thats is over 10 years old.
Two sides to every story and neither one is right or wrong.
 1
1


Categories
- All Categories
- 87.6K THE MAIN WALL
- 3.3K A-C, Heat Pumps & Refrigeration
- 59 Biomass
- 430 Carbon Monoxide Awareness
- 124 Chimneys & Flues
- 2.2K Domestic Hot Water
- 5.9K Gas Heating
- 120 Geothermal
- 168 Indoor-Air Quality
- 3.8K Oil Heating
- 78 Pipe Deterioration
- 1K Plumbing
- 6.6K Radiant Heating
- 394 Solar
- 16K Strictly Steam
- 3.5K Thermostats and Controls
- 56 Water Quality
- 51 Industry Classes
- 50 Job Opportunities
- 18 Recall Announcements