Need some advice for a vintage Peerless radiator valve hookup

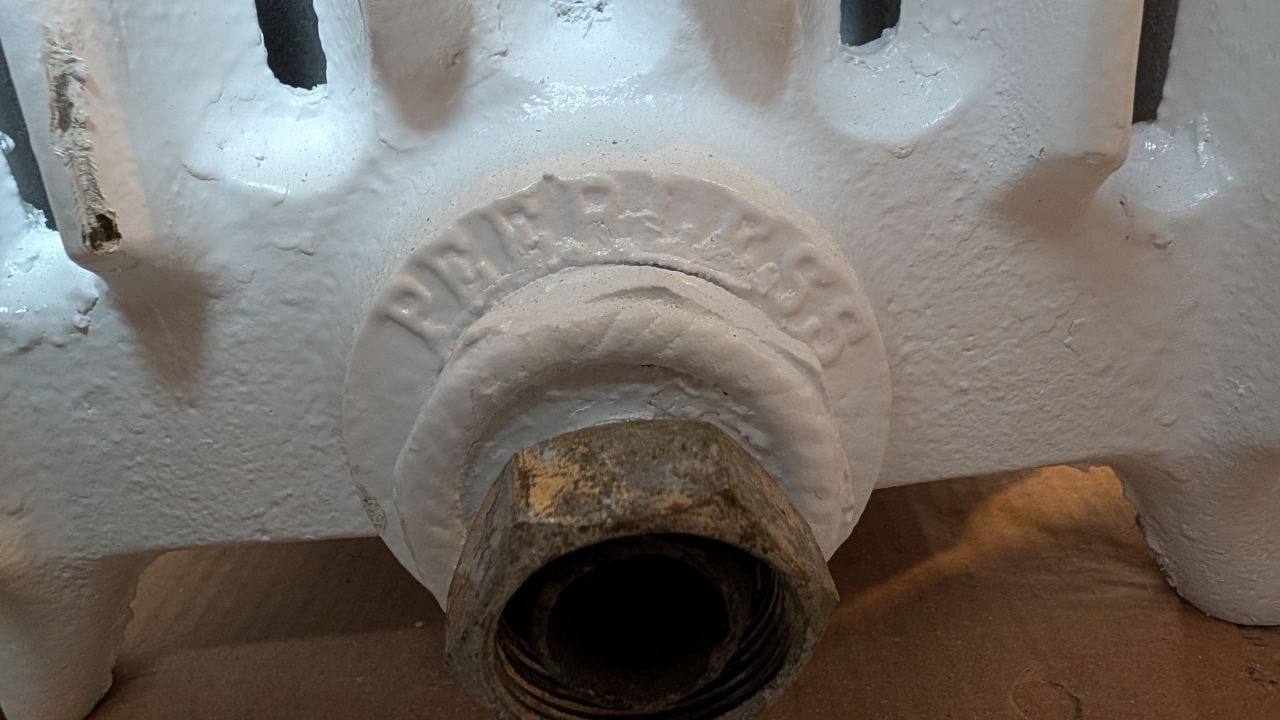
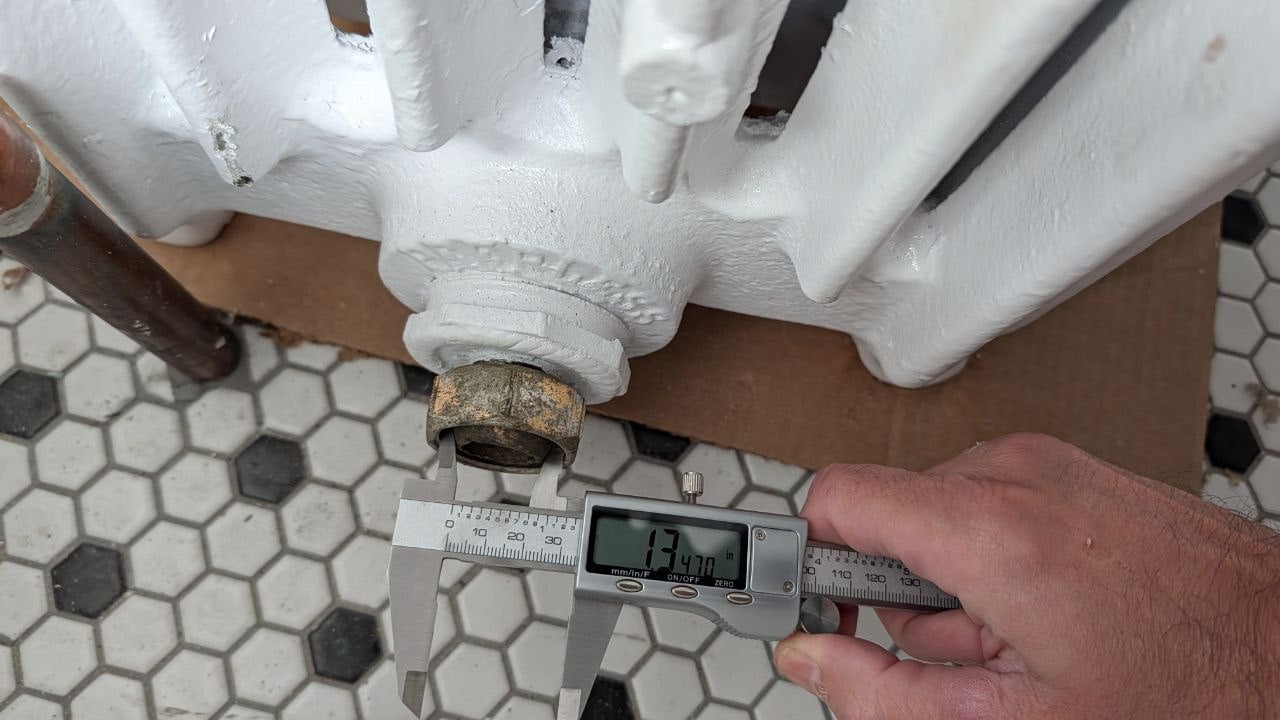
I have a vintage Peerless (American Radiator Company) cast iron radiator that I'm trying to use in a bathroom renovation. My contractor's plumber is unable to to easily remove the old bush ends (he tried heat but didn't want to try too much pressure for fear of breakage), so we're attempting to use the old original pieces. Unfortunately they seem to be about 1-3/8 and he's having a tough time finding applicable bushing adaptors/reducers.
Does anyone here have history with these old beauties and can help point us in the right direction?
Comments
-
You have to remove the spud and replace it with the spud that comes with the new valve. If your plumber doesn't know how to do that without breaking the radiator, find a better plumber.

 4
4 -
Thank you, that was very enlightening. Now I'm questioning if the plumber is simply inexperienced or that it was the spud he had trouble removing when he tried to apply heat.
After watching THIS video from youtube I'm leaning towards him being unfamiliar with what he's doing…
0 -
That brass spud can be carefully cut and caped out. You rarely have to remove them bushing unless you cut too deep in to the thread. As Mattmia said, this is plumbing 101 stuff. Mad Dog
2 -
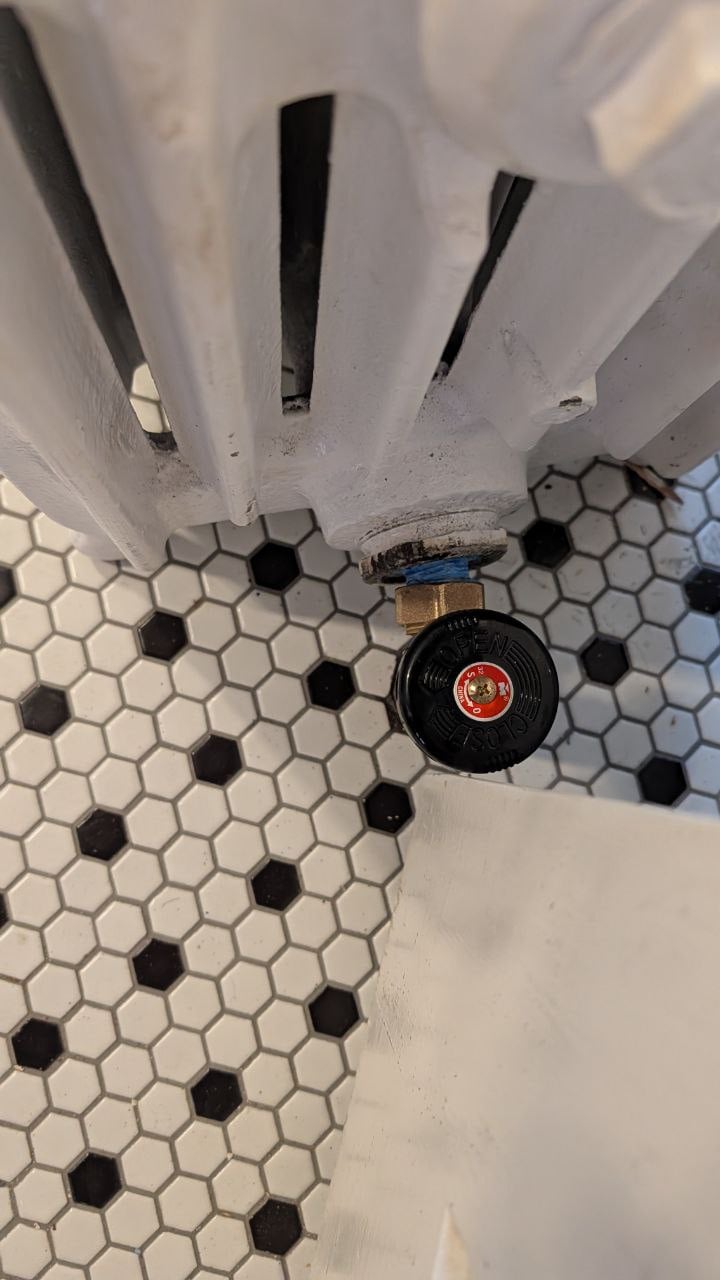
an lesson 2: that spud has to come out anyway, since it is actually half of the union connecting the radiator to the valve. The other half is/was on the valve, which I suspect is long gone. A new radiator valve will have the matching spud with it, and that gets threaded back into the radiator.
Br. Jamie, osb
Building superintendent/caretaker, 7200 sq. ft. historic house museum with dependencies in New England 3
3 -
Saw the nut off the spud by cutting in two places to split the nut. Then put something metal a piece of round stock use threaded rod, a cold chisel handle or whatever you have inside the spud so it doesn't crush with a pipe wrench on it
 2
2 -
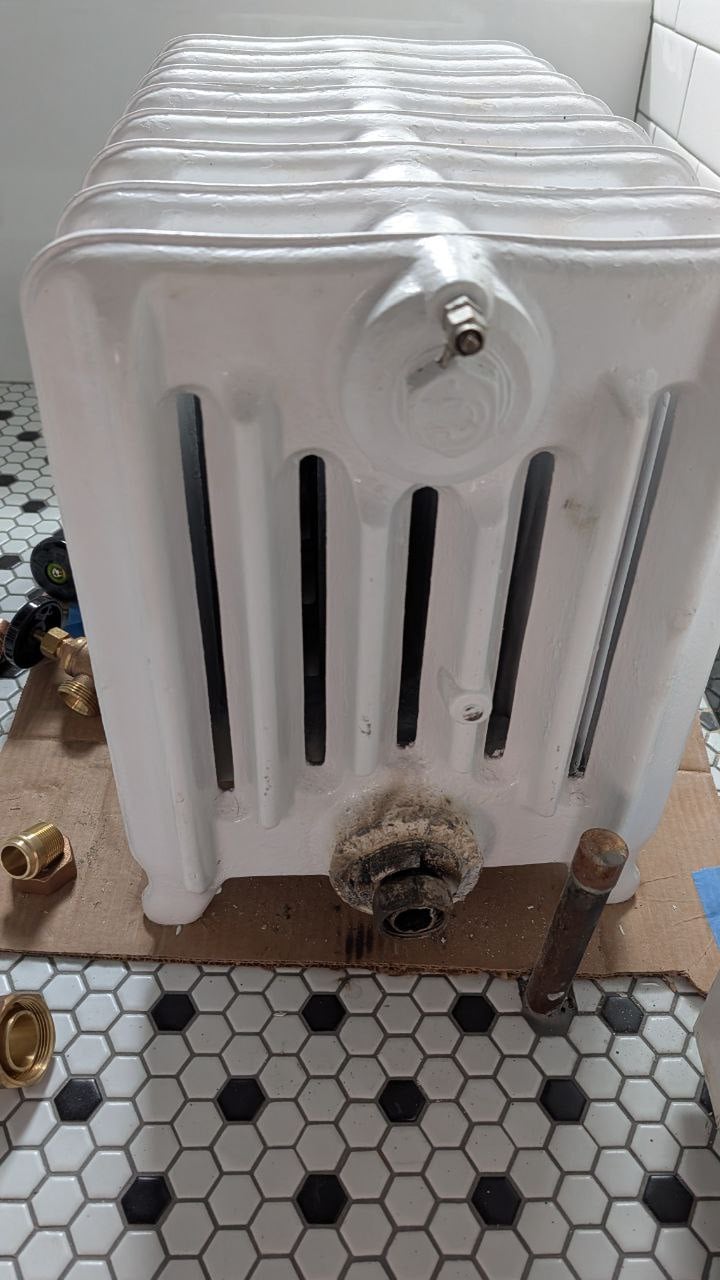
So the saga gets a little weird here, to where the plumber got the spud out and changed everything without an issue, but now the delivered product looks like this:
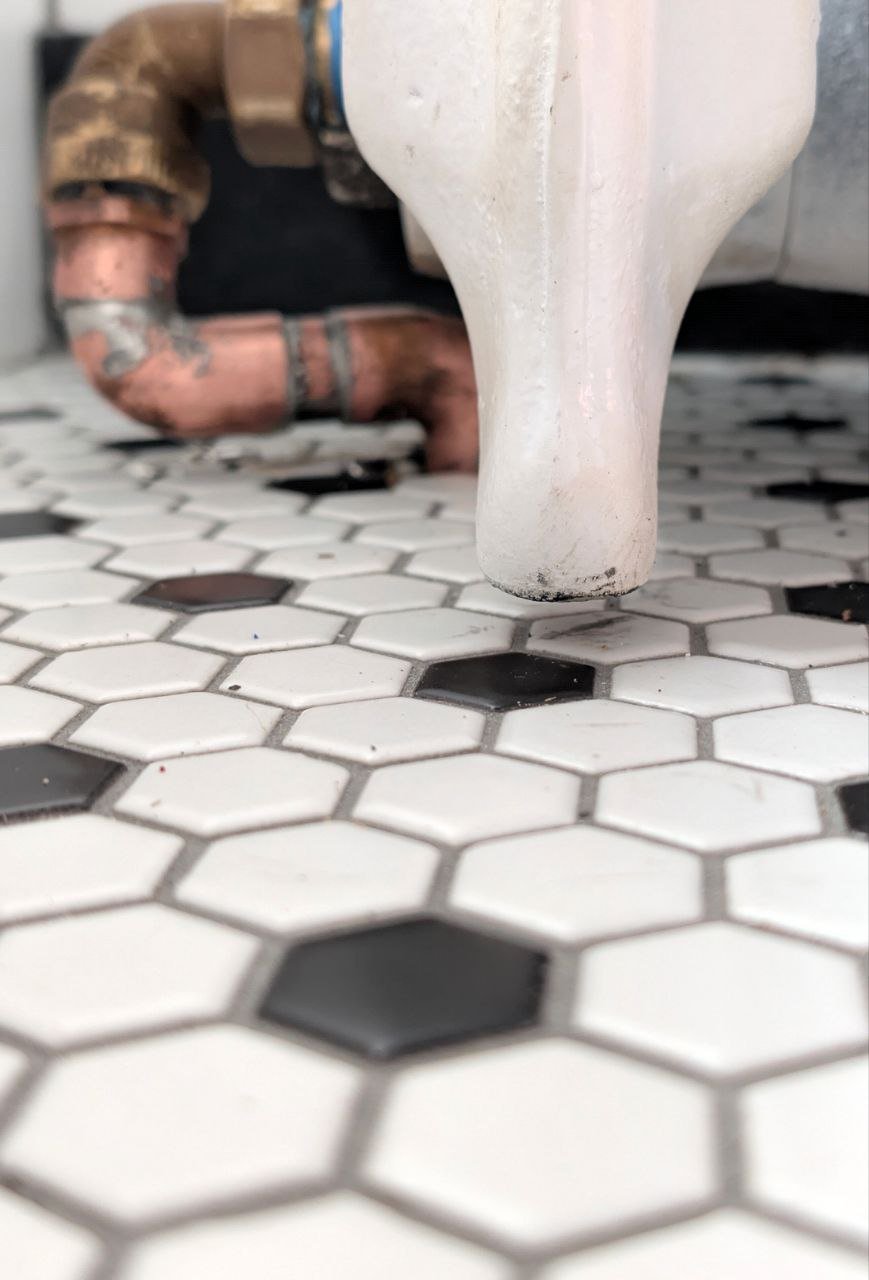

Turns out the plumber said that he had to make the radiator connections too close together because the "pipe threading points" were either where he put them or too far under the tub to where he couldn't make a connection (this entire bathroom was demoed to studs, floor gone but tub kept intact). I don't know what is real here but after he showed his ignorance with the radiator I don't know if he means making the correct radiator spacing was something that can't be done, or something that HE can't do.
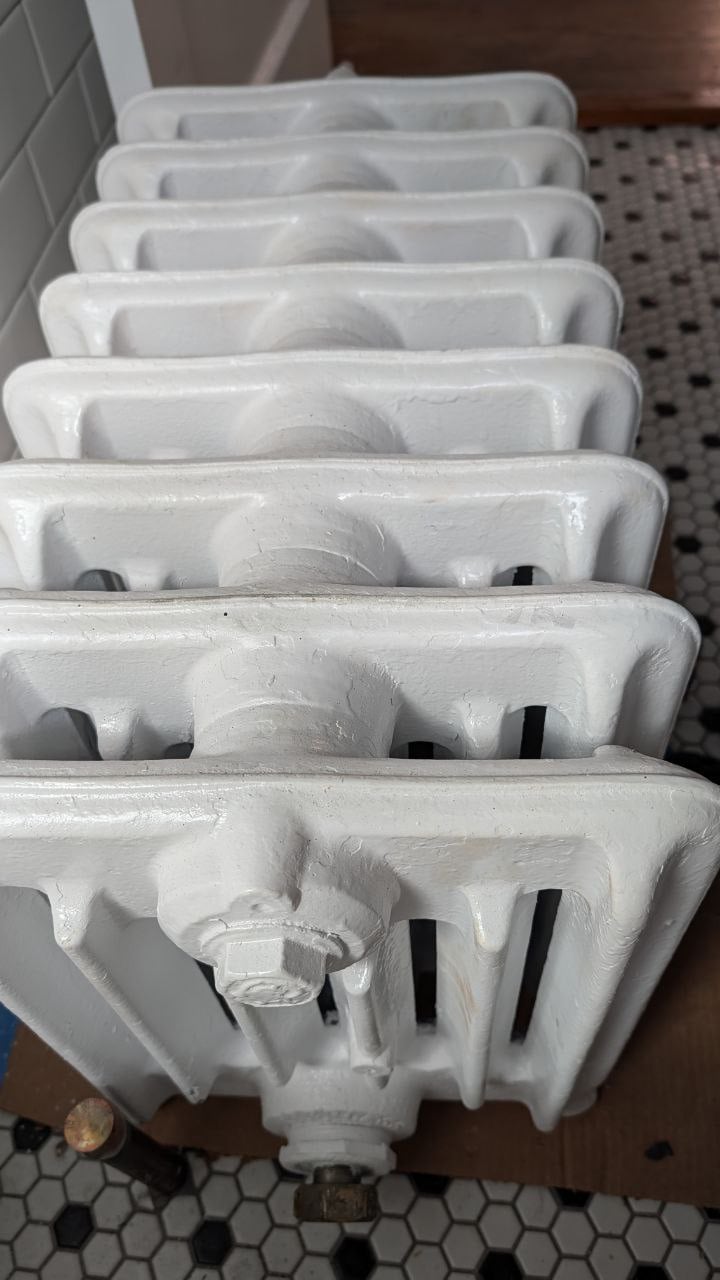
I instructed him to disassemble the radiator and am now in talks with my contractor on whether to rip up the floor to make this right or come at it from the ceiling below.
Is this really this difficult of a situation?
0 -
Did you have the radiator when the pluming in the floor was roughed in?
if so they should have got it to fit the radiator. if there was a joist in the way they could have made the spacing more and use a longer nipple out of the radiator to match the spacing.
that union that is not square to the spud is going to leak, the valve needs to be turned so it is square to the radiator.
shouldn't be levitating on the piping either.
0 -
Sorry that picture is after I had him remove the radiator from his bend solution. I also should have mentioned that the radiator is different than the one that was originally in place before the demo. But yes, the new radiator was onsite and measured before the piping was installed in the floor.
0 -
I've had the suspicion that the plumber simply mismeasured the pipe spacing and the entire spud fiasco was for me to choose a different radiator to install to cover his mistake. What I can't tell is if he's doubling down on that assertion, if being honest that it can't be done, or if he truly doesn't know what he's doing.
0 -
do yo have a picture of the floor when the subfloor was out? it is possible that it would have required some carpentry if there were double or triple joists in just the wrong spot but it probably could have been done pretty easily otherwise. i assume the joists are perpendicular to the radiator?
0 -
Is this first floor or second floor? Shouldn't make any difference if it was gutted. What he should have done was bought the fittings and screw them into the radiator while it was on site and got a center -center measurement. 2d best would be to put the supply and return a little farther apart…to close and you end up with what you got. If there is a joist in the way you make the supply and return farther apart
1 -
5th pic from the top is the radiator leg off the floor like it looks like it is or is that an optical illusion?
Looks like the pipe is holding the radiator up in the air,
1 -
Radiator leg was indeed almost a cm off the floor! The joists do run perpendicular but the issue definitely wasn't carpentry. He's stating that there were two "thread points", one under the tub by the wall and the other where he placed the (curved) outlet, and he couldn't adjust spacing due to these inherent constraints. It sounds ridiculous to me especially since this problem was not brought to my attention beforehand.
0 -
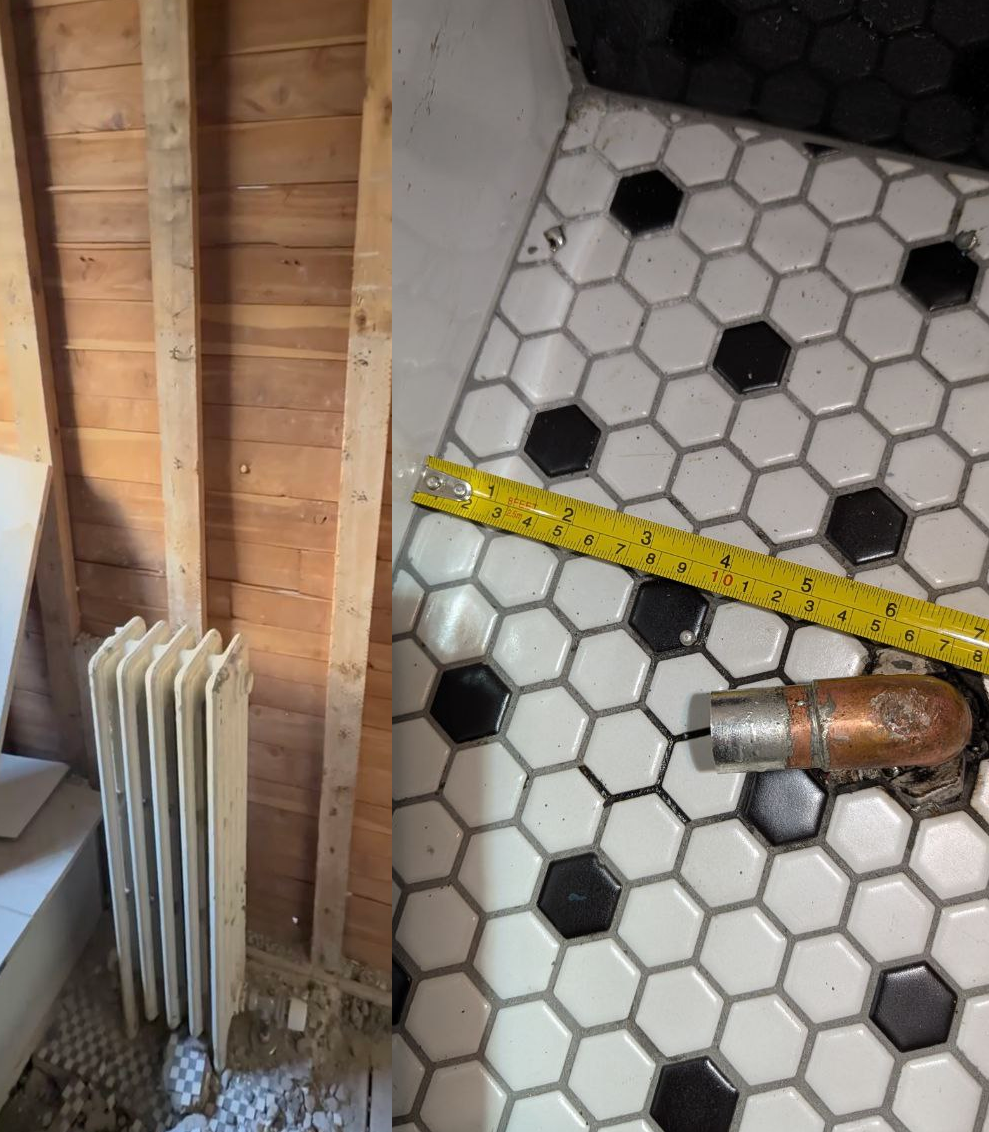
Well I think I have my answer after looking through the before pics. The old radiator outlet was clearly only 3-4" from the tub so the "thread point" seems not correct…
Is it considered difficult for an experienced plumber to make a new joint along a line of pipe? Is there anything to his assertion of reusing an older threaded junction?
0 -
With hot water any half way decent plumber could offset it below the floor to line up. If it is covered in asbestos some of that might need to be removed. If it wee steam it could be more complicated but hot water will go wherever the pipe is.
1 -
Would it make any difference of the old piping material? This is original vintage 1926
0 -
IMHO if the new radiator was on site for measurements and he was allowed to open up the floor to alter the pipe connections then he has no excuse for not making it right.
1


Categories
- All Categories
- 87.6K THE MAIN WALL
- 3.3K A-C, Heat Pumps & Refrigeration
- 59 Biomass
- 429 Carbon Monoxide Awareness
- 124 Chimneys & Flues
- 2.2K Domestic Hot Water
- 5.9K Gas Heating
- 119 Geothermal
- 168 Indoor-Air Quality
- 3.8K Oil Heating
- 78 Pipe Deterioration
- 1K Plumbing
- 6.6K Radiant Heating
- 394 Solar
- 16K Strictly Steam
- 3.5K Thermostats and Controls
- 56 Water Quality
- 51 Industry Classes
- 50 Job Opportunities
- 18 Recall Announcements