Welcome! Here are the website rules, as well as some tips for using this forum.
Need to contact us? Visit https://heatinghelp.com/contact-us/.
Click here to Find a Contractor in your area.
If our community has helped you, please consider making a contribution to support this website. Thanks!
Extruded (C) Heat Transfer Plates Under Shiplap?
Options

Marvin007
Member Posts: 52
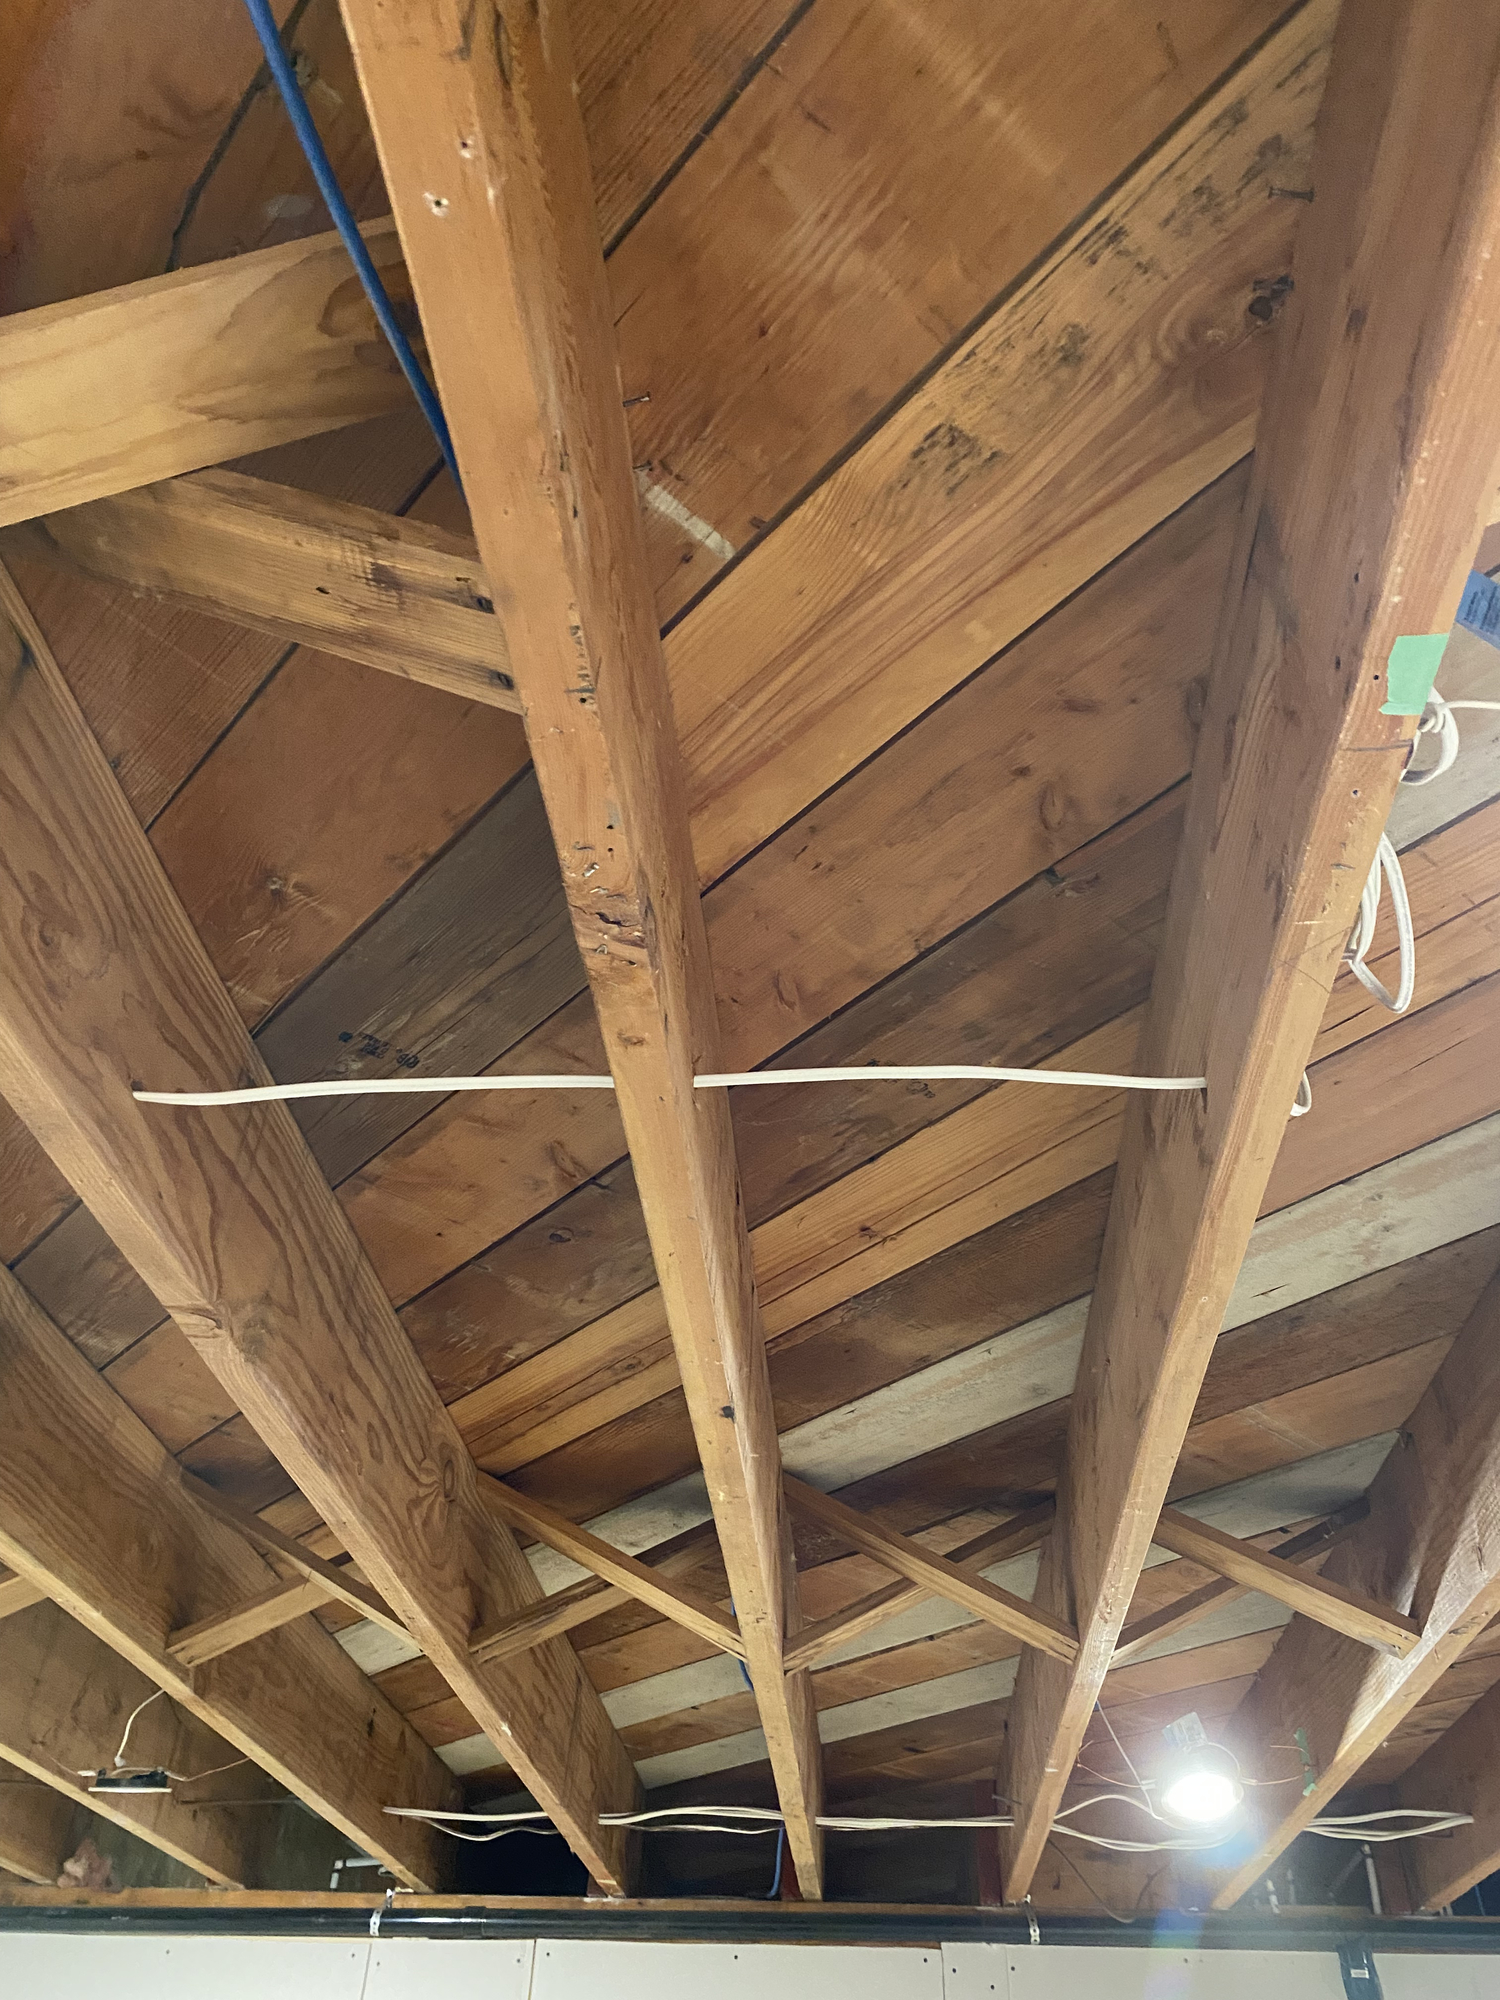
Does anyone have any first hand experience installing and using Extruded Aluminum Thermofin C or Uponor Joist Track under shiplap subfloors?
Since the boards are running diagonal they are not all equally level and the extruded heat transfer plate will not fully contract all boards above it. This will prevent the heat from easily entering those boards in the subfloor.
Has anyone done this? If so how did your system perform? Did the floor still heat up like other between joist OSB subfloor installs?
I thought about adding silicone between the board and the transfer plates but that would not be cheap and as it transferred the heat over time it would just dry up.
I thought about adding silicone between the board and the transfer plates but that would not be cheap and as it transferred the heat over time it would just dry up.
0
Comments
-
Those pictures look so familiar. I did exactly this in a converted "cure porch". (google cure cottage porches Saranac Lake.) It's now used as a sleeping porch and the bed has a heated mattress pad. The sliding windows had been replaced with themo pane windows and walls have blown in cellulose. The floors were ice cold in winter and now they are warm. It heats to 68 down to 10F, drops to 60f when it gets 20 below, but there is a lot of heat loss. My philosophy on infloor heat is I will go through the work to have warm floors even if I need to supplement with panel radiators. In this case the family member using the room didn't want a panel radiator.
My subfloor wasn't terribly uneven. I just screwed both sides of the plates into each and every board. I didn't want to remove the cross bracing so I tucked the plates as close as I could. I didn't use silicone, and insulated underneath with. bubble aluminum insulation that comes in rolls. The biggest pain was that the oak hardwood flooring nails protruded everywhere. I cut them flush with an abrasive wheel and used a pump sprayer to wet the area because sparks were flying. I used 1/2" uponor heat pex and a track similar to theirs. I glad I did it and I'm happy with the end product. Just as important my wife is happy with it.-1 -
Is there another floor above that? My brother in law had a home with diagonal plank with oak hardwood over it. He did a rubber tube staple up, running 140 f
The asphalt felt paper started to out gas.
So he left for a weekend, cranked it to 160 and the smell went away? Lived there for 15 years.
The amount of wood above the tube and the heatload will determine how well it heats, but fastening to that plank should not be a problem.
A cordless die grinder works well on nails also.Bob "hot rod" Rohr
trainer for Caleffi NA
Living the hydronic dream0 -
Here is a Picture of where the vinyl top floor is in the living room + bedrooms.hot_rod said:Is there another floor above that? My brother in law had a home with diagonal plank with oak hardwood over it. He did a rubber tube staple up, running 140 f The asphalt felt paper started to out gas. So he left for a weekend, cranked it to 160 and the smell went away? Lived there for 15 years. The amount of wood above the tube and the heatload will determine how well it heats, but fastening to that plank should not be a problem. A cordless die grinder works well on nails also.
There are a lot of double pane windows but I have supplemental heat (2x 30000 btu fireplaces with blowers 1 upstairs 1 downstairs, electric baseboards in the bedrooms). It only drops to -4C usually a few weeks every winter at night. So do I need radiant floors to heat the house…no. I just want warm floors under my feet and I don’t want to use electricity because it’s more money than gas here.
The tiled areas have 3/4” shiplap + 5/8” plywood + Ditra mat 1/8” + thinset + 1/4” porcelain tile.
Here is a pic of the living room floor. 0
0 -
That's a thick floor. Unless you insulate well you will have more heat radiate below than above. A layer of reflective material just below the pipe will bounce infrared heat rays upstairs where you want it, and additional fiberglass or board insulation with keep the warm air in.
As you said, you are looking for warm floors. There's nothing like it for comfort and reducing drafts but it's expensive.
0 -
3/4 softwood R.8, 5/8 softwood .7, pad .2, maybe .2 in the tile so R 1.9. About the same as 1/2" carpet with 1/4 rubber pad.
That is a lot to drive the heat through.
You want at least 10 times that R value for insulation below. Batts are fine, aluminum layers dust over and don't add much reflectivity. It comes down to what output you are expecting.
Maybe check the Uponor design guide for output and supply temperatures with that floor build up.
That foam layer may have the lowest temperature rating? See if there is a spec on that. It could be the limiting factor on temperature, and floor output.
Lots of different opinions on how warm structural wood products can handle on a continuous basis.
I'm guessing 10- 15 btu/ sq ft output. May be enough for some floor warming effect, or low load heating days.Bob "hot rod" Rohr
trainer for Caleffi NA
Living the hydronic dream0 -
R1.9 x 10 = R19hot_rod said:3/4 softwood R.8, 5/8 softwood .7, pad .2, maybe .2 in the tile so R 1.9. About the same as 1/2" carpet with 1/4 rubber pad.
So an aluminum bubble foil and R20 Bat below the joist trak with 5/8” fireproof drywall on the ceiling below should push the heat up. through the floor above?
I will have to insulate the ceiling (joist trak area) with bat for sound proofing anyways because there will be a suite below.My main concern is heating the floor above and not cooking the person out of the suite in the basement below.
The foam under the vinyl floor can be removed in the future when I put new vinyl down. I would think the new vinyl would probably be thinner than what is currently there.0 -
Certainly no harm in going with a 6” batt for more r-value
I learned the best way to lessen sound transfer is to hang the Sheetrock on sound channels instead of directly to the joist. That breaks the acoustic transfer better then just fiberglass batts or even sound deadening battsBob "hot rod" Rohr
trainer for Caleffi NA
Living the hydronic dream0 -
Another way is different materials, 1/2" Homasote then 5/8" sheetrock slows the sound transfer.hot_rod said:Certainly no harm in going with a 6” batt for more r-value
I learned the best way to lessen sound transfer is to hang the Sheetrock on sound channels instead of directly to the joist. That breaks the acoustic transfer better then just fiberglass batts or even sound deadening batts0 -
How much space is required between the end of a joist channel cavity and the first joist trak panel?
 How much space is required between each joist trak panel length when they are place in a line to accommodate for expansion?
 0
0 -
.0
-
I always kept the plates 12" from the outside wall and a loop just long enough so it came out of the track straight 6-8". I have also seen the plates to within 6" of the end of the bay, and the tube pulled out of it to make the loop. Seems like a waste of 6" or so of aluminum
")
Just a few inches between the ends. You want as much plate against the floor so the floor temperature is even. Probably not worth moving those. If you have any 12" cutoffs, slip them in.
The main point is that you do not fasten that loop end so it can squirm a bit. It the tube is a drive fit in the plates it doesn't move laterally.. The thin plates can squeak and pop because the tube moves in the groove.
Nice install!Bob "hot rod" Rohr
trainer for Caleffi NA
Living the hydronic dream0 -
The above pics were from the uponor install guide.
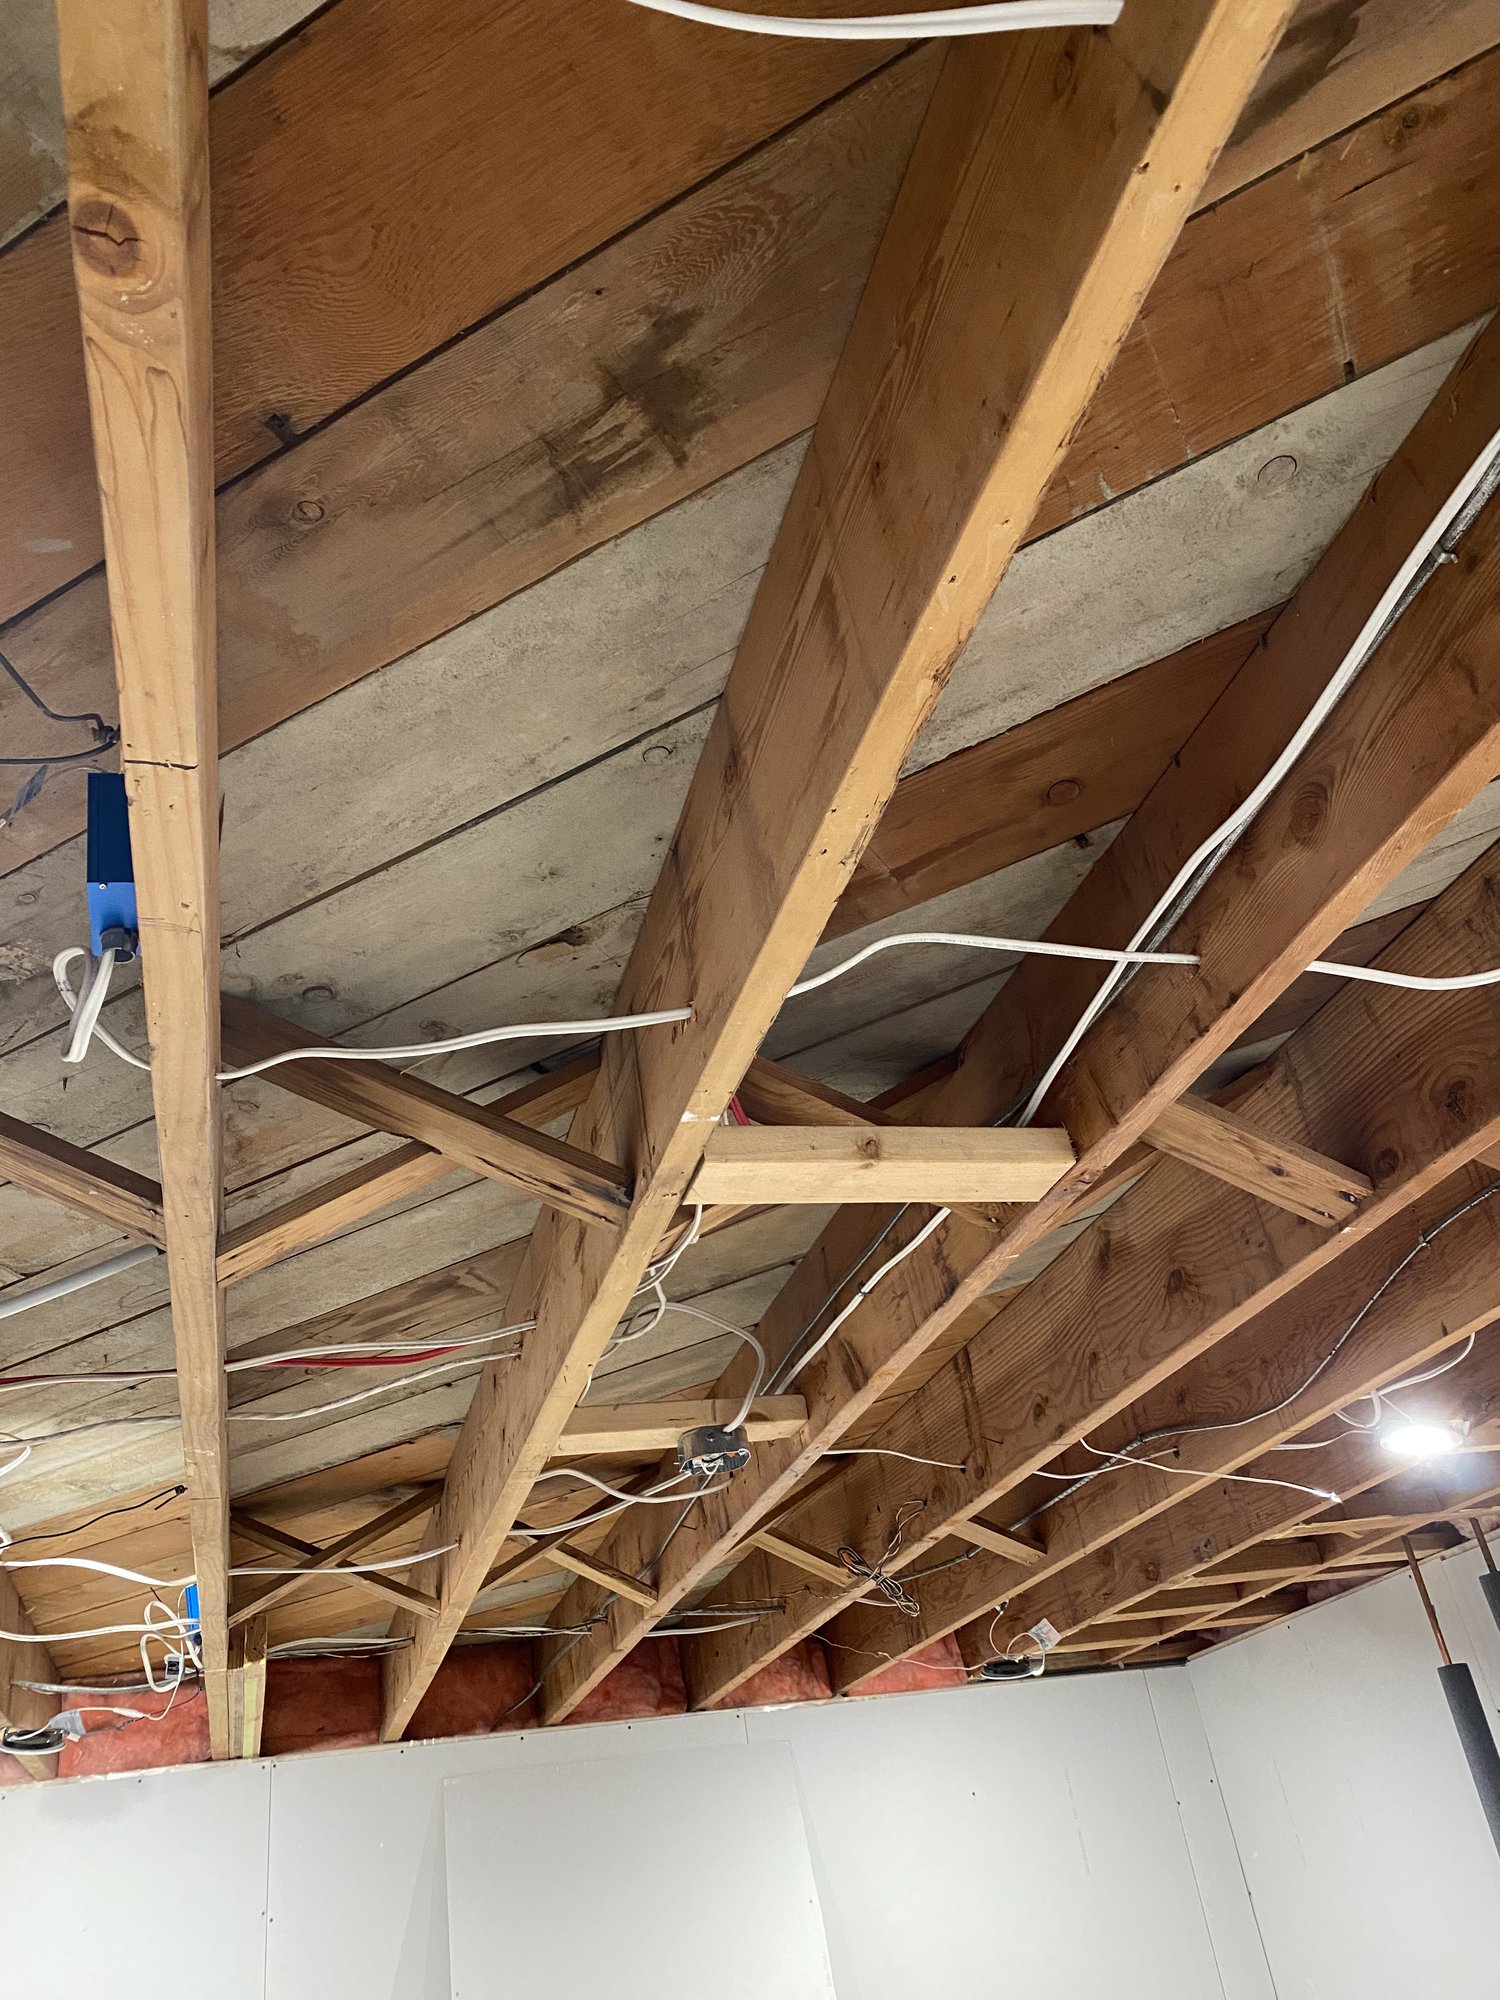
Here are my test install pics.
What is the minimum gap space if any between the next joist trak sections and these ones?

0 -
Just enough space so the cannot touch, I suppose. Make a T handle gauge to tap into the slot to keep the ends perfectly aligned. 3 pieces of 1/2 copper tube soldered into a tee works nicely
T he tee becomes the end gap gauge😁Bob "hot rod" Rohr
trainer for Caleffi NA
Living the hydronic dream1 -
The Uponor extruded plates work fine under shiplap. Mine was very uneven. First, I ground off all the nails that protruded below the shiplap, then I used 3/4" zinc-coated self-drilling screws to hold the plates tight to the shiplap. These screws could penetrate the aluminum plates wherever needed (not just at the holes) to ensure a tight fit. My system works exactly as designed, so there was no degradation due to the unevenness of the shiplap.1
-
How does my first loop look? Did I leave enough room for the end loops? I left about 1-1/2” - 2” of space to the end of the joist bay between the was and tip of loop.
The gaps where the joist trak is missing is where the counters in the kitchen above are located.
I have deburred and sanded the sharp edges of the ends of each joist track piece.


0 -
That should work. The loop ends are a bit close to the rim, no need to be under the wall plate. 6- 8" shy of the rim is a safe distance, and allows for a good insulation detail between tube and outside rim.
I would spray foam those rim joist areas to prevent any infiltration from getting to the tube and possibly freeze.
You worked around a lot of obstacles, nice job.Bob "hot rod" Rohr
trainer for Caleffi NA
Living the hydronic dream0 -
If it’s too close I will fix it. The first one is always the trial one. I don’t want to do the rest of my loops incorrectly if this one is not correct. My loop is not under the wall upstairs. I know this because I installed a plug upstairs before I had the floor tiled. See below.I was concerned about having cold spots around the outside of my kitchen floor.So I have only given 2” of space between the rim of the pex and wall plate. Would you increase this to 6-8” based on what you see below?

 0
0 -
I wouldn't pull down what you have if you can get 2" (r-10) or more insulation in there. Hard to tell from the pic what that dimension is.
Going forward, maybe hold them back enough to get 6" of insulation between the loop end and rim or end joist. The rim, band, or whatever you call it, is your highest heatloss, as you only have an 1-1/2" or so between conditioned space and outdoor temperature.
In some cases there are two joist on an outside wall detail, so it may be deceiving where the actual outside joist is, in pics. The way that ABS goes into the wall seems to indicate that also.Bob "hot rod" Rohr
trainer for Caleffi NA
Living the hydronic dream 1
1 -
“Going forward, maybe hold them back enough to get 6" of insulation between the loop end and rim or end joist. The rim, band, or whatever you call it, is your highest heatloss, as you only have an 1-1/2" or so between conditioned space and outdoor temperature.”
I made a mistake. I referred to the rim as wall plate.
Good point about the insulation needing to be enough at the ends so the heat does not leak out there approx 6” = r 20 . I definitely just learned something. I understand now.0 -
What is the easiest way to deburr/sand the inner pipe channel on the joist trak panels?I have been using a plumbing deburring tool and emery cloth sanding by hand. It’s taking a reading long time I’ve done about 65 of around 275 panels.
Other tools I have tried:
1. Disc grinder but it seemed too big.
2. Hand dremel see pic for the tip I tried. Seemed slow and harder than using emery cloth/deburring tool.

 Other bits dremel bits I have:
 0
0 -
One of those steeped type unibits or an umbrella reamer. A tapered punch would work also drive it down from the top, just flare the end. Maybe a wack with a ball peel hammer🤭
This is a size too big, but it shows the conceptBob "hot rod" Rohr
trainer for Caleffi NA
Living the hydronic dream0 -
You worked around a lot of obstacles, nice job.
Thanks, this project has got a lot easier with everyones help on here and a bunch of research. There are so many obstacles in the ceiling/floor. I’m glad I didn’t get hung up going through the joists on the first loop.0 -
In the last picture of your "wall plate" detail, what is that 1/2" blue pex pipe that disappears with the armoured electrical cable into the rim joist region? Once that region is insulated, will that not be at some risk of freezing--especially if that is an outside rim joist?0
-
The blue thing is a blue ethernet cable not pex.0
-
Good. Thanks for the explanation.1


Categories
- All Categories
- 87.7K THE MAIN WALL
- 3.3K A-C, Heat Pumps & Refrigeration
- 59 Biomass
- 430 Carbon Monoxide Awareness
- 127 Chimneys & Flues
- 2.2K Domestic Hot Water
- 5.9K Gas Heating
- 121 Geothermal
- 170 Indoor-Air Quality
- 3.8K Oil Heating
- 79 Pipe Deterioration
- 1K Plumbing
- 6.6K Radiant Heating
- 396 Solar
- 16K Strictly Steam
- 3.5K Thermostats and Controls
- 56 Water Quality
- 51 Industry Classes
- 51 Job Opportunities
- 17 Recall Announcements