Interior storm windows - anyone have experience with these to improve heating system?

Aside from not being able to afford replacement windows, in reading about historical homes, there is an overwhelming sentiment to not replace the windows but use interior storms. I have found at least a half dozen companies selling these with different mounts and materials. The companies I am leaning towards are advanced window panels, indow, Larson, and innerglass. The material range from plastic polyolefin to acrylic to low e glass. There are also window saver kits where you can make your own interior storms using plexiglass at a much lower cost than buying windows. Lots of options.
Any guidance on how to decide what to use would be appreciated. Again main issue is to keep my heat in and prevent cold air infiltration from outside.
Josie
Comments
-
Hi josieT.I personally think you are making the right decision here.I am going to call a carpenter I know and ask him for recommendations for you.
 1
1 -
I second Jonny99 here. And might add that those old metal frame casements are indeed horrendous -- never seen one that didn't leak air, and the metal frame. But the inner storms are all good -- but some are quite expensive. I hope Jonny88 comes up with something, and when I see my carpenter I'll ask him as well.Br. Jamie, osb
Building superintendent/caretaker, 7200 sq. ft. historic house museum with dependencies in New England1 -
Hi again. I'm away for the weekend, but will send pics and instructions when I'm home. I would stick with plexiglass as opposed to glass: lighter, easier to remove and protects fabric. Are you at all handy? I have followed two methods: one is sandwiching between two pieces of wood, in the other the plexi slips into a channel that has caulk. Both work well, but the former is easier. The main thing is finding the best gasket. I used what I had which was stick-on. I'd suggest gluing it; I have some good references for that ie trim-loc .
With metal windows you might also experiment with magnetic stripping. I'm rambling.
Please check out oldhouseguy.com.Two-pipe Trane vaporvacuum system; 1466 edr
Twinned, staged Slantfin TR50s piped into 4" header with Riello G400 burners; 240K lead, 200K lag Btus. Controlled by Taco Relay and Honeywell RTH6580WF1 -
Steel casements can be very effectively weatherized. They're horrifying in their leaky state. I used to refer to them as "outdoorsy." Before the thermal upgrades, I never had to look at a thermometer to see how to dress on winter mornings. I learned all I needed to know just by opening the blind.
The first priority is the leakage/infiltration.
Formed in place gaskets can be made with a tube of silicone caulk and cheap clear packing tape. I will try to find the link to a UK website that lays out this simple process. It was one of those things where I said to myself, "Why didn't I think of this?" Anyway, it involves using the tape temporarily applied to the inside surface perimeter of the "opener" and applying a small bead of silicone caulk on the fixed part of the frame where the window closure surfaces meet. You close the window against the caulk bead and it squeezes the caulk into shape. You let this cure for 24 hours and then, with a razor, cut any caulk squeezed out of the gap. The caulk won't stick to the shiny tape, so with a little pressure, the window will pop open. Peel away the tape and voila! You have a form fitted, tight silicone gasket seal that does not interfere in any way with the operation of the window.
I will attest that the leakage is solved and the windows now seal out outside noise extremely well. In a pinch, rope caulk is available in white and brown for use on sealing windows that you have no intention of opening (and are probable painted in place anyway). Use a putty knife to smooth. [Windows painted closed can be restored to proper operation but involves selective violence!]
I fully concur with the recommendation of acrylic for the interior storms. I use a good acrylic polish on them since it makes them easy to clean with nothing but water and a soft cloth, protects from scratching and improves UV blocking.
Acrylic also has meaningful Low E properties. Now, you will be told that acrylic has no such property. My experience with them tells me they do. If you go to the physical characteristics published by manufacturers, you'll find that at the infrared wavelengths we're actually concerned about, like body temperature and room temperature, acrylic sheet has a nice peak in infrared reflecting ability. And that's on a perpendicular axis. Off axis, the Low E properties are particularly high. You will feel this effect immediately.
Also address anything that interferes with proper closure like warped locking hardware or stiff hinges and in particular, lubricate all hinges and pivot points. The popular Big Box Store water displacement spray won't cut it with these windows. A siliconized or teflon oil is what I use and recommend.
I have had full coverage interior storms on half of the windows for over 20 years with no signs of yellowing. For the other half, about 5 years ago I had acrylic cut to the "module" of the window, so that I could attach them directly to the frame with some neodymium magnets I got from K&J magnetics. The interior surface is nearly all isolated in frameless acrylic. I leave all but the one section where the screen goes in place all year. For the moment, (decade?) there's no appreciable air gap on these until I get around to applying the square piping around their inside perimeters, but they form a good thermal break against the metal just the way they are. They're virtually invisible and low maintenance. There's no frame to make. The window sill is unobstructed. The ease of this approach depends on the locking hardware design.
I'll shoot some cell phone pics of mine.
.
Regardless, even the ones that don't have much of a gap, the difference is night and day. On -11 degree nights, the 1990 vintage wood double pane low E windows in the back room aren't strikingly superior in comfort to the steel originals as they once were. Even in high winds we're draft free. And that's saying a lot.
Terry T
steam; proportioned minitube; trapless; jet pump return; vac vent. New Yorker CGS30C
0 -
Here's a couple photos I have of the kitchen window that's not gasketed but has the rope caulk. Haven't done the spring window wash yet, so this is what it looks like in real life.
Edit: Note that this window actually has the frameless acrylic storm panels installed. Look closely for the small round magnets. This arrangement is more effective than I would have thought.

Terry T
steam; proportioned minitube; trapless; jet pump return; vac vent. New Yorker CGS30C
0 -
Those are wonderful instructions. Mine are double-hung so cant' easily use the magnet. I've found the seal'n'peel to be an excellent productfor caulking that comes away fairly easily and causes no harm to paint work; it neither yellows, nor leaves a residue. It's meant for yearly application, but can last a few years, ime.Two-pipe Trane vaporvacuum system; 1466 edr
Twinned, staged Slantfin TR50s piped into 4" header with Riello G400 burners; 240K lead, 200K lag Btus. Controlled by Taco Relay and Honeywell RTH6580WF1 -
I used to live in a 1929 vintage Tudor with steel casements, so I understand your pain.
Before you do anything else, you need to carefully examine the sealing surfaces of your windows, as well as the handles. The windows will seal tightly if everything is in great shape, but almost a century on, this may not be the case. Painters tend to gum up the sealing surfaces. You may have to go over the edges with stripper before they are right. When you paint these windows, refrain from painting the edges. The handles are designed to wedge the windows tightly closed...if they've worn, you will need to get creative, possibly removing them and shaving some material from the hub to get the lock to wedge. Finally, examine the caulking around the glass. Old fashioned linseed oil caulk tends to shrink and crack, and you may have leakage around the panes...I had to recaulk 100 panes to seal mine.
An inside window will do exactly nothing unless you get the primary windows to seal. I didn't like the look of inside windows, so I engineered a light plexiglass outside storm window. Getting it to seal around the hinges was a big problem, and they were a pain to install and remove. You're not going to turn these into pressurized double pane windows, so you need to get behind the storms to clean. If both inner and outer windows aren't sealed tightly, you will have condensation which not only is unsightly, it will ruin your steel windows. After seventeen years of experimentation, I finally decided to get the primary windows to seal as tightly as possible, and disposed of the storms.
When your house was designed, it probably had huge cast iron radiators directly below each window. The thinking in 1929 was that the radiator provided a "heat curtain" in front of each window. Over the years, people modify these houses and install all sorts of heating appliances in order to recover the space of the radiators. But nothing works as well.1 -
Yes, vaporvac, the double hungs are different. I had forgotten about that tape. Always a good thing to have on hand.
Mxfrank, I totally concur with the need to get the window to operate absolutely correctly before doing anything else. I did the same. That's how we got by so many years without storms on half the windows. Also, the steam radiator air curtain works if allowed to, as you know. I watch it in action at an old factory where I handle the steam heat. Gigantic steel windows with gale force winter winds off Lake Erie and we're in splendid comfort. Put your hand within a foot of the window and you'll feel the bitter cold air locked in place there. And the building is extremely economical to heat. I plan to do a post about the heating restoration since fuel consumption is now very good, with only restoration and tight tuning of steam system and without any deep energy retrofits.
BTW, the photos above are actually showing the window with the directly attached storms installed, if one looks closely. And the snow is on the OUTside of the window!Terry T
steam; proportioned minitube; trapless; jet pump return; vac vent. New Yorker CGS30C
0 -
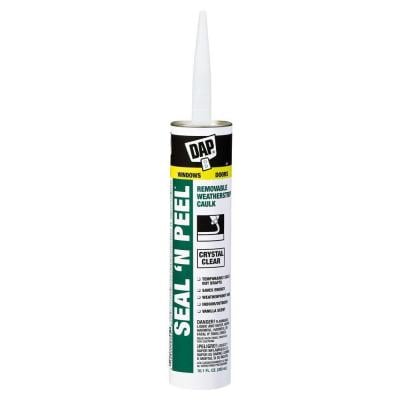
@ttekushan, just to clarify in case anyone tries to find it, the seal'n'peell isn't a tape, but a silicon caulk made by DAP. Lowe's and HD sell it: http://www.homedepot.com/p/DAP-Seal-N-Peel-10-1-oz-Removable-Weatherstrip-Caulk-18351/100140056.
I hadn't heard of the wall-of-heat before, but I can understand how that would work if the heat is generally on. Thanks for that insight. In my solariums, the windows extend around the room so it really needs something or I can't use them in the winter at all.
Condensation has not been a problem for my interiors, although they are VERY tight. Mine have an actual wooden frame with gasketing. On the next lot I make I need to put a pull tab at the bottom because they are HARD to remove they fit that tight.
I think exterior storms should have what's call a "weep hole+ to prevent condensation.
I do like the look of the metal windows with their hardware. One doesn't really notice the interiors with the double-hungs. I have many windows that are inward opening wooden casements and I had to build out a small rebate to wedge the IStorms against yet stand proud of the hardware. definitely more work, but worth it in comfort fo me, anyway.Two-pipe Trane vaporvacuum system; 1466 edr
Twinned, staged Slantfin TR50s piped into 4" header with Riello G400 burners; 240K lead, 200K lag Btus. Controlled by Taco Relay and Honeywell RTH6580WF1 -
Allow me to direct you to a window hardware website. http://www.blainewindow.com/
They had a crank assembly for my 1952 casements.
Agree with comments on getting windows back into operating condition. It's doable with some tedious time, but worth it. Spend the money saved on plexiglas interior storms, and direct funds to quality cellular window treatments. They make a huge difference in winter, and summer far more than interior storms in r value. Get bottom up, and top down operating.
 3
3 -
Thanks for the heads up on the seal 'n peel. I'm unfamiliar with it and will give it a try. It looks like a great solution in some difficult situations.
Gordy, that's a terrific link. I've never seen such a huge variety of casement hardware in one place. Thanks!
I certainly hope josieT has enough information to segue from steel casement blues to steel casement glow. :-)Terry T
steam; proportioned minitube; trapless; jet pump return; vac vent. New Yorker CGS30C
0 -
Hi Everyone, Many thanks for the comments. I've attached some pictures to give more information.
pic 1 is a large stained glass window giving me the most problems due to the solder coming apart from the glass on all the grids.
pic2 - bubble in the plastic that I had installed around the window (on a not so particularly windy day. So this is a mild day. A windy day you get a balloon).
pic 3 condensation on one of the windows despite taping up the grid with masking tape. Tape was very adhesive.
pic 4: another window showing the masking tape grid that I had to put up. This or boarding up the window with styrofoam is how i got through winter.
I am not handy person. So I will have to get help on any major work. I've talked to Seekircher steel windows who recommended repairing the windows to open and close properly to reduce the air infiltration. This isn't cheap for 32 windows. It appears the grids are also a problem for air leakage. In one of pictures, you can see how the plastic bubbles up. On a windy day it's massive. I tried to seal up the grid lines and edges with masking tape that you can see in the pictures. I also paneled up the window with styrofoam . But it looks atrocious.
From the comments, it seems there is concern with storm windows due to condensation.Condensation is a problem for me. You might be able to see on the pictures the water accumulation btween the plastic and window after a recent rain storm.
If there's any additional information that anyone has, I would appreciate it.0 -
I have a very large 100yr old house and can sympathize. I couldn't possibly do everything at once so I prioritized the most important ones and set up a sinking fund to do something every year, for me mainly roof work Perhaps you could afford to get the worst ones fixed and save up for the rest. My interior storms don't have much condensation...I'm guessing your is coming through the panes themselves so that need to be fixed first. I think @ttekushan's magnetic stripping in conjuction with the silicon sealing procedure he outlined might work well in this situation. I believe that's something even a non-handy person should be able to do. Where do you live? That's a lovely house and well worth fixing.Two-pipe Trane vaporvacuum system; 1466 edr
Twinned, staged Slantfin TR50s piped into 4" header with Riello G400 burners; 240K lead, 200K lag Btus. Controlled by Taco Relay and Honeywell RTH6580WF0 -
Hi. Two things.
Thing One, that fabulous leaded glass is exhibiting a typical problem in freezing climates, metal frame or wood. You need a stained glass specialist for that. I know my local stain glass people, and depending on your location there are usually a few to choose from.
BTW, the Seekircher people are great. They work with a local contractor to do final finishing work. They don't do storms probably for reasons innumerated in other posts. Which takes us to. . .
Thing Two, moisture. Moisture usually comes from inside the house. Without a hermetic seal, you really want the inner window to be tighter than the outer one. Otherwise excess moisture will collect on the colder (outer) glass. The operative term here is "excess." The only automatic humidifier I would use is the type that senses outdoor temp and dials back the humidity when it starts getting extremely cold. The reason is that moisture will permeate the building materials and damage exterior materials and insulation from the inside out. What you see now on the windows can make its way elsewhere out of sight. So if you're humidifying in winter, back off when it's extremely cold. It's destructive.
I've gotten around the rest of the moisture issue by using good exterior coatings on the interior. In particular, I use either a purified linseed oil based paint, a linseed varnish, sometimes the two mixed together, sometimes just the oil and varnish mixed if the base paint is already pretty decent, and sometimes a little Stockholm pine tar with the oil. You may be wondering of the logic of what material is used in various circumstances. There isn't any. It comes down to what I have on hand at the time, and curiosity about comparative durability and substrate protection. What's important is what they all have in common: they're ancient preservative formulations for wood and steel that can breath. The windows can be wet all winter and no harm is done. So I have a few windows that fog on the glass and frame but don't really have to worry about it. The bath window gets quite wet (with or without storms) and yet there's no longer a hint of rust or deterioration. For years now. These coatings will stop any existing rust or rot. They've also saved my iron railings and my car.
They are closely related to the kinds of coatings used when all wood windows and steel casements were developed, long long ago. But without the lead! I believe that's how some remarkably old windows survived for a century or more only to have rapidly fallen apart in recent years.Terry T
steam; proportioned minitube; trapless; jet pump return; vac vent. New Yorker CGS30C
1 -
@ttekushan I have cranks at the base of my windows. Will the frameless approach will work in that case?
For sealing the windows, some open and some don't. The process described to seal them sounds rather complex. The cost of interior storms are actually the same as getting a professional company to fix my 32 windows to open and close. So to do both is very costly.
I want to confirm that using interior storms will not work if I skip the sealing. My preference would have been interior storm with the cellular window treatments @Gordy recommended.
If anyone has any more economical tips on how a non-professional can seal the windows, I'd appreciate it.0 -
My experience is that storm windows are useless unless you fix the primary air infiltration problem. Moisture gathering on the steel windows will make a bad problem much worse. The Tudor was my first home, I bought it at a time when I had more energy and ambition than cash. During the years that I owned it, I faced many of the problems you are having.
With the plain glass windows, your best bet is to wire brush the sealing edges of the steel panels, make sure the hardware has no slack when closed, and chisel out the old caulk and replace. If you aren't prepared to do this yourself, it will cost some bucks, but will be well worth it. These windows can seal as well as modern windows when they are in top shape.
I also had some cut glass panes, and I taught myself how to do cut glass work. if you have some simple tools and patience, it's not at all difficult. You have an advantage that none of the glass is actually broken, in my case I had to cut out some pieces and cut and install new to match. Once the soldering is done, it's surprisingly easy to seal the windows. Here's a video that shows you how:
http://www.finewoodworking.com/item/24125/how-to-make-leaded-glass-doors
I also turned my stained glass into triple glazed windows, with a simple trick. The first step is to remove the whole panel as a unit. On windows like yours, this can be done by chiseling out the putty that holds them in place. It gets difficult if the putty has hardened, as you would have to apply enough heat to soften it without cracking the glass. The panels come out as units. There's a lead or zinc came that goes around the entire perimeter, you probably can't see this while the glass is mounted. To triple glaze them, put a thin bead of caulk around the perimeter came and apply a piece of single strength glass (picture frame glass) to either side. This creates a sandwich of two pieces of single strength glass with the leaded glass as the filling. once the silicone dries, go around the edge with a light coat of silicone to ensure a tight seal. Do this work on a dry autumn day to avoid getting moisture trapped. The panels I've done this way have lasted twenty years without further work.1 -
Your plan is fine. Rome wasn't built in a day, even though we expect that in this day and age. Simple first steps get the most gain.
If well affixed, the storms will hold back much if not most draft. Note that humble and simple rope caulk pushed into the gaps does wonders. This first step will get you pretty far. The storms block UV and infrared regardless.
The crank boxes are no problem. The acrylic is just cut to the same dimensions as the window screen. For the others, just follow the pattern provided by the window. One panel across the top lites; vertical panels right and left of the opener. What's nice is that you will find that you don't need many sizes. You'll have x number of sheets cut for the sides, I'll bet you have only 2 sizes of openers/ ventilators and the top lites may all be the same height.
Seal the windows with rope caulk or the Seal n Peel mentioned by vaporvac. Here's someone's video of the rope caulk solution and in the attached photos I have one last window done this way yet.
 https://m.youtube.com/watch?v=feVnkk49BDs
A couple detail shots. Too detailed since the micro mini blinds have been down but open all winter where the house plants have been shedding. I have to have a word with housekeeping about that. Oh wait. That's me.
In the photos, you'll notice the rope caulk, how the panels are laid out and my dirty window sills. You could take construction cardboard and make models of the sheets to fit, measure them (you'll see that the sizes repeat) and order them from one of those plastic places with the pretty decent prices. All you do is peel off the protective film and start sticking!
Regarding the crank boxes and hinges, you can shoot a little Tri Flow in each one so they move easily. I like the aerosol for the crank boxes since it foams to get well into the bearing and the worm gear.
http://www.triflowlubricants.com/index.html
For the moment I can't see how to post a photo from my mobile device so you can look more closely at the photos above for detail until I get back to the desktop to edit in a photo.Terry T
steam; proportioned minitube; trapless; jet pump return; vac vent. New Yorker CGS30C
0 -
@josieT, mxfrank knows what he's talking about. The only very minor point of disagreement is that I find the storms (with judicious use of rope caulk or other sealant) to be very useful. They also take the pressure off of you to do something radical or expensive when you need time, and I think that's where you are right now.
@mxfrank I see we've followed a similar path on these windows. In my case, it started as your situation with more time than cash. But other things became apparent from architectural authenticity as well such as the large daylight opening and bright, open feeling they give a room.
There's a point where certain attributes are irreplaceable and damage done by window replacement is virtually irreversible. So a revised attitude toward them developed on my part, summed up in a modified Kubrick fashion, "I stopped worrying and learned to love the steel casement window."
Now, what I like about the acrylic is the exceptionally high Visual Transmittance of about .9. The system of acrylic over steel windows gives unparalleled daylight and Visual Transmittance compared to the rest of modern windowdom. I live in lakeshore NE Ohio where short days and overcast prevail in winter. I need all the natural light I can get! Getting it without severe radiant heat loss is even better! Night time is different and there's no better solution than your suggestion of sealing blinds-- for ANY window.
I've not had to work with the lead glass inserts as you have. Your triple glaze leaded windows are brilliant. I'm saving your posts for my "steel window file." Fantastic insights.Terry T
steam; proportioned minitube; trapless; jet pump return; vac vent. New Yorker CGS30C
0 -
@ttekushan thank you.
Any guidance on what to do about the cranks? The cranks stick out at the base about 2 inches so the window has to go infront of the crank. Is there a max ideal space between the original window and the storm?
Also in my tudor style home, the window area curves out. it's not a a clean rectangle with perfect 90 degree sharp edge where the window enclosure meets the wall. It's more curved. Does anyone have that issue?0 -
If you're making the directly applied frameless storms, then the cranks and curved fenestration return are irrelevant. If you are using a frame type storm then you'd have to get a weatherseal that's cylindrical like for a door jamb, to accommodate the curves. The crank handles have a set screw flush with the crank surface. Loosen and slide off the handle and set it on the crank box so it doesn't get lost. Mount the full size storm so it just clears the short splined shaft now exposed by the removal of the crank handle. The wood frame windows in the house are done this way.
The direct attach approach leaves little air space as I have them right now. With the square rod I spoke of early in the forum discussion would increase to 3/8" the space from the window glass. I haven't done that yet, and I don't feel particularly deprived of improved performance considering the performance garnered from the stone simple solution as it's currently applied.
First, review the photos posted on the 20th. It shows a rope caulk seal. The storm windows are, in fact, in place on that window. If it looks like there's nothing there, that's the whole point!
Attached are a couple shots of the window at the top of the stairs. The storm windows are installed. There's no rope caulk in this window, nor a gasket for that matter. Tightening up the hardware and removing excess paint has it offering a very good seal metal to metal.
I've tried to adjust the contrast so you can see the storm panels in place. Again, they are virtually invisible. And the difference in room comfort is NOT subtle.
There are four panels on those windows. One spans the top row of lites. Two of the same size flank the crank-open window. The crank-open window has one that takes the position of the window screen. The others remain in place all year, while the center is swapped for the screen seasonally. If you're feeling ambitious in the future, then a storm that's recessed into the frame and attaches to the crank-open part and travels with it can be made for windows that you want to operate at all times. I have two like that. They have to be firmly attached in another fashion though. But don't think about that right now!
BTW, if it looks like it's about to snow in these photos, it is. As I post this snowflakes are falling from the sky. Ahhh, Cleveland in spring!


Terry T
steam; proportioned minitube; trapless; jet pump return; vac vent. New Yorker CGS30C
0 -
Maybe you can see the seam from the top panel to the side panel in this one.

Terry T
steam; proportioned minitube; trapless; jet pump return; vac vent. New Yorker CGS30C
1 -
I found my old rolodex. In addition to Seelkircher, I had the following sources for casement parts. No idea if they're still around, but a lead is a lead:
American Steel Window Service Co. 212 242-8131 108 W. 17th St NY NY 10001
A&S Windows 718 275-7900 88-19 76th Avenue "Glendale, Queens 11385"0 -
For an alternative thought, I've had situations where some windows weren't double hung sash. After years of living in different homes that I built all with double hung sash, I found that in the summer, there were few windows I ever wanted to open to get the best cross ventilation. I always had aluminum storm sash/screens. I might put all the screens down in the early Summer, but I still only opened a few window bottom sash. Single pane, double hung sash with tight aluminum storm sash have more heat resistance than double pane/insulated glass windows because there is more air between the two for resistance. 1970 Anderson Thermo Pane windows with a 1/4" air spacing had their air spacing increased to 3/8" to get better heat loss/gain resistance. Its the air space that makes the difference.
If it were my own home, I would be looking at putting something on the heated side of the casement windows. You're not going to be opening them in the winter. And if you find like I did that certain windows are never opened, it cuts down on the number of windows you have to make the panel removable or want to remove. It can be made to look decent. I could.
In a way, I have the same situation that you have in Florida. Where they think they are on the cutting edge of energy savings, but have a very dull knife. I have single pane aluminum double hung tilt out windows that are no longer manufactured nor can you get parts for them. The frames are set in Stucco. You can't put anything on the outside. But the heat from the outside, flowing into the AC cooled inside is considerable. There's also a sound issue. The greater air space deadens outside sounds. I live 3 or 4 miles out on one approach to Palm Beach International Airport. I can tell which way the wind is blowing. East or South East, and the jets are on the glide slope and around 1500' high as they are landing. If the wind is out of the West, NW, they take off and fly over my house at 3 or 4 thousand feet. Much quieter. On approach to land, they turn over my house and sometimes, they sound like they are coming in to my house. I lived for over 25 years in Massachusetts, within less than a 1/2 mile of an active airport runway or directly over an approach route. It was never as loud through insulated glass windows as it is through single pane glass without storms.
What you need can be done. I've personally made all kinds of interesting additional windows/doors because of need. Like insulated panels to fit into a sliding glass doors so the cats can go in and out and tease the crows and the Coyotes. I made a door out of that plastic wood so my cats can go hang out in their Catio/Sun porch and be entertained by stray cats, birds and lizard's. My Catio/Sunporch has tilt out awning style windows. The screens fit between the sash and the cranks. If you decide to try and put something behind the windows on the inside, don't worry about the crank handles. Take them off. If you put any AC in, you're not going to open the windows anyway. Why would you?
As another example, the worst thing someone can do is put a window where there is a tub/shower. Water will get into the window, leak down into the framing, and rot the wall. Many of the 240 units here had this problem with water leaking through the tile and rotting the wall. Mine didn't because the woman who lived here since the places were built never used the tub shower in the Master Bedroom. She used a straight shower. I took some aluminum stock used to set mirrors on a wall, and screwed it onto the OUTSIDE of the tile. I dropped a piece of 1/4" clear Lexan plastic sheet into the tracks, and now, any water that splashes on it, runs down the wall and into the tub. I still have the window and the light. This window doesn't open.
You need to look for a company that specializes in aluminum storm window fabrication. Some bright person there might have some ideas. They'd be better than what you have now.
There's a way around anything. At least that is my experience.0 -
Glass block can be a wonderful thing.icesailor said:As another example, the worst thing someone can do is put a window where there is a tub/shower. Water will get into the window, leak down into the framing, and rot the wall. Many of the 240 units here had this problem with water leaking through the tile and rotting the wall.
 1
1 -
The problem with any aluminum framed window is movement,and conduction from temp extremes, and time. Think coefficient of linear expansion from summer to winter cycles.
I spent one whole summer stripping to the wood, and re glazing where needed my double hung multi lite cottage style windows.
Yes you have to change storms, and screens per season, but winter there is no match for the dead air space a double hung with a nice fitting wood storm window can provide for the money. Find a window that will last over 60 years today is doubtful. Mine are like the day they were hung now.
1 -
SWEI said:icesailor said:
Glass block can be a wonderful thing.
That may be true in the case of the original installation. If the window opening isn't the correct modular size to fit glass block, it becomes a project
There are a lot od really great and useful products out there to make life easier. It stays hard because so few bother to learn what is out there.0 -
gordy, My original wooden storms of which I only have four, are so much better that the aluminum ones in my upper solarium. They hang from the top and clasp at the bottom...I generally leave them up year-round. Wish I had more of them. However, aluminum is better than nothing and they work great at friends' houses that I've observed.Two-pipe Trane vaporvacuum system; 1466 edr
Twinned, staged Slantfin TR50s piped into 4" header with Riello G400 burners; 240K lead, 200K lag Btus. Controlled by Taco Relay and Honeywell RTH6580WF0 -
thanks for all the comments. Sounds like my next project should be to create my own storms. There appears to be two options: 1) user rope caulk with plexiglass covers attached via magnet to the window. 2) create a storm with gasket (trimlock) that covers the entire window to the edges.
This video makes #2 look easy: http://www.mrhardware.com/articles-and-videos/build-plexi-glass-storm-window-in-4-minutes/
Any suggestions on where to get plexiglass from?0 -
I'll ask the friend who bought it for me tomorrow. It was wholesale in 8x4 pieces, but they would probably cut to fit. Mine is quite thick. My windows are large so I needed the thickness for stability. thinner works as well on smaller windows. I'll watch the video....four minutes seems a bit of a stretch. If you go with the wooden frames, the place where you buy the wood should cut them if necessary. Be sure to measure top AND bottom to get a tight fit.Two-pipe Trane vaporvacuum system; 1466 edr
Twinned, staged Slantfin TR50s piped into 4" header with Riello G400 burners; 240K lead, 200K lag Btus. Controlled by Taco Relay and Honeywell RTH6580WF0 -
Regarding the depth of air space and more being better, STILL air is an insulator. Due to convection, you'll find that more than 3/4" of air in a vertical assembly offers no added benefit.0
-
I know this thread is a little old, but if ttekushan is still listening, I'm wondering if you could tell me the thickness of the acrylic panels you used for your interior storms. I have a large steel casement window that I insisted on keeping during our recent kitchen renovation, despite the contractor's concerns about climate control. I love the idea of a frameless storm using magnets! This particular window looks out onto a screened porch, so I am also considering putting the storms on the exterior. I know you weighed in on interior vs exterior in another thread, just wondering if you think it makes any difference in this case, with the window largely sheltered from the elements and direct sunlight. Thanks so much; I'm thrilled to have found this thread.0
-
I don't know if ttekushan is still listening, but for what it's worth... I have a number of casement type wooden windows with diamond panes in the place I care for. Very elegant, or something. Because I am very concerned about condensation and the integrity of those diamond panes, I used acrylic panels on the outsides of them -- attached to the sash. I used 1/8 inch acrylic; if it were a very large window I might go thicker. Works fine. The condensation happens on the acrylic, not the glass or wooden sash material, which is fine by me!Br. Jamie, osb
Building superintendent/caretaker, 7200 sq. ft. historic house museum with dependencies in New England0 -
Oh hi. Terry here. I'm still listening! Twas a busy day. Warm weather for outdoor stuff I should have completed already, but still obligated to put my head in a big steam boiler today. Yes, it was off line!
On to the storm windows. I used 1/8" (.125") cast acrylic. I thought a thicker panel would look nice, particularly with polished edges but this started to look like a lot of money and a lot of work. Using the 1/8th inch also has an advantage in the magnetic field of the neodymium magnets' ability to reach through the acrylic's thickness. The added weight and thickness would cause a problem holding it in place.
In your application using the storms on the outside makes quite a bit of sense. You'll have a larger air gap, with a separated cell for each pane. As @Jamie Hall correctly points out, the moisture will be attracted to the outermost layer. Where high levels of humidity exist and the materials are easily damaged (like the lead cames and wood frames) then outside they should go. But you're not going to put them on with magnets out in the weather either (in most applications). They'll fly off. The interior placement allows for frameless application with magnets. Also bear in mind the frameless panel with magnets tends to slide downward but since there's always a sill and operator hardware, this is not an issue when used inside. If used on the outside out in the open, I'd say a thicker panel with actual mounting hardware would be necessary.
I have to point out that any window, steel in particular, must be finished with exterior paint and glazing so it can protect the window from the inevitable moisture that will affect it throughout the winter. I've found no trouble with moisture with my method. Some fog occurs but if there is a lot, then there's usually too much moisture in the house to begin with, say with a humidifier that doesn't throttle back when it gets bitterly cold outside. Not seeing it on the windows is a false sense of security since it will often accumulate where you can't see it doing its damage. I also have to point out that I have a secret weapon for protecting the steel windows. I have no affiliation with Viking Sales in NY but http://solventfreepaint.com/ is worth looking at. The paint breaths and stops rot and/or corrosion. It also doesn't form that hard sharp paint edge that anyone who has washed the outside of a steel casement from the inside has encountered. The linseed paint these people have is closely related to what was in use when these andany classic window was designed (19th century on back). They don't use lead in the paint by the way. Expensive, but a quart will handily do a house full of windows. Also a nearly indefinite shelf on unused paint.
As far as magnets I got mine from K&J Magnetics. These are nice:
https://www.kjmagnetics.com/proddetail.asp?prod=B882-N52
Finally, I do recommend the caulk gasket idea. I just did a set for a neighbor, and as usual, I didn't take pictures along the way. It's great for stopping infiltration of air, but it also shows how remarkably quiet the steel casement should be. You will hear a poor seal as outside noise before it gets bad enough to cause a large draft. The silicone gasket seal makes them about as quiet as anything out there. Think about how much mass is there, and the interference to sound infiltration that the multitude of differing resonant frequencies (resonance is how the noise typically passes through) and the damping provided by all that steel and glazing compound. A good seal completes that action.
As noted in Preservation Brief 13 (Department of Interior, National Park Service):
"SEALANT BEAD. This very effective type of weatherstripping involves the application of a clean bead of firm setting caulk on the primed frame with a polyethelene bond breaker tape on the operable sash. The window is then closed until the bead has set and takes the form of the gap. The sash is then opened and the tape is removed leaving the set caulk as the weatherstripping."
The "primed frame" is just fine the way it is if you wipe it with a rag with a little acetone on it.
The "polyethelene bond breaker tape" is that clear packing tape that's very very thin.
I just "nearly" close the window and drive the caulk bead ahead of the tip and into the gap. Close the lock handle and wait 24 hours. I highly recommend a fresh razor blade or X-Acto knife to run down the edge of the cured caulk before opening the window. Peel it all away and you have a tight seal that doesn't interfere with the operation of the window.
For mechanism and hinge lubrication I recommend Fluid Film. Used to be hard to get but they sell it at Lowes now.
The whole package performs very well in both visual and energy aspects.
I hope this all helps!Terry T
steam; proportioned minitube; trapless; jet pump return; vac vent. New Yorker CGS30C
1 -
Thanks, all! ttekushan, your point is well taken regarding the increased air space and separation into individual cells with an exterior application. Perhaps I will start with them on the exterior and if they are too easily dislodged by wind I will bring them inside.0


Categories
- All Categories
- 87.7K THE MAIN WALL
- 3.3K A-C, Heat Pumps & Refrigeration
- 59 Biomass
- 430 Carbon Monoxide Awareness
- 127 Chimneys & Flues
- 2.2K Domestic Hot Water
- 5.9K Gas Heating
- 121 Geothermal
- 170 Indoor-Air Quality
- 3.8K Oil Heating
- 79 Pipe Deterioration
- 1K Plumbing
- 6.6K Radiant Heating
- 396 Solar
- 16K Strictly Steam
- 3.5K Thermostats and Controls
- 56 Water Quality
- 51 Industry Classes
- 51 Job Opportunities
- 17 Recall Announcements