Welcome! Here are the website rules, as well as some tips for using this forum.
Click here to Find a Contractor in your area.
If our community has helped you, please consider making a contribution to support this website. Thanks!
How do you find the leak

After seeing water dripping down a wall in the basement, and down the wall above it, when it hadn't rained, I eventually discovered water pooling underneath a radiator on the 2nd floor. I don't see what or where the leak is coming from though. There doesn't seem to be any leaking coming from above it. I'd like to know how to find the leak, so I can then determine whether it's something I might be able to fix, or whether I should call a plumber. For all I know, the leak could even be coming from elsewhere, even though it looks like that radiator area is the source of the leak. Could be a pipe, could be the radiator is cracked, could be a pipe that I don't know is there behind the wall behind the radiator doing this, could be something else, IDK. I attempted to unscrew the one bolt on the radiator but was unable to get a grip on it with a wrench - it's not in the most accessible spot.
Comments
-
ya gotta look harder,
a good flashlight, dry up what you have with paper towels or a rag, use paper towels or toilet tissue and pat the bottom of the rad, the end connections, and observe the tissue after each pat,
post a picture of your puddle, where does it show once you dry up as above?
known to beat dead horses0 -
Typically the leak is above the puddle, unless water is spraying up somehow?
Bob "hot rod" Rohr
trainer for Caleffi NA
Living the hydronic dream0 -
wipe it up and put a pan under various places and see if it ends up in the pan
0 -
i got my but kicked by a intermitent copper pin hole spraying up.
0 -
-
and like @EBEBRATT-Ed said, don't start randomly unscrewing things.
0 -
I still haven't been able to locate the source of that leak, despite turning up the heat and waiting for the radiator or a pipe in the area to start leaking. It never leaks when I'm ready for it to. It hasn't leaked at all for 2 months. However, I discovered another leak at a different radiator a few days ago, and the source of that leak is visible and apparent. See below:
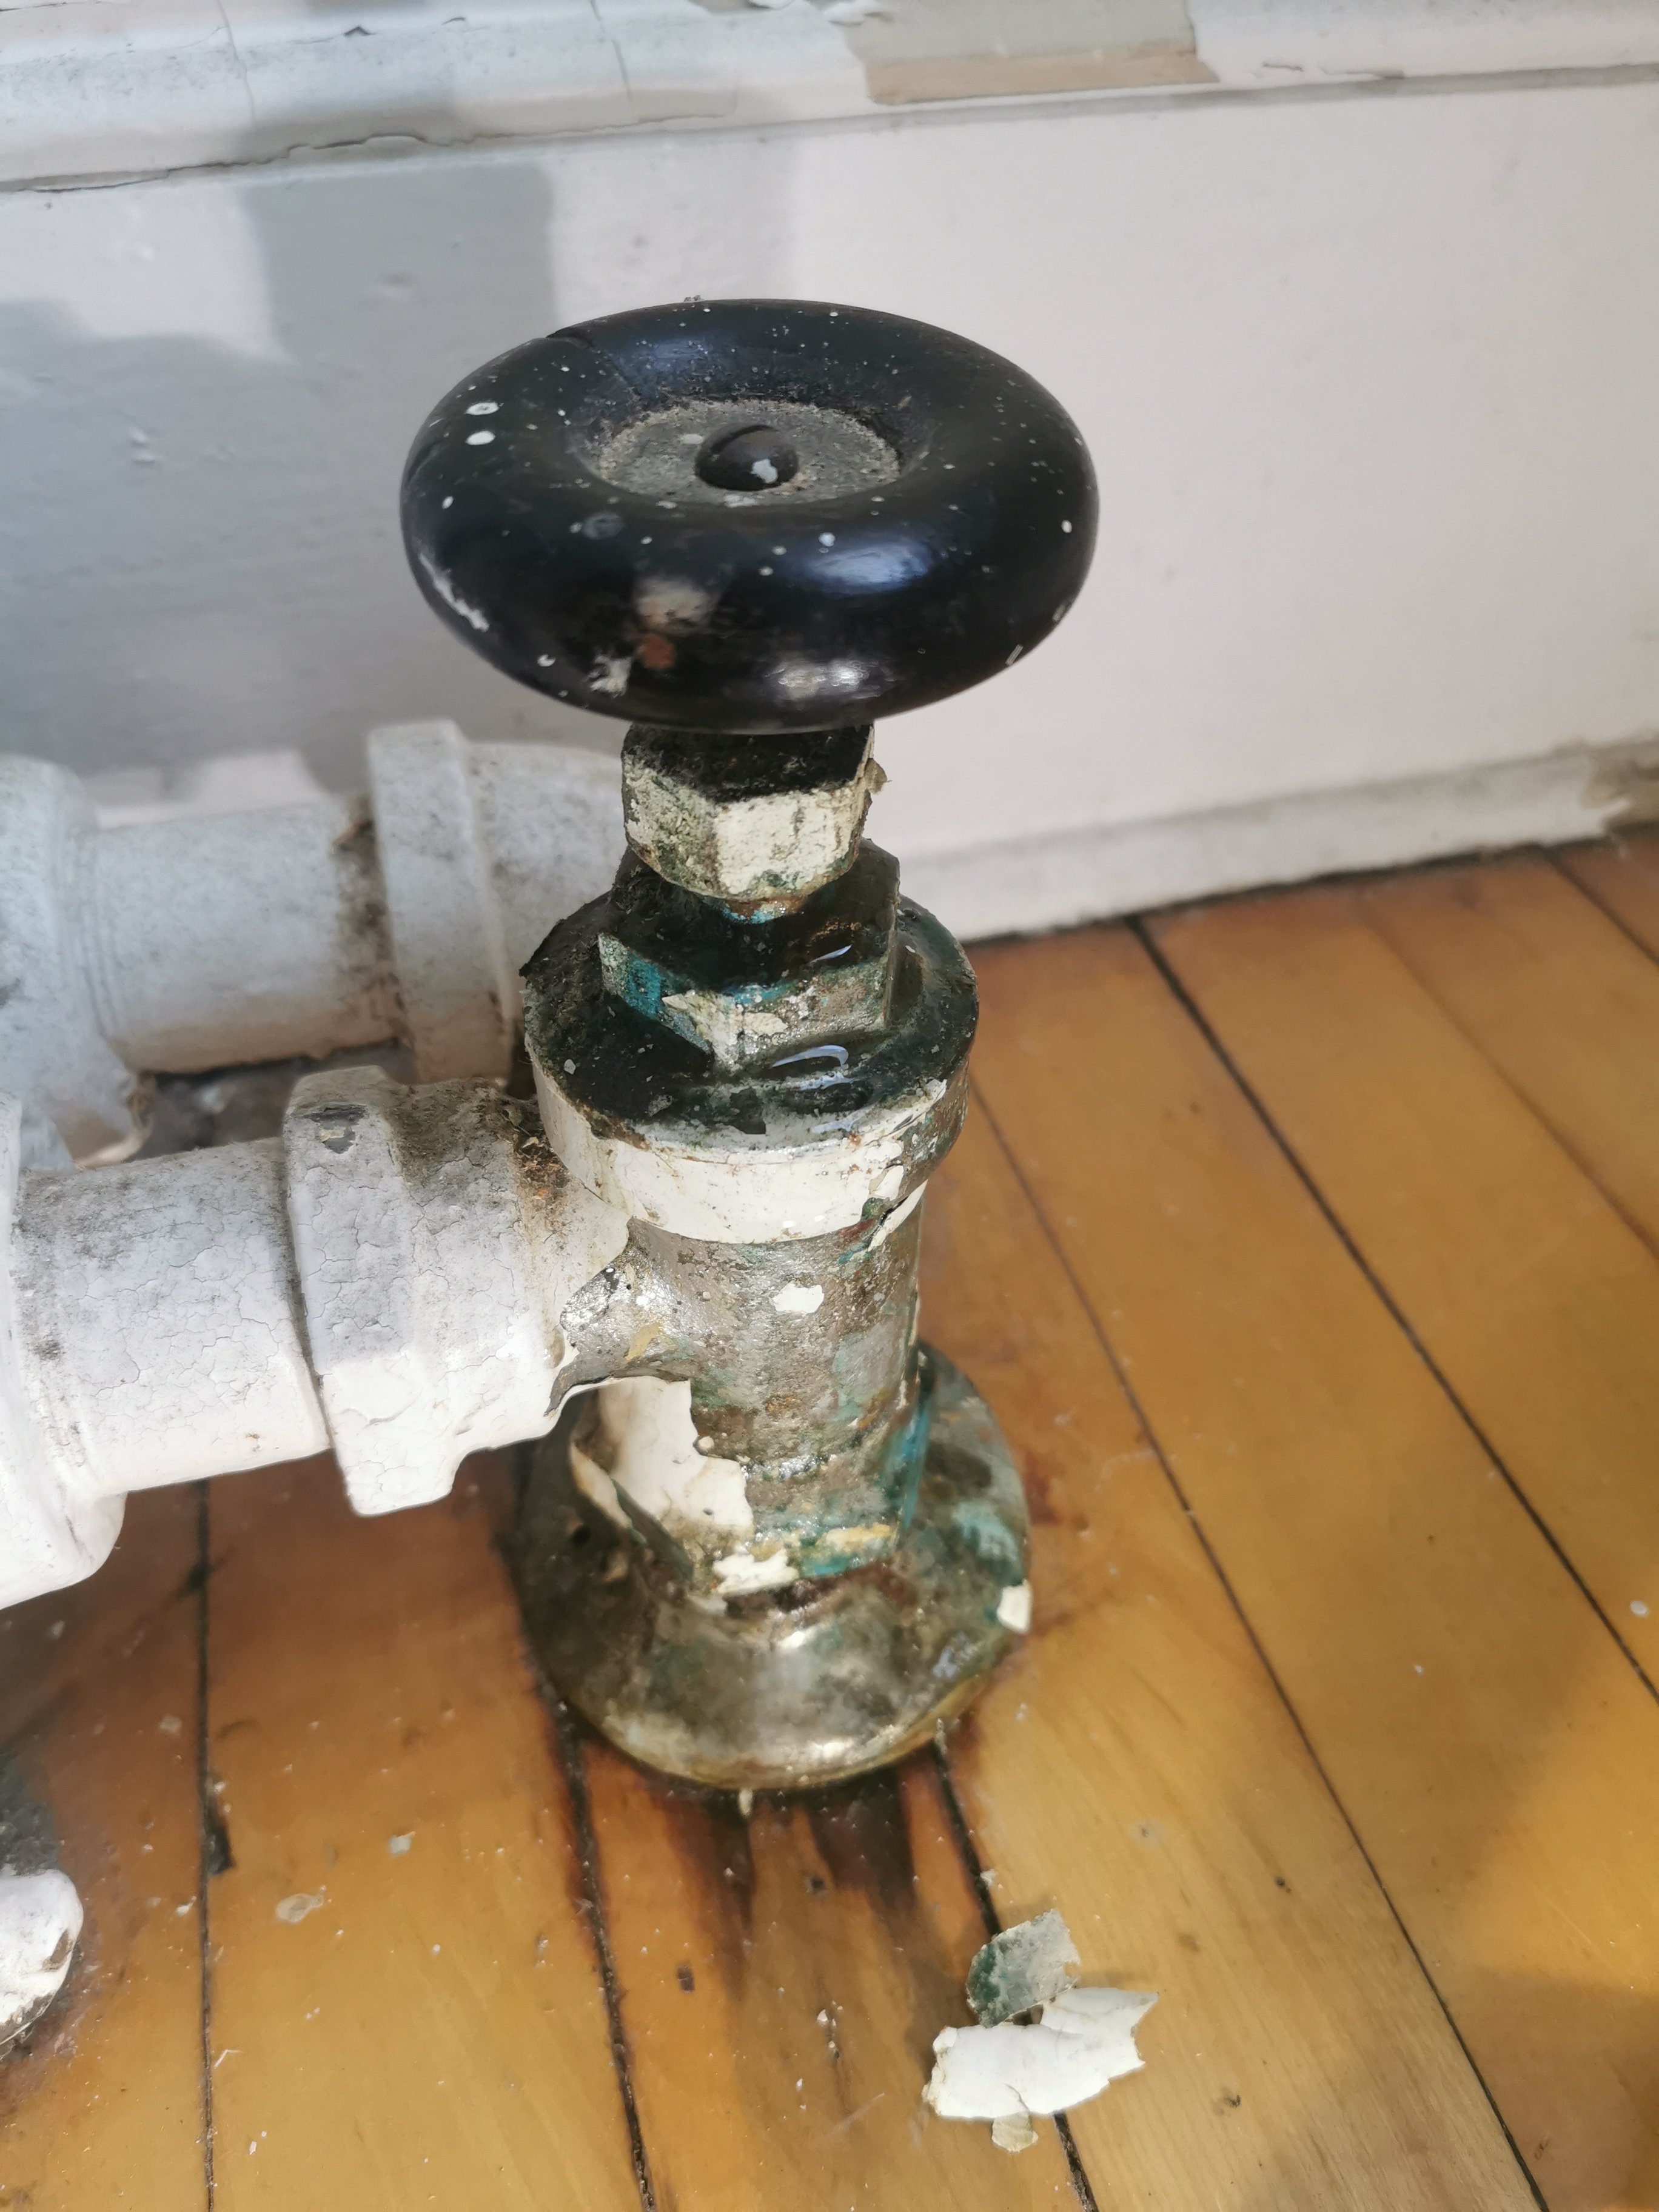
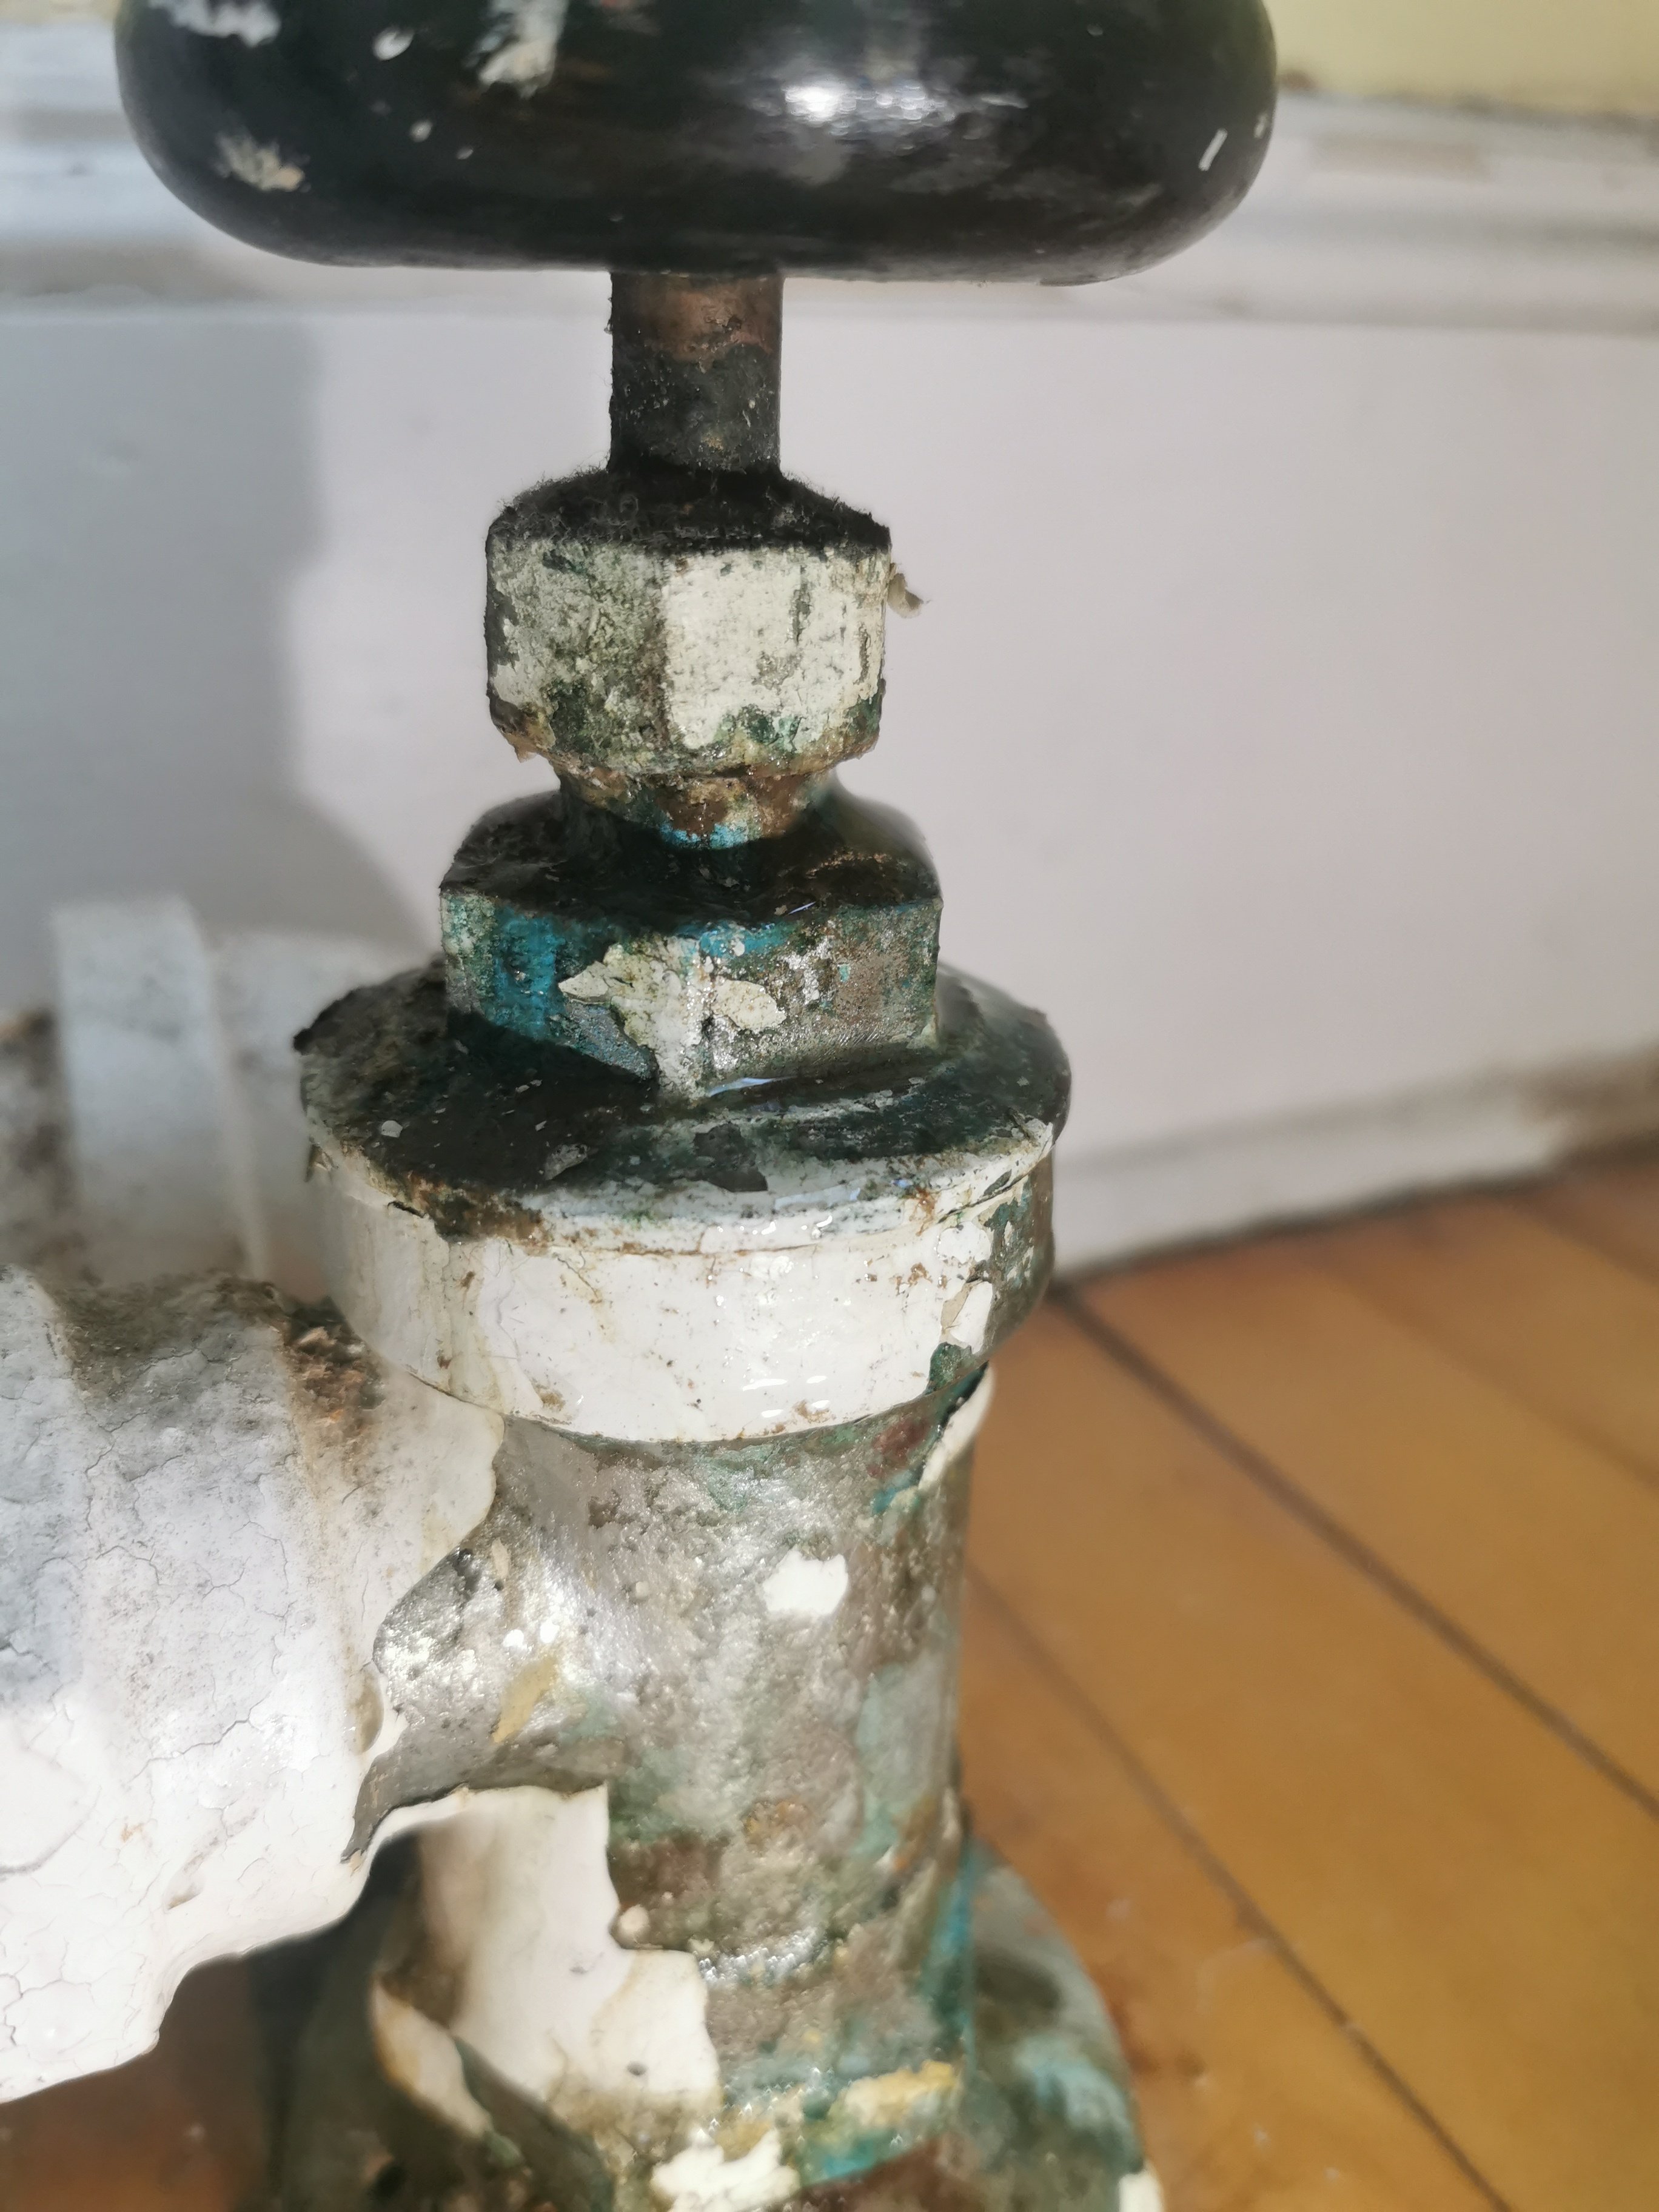
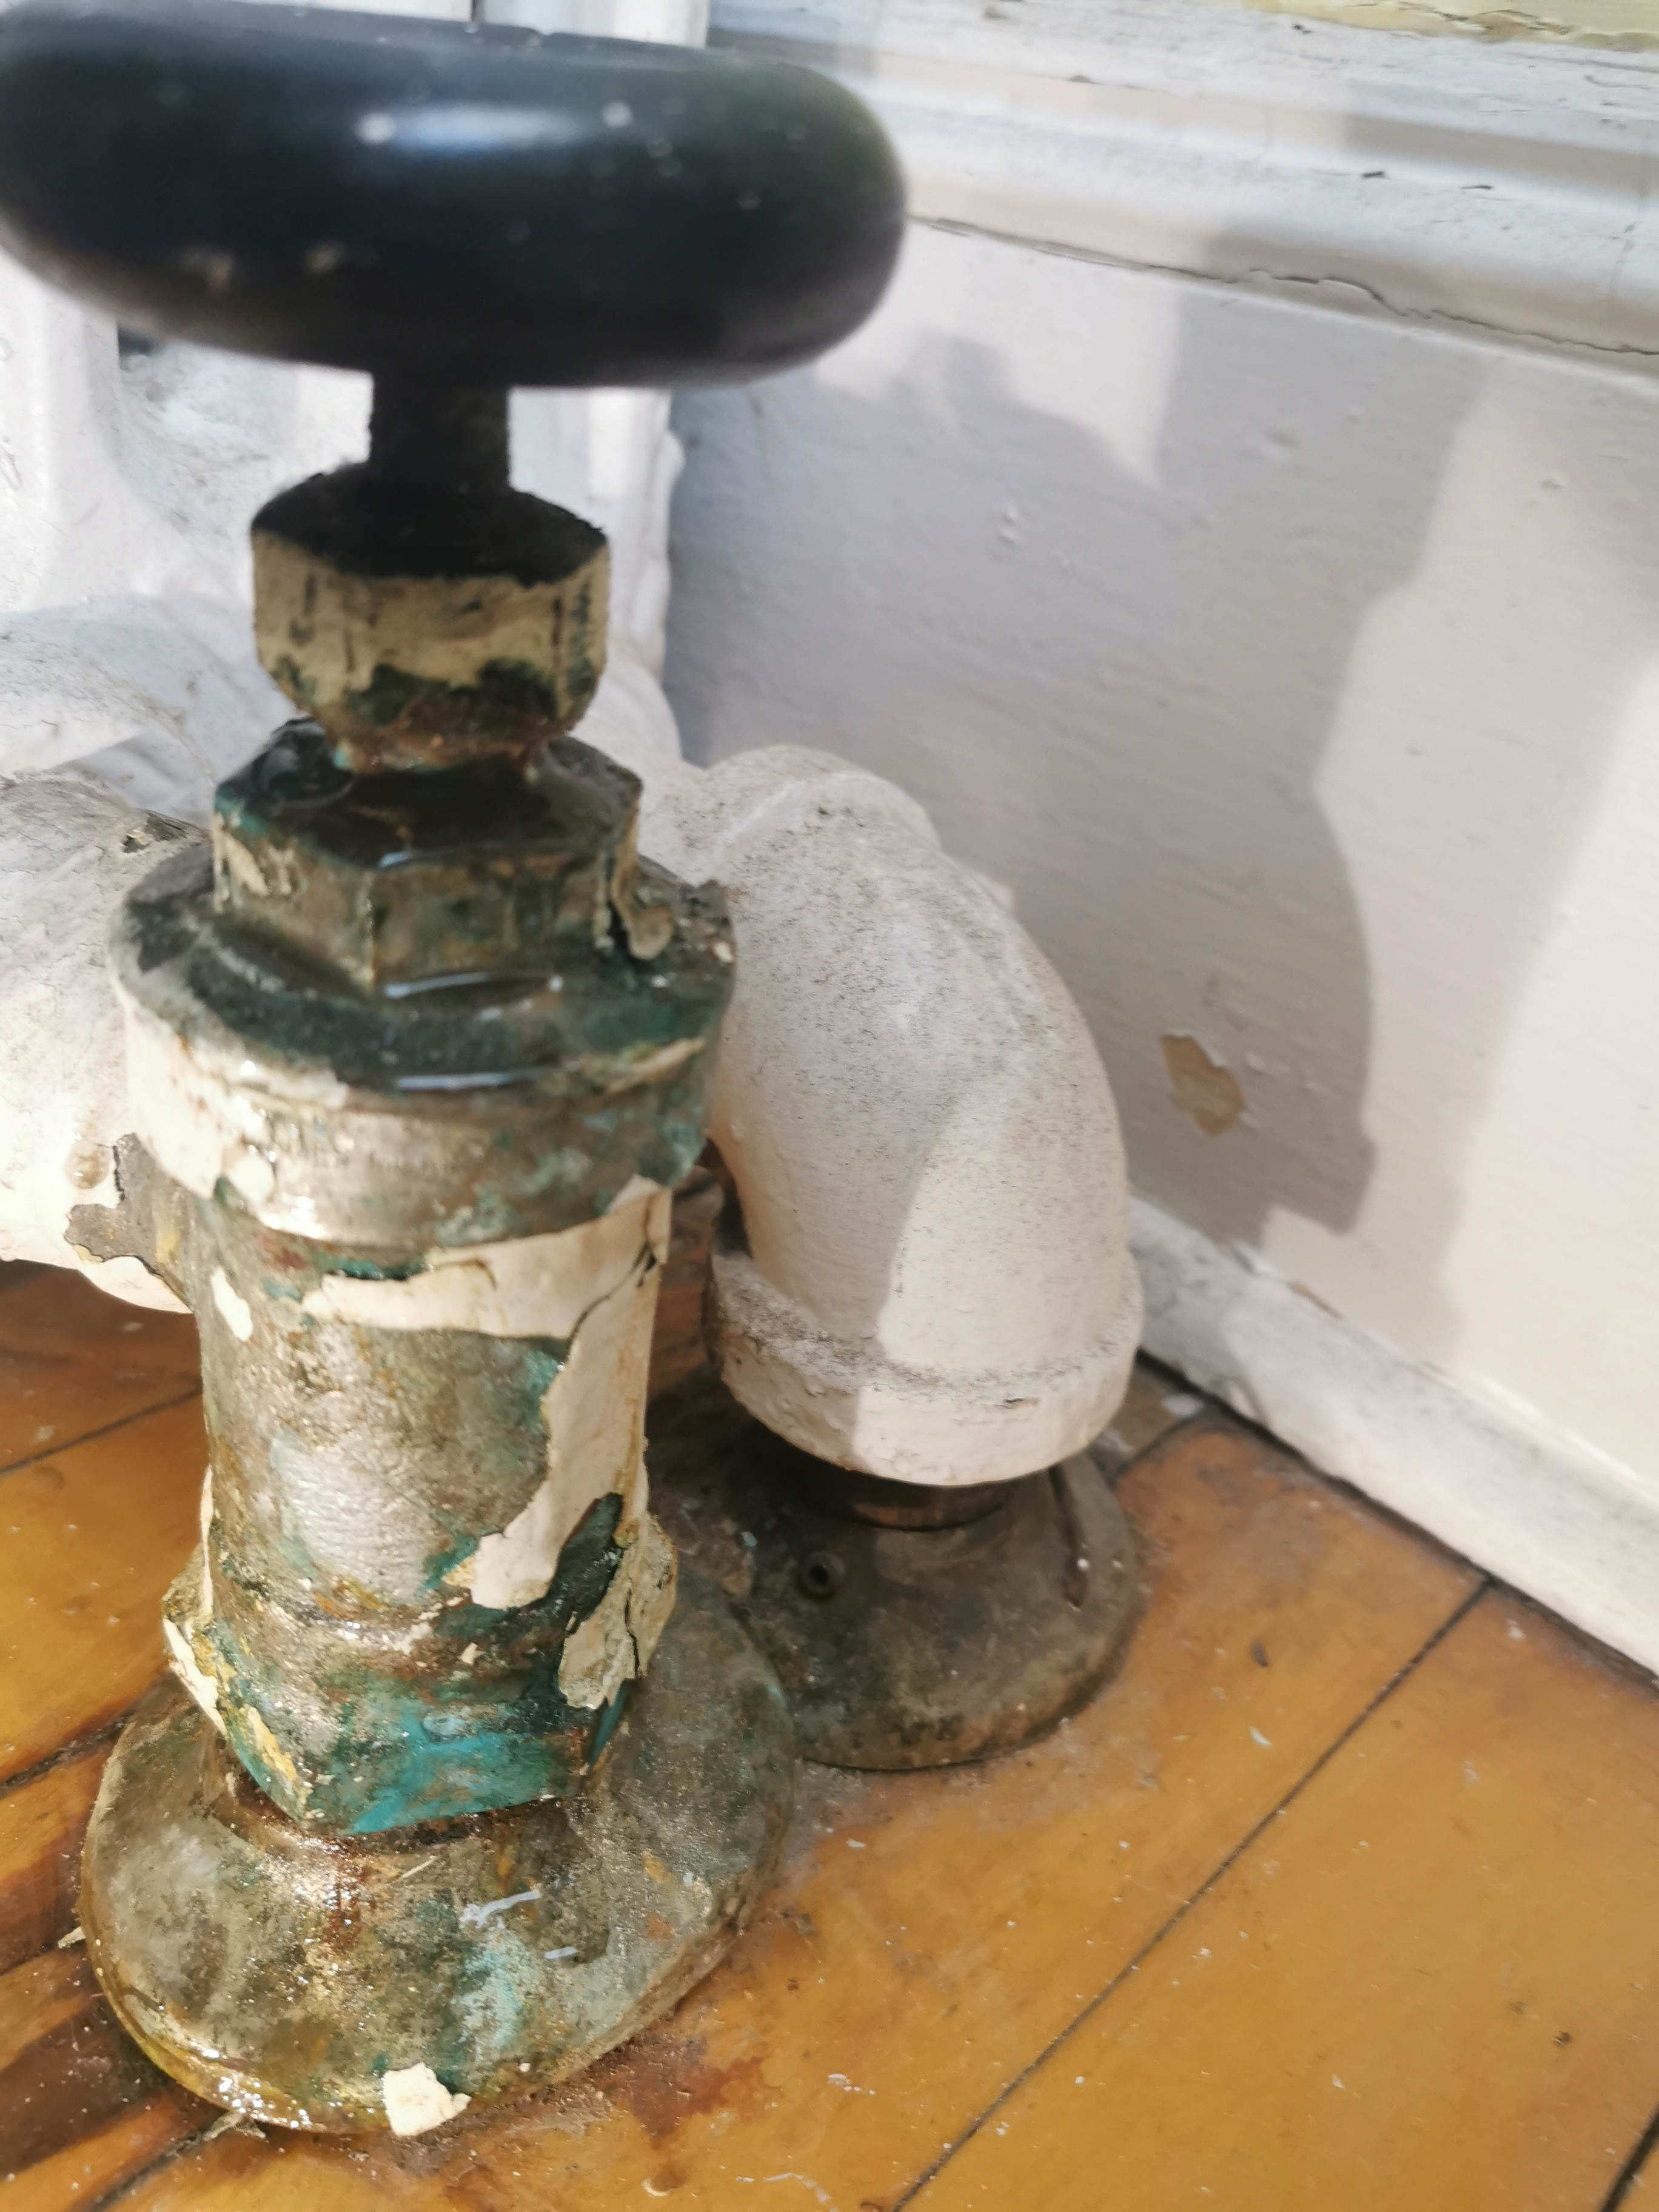
The leak is coming from either the top nut below the wheel or the 2nd nut. I think I should replace both of them, and the length of pipe that comes out and goes into the wheel. That short section of pipe is likely copper, although I'll have to take a closer look. IDK what material the nuts are but will know after scraping off more of the paint.
Should I also replace the wheel, or keep it?
The pipes coming out of the floor are 5.5" in diameter so I'll just replace them with the same diameter. They're probably threaded galvanized steel.
That's pretty straightforward. Unfortunately it gets worse, as the pipes and connections below it look very corroded. I followed them to the basement, where I found these:
First, before I went to the basement, I lifted up the pipe cover to find severe corrosion: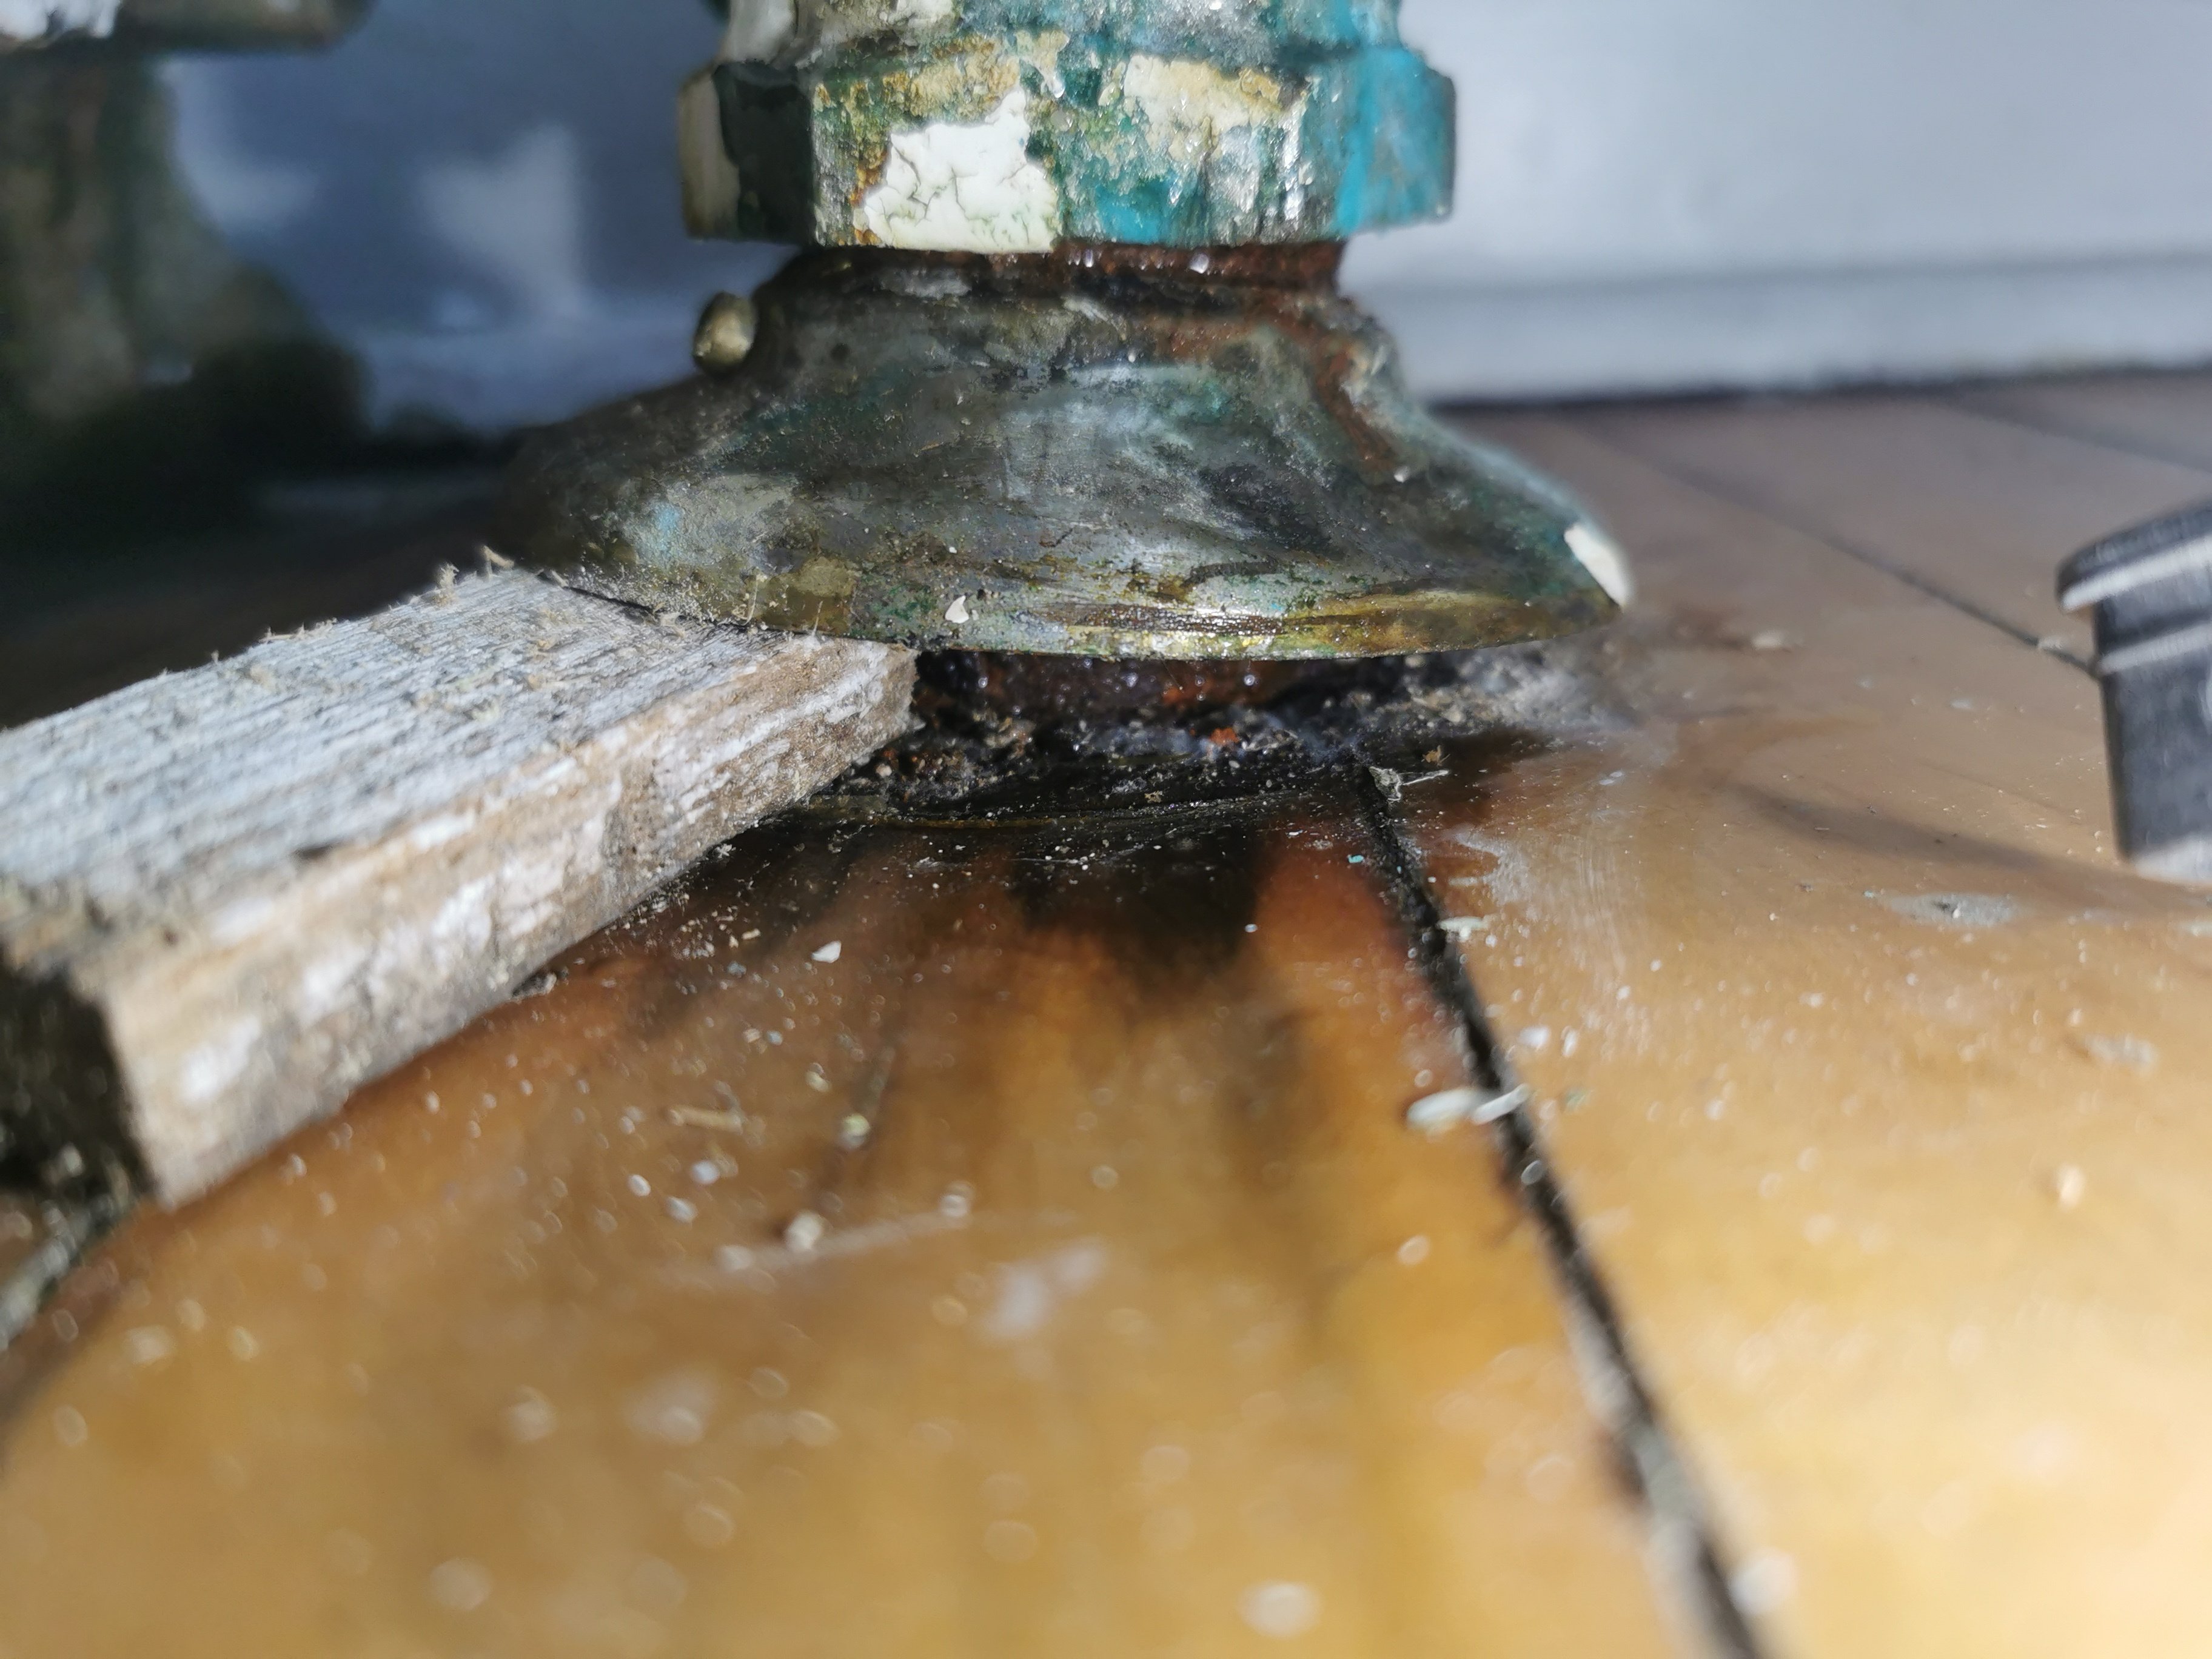
This is after I scraped off the worst of the rust, corrosion and dirt with a wire brush: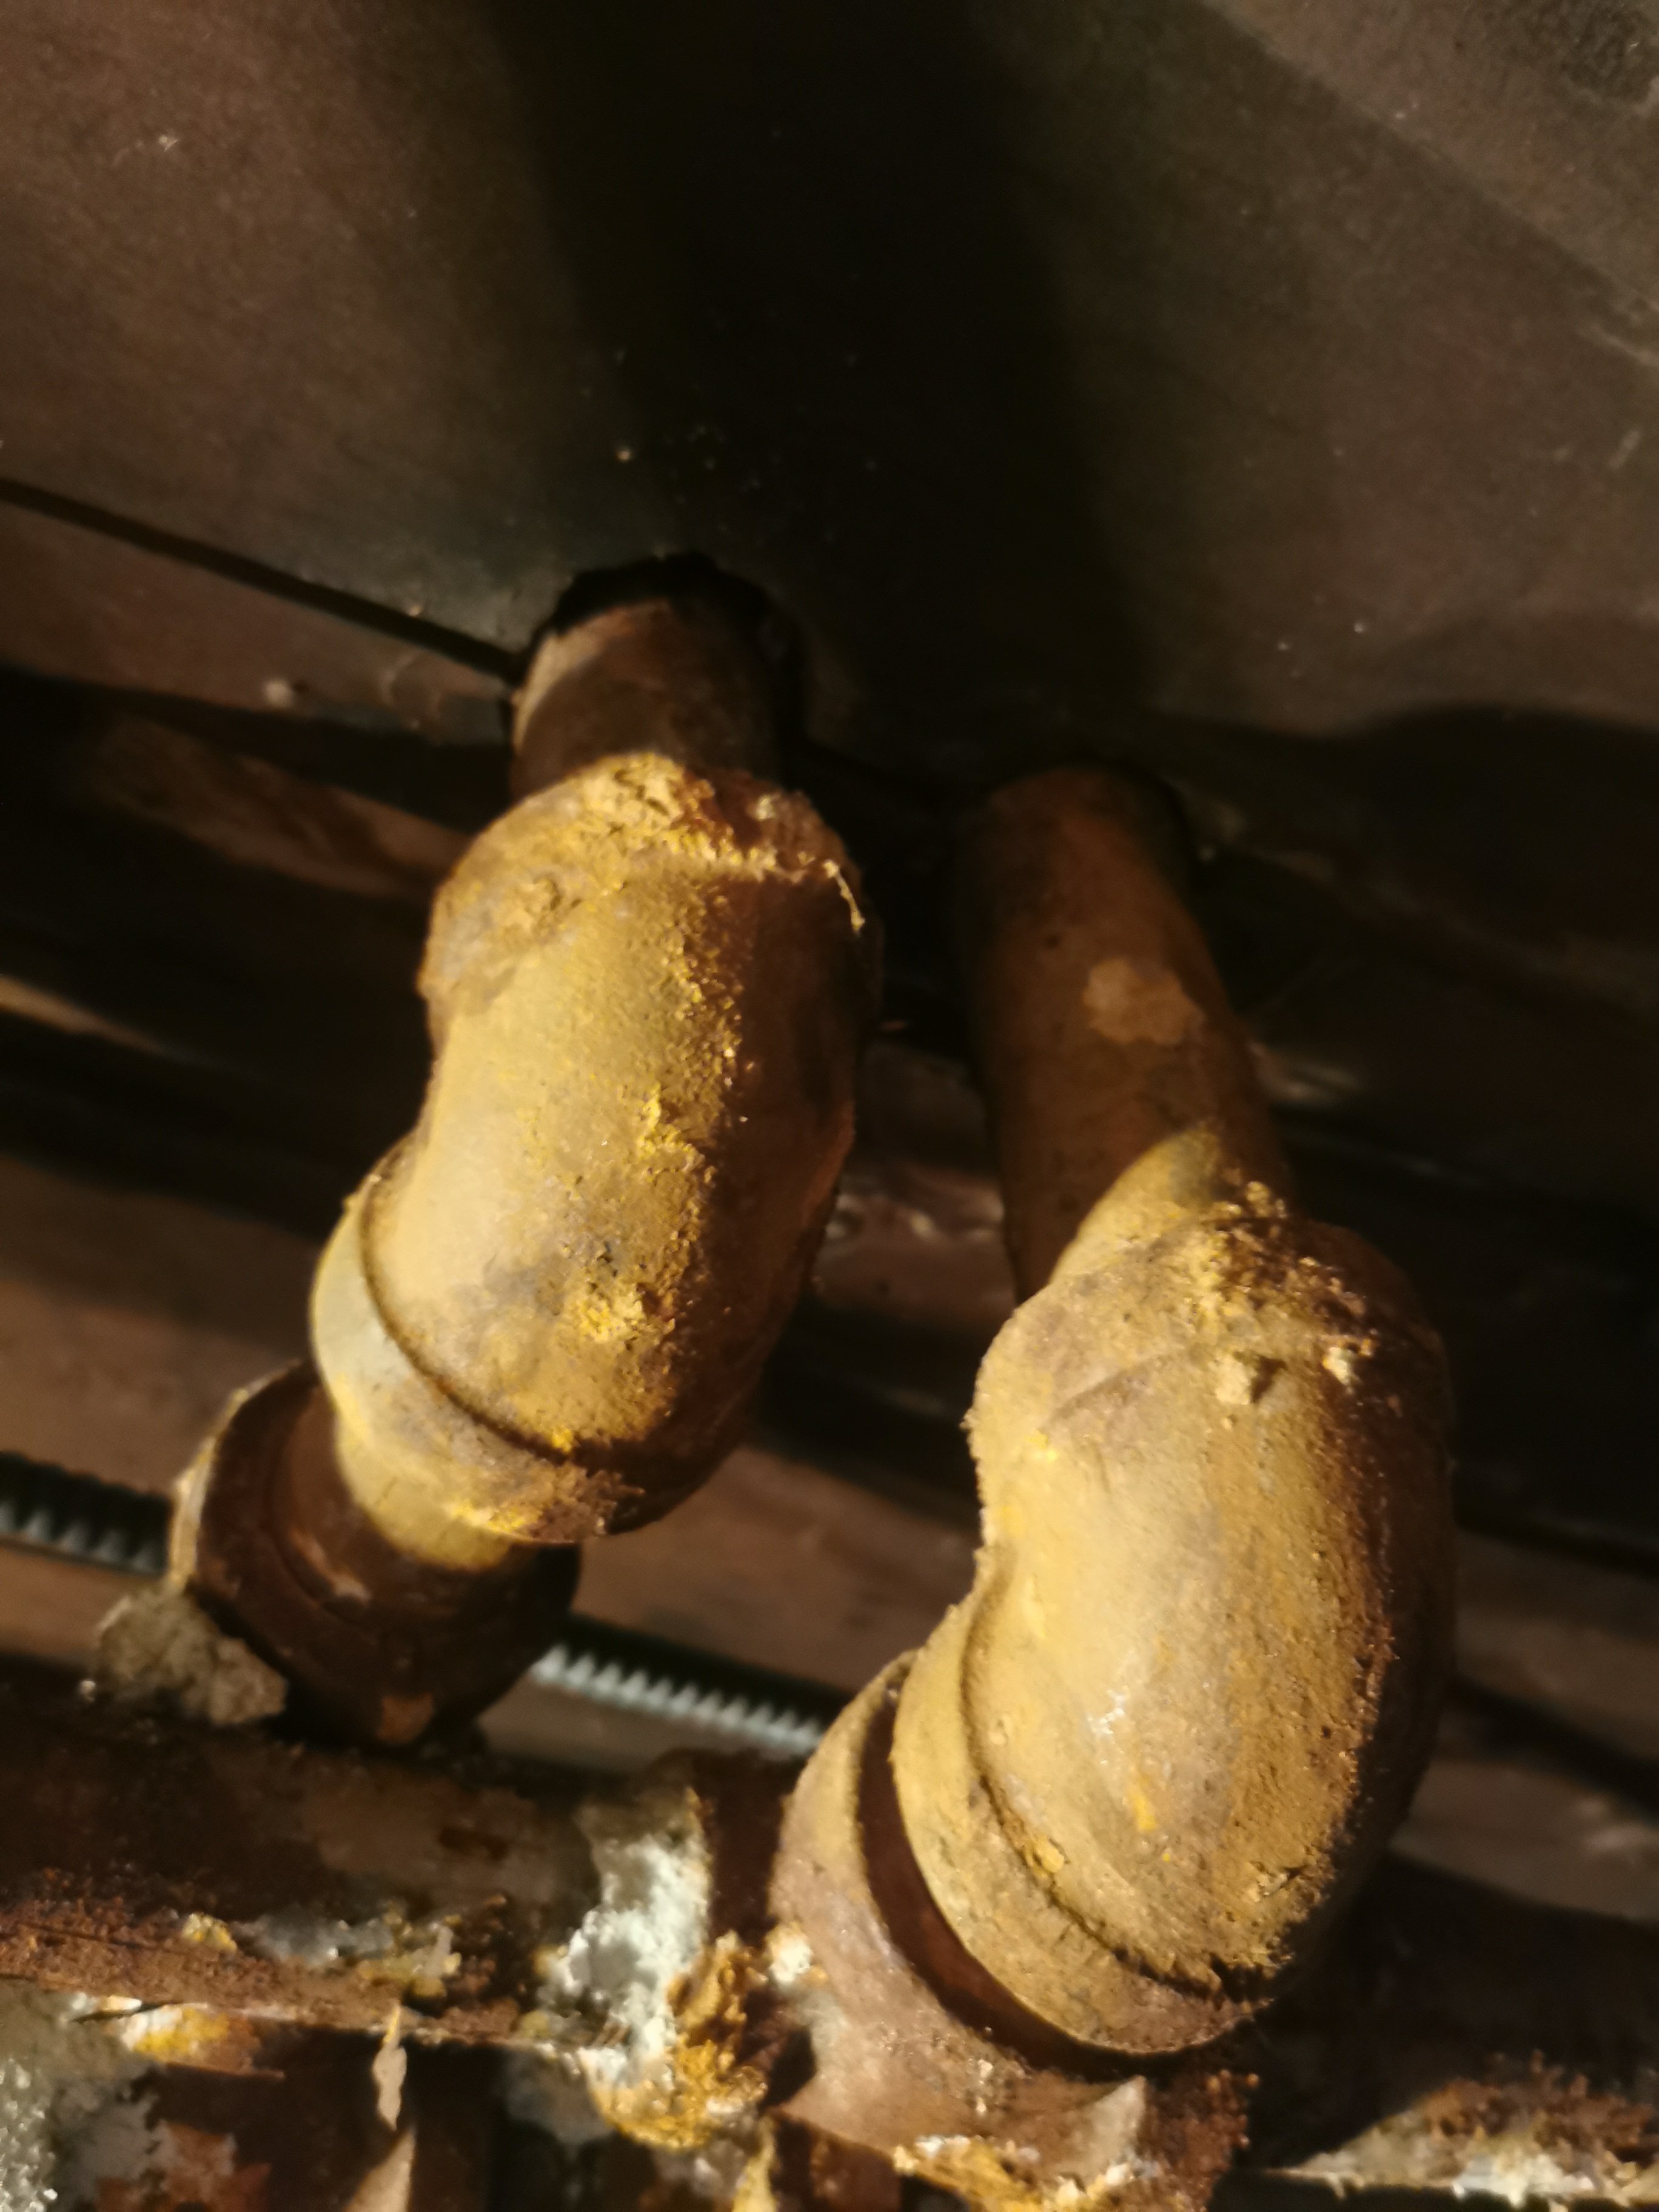
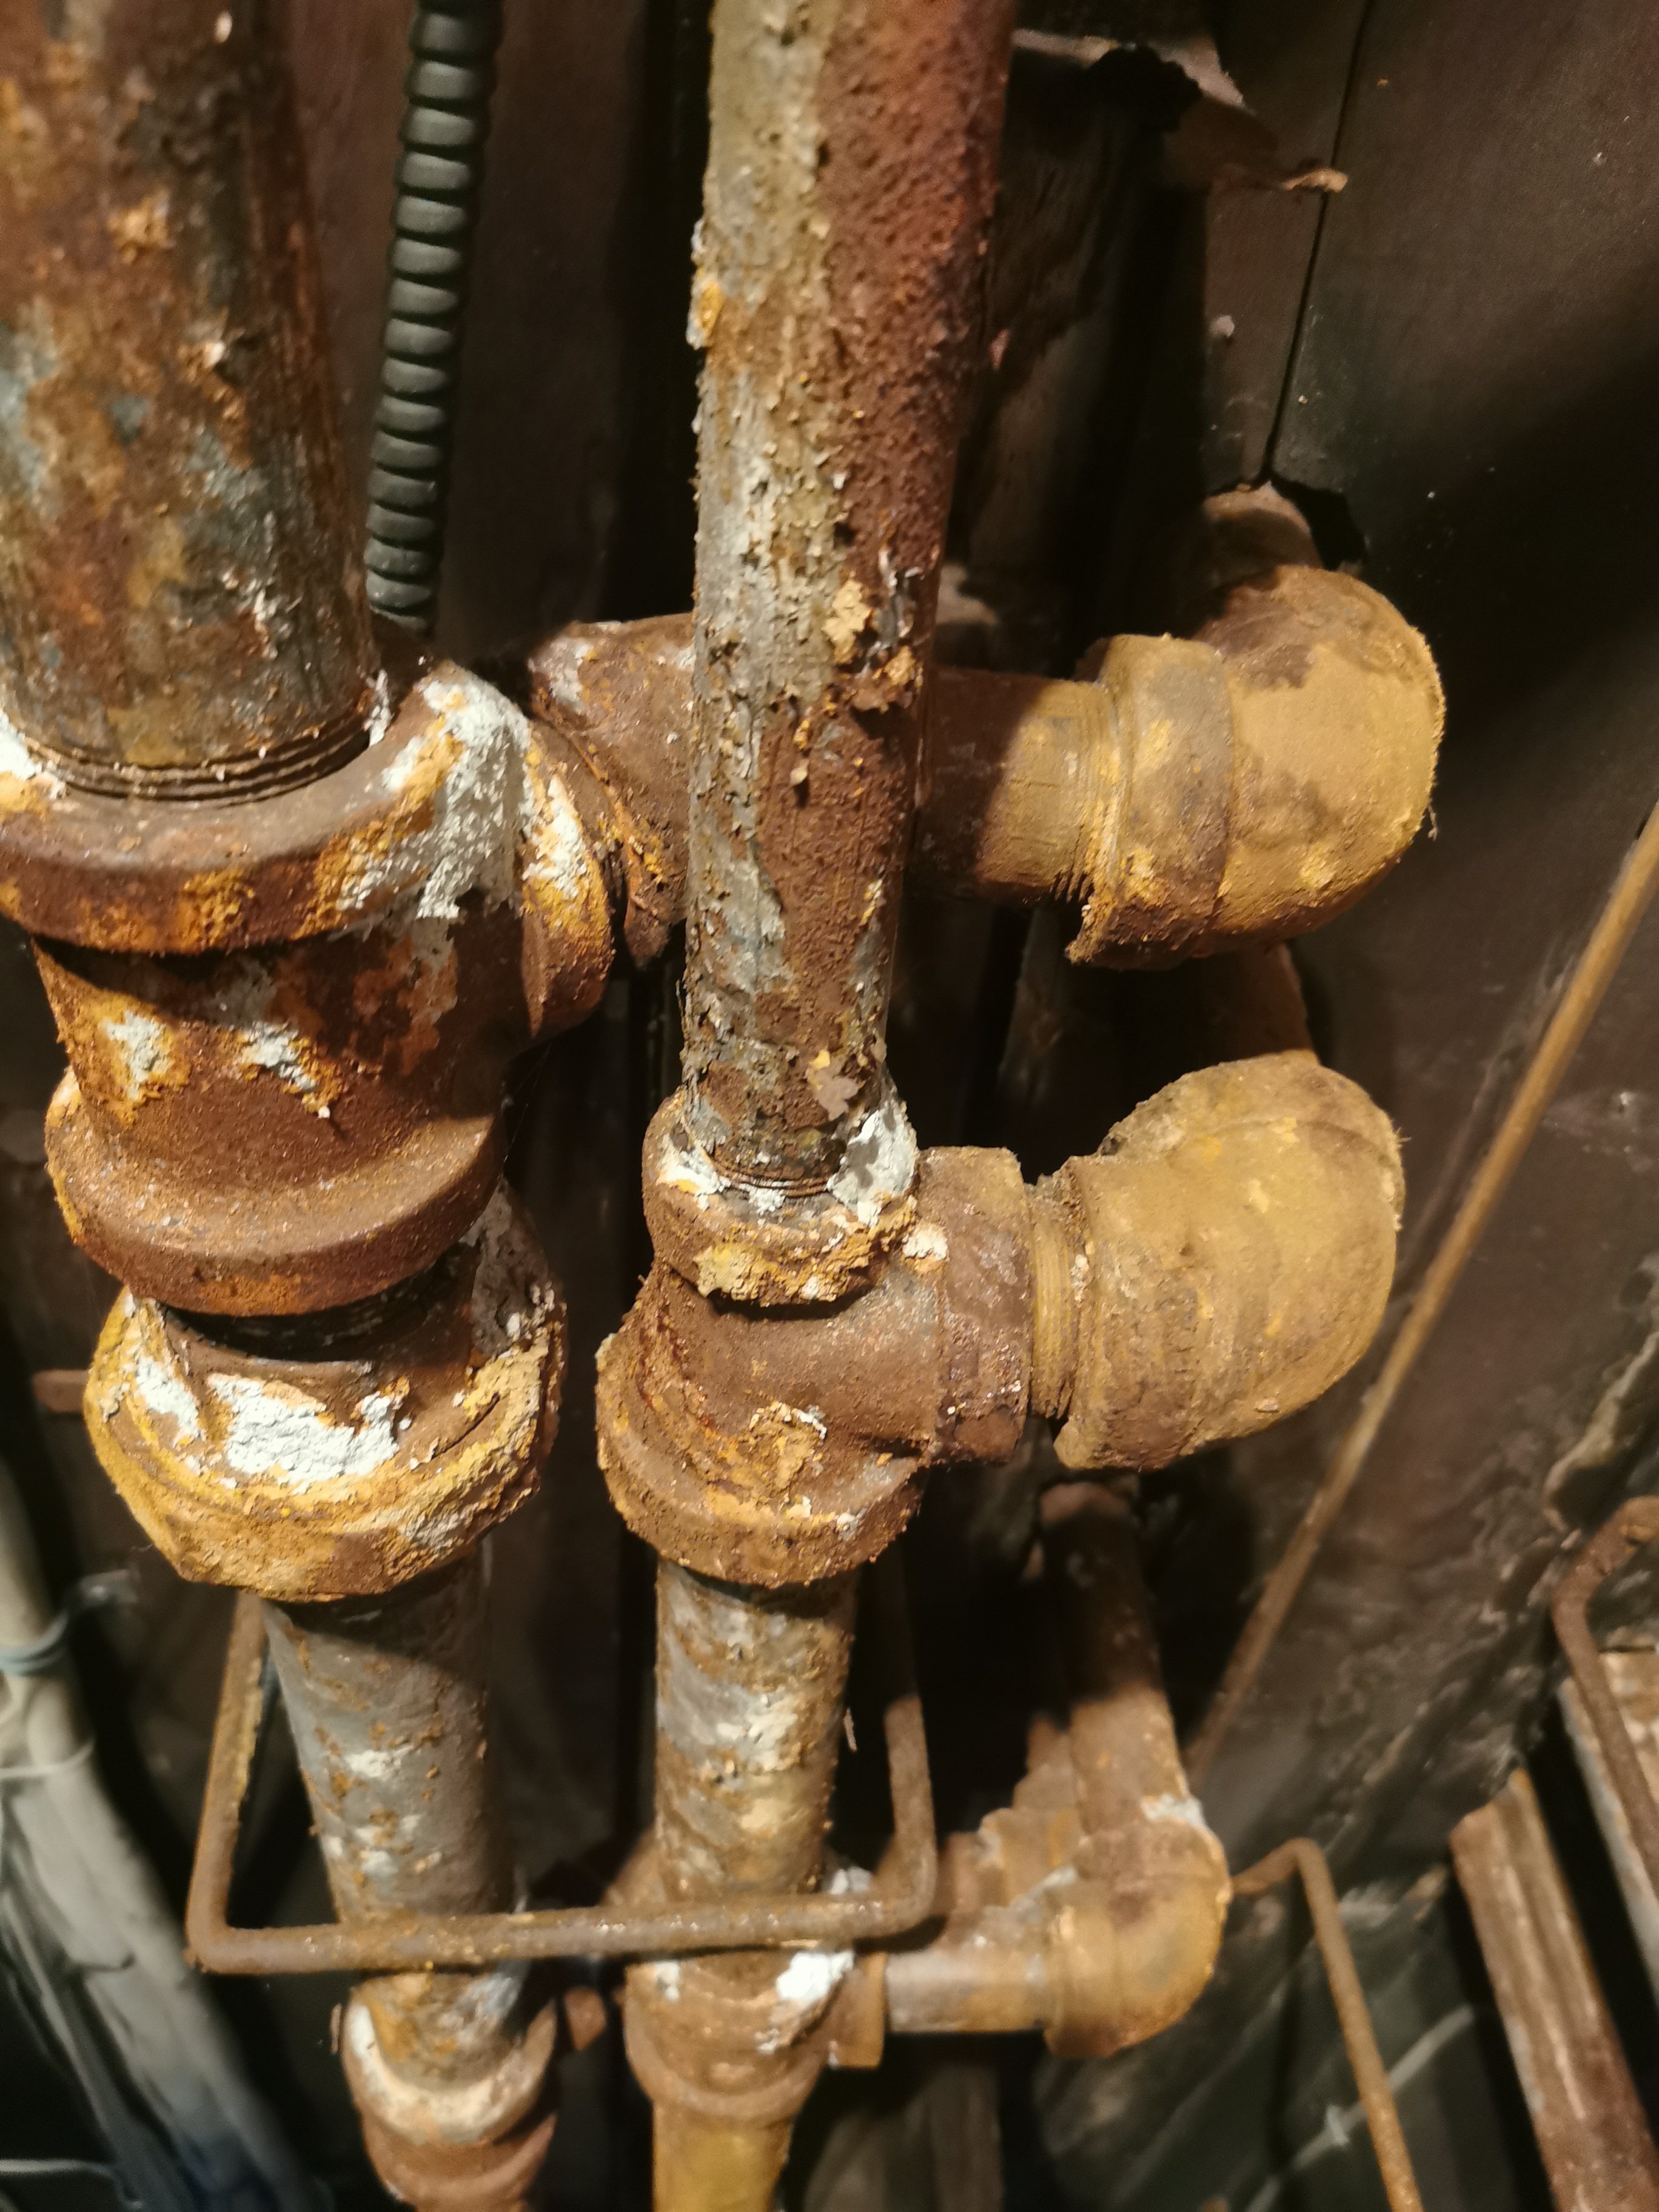
They look like this for a good 30 feet until they're well into the boiler room. Am I supposed to replace all of that, or are they fine and it's ok for them to look this bad? Is it a problem?
How far do I need to replace? Just the top nut? More? Am I going to be able to attach brand new fittings/pipe to such corroded galvanized?0 -
it is leaking from the packing because it is wet above the place where the bonnet threads in to the valve body. put a little string packing in there, don't go crazy with tightening the nut because you can crack it, put a little in, tighten it, put a little more in if you need to and repeat until you stop the leak. cleaning the stem with scotchbright or steel wool will help too.
it looks like there is friable asbestos on those pipes and probably in the general vicinity.
0 -
Looks like the packing nut on that radiator shut off valve needs new packing . Drop the pressure of the system , remove the handle if you can . The packing nut below handle seals the valve stem . Loosen the nut from the valve bonnet and wrap the stem with teflon tape or rope. Reinstal the packing nut , catch a few threads with the nut first before using a wrench, and dont over tighting the nut . You do not want to strip or split the packing nut or you are stuck replacing the valve …Best to add packing a little at a time ..
Good Luck
There was an error rendering this rich post.
0 -
Just the packing on the valve stem. No need to do any of the other things you mention.
Br. Jamie, osb
Building superintendent/caretaker, 7200 sq. ft. historic house museum with dependencies in New England 1
1 -
Thanks all, that's good news. Is packing string as effective as teflon, or more effective in this case? Because I'll buy some if it is. Otherwise, I have teflon here.
0 -
leaks like that tend to come and go
When the system is hot, expansion can stop seeps like that
In the off season parts contract and are more prone to leaking
A stem packing will be the easiest of leaks to repair, threaded joints, maybe not as easily repaired
Bob "hot rod" Rohr
trainer for Caleffi NA
Living the hydronic dream0 -
You mean the other leak, the one that I can't replicate? To attempt to locate that leak, I turned the pressure up to 30PSI (supposed to be 20) and the heat up full blast on that zone. No leak. I left it like that overnight. This morning, still no leak. All that happened was water flowed out of the relief valve and the pressure went back to near 20. I know there's a problem there, but can't find it. The worst thing is that it'll probably reappear in the winter, when it's problematic to deal with it, and could cause real damage by freezing. Better if it reappears now while I'm ready for it.
0 -
Hi, This approach may need a tool most people don't have, but another approach could be to put the system under slight vacuum first. Then go around with a sonic leak detector, and listen for where air is getting sucked in. Sometimes things simply seal better under more pressure and reversing that pressure could make the leak show up.
Yours, Larry
0 -
Let the system turn cold if you want to find all the weak joints….
There was an error rendering this rich post.
0 -
MOEN 1/8" x 24" Graphite Twist Packing was the solution. It's thicker than the string that was in the packing nut before, but on the second try, I got it to fit snugly around the spindle and up inside the packing nut, and after several hours, it's not leaking. It leaked after my first attempt, yesterday. So this morning I watched an instructional video on using graphite packing. Armed with that, I tried again. On my 2nd attempt, I packed double the material in. One length wrapped around the spindle, the other circled around inside the packing nut itself. Turned the handle to ON, came back an hour later, no leaks. Came back an hour after that, still no leaks. So I think it's fixed. I'll keep checking on it. I didn't even turn the house water off the 2nd time.
After 1st attempt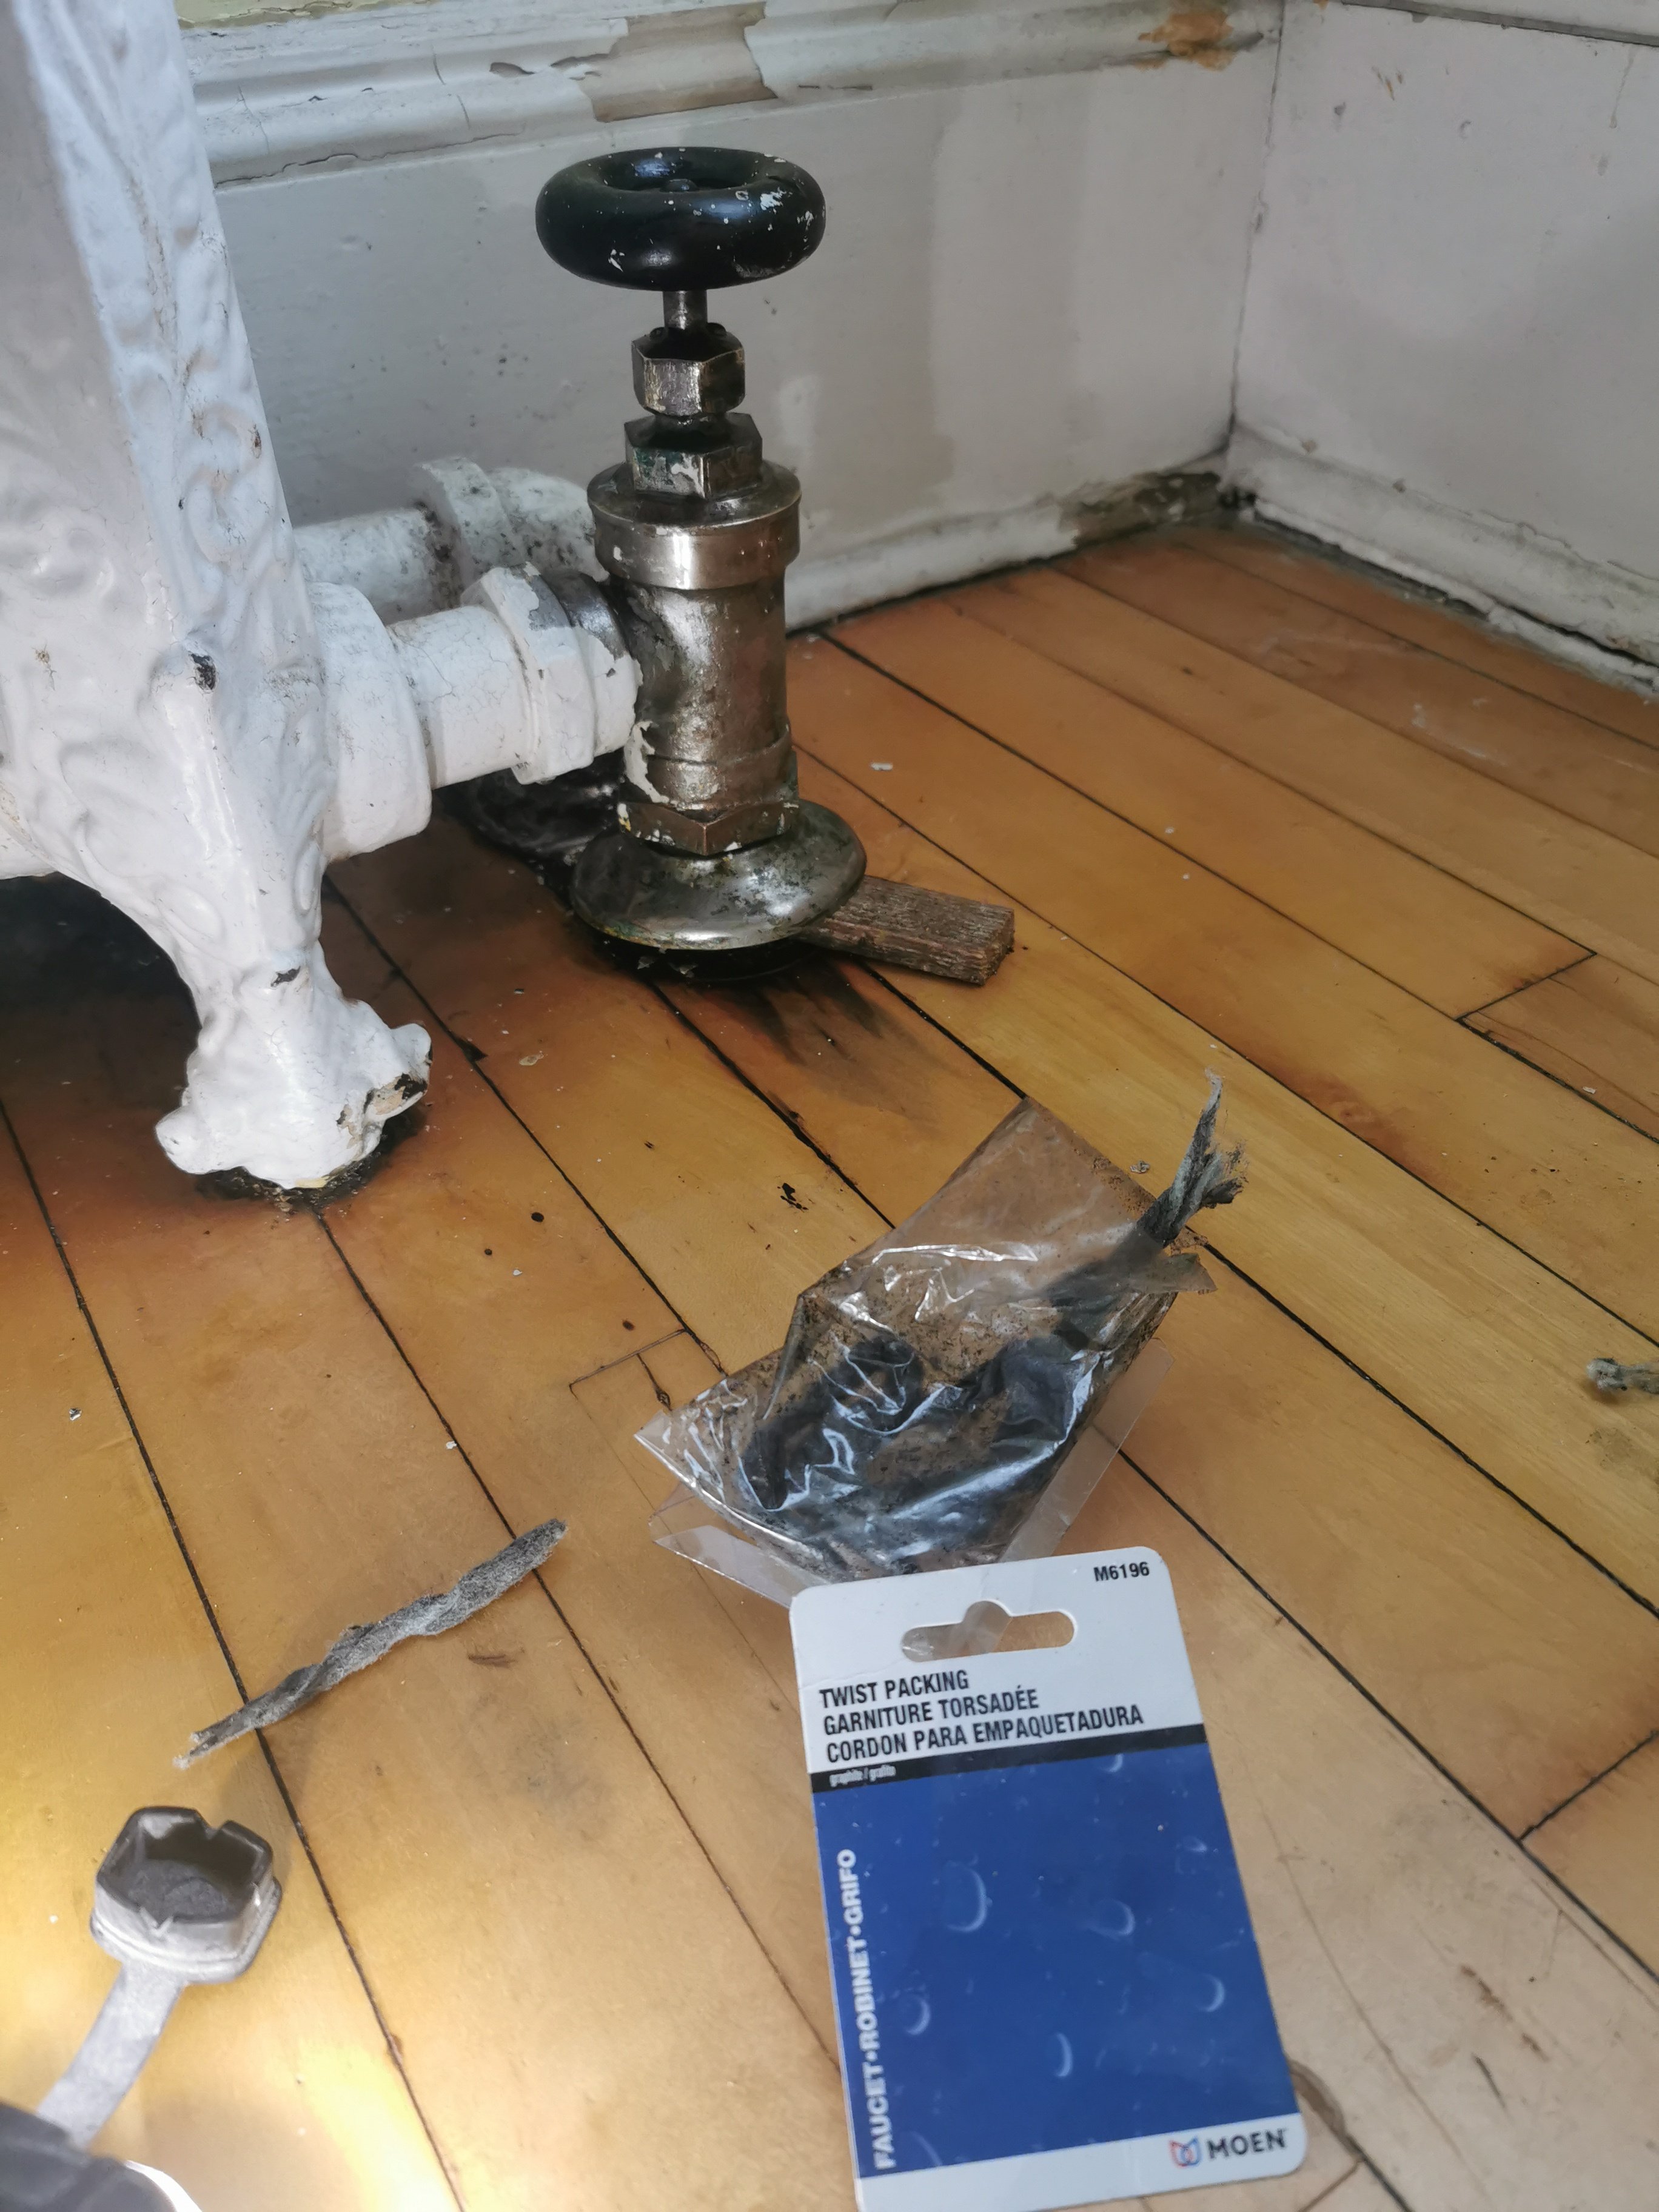
After 2nd attempt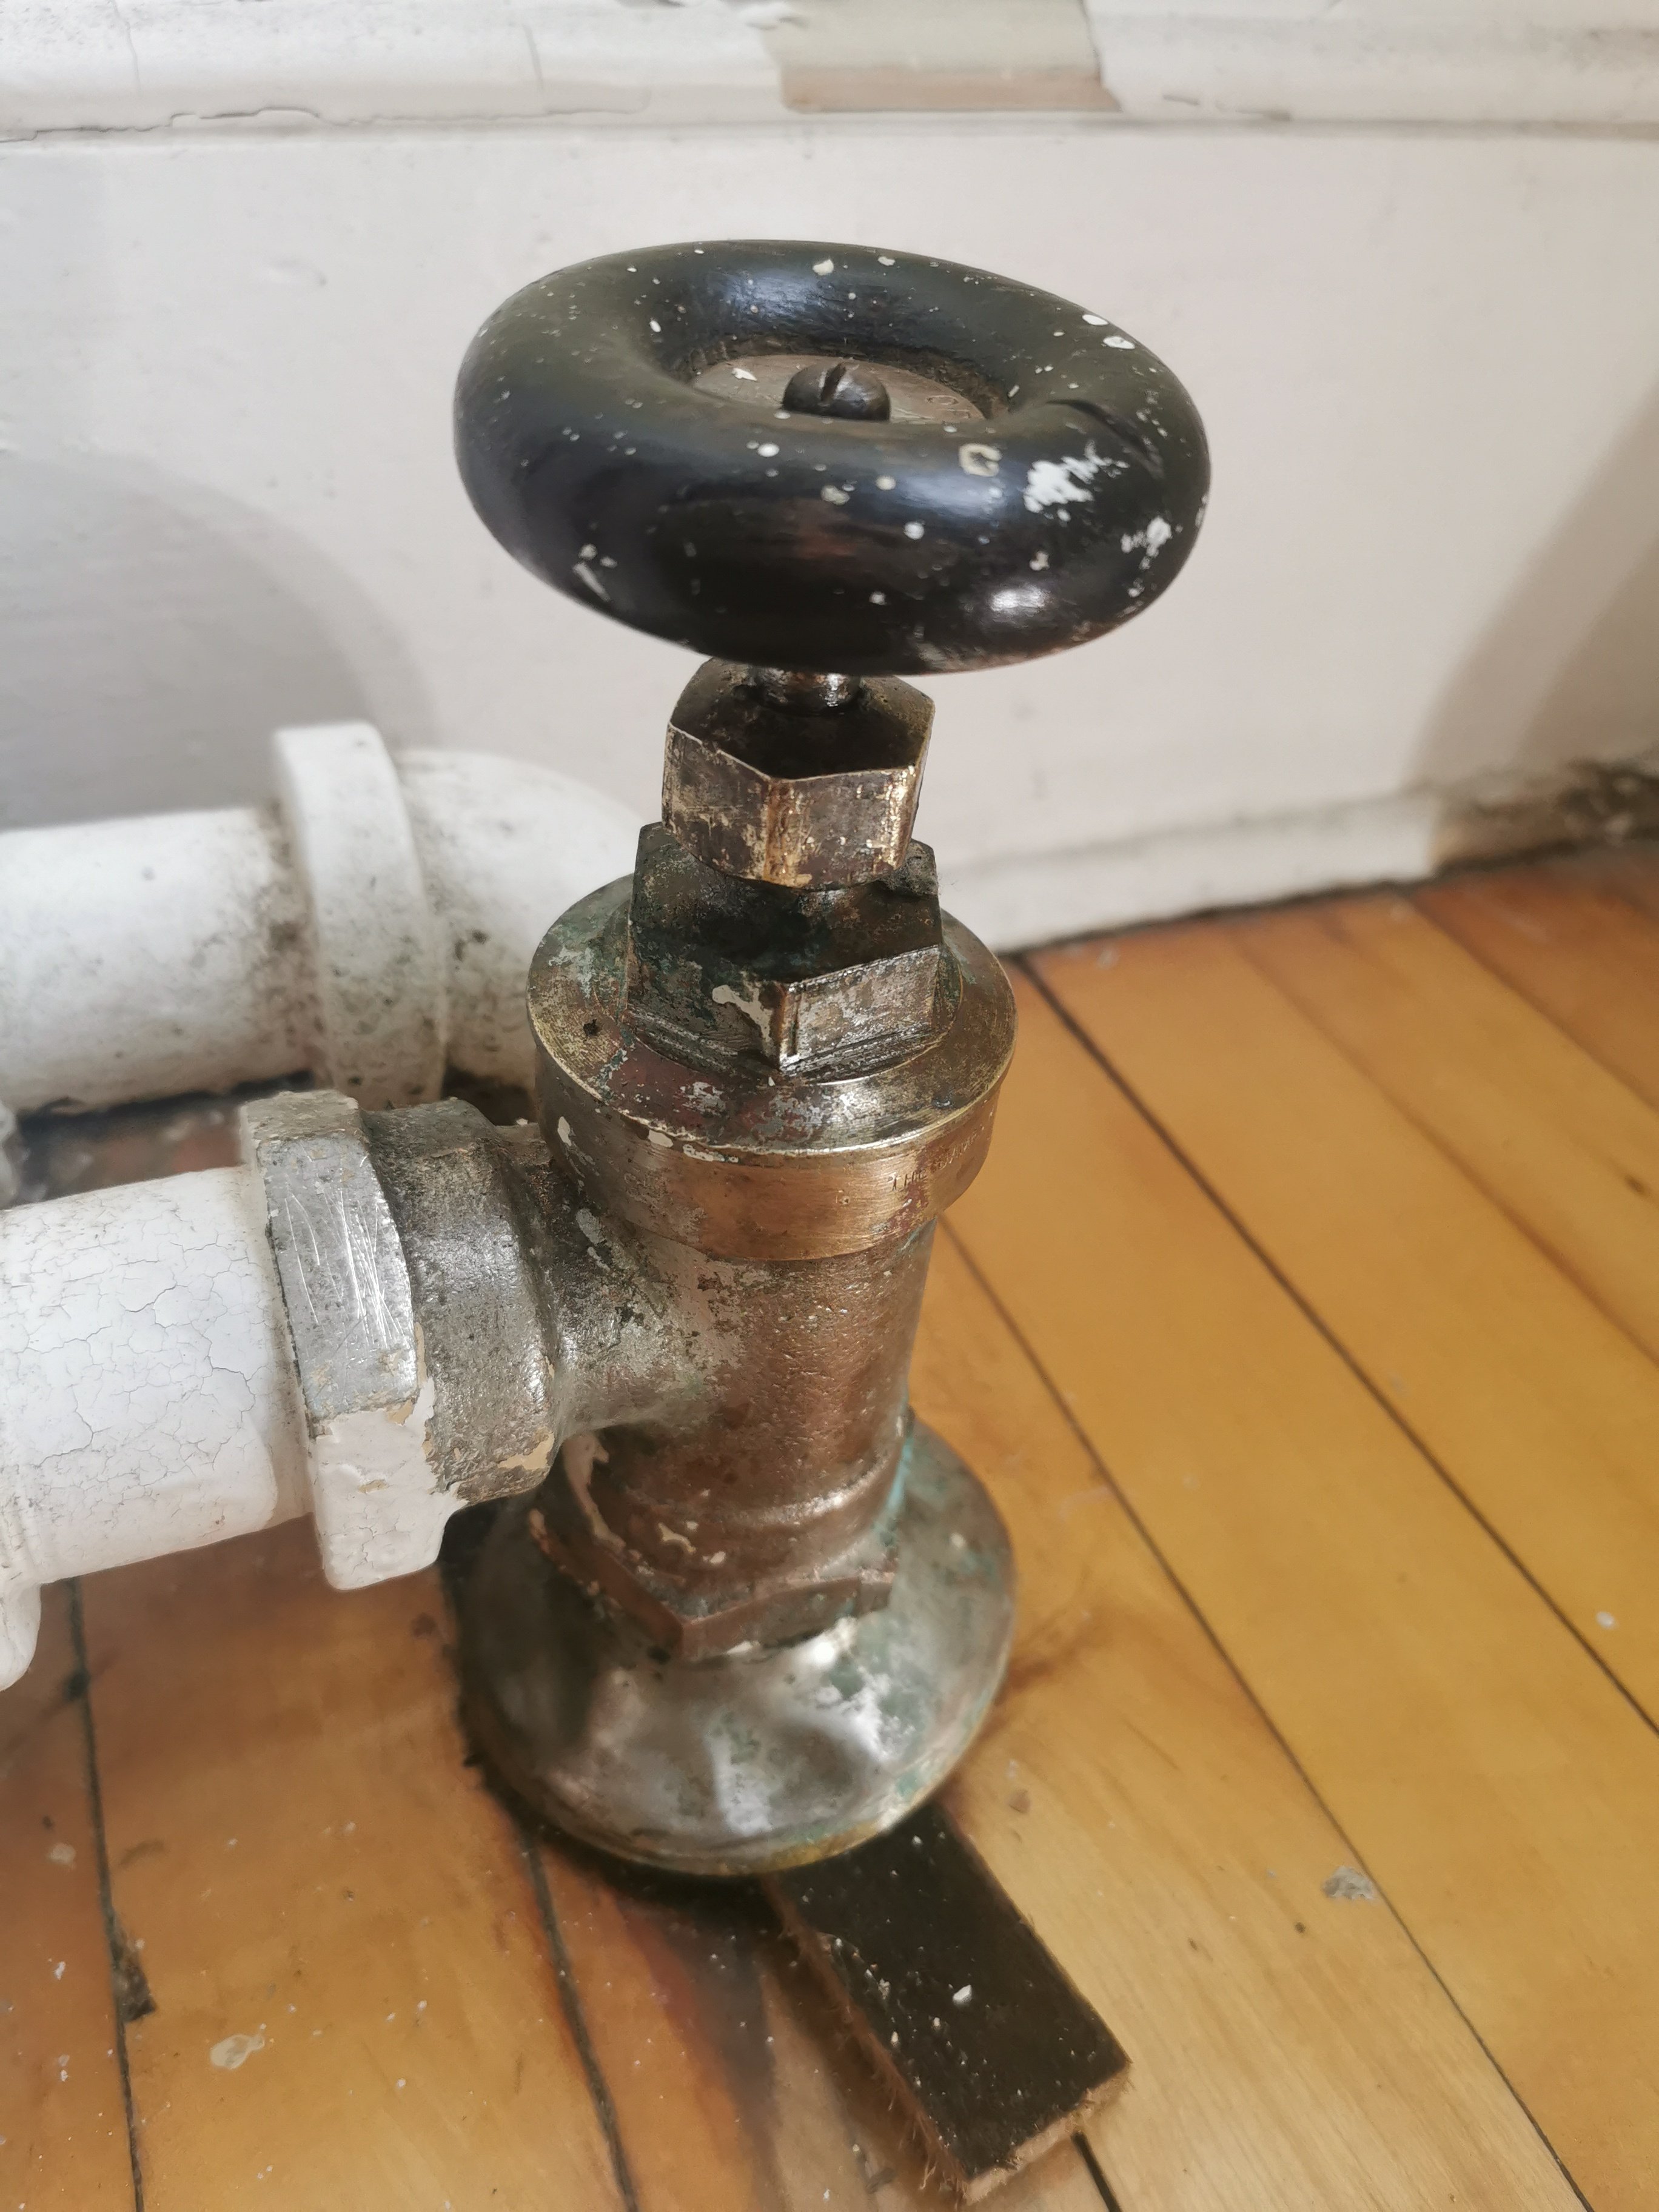 0
0 -
ironic that the name slapped on it is a company that only makes washerless faucets.
you can put a little piece in, tighten the nut down, back off the nut, put another piece in and you can pack it in that way. if you try to shove all of it in at once you can crack the nut.
0 -
Are there any union connections for that radiator?
Perhaps left hand-right hand nipples?
Could be a bear to replace the valves if needed….I would certainly want to repair in place.
0 -
What you see is what you get - I've posted several photos. That's what's there.
I don't know anything about any left/right hand nipples or union connections.
I asked about replacing the rusty pipes and fittings below it, but was told it wouldn't be necessary.
If you can point at what you mean I should replace, that would be really helpful.
edit: are you referring to the original leak I opened this thread with, or the 2nd leak?0 -
he isn't suggesting you should replace anything, he is just trying to figure out how that valve got there and saying it may be difficult to replace because there is no union to unscrew the valve.
he thinks this nipple may be right hand tread on one end and left had thread on the other:
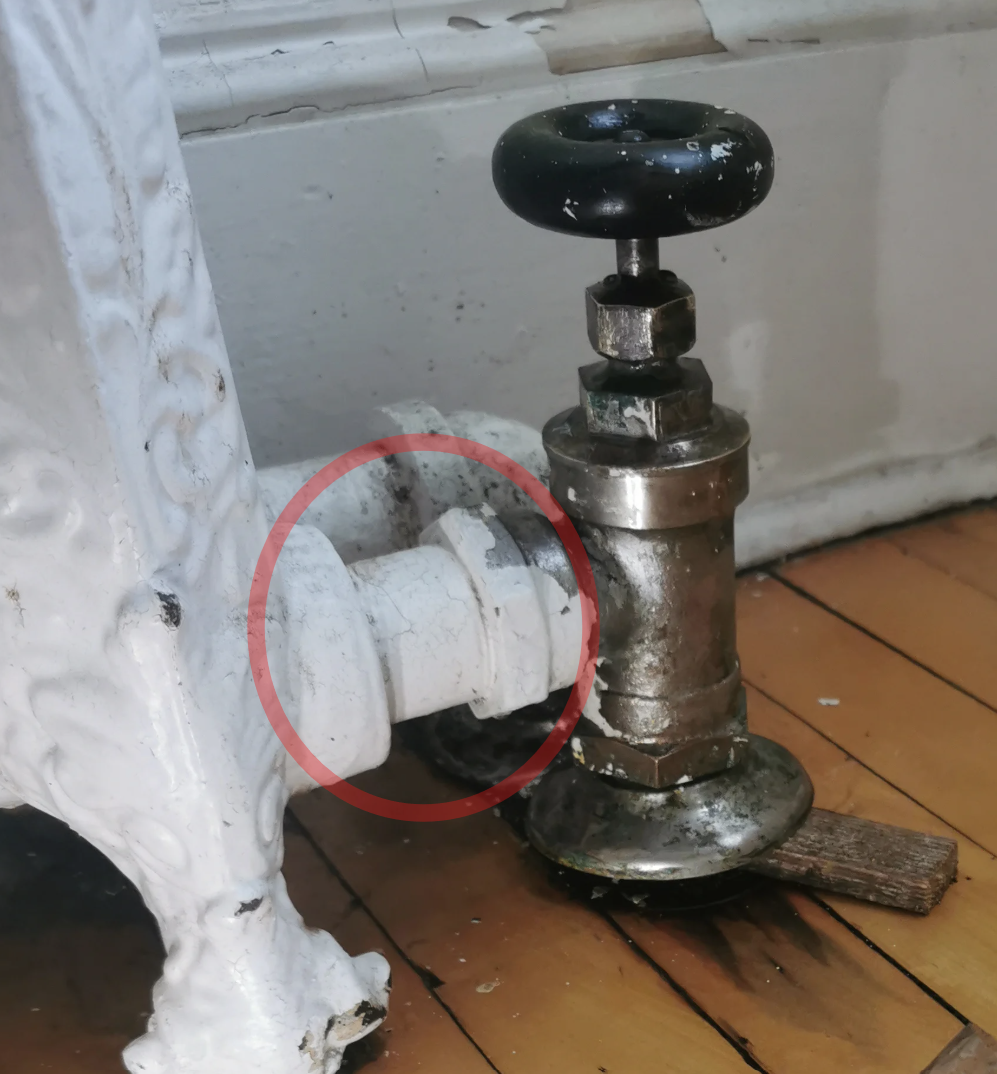 0
0 -
Hi, Being a domestic hot water guy, I'm pretty clueless here, but might that actually be a union nut circled in red? 🤔
Yours, Larry
 1
1 -
look at the other picture, it is just a female fitting.
0 -
Oh, ok. To replace that, if it was necessary, I think I would have to first disassemble everything above the red line I just drew in, unscrew the fitting from the red peanut shaped 'ellipse', then twist the fitting off.
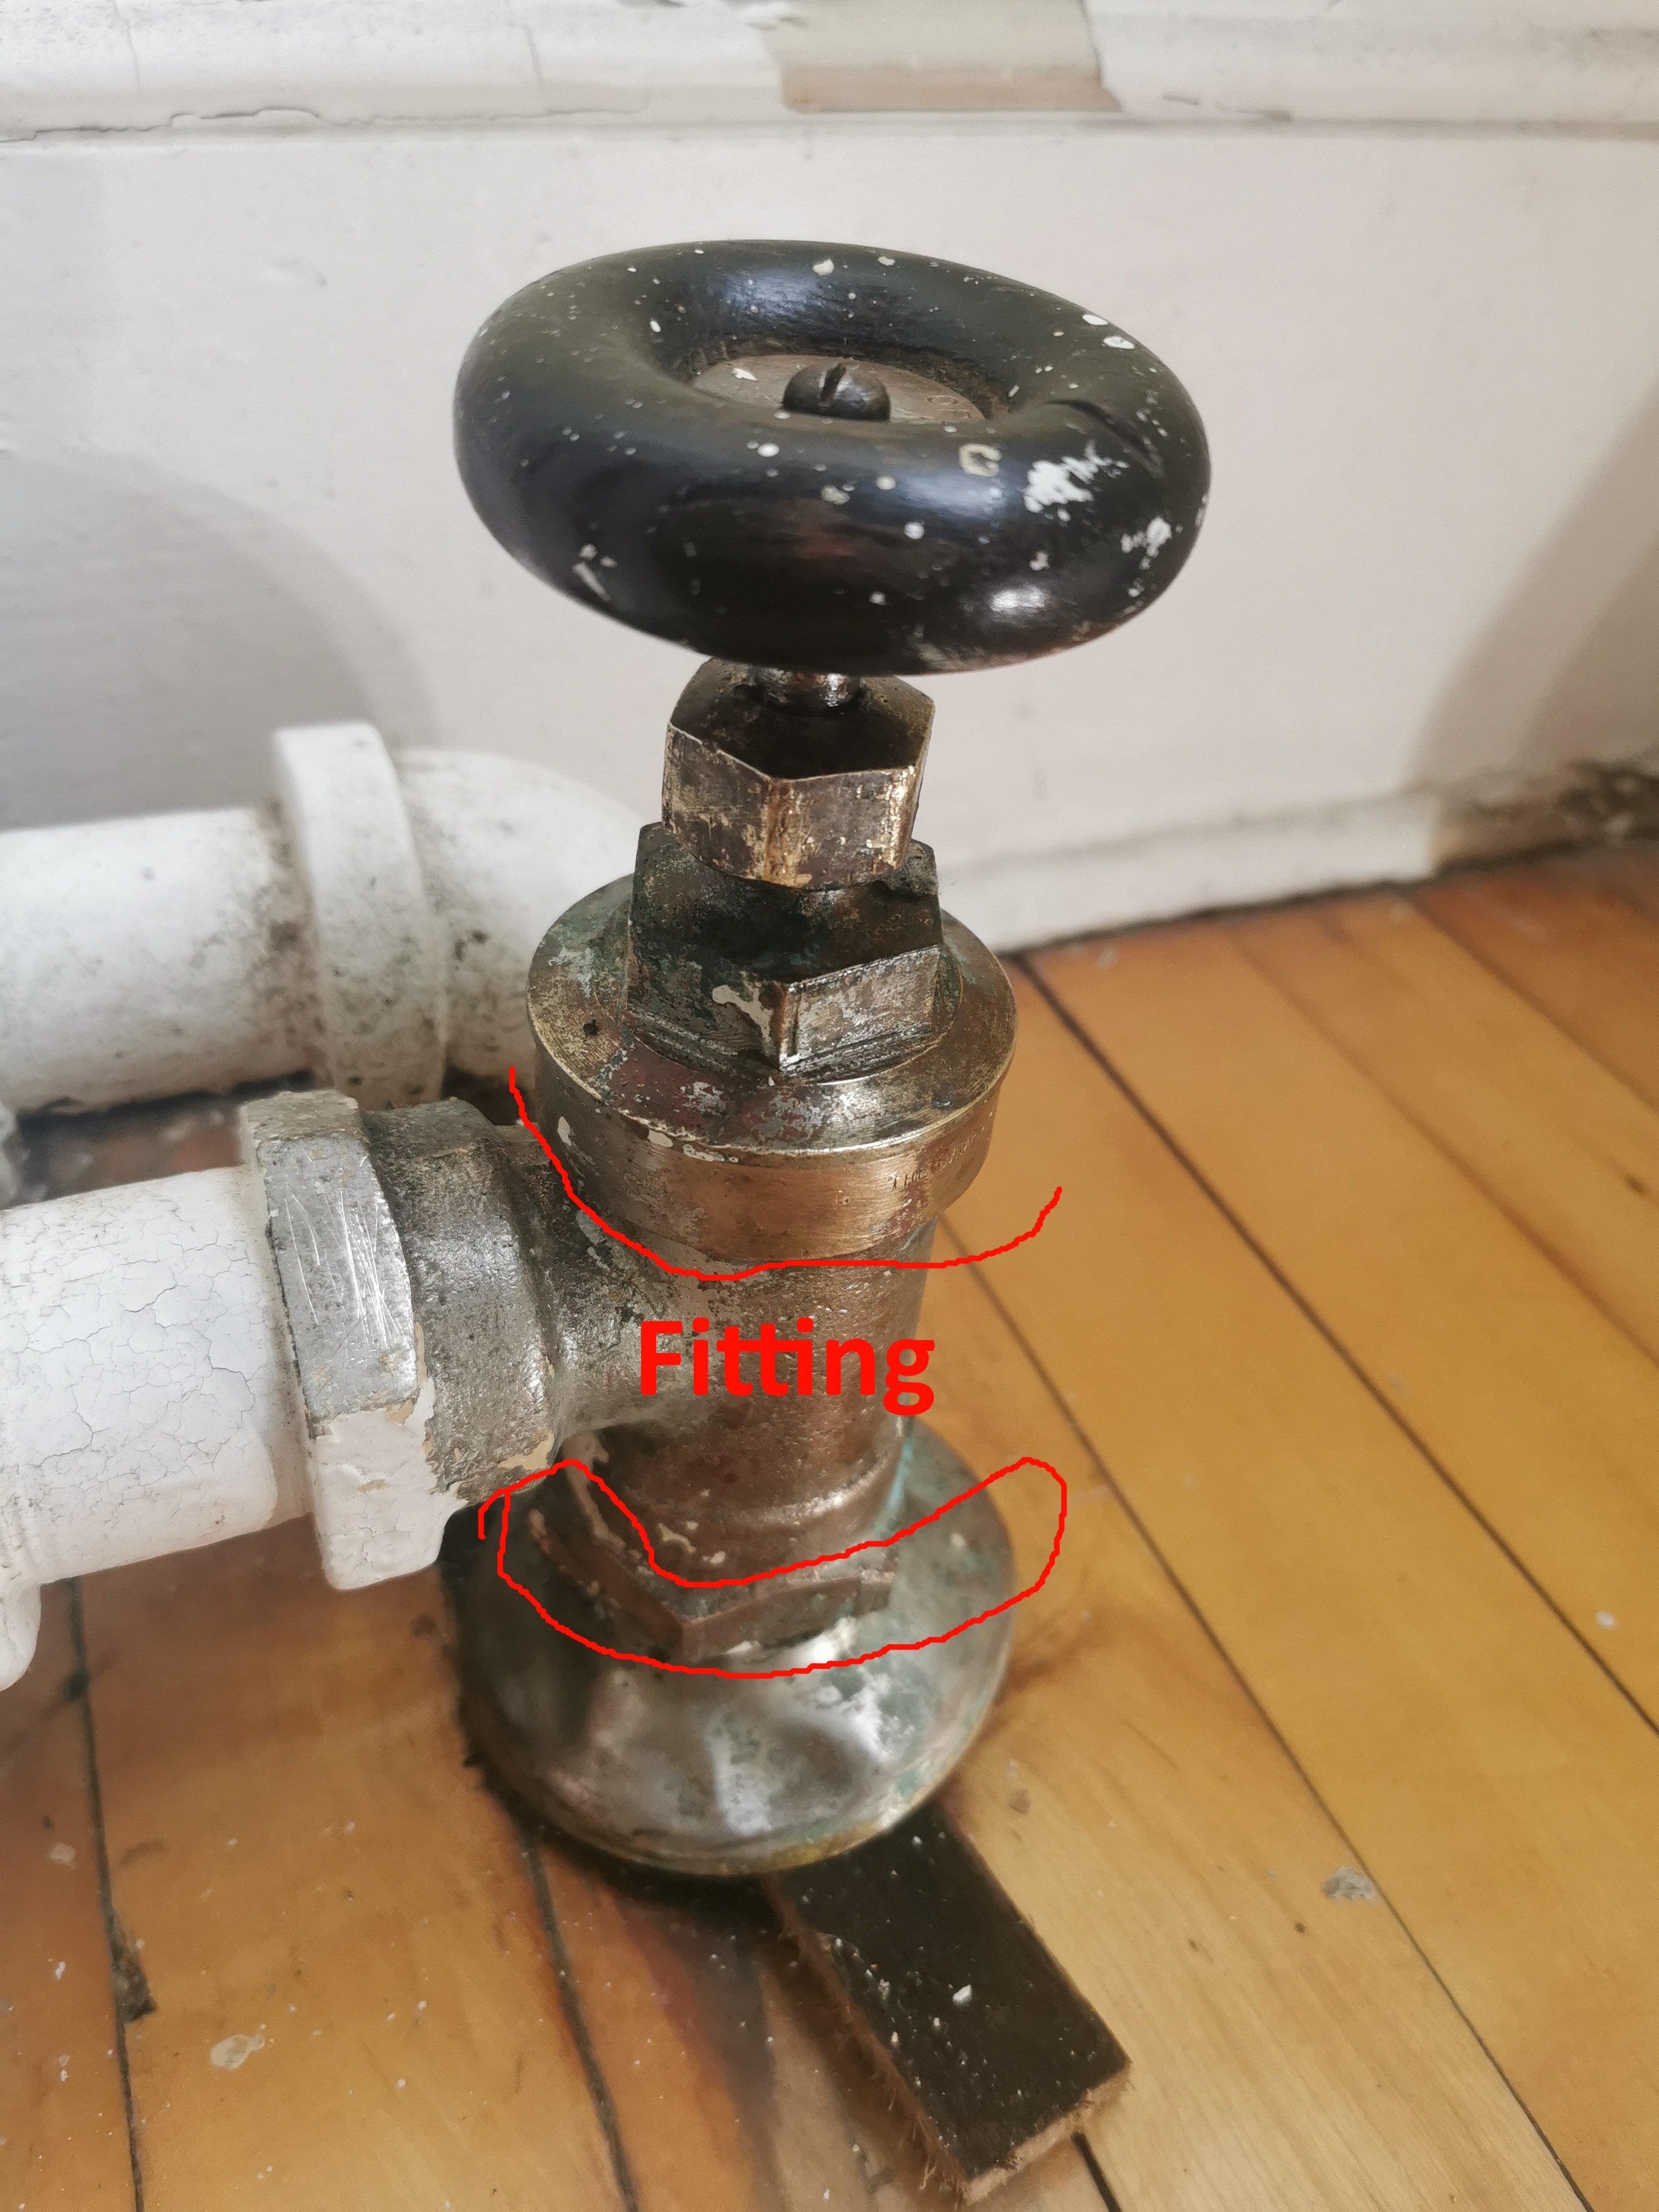
 0
0 -
the problem is that you'd have to turn all of the piping in the basement to unscrew it from the bottom of the valve or disassemble it up to that pipe. most likely the nipple i circled is left hand thread on one end and right hand thread on the other so you can turn it in one direction and both ends tighten and loosen at the same time because each has opposite threads.
1 -
The most plausible assembly is the left-hand threaded nipple that is shipped with the valve, which also has left-hand threads, as indicated by @mattmia2 .
I can’t see anyone doing all this work behind the scenes, starting at the radiator and ending up in the basement. You would normally start at the boiler with the biggest pipe (the shared piping) then reduce the pipe size as you branch off, until you terminate at the radiator location. After each branch, you would then reduce the shared piping as enough BTU capacity was delivered to the branches, until you reach the last radiator on the main pipe at which point the main has been reduced to the size needed to feed that radiator.
Most valves come with a matching union spud that is threaded into the radiator and connected to the valve, or to the return bend on the return side, so the radiator can easily be removed without a bunch of pipes being removed from inside the walls back to the basement. That just does not make sense.
When you want to paint behind a radiator, you just remove it and then put it back. The only way to do that with this connection would be to back out the opposite-threaded nipple the has been indicated by the red oval in the picture above.
Edward Young Retired
After you make that expensive repair and you still have the same problem, What will you check next?
0 -
If you wanted to replace that valve, you would need to remove the nipple from the radiator and remove the valve as indicated by the blue arrow.
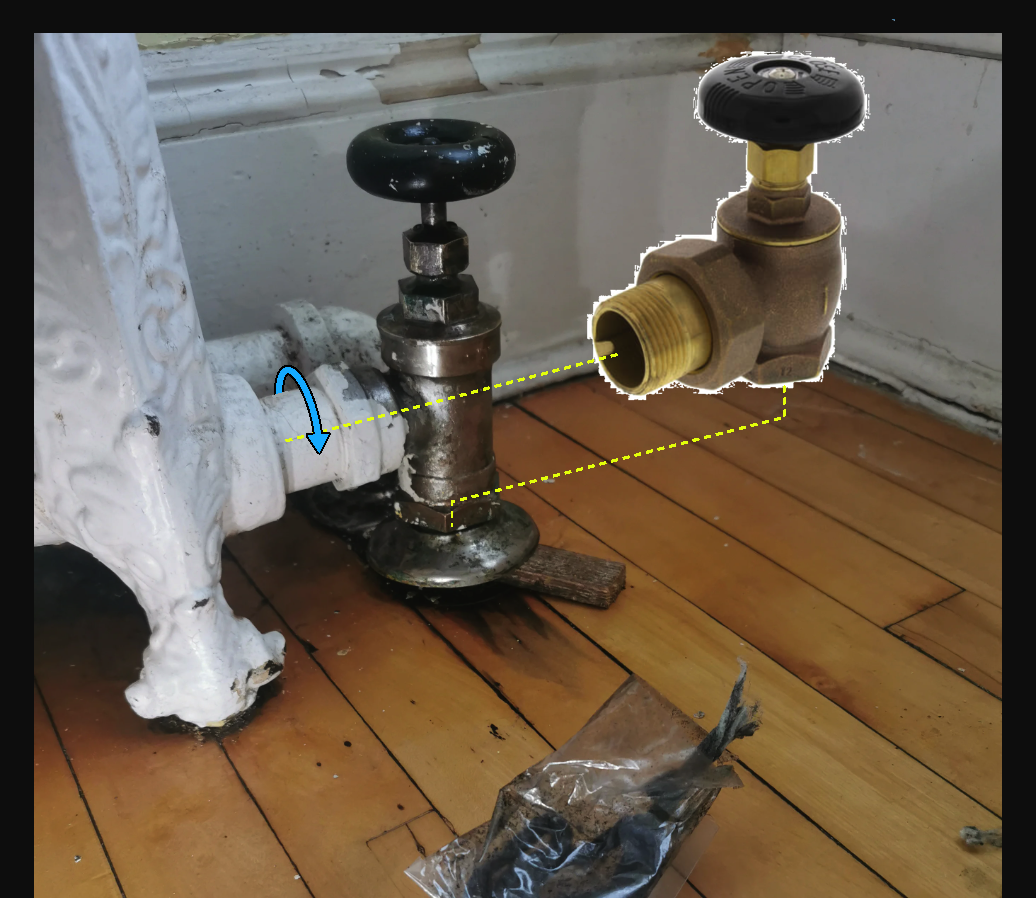
If it did not move with an 18" pipe wrench with a 3-foot pipe over the handle for leverage, then I would cut it out with a saw near the valve so there was something left to grab with a pipe wrench, after filling the nipple with some wooden dowel to keep the pipe from crushing.
Then you could fit a 36" pipe wrench on the cut-off nipple stub, with a 6-foot pipe over the handle for leverage. That will surely break those threads.
Once you have the female thread on the radiator ready to accept a male thread, and the valve off of the riser ready to accept a female valve thread, all you need to do is put the new valve in place.
Edward Young Retired
After you make that expensive repair and you still have the same problem, What will you check next?
1 -
Then, IF you have to change one of the valves, there could be other complications.
New valves are usually shorter than old…..maybe the riser pipe could be pulled up to compensate for the height issue.
Next the new spud for the new valve probably won't be long enough and adding a close nipple and coupling will make the horizontal spud too long.
So then you might need to move the CI rad which means dealing with the return pipe that has no union also.
40+ years of mistakes have made me think this thru that this is not a 10 minute job.
So I would certainly repair in place if at all possible.
0



Categories
- All Categories
- 87.8K THE MAIN WALL
- 3.3K A-C, Heat Pumps & Refrigeration
- 60 Biomass
- 430 Carbon Monoxide Awareness
- 133 Chimneys & Flues
- 2.2K Domestic Hot Water
- 6K Gas Heating
- 124 Geothermal
- 170 Indoor-Air Quality
- 3.9K Oil Heating
- 79 Pipe Deterioration
- 1.1K Plumbing
- 6.7K Radiant Heating
- 397 Solar
- 16.1K Strictly Steam
- 3.5K Thermostats and Controls
- 56 Water Quality
- 51 Industry Classes
- 51 Job Opportunities
- 18 Recall Announcements