Downspout drains underground under brick patio — no backup, but no water at exit either
Comments
-
did you look in that basin for the missing water when you ran it for a few minutes and it didn't come out down hill?
0 -
Is water supposed to leak out of the joints?
I actually assumed everything underground was the perforated corrugated pipe that you see at the discharge0 -
I lots lots of rodents on my property. many chipmunks and squirrels. i've definitely seen nuts in the vicinity of the discharge and i've seen chipmunks going in there. i should probably add some kind of mesh cover to the discharge to prevent this?
0 -
Wait is the "ABS" pipe the pipe you see protruding out of the ground at the discharge location? I thought that was some kind of perforated corrugated pipe.
w.r.t gutter guards: it looks like my 2nd and 3rd floor gutters all have gutter guards. most of the first floor do not, but I bought some from costco and plan on installing them. i've heard mixed stories about gutter guards though… did you go for a gutter brush because you didn't want to install gutter guards?
0 -
They're not. I pulled a few up a couple days ago and it looks like it's just sitting on soil.
My masonry guy said this seems like a $k-$$k kind of job though which made me think it's actually hard0 -
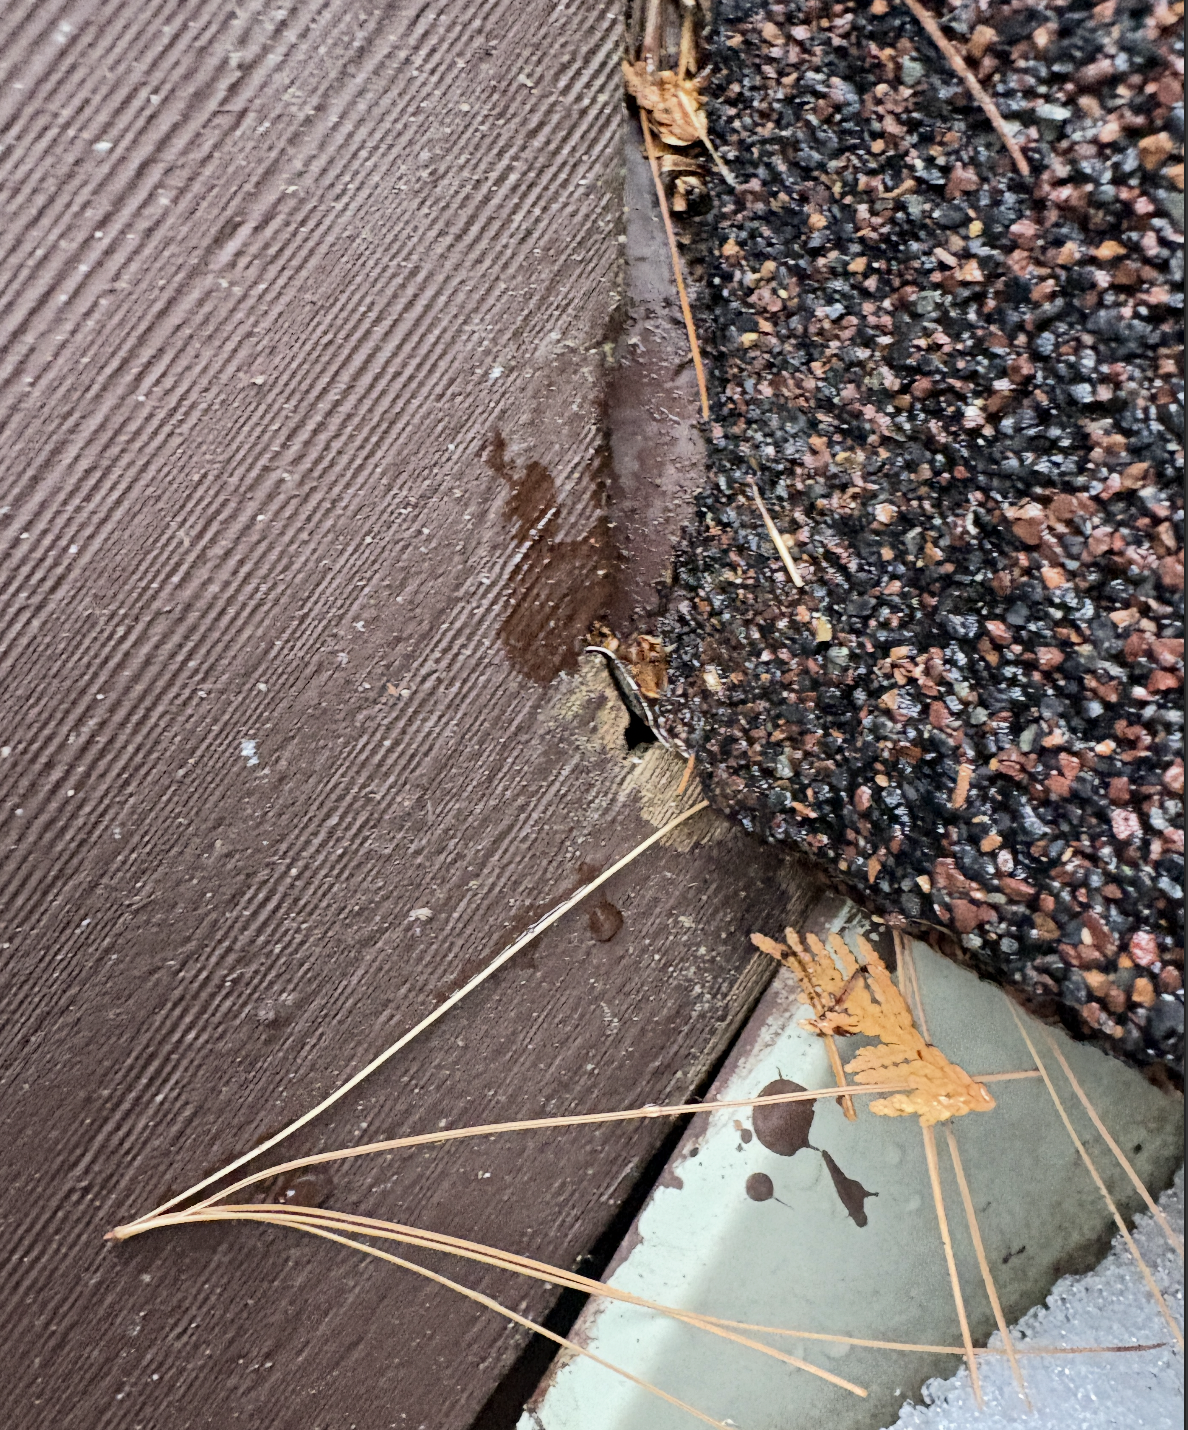
Sorry which basin are you referring to? do you mean this one by the rocks?
if so, water did start backing up in there both yesterday and today
0 -
that corrugated plastic pipe comes in both perforated and non-perforated versions. the joints are far from water tight so a fair bit of water can leak out the joints even if it is the solid kind. If water is filling up that basin (what you showed a picture of) either it is partly clogged or the pitch is the wrong way on part of it, or it is pitched to that basin and it is open or perforated and the water is intended to flow there and the pipe off to the side is just an overflow.
0 -
If you look closely at the ABS pipe you will see slits in it if it is the drainage type of ABS pipe.
I invested in the gutter brush brand of gutter protection because I have the hanging strap Alaska rain gutters and it is a worry free method to keep the junk out of the rain gutters.
0 -
The white PVC pipe is what you want for that as you can slide a solid 10 foot length over the ABS and put a slit drain cap over the end of it.
0 -
Hey @mattmia2 — I just realized we chatted a few weeks ago in another one of my posts and found out we're in the same area.
You’re probably familiar with Michigan Power Rodding — that’s who I’m using. They’re actually here right now (showed up a bit late).The tech’s working on clearing the line but had to switch cutters because he couldn’t get past a section about 20–30 feet from that square drain by the rocks. He thinks the entire line might be corrugated and perforated. He said he can’t run the camera until the line is fully cleared, so we’re focusing on that first and then deciding afterward whether to scope it. There's lots of root growth according to him, but I think we all suspected this from the beginning.
I have lots and lots of tall trees in my yard.
He did say that the permanent solution here to all this root growth would be to replace the line. That's probably a $10k project in this city, with all the paver and plumbing work that needs to get done
When my masonry guy (Dexter block) came here a couple days ago, he threw out a $6-7k work for this work, but my guess is it'll be more. I wonder if this is something home insurance can covermy first year as a homeowner has been a massive headache….
0 -
I think I will ultimately take on this project, whether DIY or hiring a contractor. I could probably manage the part on the grass, but I don't know how to lay bricks..
0 -
the sewer cleaners i knew retired like 15 years ago. ask stadium hardware or jack's hardware who they recommend.
there were a couple hometimes on how to lay pavers. if you are just removing a couple sections to replace some drain tile it might be easier than if you had to set the grade of the whole thing, you just need to match up the sections you removed.
I used solvent welded sewer and drain weight pvc when i ran a downspout under the apron to my garage before i poured it. using corrugated drain tile for something like that is kind of a crap job. I wouldn't be surprised if they cut corners on the base for the pavers too, if it is not as deep as it should be.
a home warranty might cover it, homeowner's insurance wouldn't cover it.
0 -
Whatever you do invest in the gutter brush for your rain gutters buy once and its done.
0 -
I don't think I have home warranty. I don't recall signing up for it or being offered it
for sewer cleaning, I was choosing between dynamic drains and michigan power rodding, and decided to go with the latter but kind of regret not going with the former now. I think the former would've been cheaper an d just as reputable, if not more.
I'm paying around $860 for sewer cleaning, storm line cleaning, and storm line camera scoping0 -
As for the base, I'm not sure if it's the same company that did the patio and stormline.
I did pop up a few bricks the other day to see if I can find the storm line. It looks like it was just earth underneath. I don't think there was mortar. Maybe there's sand. I'm not totally sure.
I did upload a pic earlier showing the bricks I popped off (i also dug a bit into the beneath to see if I could get to the underground pipe) :0 -
Don't you have to get the level correct and such? I pulled up a couple bricks the other day and the base doesn't look like mortar. I think it may have just been set of normal earth perhaps with some sand but not too sure
0 -
it should be crushed limestone and sand in different layers, the crushed limestone locks together and makes a solid base that doesn't move.
if you are just taking out a trench you can screed and pack and screed it to the adjacent area.
0 -
the correct method is to have a compacted base under the pavers, and good drainage so there are no puddles There is an art to installing pavers, just like bricklaying
Bob "hot rod" Rohr
trainer for Caleffi NA
Living the hydronic dream0 -
I think there might be some crushed limestone/sand/compacted base under the pavers. I'm just not familiar enough with what I'm looking at to know for sure.
I took 4 bricks out last weekend along with a bit of the base/dirt and put them back a few days ago, and all I did was put the dirt/sand I digged out and put the pavers on top. Given this was only 4 bricks, is this OK, or should I have done something more sophisticated?
In all likelihood I'm gonna have to take these out again when I replace the underground pipes0 -
Depends on how much you want to diy as you may want to rent a pad tamper or buy a flat hand held tamper to pack it all back in.
I you dig them up you will have to put them back being careful to separate the crushed rock from any dirt.
If they had not done a herringbone brick lacing to would have been easier.
If the drain pipes have been cleared put gutter brush in the lower gutters if the other gutters are covered and close the end of the pipes with solid PVC pipe and use drain caps with slits making sure the slits are vertical and you will never have to deal with this again.
The quick way to do this is buy a small bucket for each exposed drain opening and drill; some holes in the sides of the small buckets for a temporary fix until you have the all the gutter brush on hand to install in the gutters.
If the drains have been cleared with a claw cutter or jet rodder and flushed with water to clear them do the above and order the gutter brush to quickly solve this.
0 -
it would be better to use a hand tamper to pack it together. for a couple pavers you could probably improvise with something else like a mallet or a 2x4
0 -
How did you make out with the plumber. It sounds like he had the right tools for the job, removing roots, a sewer camera for analyzing?
Bob "hot rod" Rohr
trainer for Caleffi NA
Living the hydronic dream0 -
I'll probably delay that work until warmer weather. I don't think it's that urgent, and I don't think it's the cause of the water issues I'm seeing in that sunroom, which is what motivated me to start looking into my downspouts in the first place.
My immediate focus is to figure out the water intrusion issues. I think I have some good leads. I'll need to do the following:- Get a kick out flashing installed here:
The roofing company that installed the shingles in 2013 said kick out flashing wasn't a known thing at the time hence why they didn't install it. Kind of sounds like BS to me to cover up for themselves
2. The siding above the window has some cracks. I had Pella windows come in today to fix a missing caulk/seal in the bottom right corner of that window and they caulked above the window to cover the cracks in the siding as well but that's a temporary solution and I'll probably need that siding fixed.3. There are some cracks in the mortar below that window that I should get mortar caulk for.
0 -
Oh I forgot to update. They came back this past Sunday after using some cutter to get through the pipes on Wednesday. On sunday, they scoped it for me and it was definitely oval'ing as the plumber originally suspected. I have a video on a USB, and he marked also some places on the pavers where the oval'ing was happening and also some T and Y junctions in the network.
He recommended replacing with PVC or something more rigid as opposed to the perforated corrugated black pipe garbage that I have currently, and also mentioned that with PVC, I won't really need maintenance work for a long time.0 -
ah, I definitely didn't separate anything unfortunately. I just put all the stuff i dug out into the base and put the bricks back on so looks like I screwed up there…
0 -
Is there step flashing under the shingles that goes up under the siding? There should be an L shaped piece of flashing under each shingle that goes up under the siding. There should then be pieces of flashing at the end that brings that water out over the fascia instead of behind the siding. None of that is new, thinking like water and directing it out has been around for hundreds of years.
My bet would be on the water leaking down through that whole joint and down through the wall.
 1
1 -
Hey mattmia2. I don't believe so. I should be able to visibly see it if there is right? Here are a couple pics below. I don't see anything there.
Neighborhood roofing installed the shingles in 2013. They told me "kick out flashing" wasn't common knowledge at the time and now wants to charge me $800 to fix their mistake. I think I'm going to call them out on it because it sounds like they're full of it….
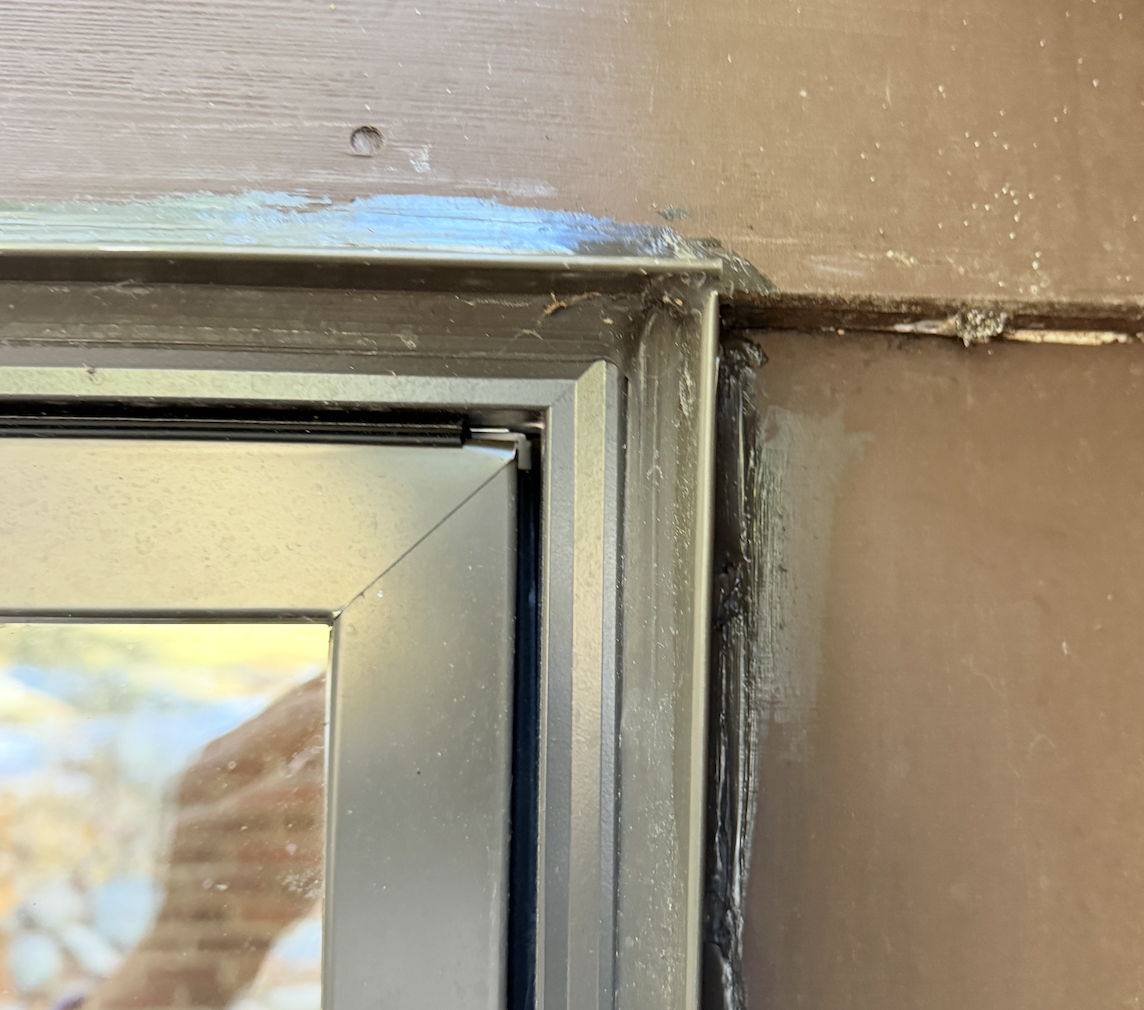
Also attaching a couple pics of the cracks in the siding above the window. I'm guessing this is due to water damage…0 -
The damage you have is because the roof line/eave was not extended by 3-5 feet over the windows.
 1
1 -
I don't think it can be. If you look at the pic in the OP, the slope of the roof is too sleep and it wouldn't be able to be extended over the window at that angle
0 -
Is this a piece of flashing or is this the top of the window? There should be a piece of flashing here to keep the water from going behind the siding
If you lift up the tab of any of these shingles do you see a piece of flashing, a piece of aluminum?
the idea that the water needs to be directed over the siding and fascia instead of behind it existed in 2013
0 -
YUCK, there is no continuous flashing secured under the siding at the wall to hold the water back on to the shingles!!!!!!!!!!!
0 -
Sorry, I think I mispoke. I think there is step flashing between the shingles and siding — I didn't check if it's continuous, but I can check later today or tomorrow when it's a bit warmer, so all that's needed there should just be the kick out flashing.
As for the top part of the window, I'm attaching a couple more pics from today (that area is now caulked so that's why it looks different from the previous pic. It's a Pella window and I think some of them have flashing integrated into the window frame. I'm not sure if this is flashing or just part of the frame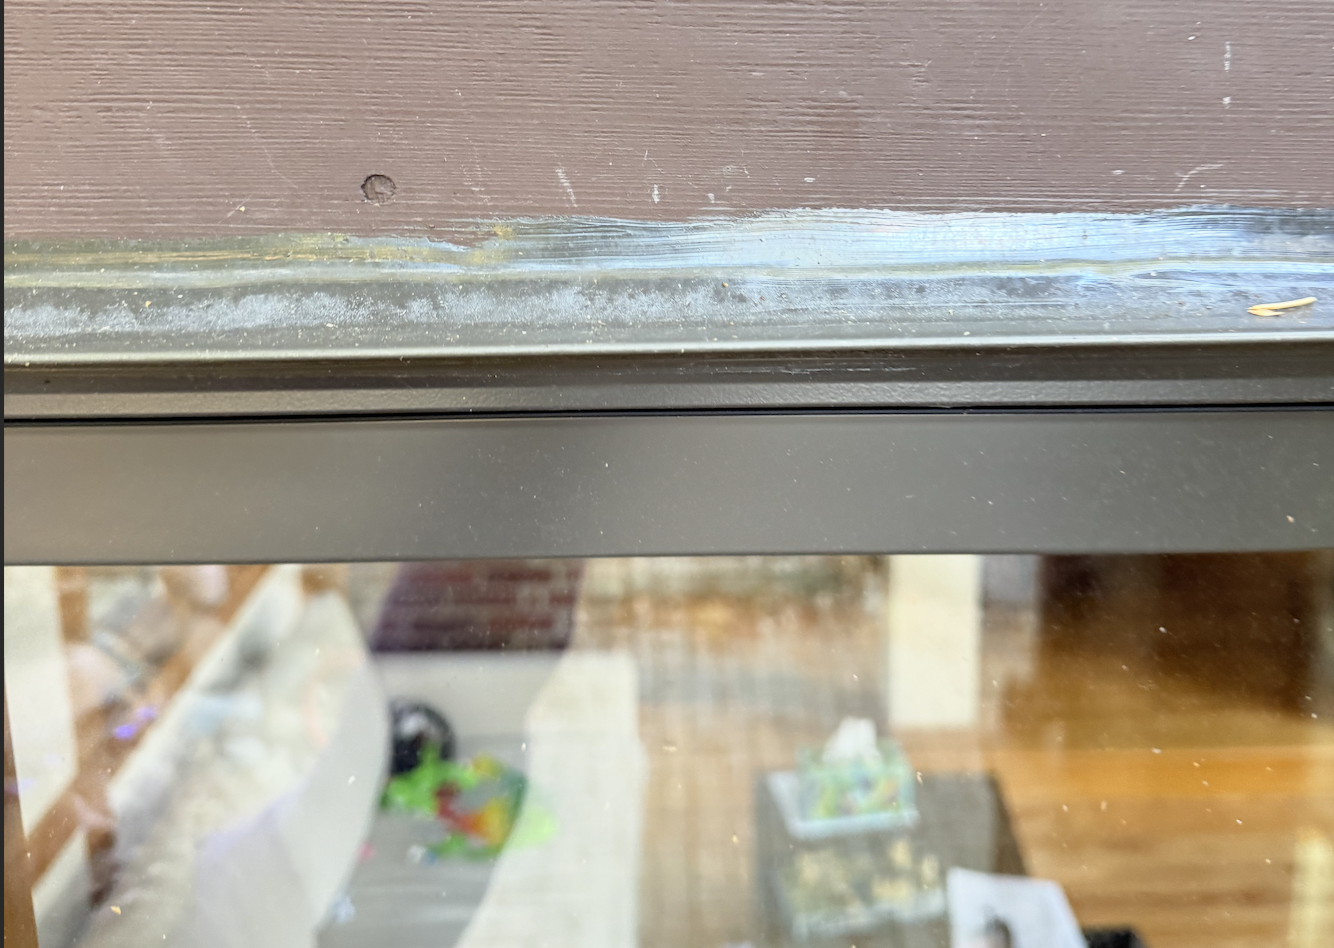
 0
0 -
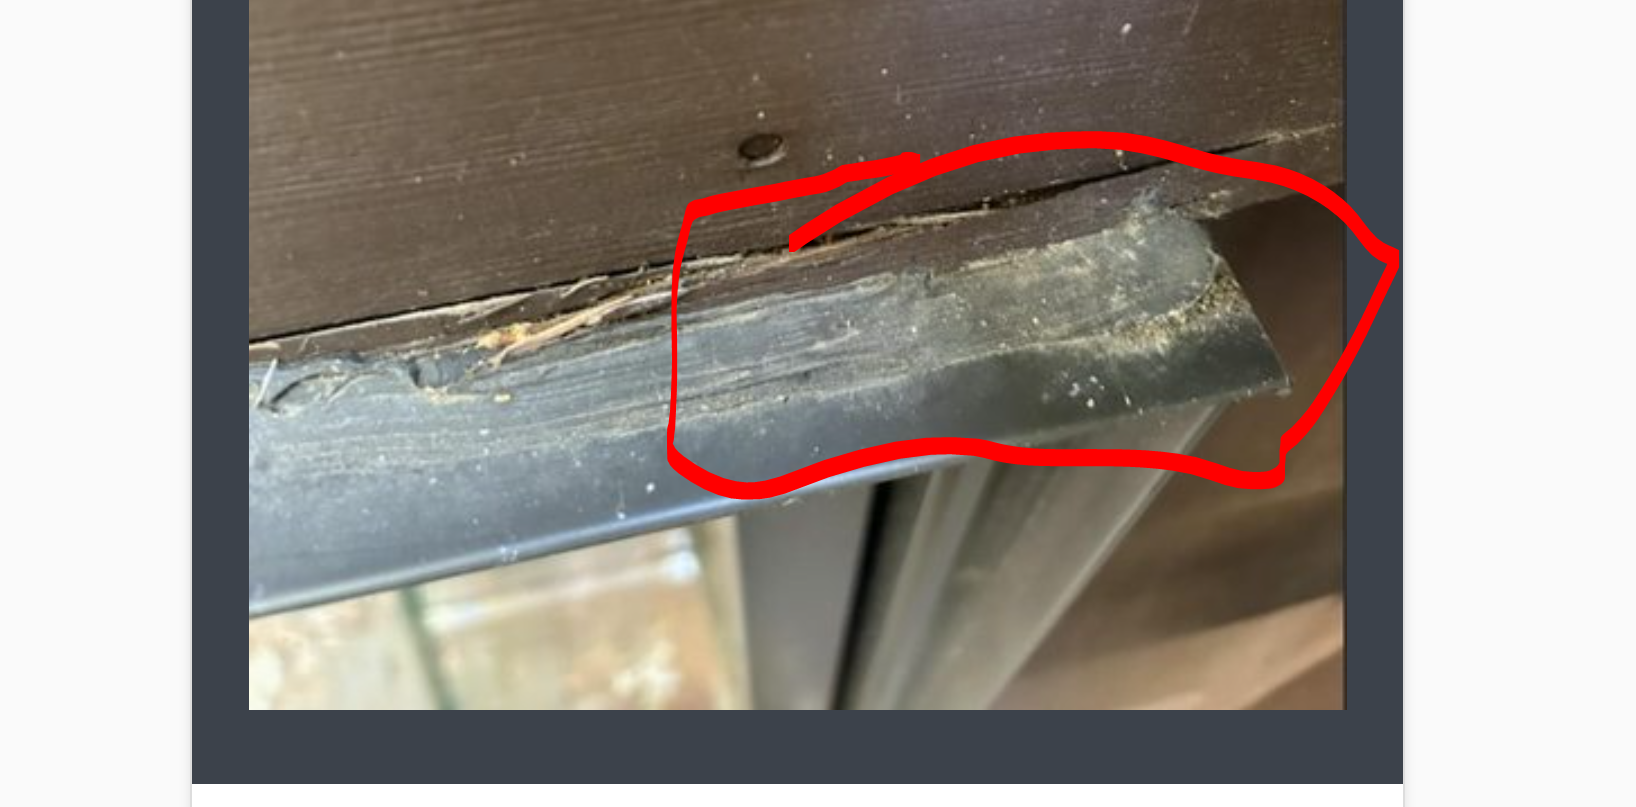
Hey. So the lead roof guy/owner of the company that installed the 2013 roof came by to take a look a week ago, and he said there is a kick out flashing. See attached photo. It's that tiny metal piece sticking out. It's so small that idk if it's even doing the job. He also saw, as shown in the attached pic, that there's a hole in the siding, behind the kick out flashing. He caulked that for me.
But now i'm confused why they installed such a small kick out flashing, and what could have caused that hole? Any insights on both these confusions? I feel like the more I talk to them, the more questions I have….
They said they could install a larger kick out flashing, or alternatively, the gutters can be replaced and have it go under the siding, which removes the need for kickout flashing
0 -
the flashing should have gone behind the siding. that wood is rotten because there is wood there instead of flashing.
the way that is arranged there is no place for the water to go but behind the siding.
0 -
i'm not sure exactly what the detail should be and i would probably just layer like 4 pieces of flashing from different directions which would keep the water out but wouldn't be pretty but there is probably a more elegant way to do it.
i believe the michigan residential code requires ice and water shield under that too.
0 -
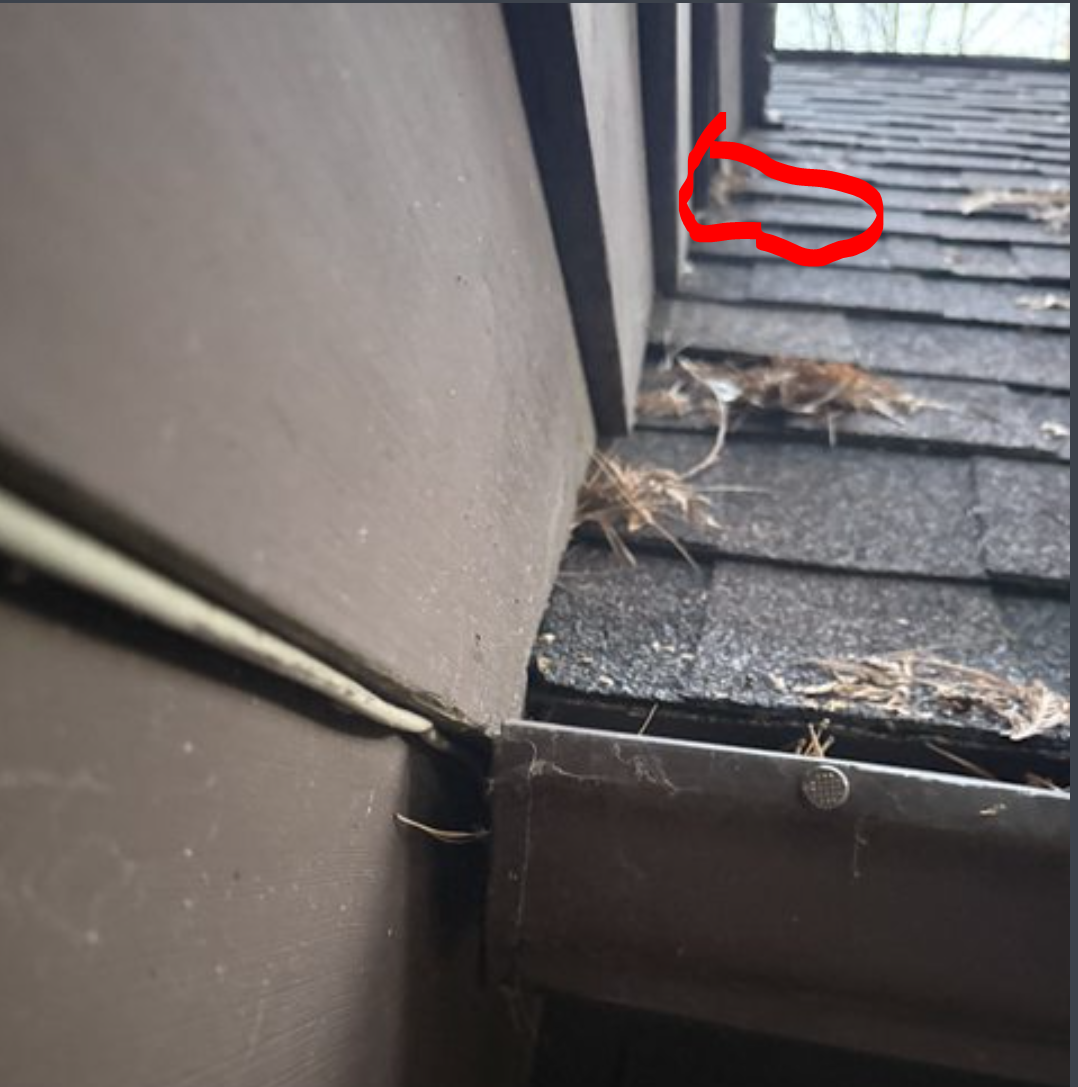
This is what this should look like if done properly:
There needs to be a gap between the siding and roof so the bottom edge is not sitting in water plus there is a path for any water behind the siding to drain out. Caulking it closed actually makes it worse as water can't escape.
Same for the window head flashing.
1


Categories
- All Categories
- 87.7K THE MAIN WALL
- 3.3K A-C, Heat Pumps & Refrigeration
- 59 Biomass
- 430 Carbon Monoxide Awareness
- 127 Chimneys & Flues
- 2.2K Domestic Hot Water
- 5.9K Gas Heating
- 121 Geothermal
- 170 Indoor-Air Quality
- 3.8K Oil Heating
- 79 Pipe Deterioration
- 1.1K Plumbing
- 6.6K Radiant Heating
- 396 Solar
- 16K Strictly Steam
- 3.5K Thermostats and Controls
- 56 Water Quality
- 51 Industry Classes
- 51 Job Opportunities
- 17 Recall Announcements