1972 HB Smith OHB13W-7T 7 Section Combustion Chamber Replacement

Hey everyone. I wanted to get some opinions on combustion chamber sizing recommendations.
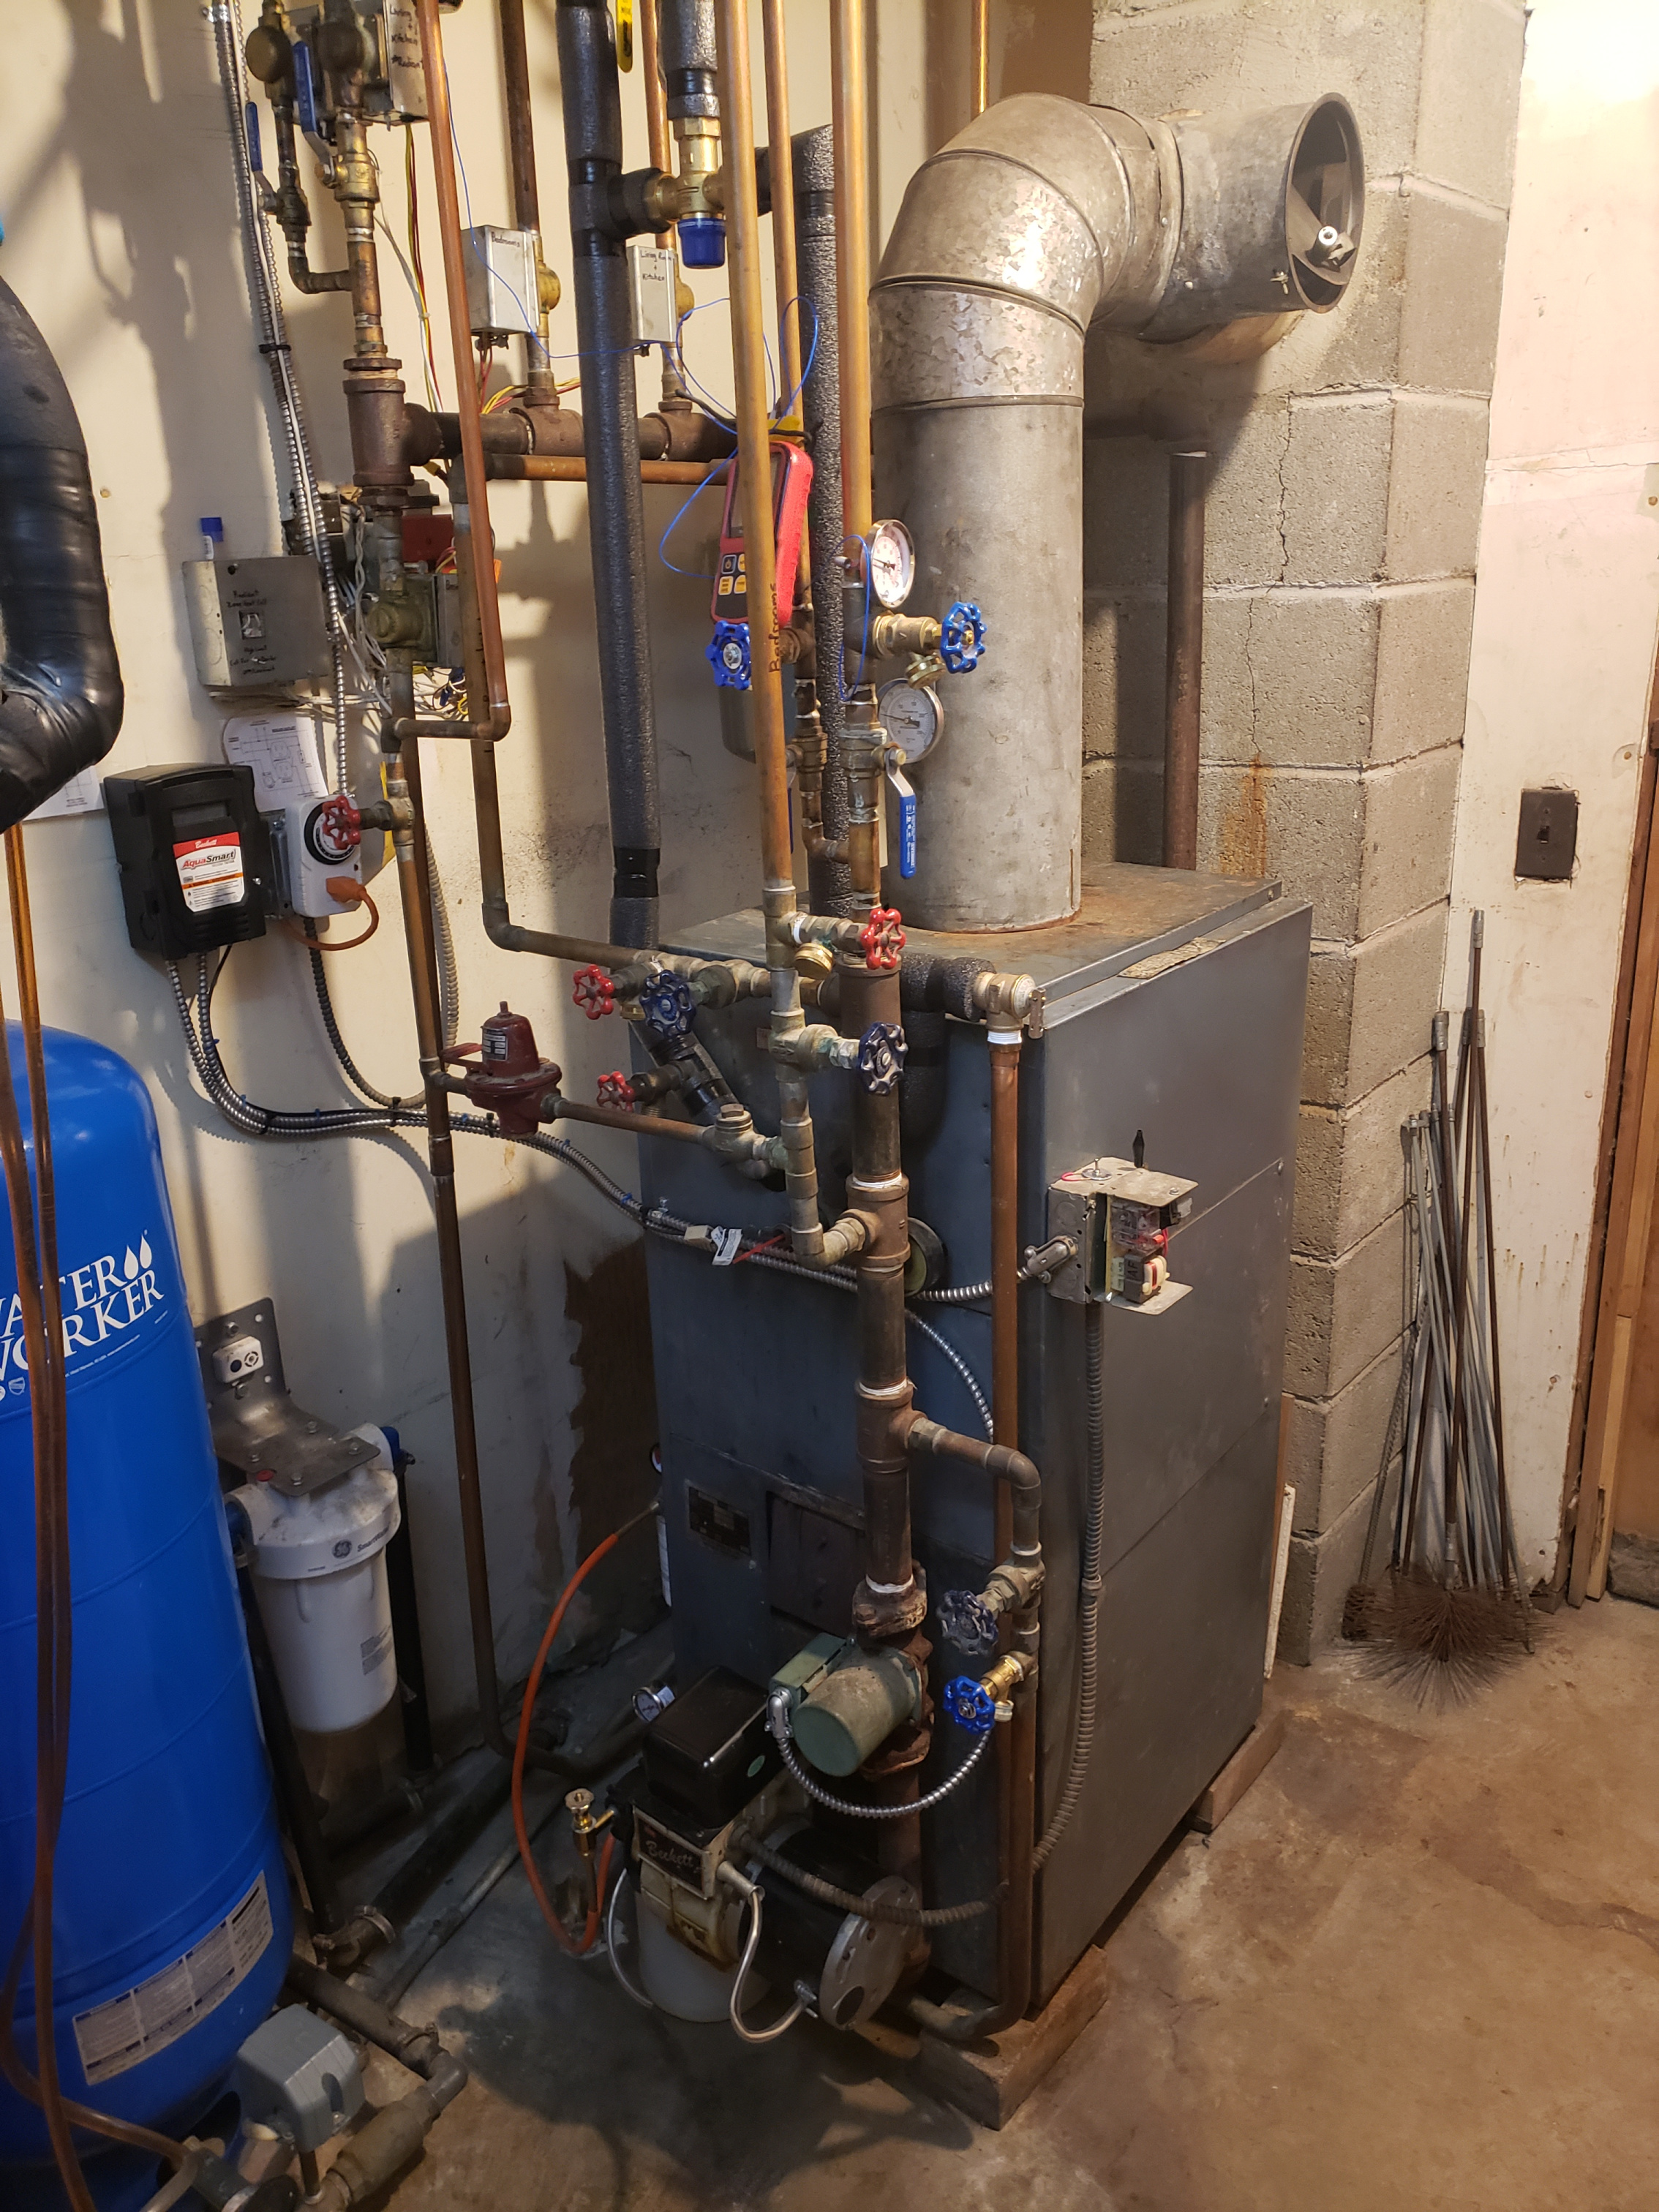
I have a 1972 HB Smith 7 section boiler. (Model OHB13W-7T) Its rated at a maximum firing rate of 1.95 GPH. However its current firing rate is set to about 1.25 GPH (1.00 GPH nozzle at 160psi)
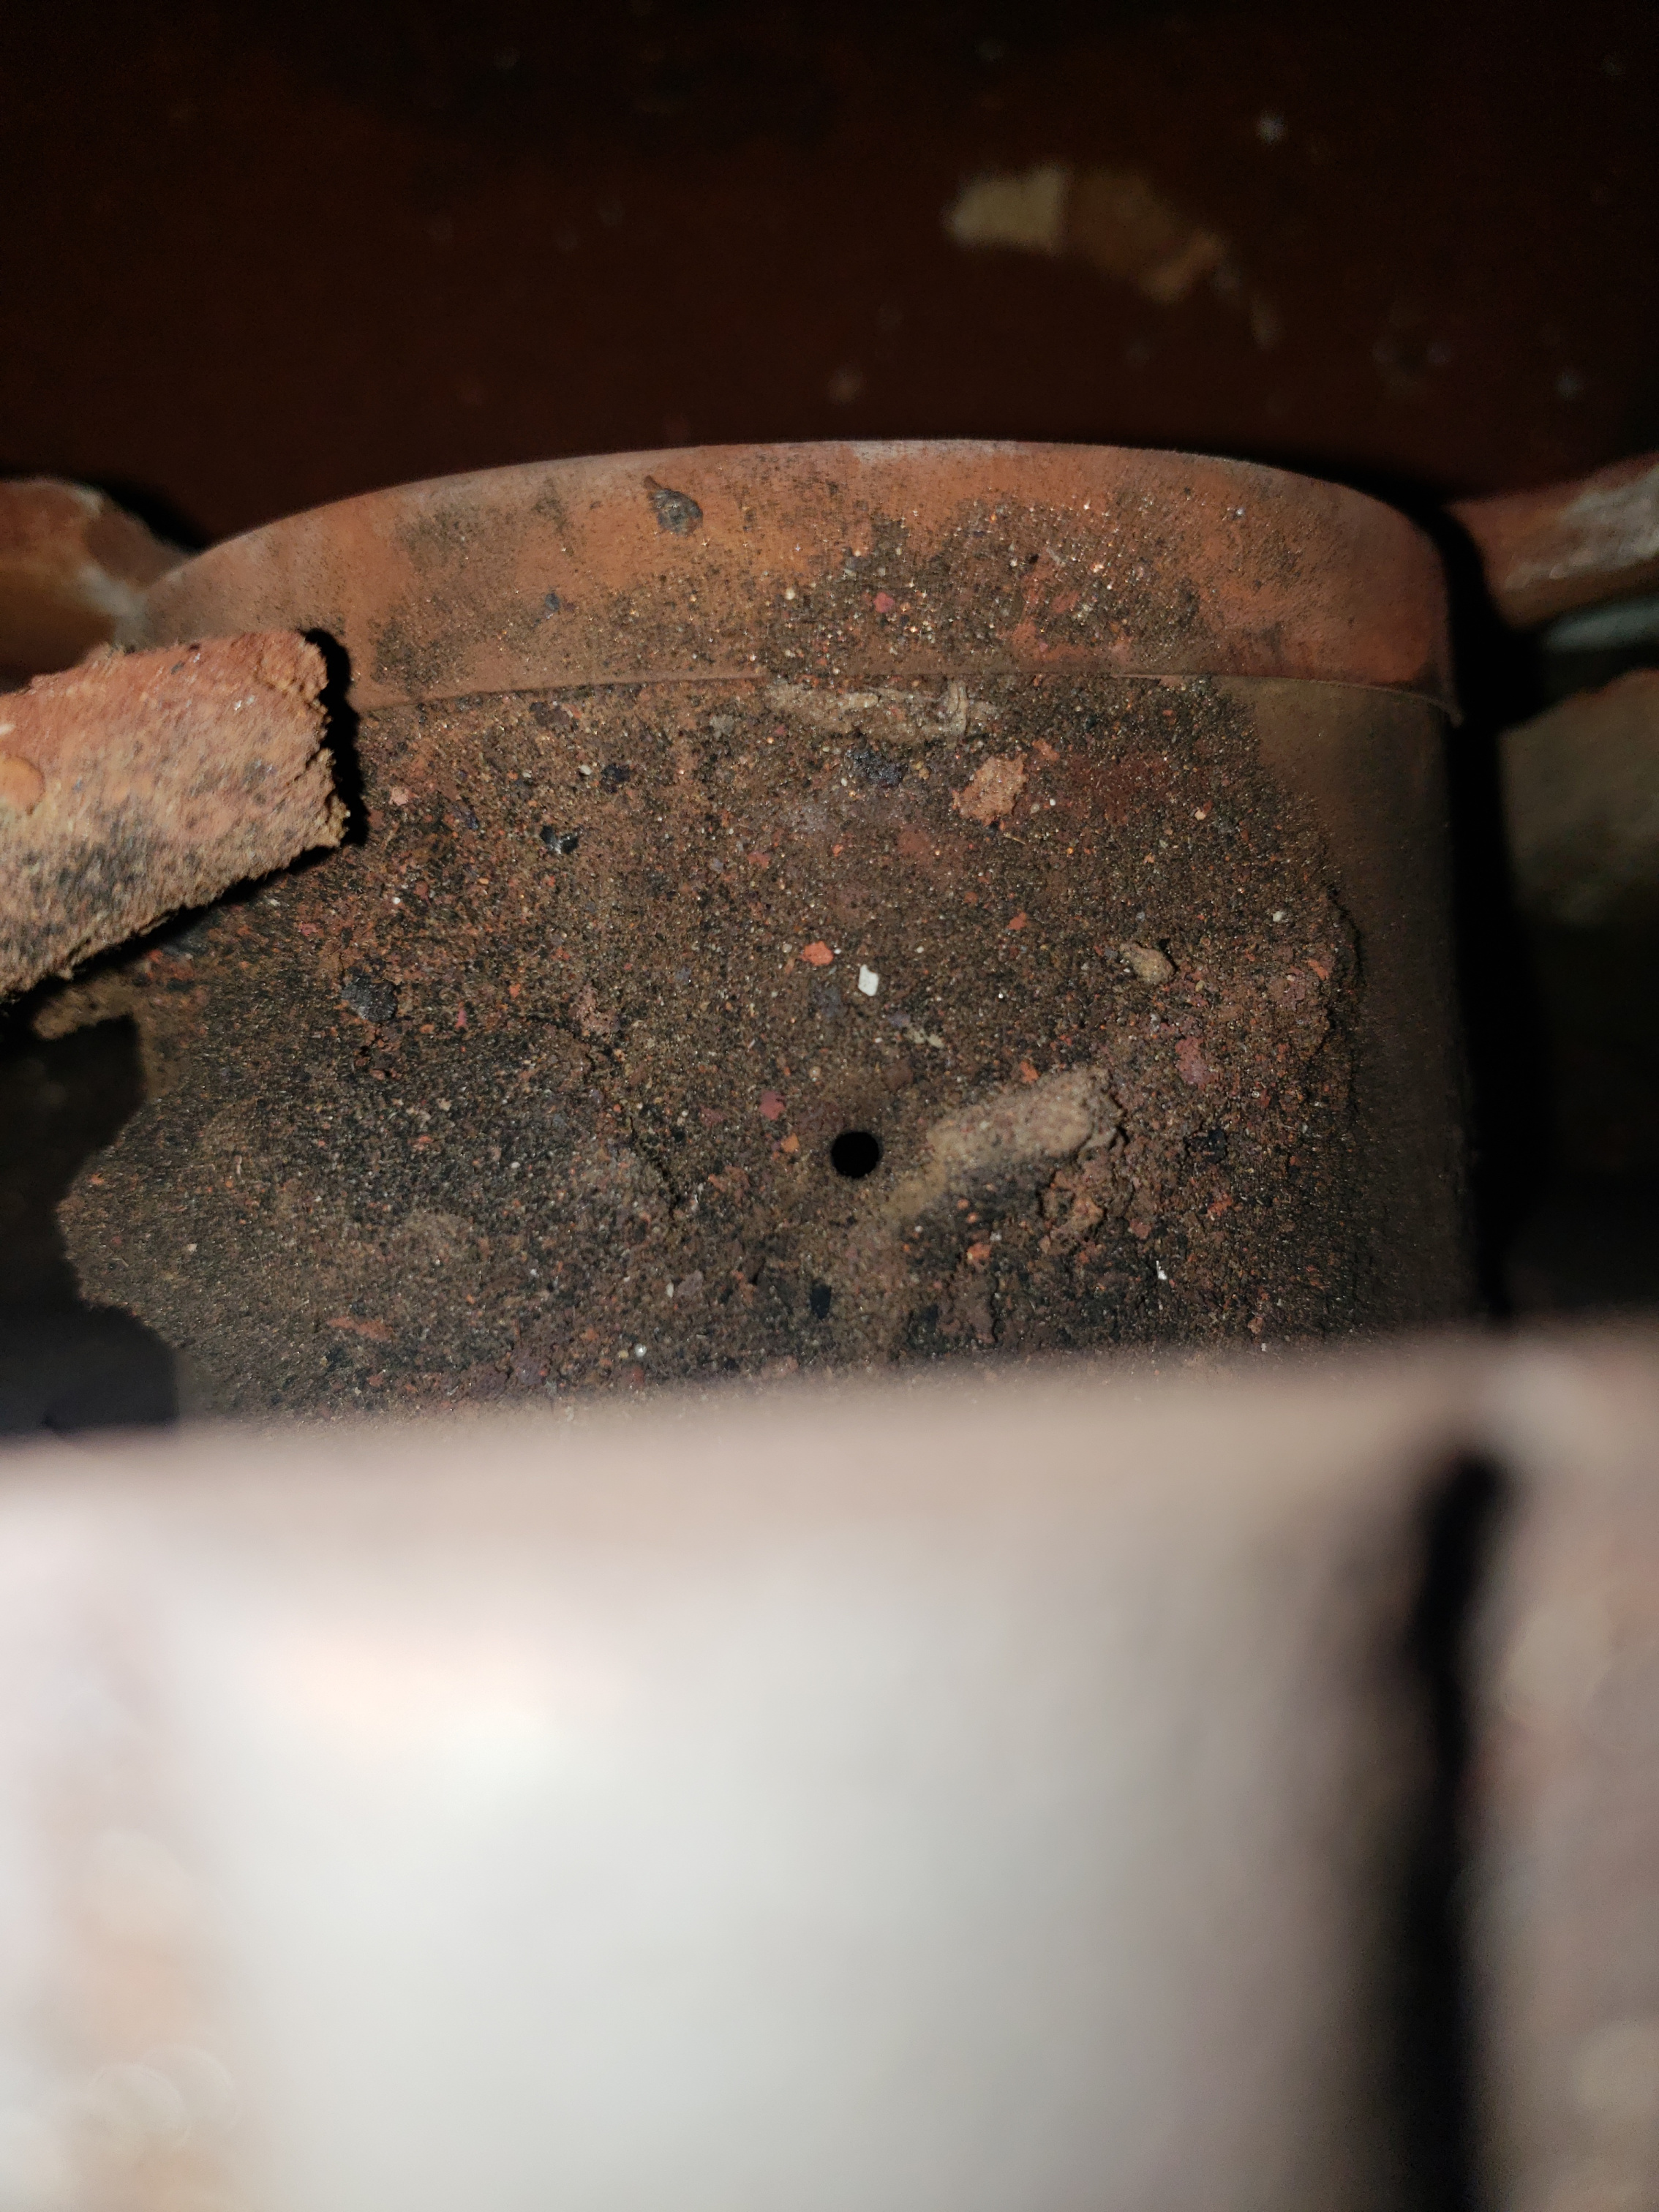
The current combustion chamber is on its last leg and is falling apart so I am going to be replacing it soon. Because I can not find any OEM parts or direct replacement parts for this boiler I am forced to use a Lynn Quickie 200 or 300. I cant decide on what one is best. I already purchased the Quicky 200 however im second guessing my choice. Here is why…
The Quicky 200 is rated for a firing rate of 1.35-1.75 GPH and the Quicky 300 is rated at 1.75-2.25 GPH. As far as actual dimensions go, both should fit inside the boiler. But here is the thing. This is a wet base boiler and as far as I know the combustion chambers are really only in there to aid in proper combustion vs protect the boiler interior like on a dry base boiler. My thought is that because the Quicky 200 is even oversized for my firing rate, I would only hurt combustion further going with the Quicky 300. The only thing I like about the 300 over the 200 is that It would "fill" the boiler more. But proper combustion is probably more important.
Note: The current combustion chamber that is falling apart is about the same size as the Quicky 200. (I am not sure if the current chamber is the original or not but it appears to be if I were to bet on it). Based on the OEM cutsheet of the boiler the 7 section boiler I have as well as the 6 section model both share the same combustion chamber size theirfore there is a 3-4" gap behind my current combustion chamber to the back wall (Boiler back section).
Do you think my Quicky 200 is the correct choice or not?
Comments
-
What was Lynn's recommendation?
0 -
I called in this morning and they were not helpful at all. From what it seems their customer support is capable of reading the product cut sheets to you over the phone…. It seems that this is the type of support you get now a days when you call places. Few have any knowledge at all, the ones that do and are capable of helping are probably to valuable to the company to be answering phones…. This is what sparked me to post here in this forum.
0 -
Either one is fine use the 200 you have.
With old non wet based boilers and non retention burners the combustion chamber was required to allow the old burners to burn clean and the chamber protected the non water backed surfaces in the boiler.
With a wet based boiler and a flame retention burner (I assume you have a Carlin 100crd or a Becket model AF) the burner will burn clean without a chamber but better with it.
Also the boiler doesnt require a chamber to protect the boiler.
Use the 200 and you will be fine.
 1
1 -
Yes, the current burner is a Becket and says Model "A", AF" (May be suffixed). The original burner is long gone.
Do you think I should cut the hole in the combustion chamber slightly larger, or even U shape the top of it, and set it back further to the center of the boiler to concentrate the heat in the center more? Currently there is that 4" ish gap behind the combustion chamber to the back of the boiler so in my theory the back of the boiler is not getting as much heat from the combustion chamber.
If you were to chose the 200 or 300 for my situation what would you pick and why?
0 -
Either one is fine. With 4" behind the 200 the heat will get back their with no problem. It will be fine.
You should combustion test the burner when complete.
0 -
Better if the blast tube fits snugly in the hole to insulate the retention head. Make sure that the face of the retention head is about 1/4" to 1/2" back from the interior face of the chamber. You don't want the head to get damaged from intense heat.
0 -
Wet Pack and Kaowool blanket.
1 -
I will have to inspect the head to see what it looks like. With the shape the current chamber is in, if this was going to cause damage by it not being snug and slightly recessed it should have done so by now.
0 -
What makes you recommend that over the Quicky? I would think that the rounded shaped bottom of the Quicky would likely reflect and concentrate the heat into the burn zone and result in a cleaner burn than simply lining the large square chamber.
0 -
The wet pack is just the target wall, which the flame shouldn't be hitting anyway. If the condition of the burner door is good, you don't even really need the blanket IMO. Wet base boiler. Better heat transfer. I've installed the bathtub chambers in old Dunkirk 1352, or an American Standard Arco Leader where the box is there and it's a nice snug fit. Not sure about a 1972 Smith. Got any pics?
0 -


 0
0 -
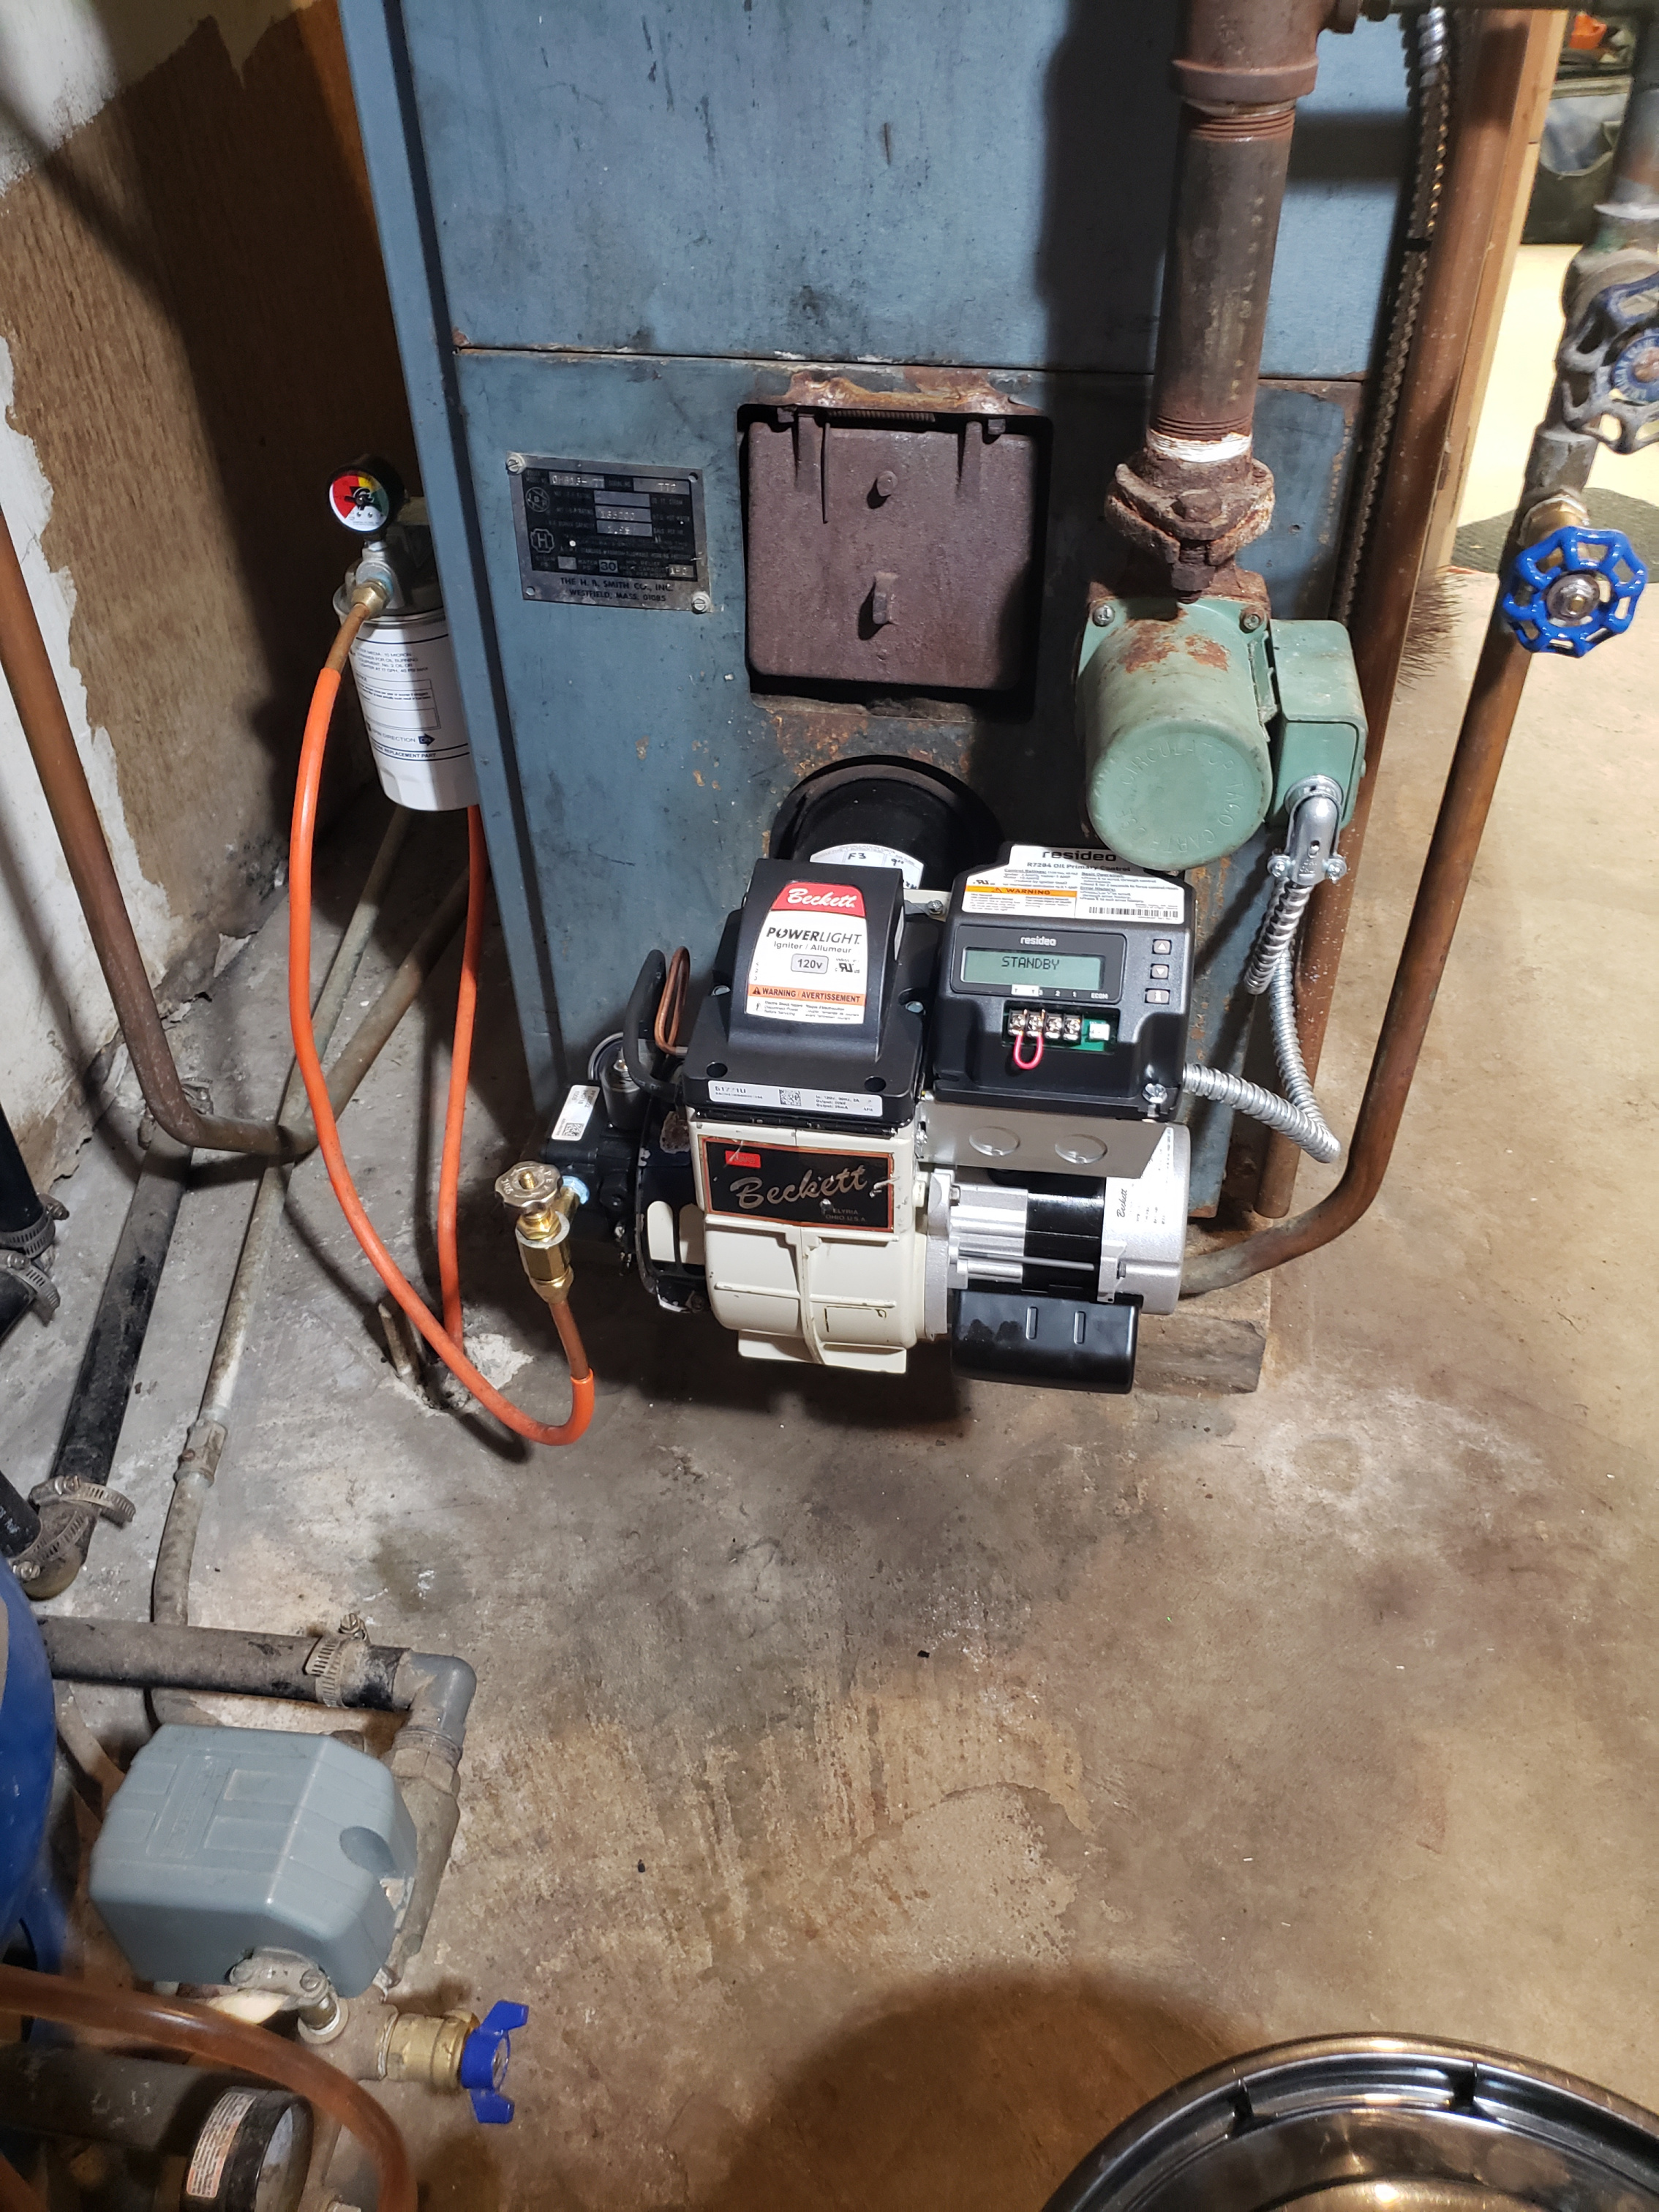
The above post shows some pictures of the boiler. Of course when installed the plumber didn't leave much room for access to the chamber. I basically have to carefully pry the fire inspecton door over the taco pump just to get a good look inside. I'm also not sure what's hanging off the one side of the burner tube but thats probably a piece of the old chamber. Hard to tell.... Either way the end of the burner looks OK to me even without it being "protected" by the current combustion chamber. I've also attached the full manual on this post
for more info if you want to take a look.
0 -
That looks like the same boiler as the Dunkirk 1352. The Quickie 2 will work fine.
 1
1 -
@HVACNUT is correct. That is a Dunkirk boiler relabeled as Smith.
Those boilers are absolute tanks.
I know of one of those running steam that a relative has. He abuses the thing and won't fix anything, and that boiler keeps going and going over 50 years old
0 -
For the price of a new boiler I've justified just simply trying to get this one running as good as possible. To be honest it's in really good shape and it was set up for the longest time as a cold start boiler. I recently added the domestic hot water hookup along with the aquasmart and it's outside reset module. It had the coil in it already but it wasn't being used. I've been heating my house with electric for the last few years because fuel got so expensive during COVID BS however they just jacked up the electric rates so I'm going back to oil. Im just trying to try to get this as efficient as possible. My neighbor used to work on boilers and we just did its first cleaning, filter, strainer nozzle, since I bought the house in 2016! Who knows how long it's been neglected since before then....The best we could get was a 7% on the CO2 from his old acid tester before smoke test got too dark. Stack temp around 425 with a space temp of about 50 degrees. Run times have shortened quite a bit and stack temps have dropped since cleaning.
I noticed in my photo of the "burner head" using the mirror that there is a number 8 stamped on it. I have no idea what size this current cone is however due to my firing rate it's probably too large. I think I need an F3 end cone. Beckett doesn't make an F8 so who knows that is in there.
Hopefully with the proper end cone for my firing rate and the new combustion chamber we can get it to run even better.
It's way oversized for my house so we may even try to cut the fuel pressure down a little bit to increase run times.
0 -
Chances are the 8 you are seeing is a 3.
Don't know how old the fluid is in the old Co2 kit is but that fluid when it goes bad it will read low.
Your stack temp is ok
0 -
We had to rebuild the analyzer with new seals and fluid before we did this job because the old stuff leaked out. The fluid he had was in an unopened bottle however it was old so who knows about its quality.
What do you think is the safest lowest stack temp we can go for? If I under fire it a bit more it may drop. As of now on short fires sometimes I only see just about 375 and that's actual stack temp. It's about 50 degrees in the boiler room. So about 325 net.
I also had to put an additional counter weight on the 7" draft control to get the over fire draft down to .02 because even with it adjusted all the way it wasn't enough the flue is 8" and I think because the boiler is so underfired it's pulling a lot of vacuum up the flu compared to what we are feeding it with the burner.
The 8 is pretty clear...
 0
0 -
Post a pic of the rating plate.
IDK what that 8 is, but head size is stamped on the perimeter face. It looks like an F6. If the boiler can fire at 1.00 GPH, then an F3 is fine. It might cross over to the F6, but the AF is a low SP burner, so I would lean towards the F3. Get the whole air tube assembly. And if the boiler can fire at 1.00 GPH, then the Quickie 1 will work.
You mentioned you "recently added the domestic hot water hookup..." Is that an indirect water heater? Wired as priority in the Hydrostat? What size indirect? It will need the BTU's for the rated output, so don't go too low on the nozzle.
There's scorch marks. The cover between the aquastat well and inspection door comes off. Behind it is a clean out plate. That plate isn't sealed. Get kaowool rope with self adhesive tape. Check the existing size. (3/8"?) Theres also access on the right side for cleaning. Brush and vac everything down so your new chamber stays new.
Is the draft regulator upside down? Take the flue apart and brush and vac.
You did good with the Hydrostat, spin on filter with vacuum gauge, and the pressure gauge, but you still have what I think is an R8184G primary. Any plans to upgrade?
Is there an analyzer going on this thing when its done? I forget. If no, disregard everything and get a pro.
0 -
I hooked up the direct domestic heating coil with a tempering valve. I actually have an electric hot water heater / solar heater combo tempering the water before it enters the coil with the electric element currently off. (I'll shut boiler off when not in heating season and use only the electric hot water heater) I have everything set up with valves to isolate ext. I'm also feeding my combo electric water heater from a wastewater energy recovery drain. So there is a lot going on in there to save energy.
I'll attach a picture of the boiler plate and pump at the end of this post. I may update the pump to a clean cut one with a new burner control at some point to. Anyways the boiler is rated at 1.95 GPH. I'm running about 1.25 GPH with my 1.0 GPH nozzles and 160psi pressure. I think I'm going to kick that down to 140PSI which is about 1.1 GPH and run the F3 head. There is no issues with domestic hot water as of now.
The aquasmart is set up with a high / low. It's set to 140 low with 15 deg diff. (Kick on 140, kick off 155). 175 high with a 15 deg diff (on at 160 off at 175) It's also on an outside reset that lowers the high limit down to 160 @ 40 degrees outside and raises to 175 @ 0 deg outside.
The "scorch marks" on the head you see may have been from the recent cleaning. My buddy ran an angled brush in there. The flue, front plate, top, and all 6 section plates were removed for the cleaning and vac. Only thing that wasn't off was the large plate that holds the burner. I'm going to hold off on pulling that untill I'm ready to the the chamber. I may have clearance issues with piping but I won't know until I try. But the top 2/3 of the unit is clean for now.
The draft control is in properly. (Unless all letters and stampings were done upside down) It looks like the newer ones are slightly different than some of the older ones. Almost like they flipped the setup in some way for some reason.
As I said before we did run an old school combustion analysis test with his acid filled gauge and pump and the best we could get was 7% CO2 before smoke got past a #1.
As far as my understanding goes, basically as you take away more air your CO2 goes up but the smoke goes out of range. (To dirty) The C02 is nice to know but you can only get so much out of it. Maybe the new head and combustion chamber will help a bit. It shouldn't hurt!
What is really the point of the CO2 analysis on the flue if it seems like you can only get it so high before smoke gets bad. Why not just set the smoke around 1, back off a hair towards 0 and call it a day?

 0
0 -
You guys are great! Please take no offense, I have to give my $.02 on burner adjustments due to my 48 years of oil heat service and seeing the carbon on the head. I love the 160-psi fuel pressure. F3 head at the max firing rate is rough. Smokey edges, classic carbon on the head. If you do not need the BTUs, go down to .85-80-B.At 160 psi that is a 1.10 gph. If you need more fire, I would go to the F6 head at 1.00 or 1.10-80-B. Will fire much better and cleaner.
0 -
P.S. Any air infiltration into the boiler due to lack of perfect boiler sealing (not on this boiler) from necessary chimney draft will inadvertently show falsely low CO2 readings upon testing. There is NO precision adjustments on an old boiler. Get #1 smoke, open air slowly to #0, and stop. that is it.
0 -
Your as low as you should go with the stack temp. 325 net is it.
The general rule of thumb is around 100 deg over water temp.
You may get flue gas condensation if you go lower.
1 -
You will want to set the Quickie in the firebox area so that the end cone does not enter past the edge of the combustion chamber. Depending on how the burner flange is attached (welded or adjustable) you will want the combustion chamber to be set further in the boiler than the existing combustion chamber. I would also replace the firing head with the F3 or F6 to better match your firing rate, and it is always good to start a new chamber with a new end cone.
Once you have the Quickie combustion chamber set inside the fire box, you will want to temporarily mount the front door and measure the distance from the flange to the chamber in order to know the insertion depth. Also measure the place you need to cut the burner opening in the chamber then remove the door, and mark the location of the chamber in the boiler. Remove the chamber and place a piece of firebrick against the back wall of the boiler and trim it to be a spacer so the chamber does not slide back when the burner is inserted. (when it is time to mount the blast tube, I have found that disconnecting the blast tube from the burner makes it easy to install and adjust the blast tube/flange to the boiler)
Place the trimmed fire brick on the floor of the boiler then put the Quickie in place then the fire door then the blast tube/flange on the boiler. After that is done you can mount the burner to the secure blast tube easier than installing the blast tube with all the weight of the rest of the burner attached.

Edward Young Retired
After you make that expensive repair and you still have the same problem, What will you check next?
0 -
Thank you for the input. I ordered a 9" tube with a new F3 head so I have more room to play with as far inserting the fire tube into the boiler a bit more if needed. My current tube is only 7.25" and I can't insert it into the boiler more due to the hot water return piping hitting the burner motor. My gut is telling me to center the new chamber in the boiler. The boiler is roughly 20" deep inside and the new chamber is 14" deep. I was thinking about putting it centered with a 3" gap on each side to try to concentrate the heat to the center of the boiler. I also considered the fact that the flame may be hottest in the deepest part of the chamber. So maybe it's a good idea to cheat it towards the front a bit. Maybe 2-2.5" gap in the front and 3.5-4" in the back. Having the hottest part of the flame centered in the boiler just makes sense to me.
0 -
Here is a detail from Beckett's installation manual on the left:
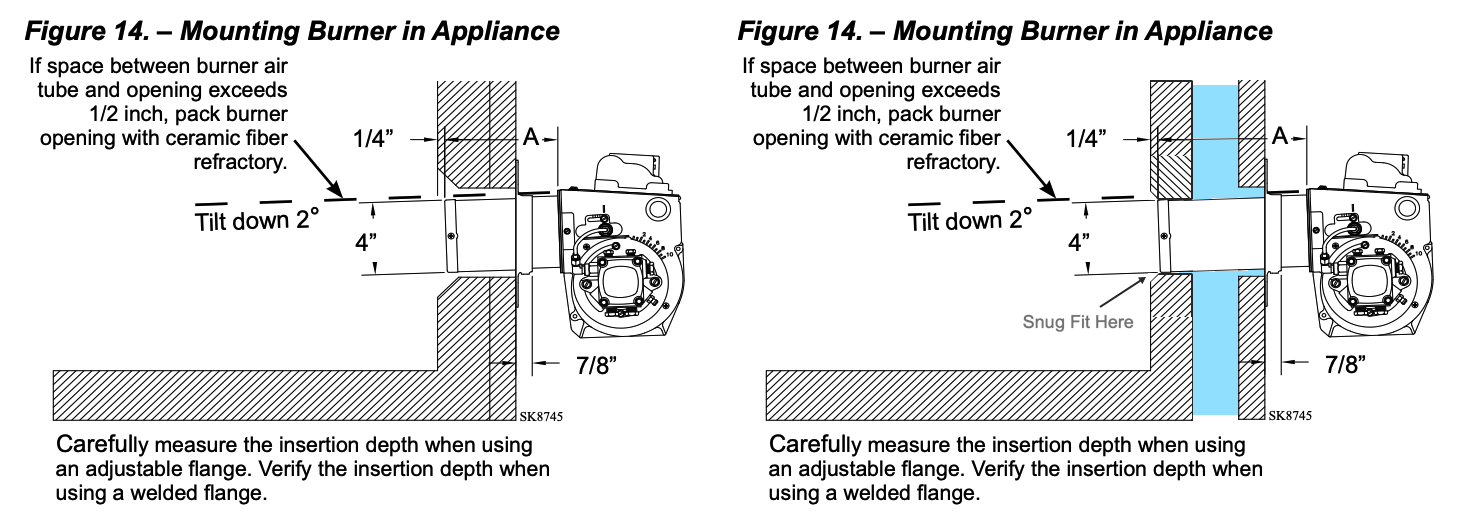
On the right I have modified the illustration to show your idea of placing the chamber a few inched away from the mounting door plate. The blue air space is acceptable. In order to prevent excessive heat form finding its way to that air space, I suggest that the opening in the Quickie be made by using the actual Air Tube as a cookie cutter to get a Snug Fit into the chamber. Leave the end of the air tube/end cone 1/4" back from the internal edge of the Quickie. This Snug Fit seal will act as a protective gasket to keep the end cone from overheating and being damaged by the heat of the flame.
Edward Young Retired
After you make that expensive repair and you still have the same problem, What will you check next?
0 -
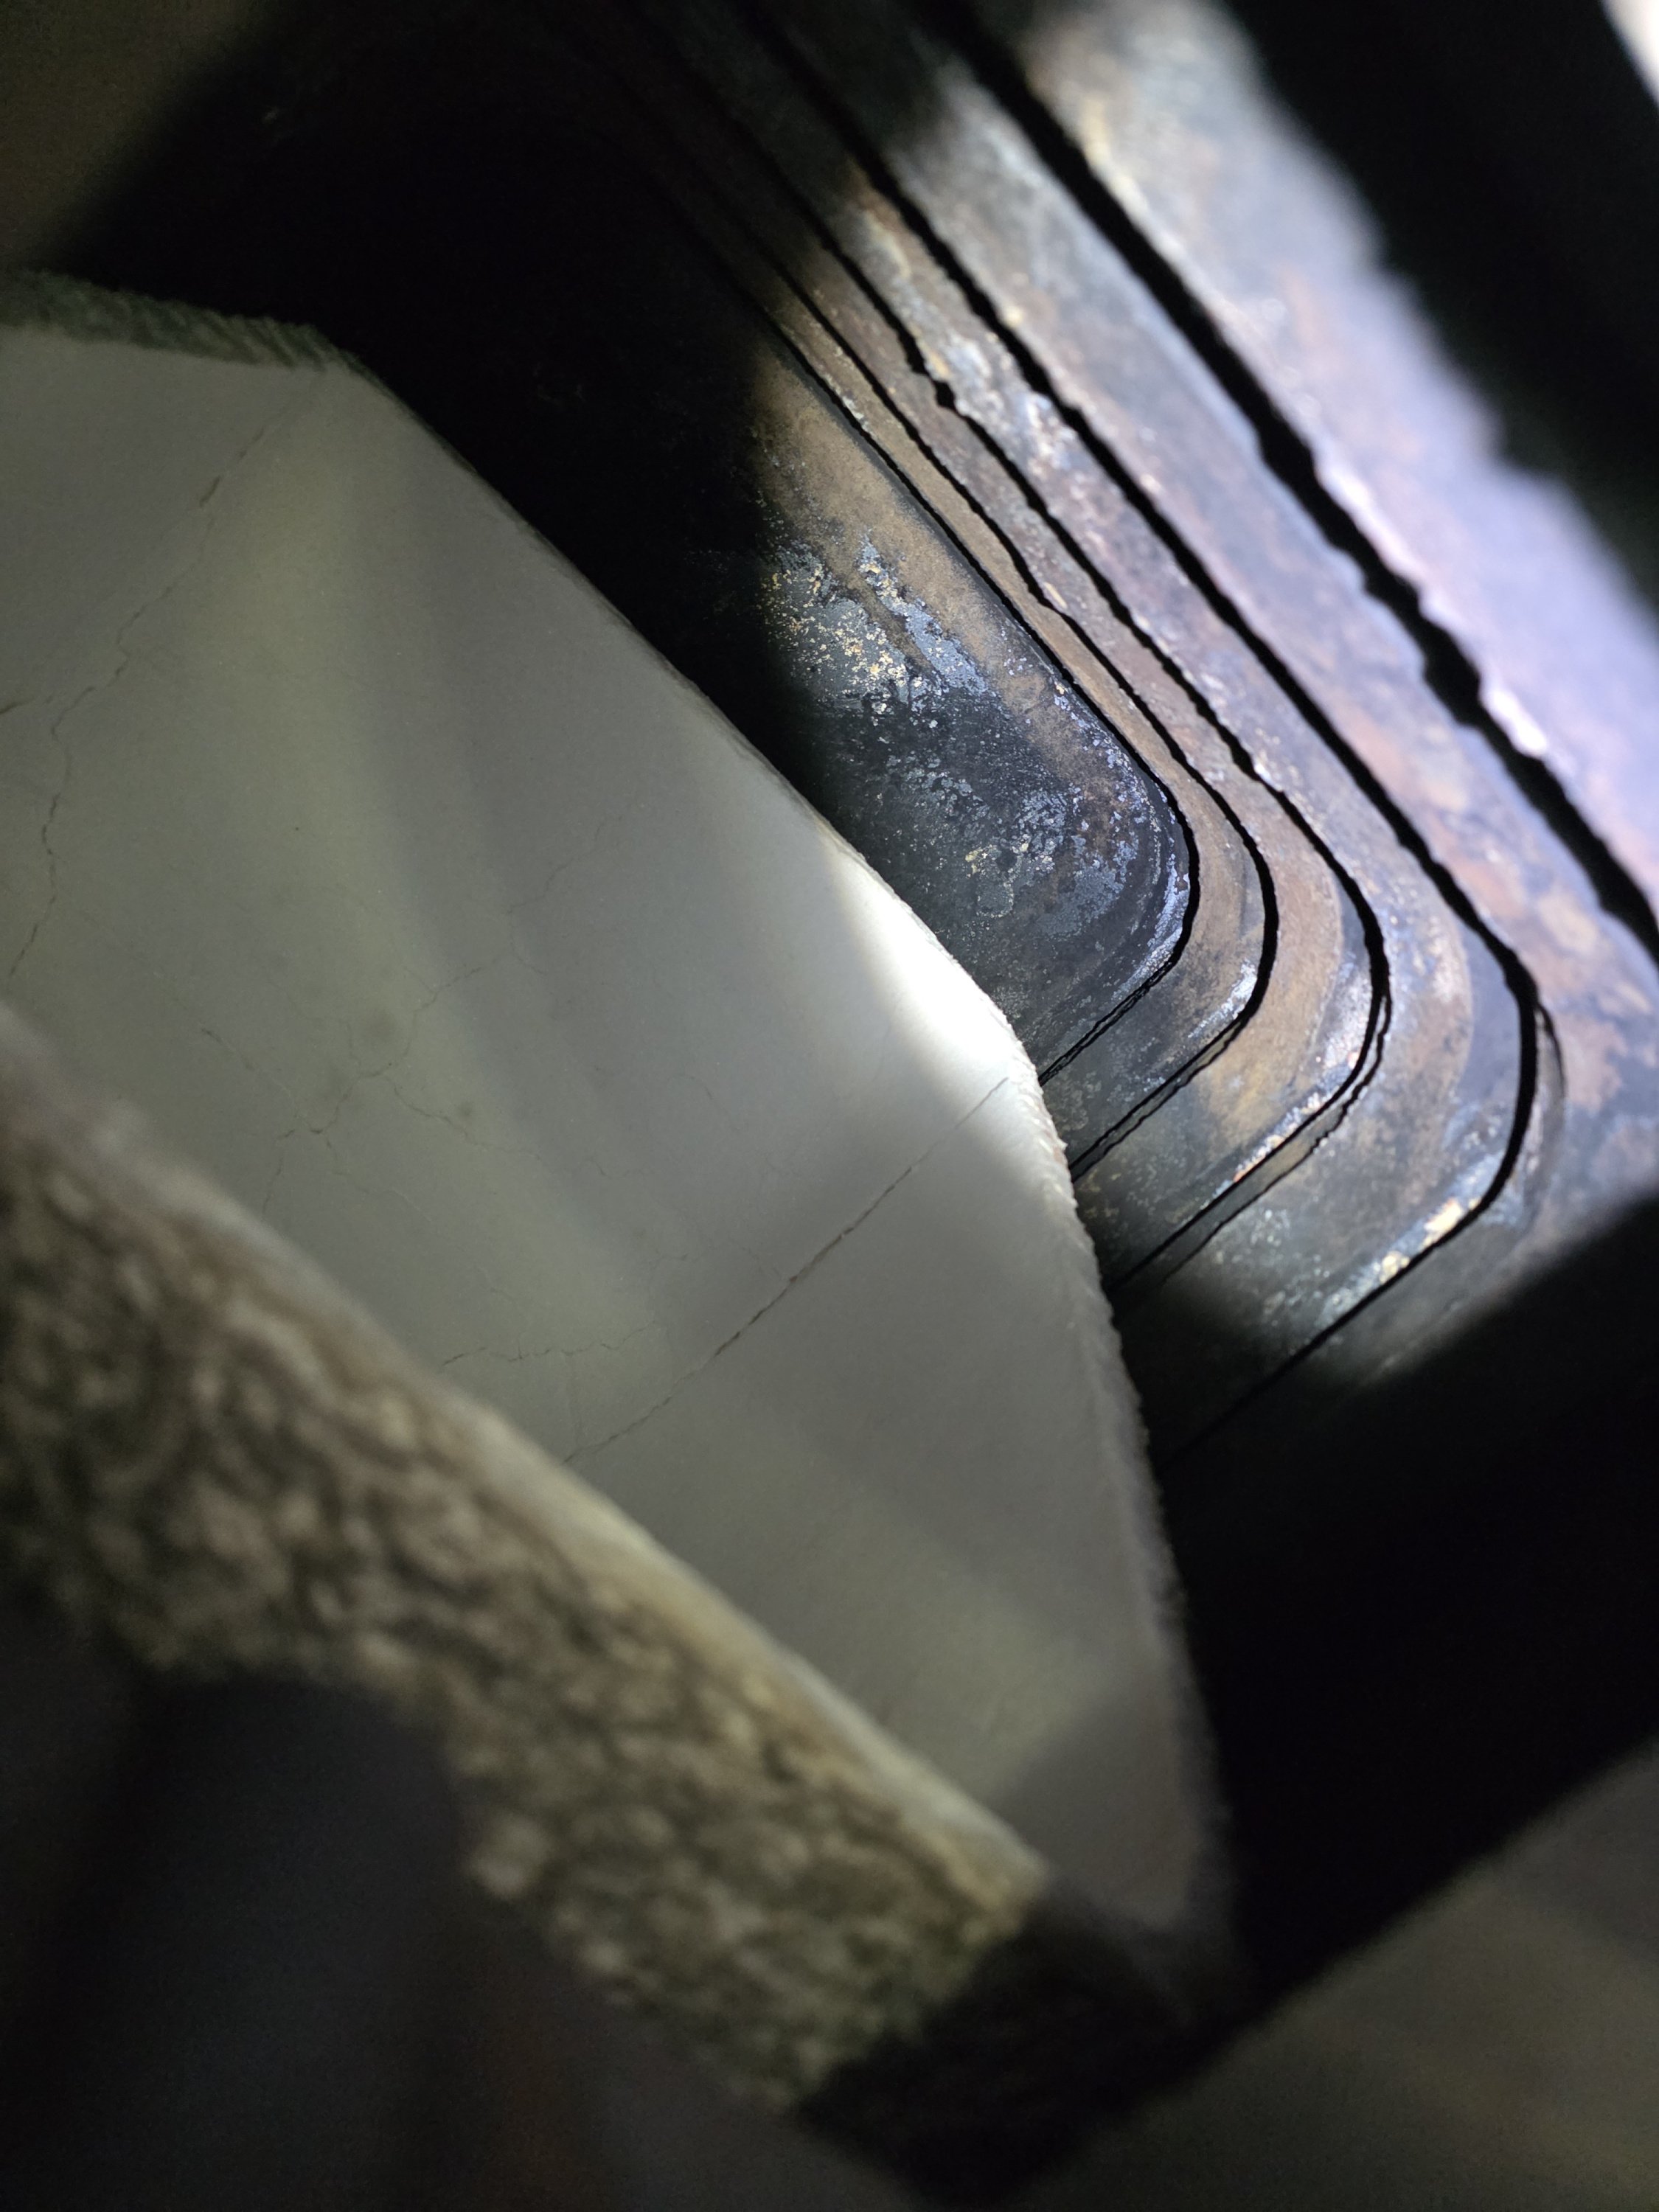
Okay I got everything installed and the boiler has been back in operation now for about 5 weeks since it got colder outside. I noticed today that the new combination chamber has cracks already. Is this normal?
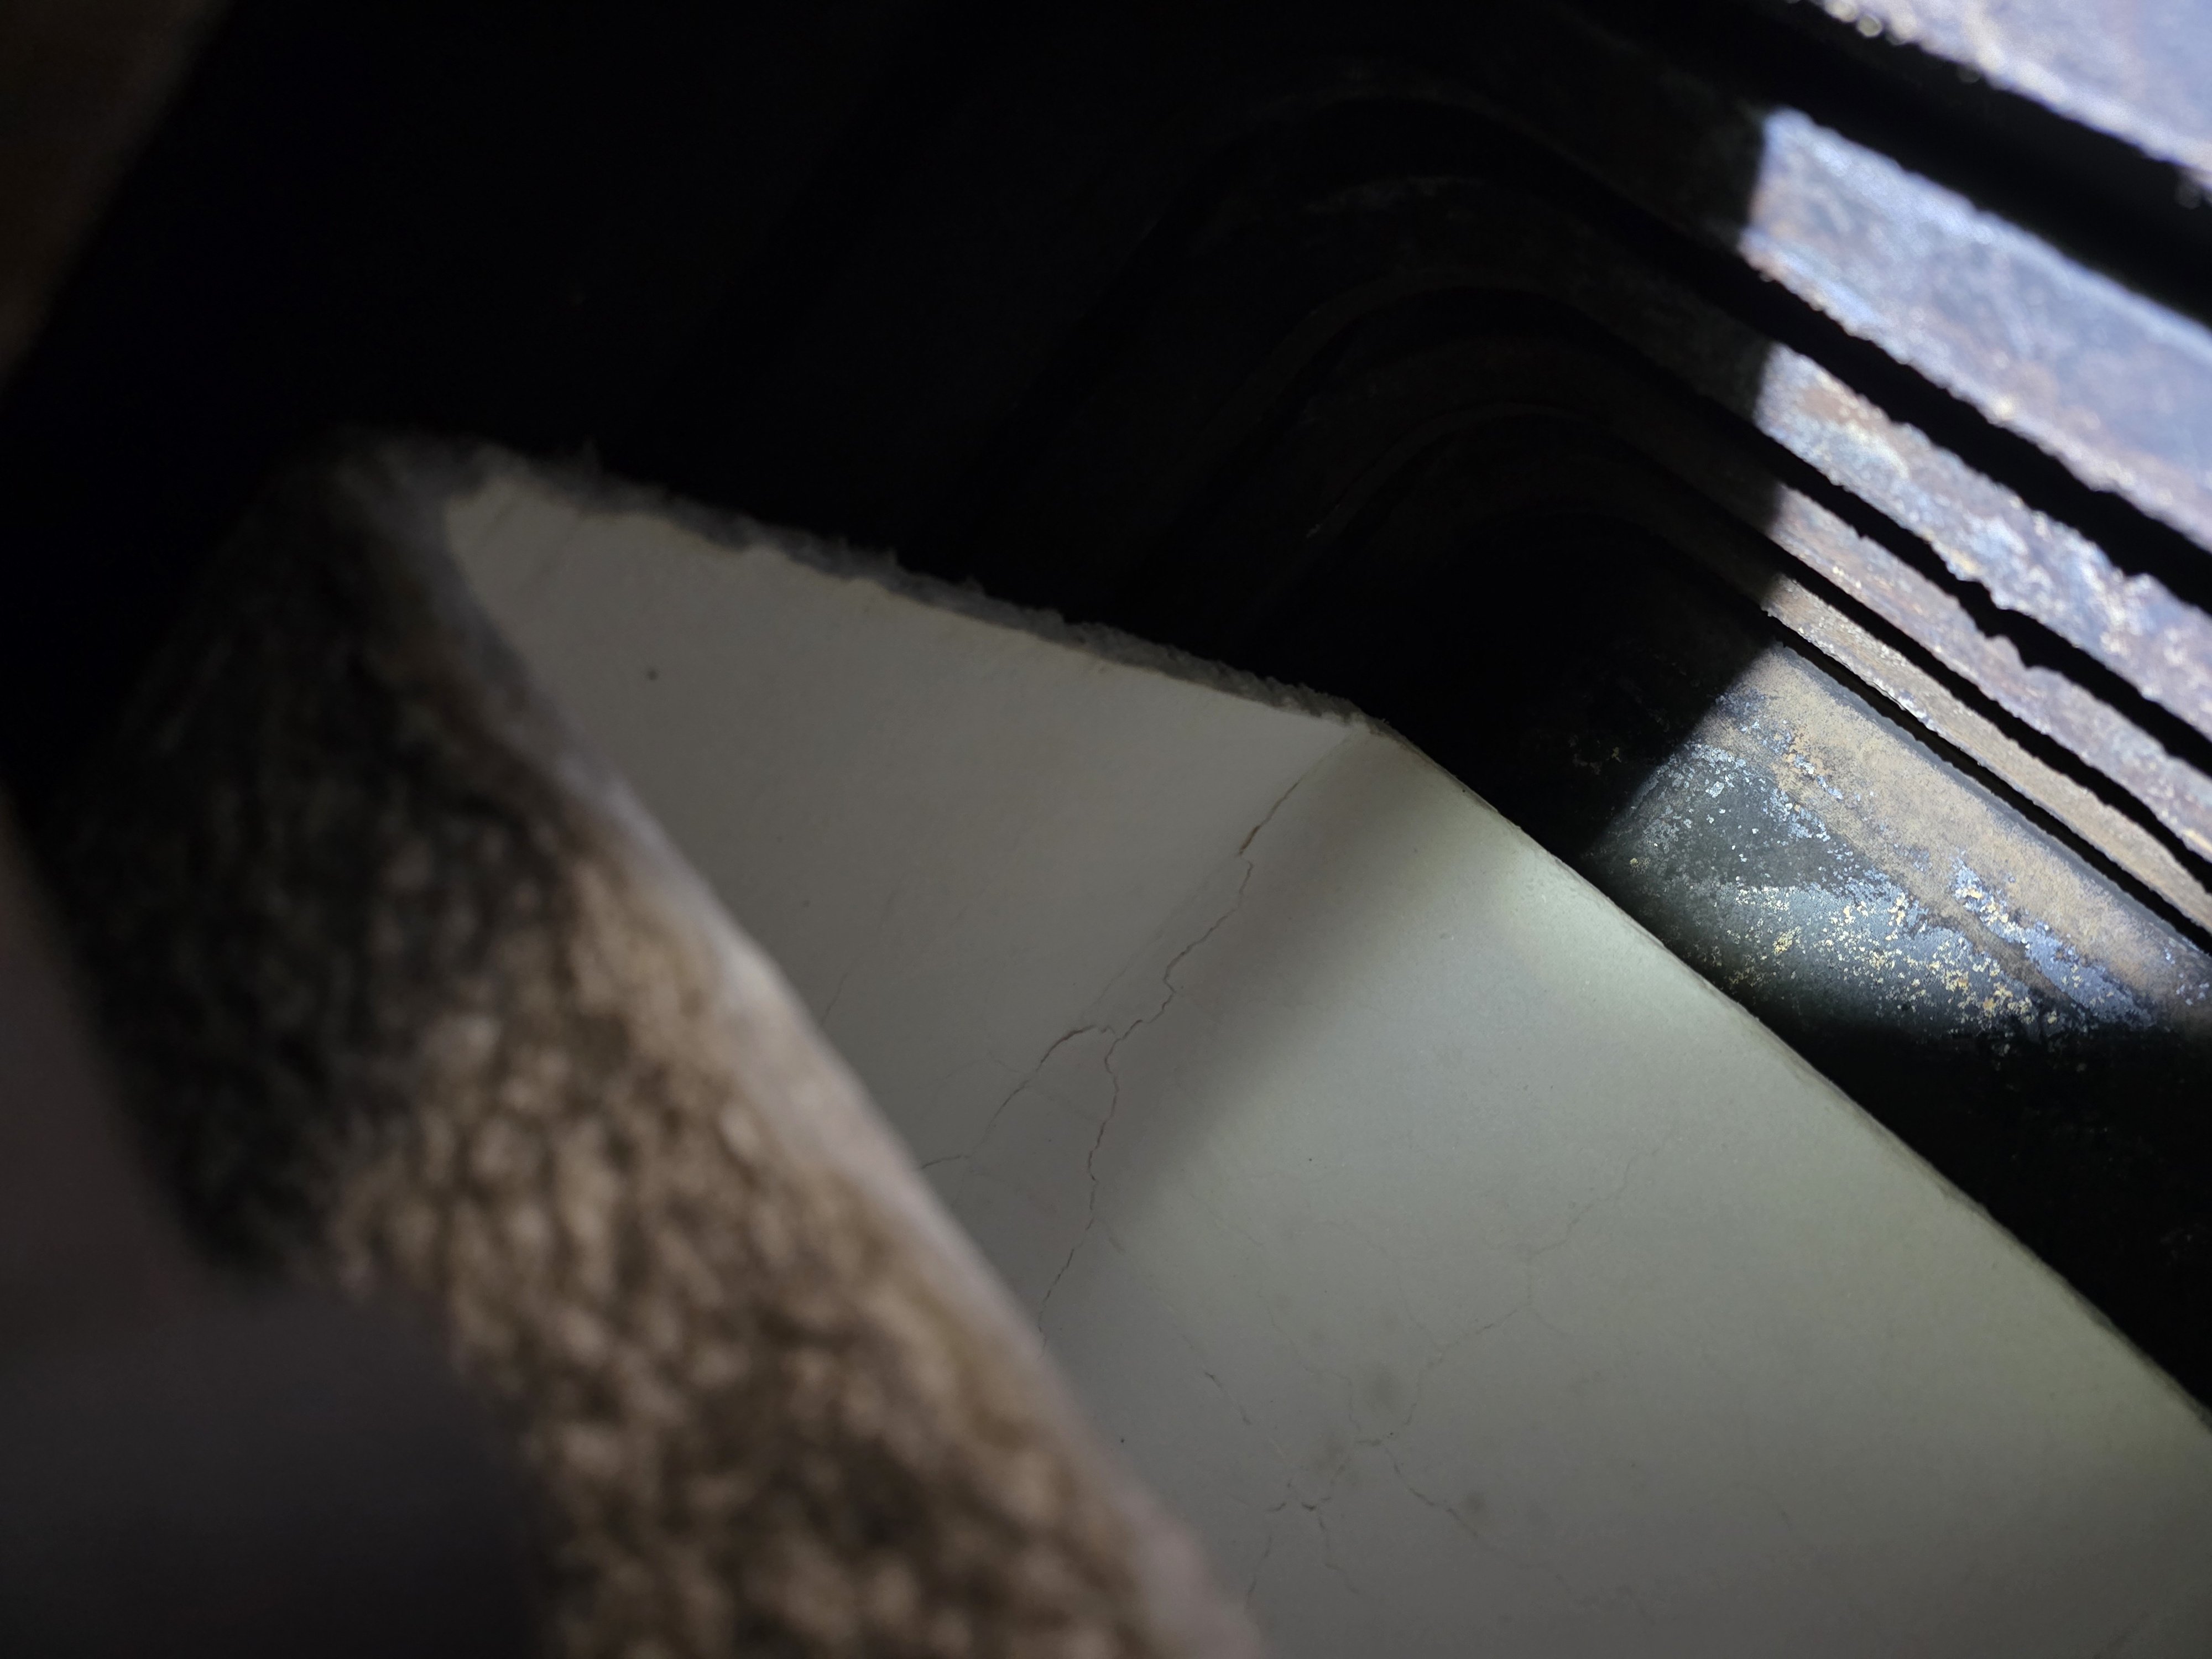
 0
0 -
Your going to get some cracks.
@EdTheHeaterMan if there is a space between the front plate/burner flange and the chamber what will keep the air tube from burning up?
0 -
I suggest that the opening in the Quickie be made by using the actual Air Tube as a cookie cutter to get a Snug Fit into the chamber. When you add the F Head to that hole in the chamber the fit is very snug. That combustion chamber fiber will have a little give to let the end of the air tube fit in the opening made with the air tube.
As far as the temperature of the flame spilling over the the top of the Quickie and dropping down to the air tube in the space between the burner chamber and the flange/plate: that can get hot but there is cold air from the basement air intake blowing through the inside of the air tube the entire time the flame is on. If the burner motor stops when the flame stops there is a chance of over-heating since the combustion air is no longer cooling off the air tube, you may want to add a valve and post purge to keep the cold basement air blowing thru the tube for at least 90 seconds after the flame goes out.
I have not experienced that problem with this Smith boiler and ARCO wet base boilers using the quickie chamber, unless there is a partially blocked chimney base.
Edward Young Retired
After you make that expensive repair and you still have the same problem, What will you check next?
0 -
The air tube / quickie chamber fitment isnt quite a press fit but it's pretty good. There would be no reasonable way to assemble this with a "press fit" especially now with the chamber broken in from heat and becoming fragile. While looking at the flame burning there is no flame going by the burner tube at all. The tube and head are slightly inside the chamber with little gap between them. In fact even with the old tube and broken chamber the tube was fine. Keep in mind this boiler is deep and under fired so the flame doesn't "bounce back" as much as some shallow boilers. I do have a pre and post purge control with a clean cut pump. My only concern was the cracks in the new quickie combustion chamber. But I guess this is normal… Seems strange but as long as the pieces stay in place I guess it's nothing to worry about.
 0
0 -
Since you have a wet based boiler some wet based boilers now don't even have a combustion chamber. The chamber is not needed to protect the boiler from the flame. It is only there to help the burner combustion and with modern burners it may not be needed but combustion will probably be better with it.
I think that boiler was made by Dunkirk for H B Smith. Those were good boilers. Probably early 70s.
0


Categories
- All Categories
- 87.7K THE MAIN WALL
- 3.3K A-C, Heat Pumps & Refrigeration
- 59 Biomass
- 430 Carbon Monoxide Awareness
- 127 Chimneys & Flues
- 2.2K Domestic Hot Water
- 5.9K Gas Heating
- 121 Geothermal
- 170 Indoor-Air Quality
- 3.8K Oil Heating
- 79 Pipe Deterioration
- 1.1K Plumbing
- 6.6K Radiant Heating
- 396 Solar
- 16K Strictly Steam
- 3.5K Thermostats and Controls
- 56 Water Quality
- 51 Industry Classes
- 51 Job Opportunities
- 17 Recall Announcements