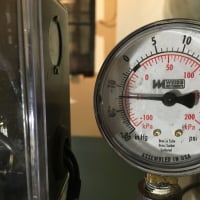
Rebuilding a Trane 55AL F&T trap -- any tips?
I have steam in the condensate and I'm pretty sure this trap is the culprit. It only occurs when this zone is open, it is hot on both sides of the trap, and I don't hear any operation of the float valve.
I ordered the Barnes & Jones kit. No instructions, of course. I have not rebuilt one of these before. Any tips or suggestions?
I do know I can get the screws loose.
There is a strainer on the steam side just ahead of the trap. Should I open that up as well?
Comments
-
Probably nothing in the strainer but if you can get it apart without much trouble it would be worth a look. Some of the kit parts may differ from the original so just go slow with it and figure it out
0 -
yes on cleaning the strainer and the repair kit should not be to difficult to rebuild as long as long as your able to disassemble it without snapping the cover bolts . Have you cleaned your steam boilers water side ? it s usually not done for decades and greatly effects the production of dry steam ,it's hard to make steam when the boiler is full of chocolate milk it needs clean water not mud .
peace and good luck clammy
R.A. Calmbacher L.L.C. HVAC
NJ Master HVAC Lic.
Mahwah, NJ
Specializing in steam and hydronic heating0 -
-
This did end up being pretty easy. I'll detail what I found in case it may be helpful to someone else in the future.
The rebuild kit consists of a new float ball, retaining screw and lock nut, the float lever, lever guide, one guide mounting screw (3/32 hex key), valve seat (9/16 socket wrench) and cotter pin. It will not be obvious what these parts do until you open up the trap. The kit also includes an air vent cage unit.
I had no problem getting the cap bolts out. The bolts are threaded through the flange and I had been spraying the bolts with PB Blaster from time to time over the past year or more. It took a screwdriver and hammer to get the cap itself loose but it was not hard.
This trap as originally built has a bellows attached to the cap that presumably expands to insert a pin in the air vent once it reaches a certain temperature. The pin had fallen off the bellows, so the air vent was basically always open. The float and trap valve are probably OK, though there are some signs of wear on the seal. There was really no debris in the valve body.
The main valve seal is partially blocked by the cup for the bellows, which the instructions say to leave in. You can get a socket on the seal but it is tight.
The bellows did not just unscrew from the cap. The bellows collapses if you put any tools on it. The brass pipe inside is also very soft. I cut the bellows out to expose the base, sprayed PB Blaster under the base and let it sit for most of the day.
I was able to get a grip on the edges of the base with a channel lock pliers and that was enough torque to get the piece to back out. I am guessing you have to get all of this stuff out for the new cage unit to fit properly.
I used a razor blade, sandpaper, and a wire wheel on a Dremel to clean up the gasket surfaces. They are not really very flat in the casting.
I put pipe dope on the threads of the new main valve seal. I put anti-seize on the seal of the cage unit, on the gasket surfaces, and on the cap bolt threads.
I was not able to get the strainer open.
In fairness I have not yet fired up my system to see if the rebuilt trap is working properly.
Thanks for your input in this thread.
0 -
Just an update — this rebuild was totally successful. No leaks, zero steam in my condensate, and a nice 20+F temperature difference across the trap.
Again, thank you for your input.
0
Categories
- All Categories
- 87.5K THE MAIN WALL
- 3.3K A-C, Heat Pumps & Refrigeration
- 61 Biomass
- 430 Carbon Monoxide Awareness
- 122 Chimneys & Flues
- 2.1K Domestic Hot Water
- 5.9K Gas Heating
- 117 Geothermal
- 170 Indoor-Air Quality
- 3.8K Oil Heating
- 78 Pipe Deterioration
- 1K Plumbing
- 6.6K Radiant Heating
- 395 Solar
- 15.9K Strictly Steam
- 3.5K Thermostats and Controls
- 57 Water Quality
- 51 Industry Classes
- 51 Job Opportunities
- 18 Recall Announcements


