Welcome! Here are the website rules, as well as some tips for using this forum.
Need to contact us? Visit https://heatinghelp.com/contact-us/.
Click here to Find a Contractor in your area.
If our community has helped you, please consider making a contribution to support this website. Thanks!
steam boiler replacement pics clammy
Options
clammy
Member Posts: 3,242
It'a been a while since i posted some job pics but here is a quicky i did yesterday .The weil steamer was only 10 years old and had never been properly clean (water side ) or serviced .I offered and gave a price to service and clean the boiler except the powers who contaced me chose to replace the boilerwhich turned out to be a wise choice since the piping was terrible and after pulling the old one apart to remove i had found the combustion passes on the section to contain what looked and felt like rock hard carbon despoits which a flat head screw drive could not get off the section and which blocked about 40 % of each section s flue pass .i bvelieve i would have spent at least 3 to 4 hours to get the section cleeaned besides needing a chamber kit ,new flue piping and a repipe .so a new peerless 4 section was installed with a svt water feeder and a drop header ,i skimmed her out yesterday for a few hours except the rest of the systemn is in need od some work like insulation for the steam mains and near boiler piping and the returns need to be either replaced or cleaned being the home and systems is over 100 years old peace and good luck clammy
R.A. Calmbacher L.L.C. HVAC
NJ Master HVAC Lic.
Mahwah, NJ
Specializing in steam and hydronic heating
0
Comments
-
here's the new one
Here's a little more info. the old boilers combustion chamber had about 5 inches of garbage in it also and was running about a 800 stack who knows how long it was running like this HO had no service done to the boiler including yearly cleanings .I will be trying to keep on top of it so the new boiler will be serviced yearly that is if the HO is going to pay other wise she will probalby be replacing it again in 10 years or so. We did the best we could do for the price that was settled on and did this job on about 3 hours notice .We recieved the boiler late around 12 and had her piped up and running by 4;30 we had all the materal and fittings when we started and worked like horses with no breaks or stops .We had to return to do a little conduit work and change the water feeder and skim but to bad for 1 46 year old and one 56 year old guy .I will have to bow my head for the excellent people at the supply house who moved around other deliveries to obtained the boiler and get it to the job with in about 3 hours of me placing the order PS they did not stock this boiler so they went about 45 miles away and picked it up ,excellent guys peace and good luck clammyR.A. Calmbacher L.L.C. HVAC
NJ Master HVAC Lic.
Mahwah, NJ
Specializing in steam and hydronic heating0 -
Thank goodness,
I looked at your post before you put the "after" pics up and I thought were saying the "before" pics was the new install that you were proud of! Luckily I saw your second set of pictures, I was about to have to question your skills!.....Good looking job, though!There was an error rendering this rich post.
0 -
Thanks
This was a quicky job and i was just a sub doing it for a lost plumber who kinda beat me down on the price ,if it was not for that beating i would have straighten out that first riser and she would have been on the square and level but i think the piping is a bit better then what was there also these photos where before the skimming .I also changed it to a single pipe and installed the tiger loop i hate filtering more oil then i'm burning espicaly when the oil tank is about 70 years old and dirty it makes life a bit easier thanks for the comments peace abnd good luck clammyR.A. Calmbacher L.L.C. HVAC
NJ Master HVAC Lic.
Mahwah, NJ
Specializing in steam and hydronic heating0 -
Very nice...
Nice job indeed!Br. Jamie, osb
Building superintendent/caretaker, 7200 sq. ft. historic house museum with dependencies in New England0 -
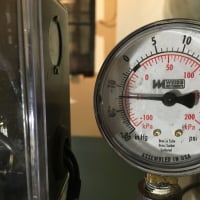
pigtail
you need to turn the pressurestrol 90% so the pigtails expansion tilts it front to back not side to side0 -
Nope
That only matters when there is mercury in them. No need with the PA404.0 -
Nice work!
Very nice, clammy. My hat's off to you!0 -
Nice......
love that dropped header!
JimThere was an error rendering this rich post.
0 -
thanks for the kind remarks
Thanks to you all for your kind words.I always try to give the custermer the best valve for money of course there's always more improvements that could be done including up grading the main vents and rad vents and insulating the mains and near boiler piping but in some cases it's just a matter of time and money and other cases it is a neccesary that they are addressed before more work is created.As is the case here they are wasting alot of heat due to uninsulated steam mains and the wet returns are in need of some cleaning and or replaement but one step at a time .I figure that it took close to 100 years for it to get to the point it is at now and maybe with a bit of money and time i can get it back into shape and save the HO some money and fuel and increase there indoor comfort .Thanks again for your kind and encouraging words it is truely a complement coming from the pro's on the wall peace and good luck clammyR.A. Calmbacher L.L.C. HVAC
NJ Master HVAC Lic.
Mahwah, NJ
Specializing in steam and hydronic heating0 -
hoss50
Why the drop header? Looks like you had plenty of room for a conventional header0 -
why not the drop header
Here's a couple of reason why the drop header in my eyes,more room for expansion being it is a better swing joint and allows for more expansion with out stressing your boilers block ,helps to further slow down your exiting velocity and helps to further dry out the wet steam your boiler produers due to the smaller steam chest area which most all modern steam boiler have compared to yesteryear.The fact that a drop header enables you to tie your 2 riser together and have a bit more play then a standard swing joint.The main reason for myself is that after using a standard swing joint set up for many years that installing a drop header and tieing the riser together is much easier espically when you work alone and also that fact that this type of swing joint gives you more room to tie into your existing piping and bottom line it dries out steam much better then a standard swing joint type header also by not limiting you to the what you can squeeze as a riser between your boiler tapping and what you have to tie into the existing steam mains .And the botton line is it gives your custermer a better job and dryer hotter steam plus to myself it makes the differene between the one who know and the one who are clueless and are in it just for the money not for the skill and craft which each day is dimmished by the lack of skill and knoweledge and giving a damn for a trade whih each day fades like a sunset .Let's not let dead men roll in there graves peace and good luck clammyR.A. Calmbacher L.L.C. HVAC
NJ Master HVAC Lic.
Mahwah, NJ
Specializing in steam and hydronic heating0 -
How much drop in a drop header?
Kudos on the impressive installation.
How do you calculate/determine the amount of "drop" in a drop header? Are there any rules or guidelines? Would you also recommend using a drop header in a single riser setup? (Are those 2" risers and a 3" header in your setup?)
Thanks.0 -
drop header
i did use both 2 inch tapping and they inrease to a 3 inch header ,determining the drop is not as criatial as the length of the risers.I try to make the riser as high as i can which is usually way above the minium 24 above water line ,the drop is usually determined by how much room you need to tie into the existing supply piping.The longer those risers off your header is the less chance you have of water making the leap of faith into your existing steam main.Ideally you would want to keep it up as high as possibel but i have seen other drop down very low with out any ill effects.I use drop headers weather it is a single or double hook up ,the only time i would not use a dropheader would be if there was very high cieling and i had say 4 or 5 feet to tie into the existing mains but if the riser and header where going to be say 3 inch risers with a 4 inch header i may still do a drop being that it makes tie the 2 risers easier and i believe make a better swing joint for expansion whih help relieve stress on the boilers sections due to expansion .I hope this helps you out ,On another note not every one out there even kows what they are and even when some one may know what they are it does not mean they know what they are doing and also if they suggest to do the piping in copper please show they out the door ause they have no respet for the trade nor the art peace and good luck clammyR.A. Calmbacher L.L.C. HVAC
NJ Master HVAC Lic.
Mahwah, NJ
Specializing in steam and hydronic heating0 -
Copper return line
Thanks for your response clammy. I noticed a few posted pictures that show copper return lines. If it's ok to use copper, should it tie into a steel Hartford Loop, or can the loop also be copper? Finally, should the center of Hartford Loop be 2" below the water line (or is it 2" from the water line to the top of the Loop)?0


This discussion has been closed.
Categories
- All Categories
- 87.3K THE MAIN WALL
- 3.2K A-C, Heat Pumps & Refrigeration
- 61 Biomass
- 429 Carbon Monoxide Awareness
- 120 Chimneys & Flues
- 2.1K Domestic Hot Water
- 5.8K Gas Heating
- 115 Geothermal
- 166 Indoor-Air Quality
- 3.7K Oil Heating
- 77 Pipe Deterioration
- 1K Plumbing
- 6.5K Radiant Heating
- 395 Solar
- 15.7K Strictly Steam
- 3.4K Thermostats and Controls
- 56 Water Quality
- 51 Industry Classes
- 50 Job Opportunities
- 18 Recall Announcements