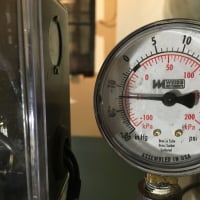
How Does This Look?

Comments
-
-
Looks good but where the backflow preventor and a electronic low water cut off unless its equipped w a digital aquastat w a lwco feature ,both are code in my area if getting inspected . Other wise welcome to doing it the correct way now dont fall back into old habits . Its a wonderful thing when ya don't have to remove convector covers to bleed rads and convectors . on another note if looking to get better try califee demineralizing filter to bring your fill water within what the manufacture's specs . Keep up the good work .
peace and good luck clammy
R.A. Calmbacher L.L.C. HVAC
NJ Master HVAC Lic.
Mahwah, NJ
Specializing in steam and hydronic heating4 -
-
Thanks Clammy!
The backflow is right after the ball valve on the feed line if you zoom in. LWCO isn’t required in our area unless it’s steam. The control board has an LED with “LWCO” next to it. Not sure how to identify if it has one built in or not. How would I verify that? I’m a plumber trying to get more into the heating side, and have very little personal resources at my disposal beyond books, so have lots of questions.
0 -
Thank you!
0 -
It adds time and cost, but running a cleaner, flushing and adding a treatment is another good step. You want the insides as clean as the outsides :) Smallsquirt cans like this make it a simple job to ad the chemicals.
Testing the fill water is a good step also. The installation manual will show the water spec.
Bob "hot rod" Rohr
trainer for Caleffi NA
Living the hydronic dream0 -
The new CGa from Weil McLain is equipped with a LWCO that is connected to the boiler control part number 381-330-039. the sensor is part number 591-391-995
You don't want to be that guy that only does the "Minimum Required", do you? You used a micro-bubble air separator, which is a step above the minimum Air Scoop. That makes for a better system, and trouble free purging and constant air removal over the season. If your boiler does not have a LWCO included, then add one to the system. You might want to look into the Modulating Condensing boilers to save your customers even more on operating cost.
Good luck with your quest to be a better heating professional. God known that we need more of you!
Edward Young Retired
After you make that expensive repair and you still have the same problem, What will you check next?
0 -
Thanks Ed!
My trouble is that Im so new at this, and fairly unfamiliar with control wiring I always revert to “keep it simple” more for my own benefit. I need to learn more about controls, and wiring so I can feel more confident about this stuff.
I’ve never touched a ModCon boiler beyond a Weil Mcclain Ultra that I could never get to run right early in my career and made me scared of them lol.
I will say as a plumber, I fix/install tankless water heaters so I have at least that much familiarity with them, but never been around these types of radiant systems i see pictures of with all the primary/secondary piping and whatnot. Intimidating to me because I don’t have anyone here to fall back on if I get stuck, beyond tech support and books.
0 -
Cast iron radiators? How did you size the replacement boiler?
The first step with a replacement is to size the boiler to the load of the home as it exists today. If any upgrades have been made to the home the load may be lower than it was, which could indicate a smaller boiler.
Boilers tended to be over-sized often.
Bob "hot rod" Rohr
trainer for Caleffi NA
Living the hydronic dream0 -
Your work is Stellar...neat as a pin..Great soldering job! Mad Dog
2 -
it’s all fin tube baseboard. Old boiler was 150,000 btu. I called our supply house and their boiler guy had me measure all the baseboard, asked the sq ft of the house, and how many windows and came up with that CGA-5 as a replacement which was smaller than the original.
0 -
thank you!
0 -
how many feet of baseboard do you have?
Bob "hot rod" Rohr
trainer for Caleffi NA
Living the hydronic dream0 -
Been about a week ago now but if I remember right it was 154 ft. House was 2 stories on a slab, and living room was huge with windows so large they were basically walls. 1971 construction.
0 -
Categories
- All Categories
- 87.4K THE MAIN WALL
- 3.3K A-C, Heat Pumps & Refrigeration
- 61 Biomass
- 430 Carbon Monoxide Awareness
- 122 Chimneys & Flues
- 2.1K Domestic Hot Water
- 5.9K Gas Heating
- 115 Geothermal
- 168 Indoor-Air Quality
- 3.8K Oil Heating
- 78 Pipe Deterioration
- 1K Plumbing
- 6.6K Radiant Heating
- 395 Solar
- 15.8K Strictly Steam
- 3.4K Thermostats and Controls
- 56 Water Quality
- 51 Industry Classes
- 50 Job Opportunities
- 18 Recall Announcements


