Welcome! Here are the website rules, as well as some tips for using this forum.
Need to contact us? Visit https://heatinghelp.com/contact-us/.
Click here to Find a Contractor in your area.
If our community has helped you, please consider making a contribution to support this website. Thanks!
Insulating the Brick Wall Next to the Radiator
Options

Kevin_in_Denver_2
Member Posts: 588
My 1929 apartment building is built with two courses of uninsulated brick. Of course, I should fir out the exterior walls and insulate, then re-drywall.
Instead of doing that big job, It dawned on me to glue a square piece of the foil-faced polyisocyanurate foam board to the exterior wall just where the radiator is. It would theoretically deflect all the radiant heat back into the room instead of heating the wall.
Has anyone seen that done?
While I'm at it, I'd like to change the radiator color from silver to white, but I'm afraid the white will turn yellow too soon. I don't want to powder coat, but does anyone know of a good paint to use? Or should I just start out with yellow?
There was an error rendering this rich post.
0
Comments
-
BE very careful....
Your idea of furring out and insulating your walls sounds great, but you could invite disaster. When you insulate on the interior of a marsonry wall, the temperature of the masonry gets very cold. However, the wood floor joists still travel into this brickwork to support the floors. The moisture vapor in the building travels throughthe wood and any opening surrounding it and condenses at the very cold surface of the brick wall. This condensation can rot off the end of the joists and the floor will collapse. This problem is still under study, and, as I understand, the problem does not occur all the time or in any pattern.... so you could have no problems or have major problems. Insulating behind your radiators is a very good idea.
If possible, in terms of thermal performance, insulating the exterior of a masonry wall is very, very advantageous, but also can be difficult or unsightly. Moving all this mass inside the envelope makes the interior temperatures very stable and reduces peak heating and cooling loads so equipment can be sized much more efficiently.
BoilerproThere was an error rendering this rich post.
0 -
EIFS
Exterior insulated foam stucco doesn't even cost all that much, but it devalues the property. On an apartment building, however, resale value can go up as expenses go down.
The insulation behind the old cast iron radiators is an idea for the next edition of Greening Steam. I'll try to get before and after IR photosThere was an error rendering this rich post.
0 -
one-coat stucco systems
Exterior insulated one-coat stucco (like Dryvit) is a system that is just asking for failure. The one-coat cannot be patched. And as much as the manufacturers would like to believe otherwise, water will get in, and it will rot out the material behind. When that happens, there goes its insulating advantages. But it will affect the construction behind and not just the styrofoam insulation. This is not as big of an issue with brick as it would be with wood construction, but it is still a concern.0 -
Radiant barrier
I have done this .. kind of.
What you would be doing is creating a radiant barrier. The insulation won't do much since it won't cover the whole wall - so there is not really any pointin getting the thicker panels - but the foil facing can have an effect. Just remember that for it to work, the foil must face out and it must remain uncovered. The radiant barrier property of the foil will only work if one surface of the foil remains exposed. This could be kind of unsightly, but it will retard radiant losses from the radiator through the wall.0 -
Getting ready to do it.
Whoops I spoke too soon. This idea is already in Dan's book, Greening Steam. Radiator paint recommendations are in there too.
Since I have a large exposed wall to the north, I'll put the silver polyiso next to a few radiators on that side and get IR images of the whole wall. That would be an instantaneous "before and after" photo to help us evaluate the effectiveness. I'm afraid, however, that because it's a double-wythe wall, convection currents inside the wall will wipe out any measurable proof that the insulation is helping.
Has anyone else done this and do you have any other tips for me?There was an error rendering this rich post.
0 -
convection vs conduction
Since you're dealing with a solid and not a liquid (including air), convection isn't really the driver, but conduction.
It all depends on the specifics, but you should still see the impact on a thermal scan with just 2 wythes. The key is to make sure that your house is really up to temperature (maybe even a little above normal temp) before taking the pictures and letting the walls cool down (or at least wait a couple of days for them to normalize) between the before and after. I think you'll still see a hot spot where the radiator is, but it won't be as pronounced.
Either way, post pics, I'd love to see them.0 -
We installed the foam today
The materials for this job were cheap ($4 per apt.), and it only took about 1/2 hour per apartment. Pins (pneumatic finish nails) and caulk work magic on a plaster wall. The shiny side of the polyisocyanurate isn't perfect looking, but I think people will understand the idea.
So, the payback should be quick, even if it doesn't save much money but makes the tenants more comfortable.
Polycarp, you're right about the thicker foam not helping much, and the space was limited anyway.
Now I just need some cold weather! (Denver was 62F today)There was an error rendering this rich post.
0 -
all insulation types or just some?
BP -- I recently blew cellulose between plaster lathe and double-layer brick .. do you think I may have the potential here for floor joist rotting or will the cellulose tend to absorb some of that moisture that might end up on the joist ends with other hydrophobic insulation types.1-pipe Homeowner - Queens, NYC
NEW: SlantFin Intrepid TR-30 + Tankless + Riello 40-F5 @ 0.85gph | OLD: Fitzgibbons 402 boiler + Beckett "SR" Oil Gun @ 1.75gph
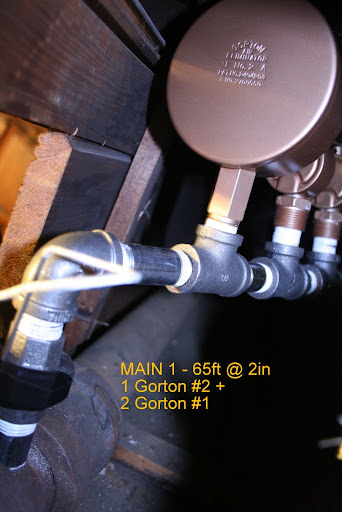
installed: 0-20oz/si gauge | vaporstat | hour-meter | gortons on all rads | 1pc G#2 + 1pc G#1 on each of 2 mains
Connected EDR load: 371 sf venting load: 2.95cfm vent capacity: 4.62cfm
my NEW system pics | my OLD system pics0 -
Green Building Advisor
All the best building scientists are discussing topics just like this one at:
http://www.greenbuildingadvisor.com/qa
You might not actually get the right answer to this question, but you will get lots of well-informed opinions and things to consider.
If the space between the lathe and brick is only 2" or less, the temperature reduction of the brick won't be enough to worry about. Cellulose is the best choice because of its hygroscopic properties. Foam injection has been known to cause trouble in wet climates because of its impemeability, but we do it all the time in Denver because it's so dry here.There was an error rendering this rich post.
0 -
thanks ..
without too much digging I found this thread at GA... http://is.gd/iJW2p cellulose seems to be a reasonable choice ..1-pipe Homeowner - Queens, NYC
NEW: SlantFin Intrepid TR-30 + Tankless + Riello 40-F5 @ 0.85gph | OLD: Fitzgibbons 402 boiler + Beckett "SR" Oil Gun @ 1.75gph
installed: 0-20oz/si gauge | vaporstat | hour-meter | gortons on all rads | 1pc G#2 + 1pc G#1 on each of 2 mains
Connected EDR load: 371 sf venting load: 2.95cfm vent capacity: 4.62cfm
my NEW system pics | my OLD system pics0 -
cellulose
I would say to go with cellulose. We don't entirely understand the behavior of moisture in buildings. However, I think a really safe maxim is: if it was made to breathe, let it breathe. Even the more permeable foams are pretty hydrophobic. This means that the moisture that gets into the walls - and moisture *is* going to get into the walls - is going to get directed into the structure, in your case the wood and the bricks. If you can't get a real vapor barrier in place, don't go with a foam retrofit.
How much of a gap do you have? My exterior brick walls are just furred out 1" before the lath and plaster. With that little space, retrofit insulation doesn't make sense. Do you have more of a gap? Have you already tightened the envelope and reduced infiltration? Maxed out your ceiling/roof insulation? Done something to your windows (either replace or add interior or exterior storms)? These are generally all more cost effective than a wall insulation retrofit.0 -
thermal scan
Do you have access to a thermal camera? or even just a laser thermometer? It'd be great to see what kind of difference in temperature this makes to the exterior of the wall. Even better if you had done it pre and post retrofit.
edit: duh, I already asked this. Hope to see images soon.") 0
0 -
instantaneous before and after
On the wall I have access to, I left out four out of the eight apartments. Therefore, I can see the before and after side by side under the same conditions of exterior temperature and boiler runtime.
I'm working on getting the camera.There was an error rendering this rich post.
0 -
thanks PC and replies to your ?'s
for reference here's a couple views of the house .. I have boxed off areas I blew with cellulose this year...
http://screencast.com/t/hHQJHmkHgs
http://screencast.com/t/W6N1l7dYzoc
http://screencast.com/t/LZHpuxd03aQu
in terms of a lathe/brick gap .. i'd say about 2 or 2.5" .. not a full 2x4 stud perhaps a 1/2 of a 2x4. but I figured that something in the gap was better than nothing considering I found the R value of brick to be miniscule another bit of miniscule has to be better off correct?
i've been tightening .. the cellulose was a very cheap option .. it cost me about $600 (~15bags of "green fiber" + a helper for 2days at the machine + some patching supplies) to do about 1/2 of my cold walls. (3 of 4 corner rooms (semi attached house)) i still have dining room and living room to do .. but it was more of a learning and get the process down exercise before my wife let me at our main living/entertaining space. (BTW if anyone wants any tips about my "almost dustless" cellulose blown inside plaster lathe from interior process from interior, drop me a line)
i feel that my envelope and infiltration are pretty tight, but I have not had blower door test done yet. i do not have any perceptible drafts (after removal of final in-window AC) and I have shot almost all of the house with IR camera (granted on not an extreme delta-T day such as today).
i do have some attic pink fiberglass insulation (R-value unknown, left from previous owner) in place (in walkable space above 3rd floor rooms and below un-insulated roof rafters, BTW the roof is red-clay Ludowici Tile) and it was on my list to blow more cellulose on top of that pink .. however, didn't get to it this season. as well, i was going to blow the floor joists of my first floor since I have hardwood floors and they can get a bit chilly for the kids to play on.
i have single glazed double hung wood windows (6 panes "actually divided" per sash) inside of single glazed exterior aluminum storms. I had several window quotes in the late summer and just couldn't bite off the budget for my 25 windows .. (late spring I installed mini-split 36K heat pump (to service 1/2 the house 2nd half (24K) this spring) and early fall a new boiler) ..
good quality windows are certainly high on the list (even if just a room at a time for several years).. but cellulose insulation was the cheapest quickest DIY option I had available to me this season.1-pipe Homeowner - Queens, NYC
NEW: SlantFin Intrepid TR-30 + Tankless + Riello 40-F5 @ 0.85gph | OLD: Fitzgibbons 402 boiler + Beckett "SR" Oil Gun @ 1.75gph
installed: 0-20oz/si gauge | vaporstat | hour-meter | gortons on all rads | 1pc G#2 + 1pc G#1 on each of 2 mains
Connected EDR load: 371 sf venting load: 2.95cfm vent capacity: 4.62cfm
my NEW system pics | my OLD system pics0 -
Insulate that ceiling
That's a nice house!
The ceiling really should be your priority. From a cost effectiveness standpoint, it probably would have been better than the walls (depending on just how much insulation you have). DOE recommends R-38-60 in your area. The pink stuff isn't anywhere near that. It sounds like your attic doesn't have a floor, so that makes blowing cellulose in pretty easy. If you still want to walk up there or use it for storage, you'll need to frame up a platform above the insulation. Once you blow it in, you really don't want to be disturbing it. Make sure that before you insulate, you pay special attention to the edges. In a lot of houses the vintage of yours, there are some pretty serious infiltration routes around the edges of the attic. You'll want to go around the perimeter and make sure that you don't have any wall cavities open to the attic or gapping at the wall-roof joint.
Also, don't forget about attic ventilation. With the blown-in, you'll need special venting channels that will keep your soffit vents clear and keep your insulation from creating a mini snow fall out the vents. This would also be the time to fix inadequate venting.
For the windows, replacement may not be cost effective. More ceiling insulation is certainly above that. Tightening up your windows and storms won't give you quite the same performance as new windows, but it is far, far cheaper and way, way better bang for your buck. There's also the reality that vinyl windows are a horrible product with very unpredictable lifespans. So for quality windows (that wouldn't look ridiculous on your handsome house) your window replacement cost is going to go up even more. Although you might look into just replacing the storms. I've never been a fan of aluminum triple-tracks like it looks like you have.
I'd be interested in your wall insulating method. I'm always looking to learn ways to make it easier and more cost effective. Wall insulation retrofits make a difference, but the cost-effectiveness of the approach always leaves it pretty far down on my list of efficiency upgrades. DIY certainly helps with that though.
And you know, that floor would be warmer if you hadn't insulated your boiler so well. ;P0 -
DIY Cellulose...
PC -- Thanks for the compliments on the house .. we were lucky to finally find it.
Thanks for all the great thoughts on the possible improvements .. for windows, I was looking at fiberglass ones as available here: http://www.fibertec.com/
OK so .. my method for blowing cellulose
supplies needed:
-- drill
-- Milwuakee 1-1/4" GRIT hole saws (2-4pieces depending on the job) http://is.gd/iP1le
-- good shop vac with brush attachment (I have a rigid)
-- FINE dust filter for shop vac http://is.gd/iP1S7
-- spackling knife
-- long bladed serated knife
-- Great Stuff Foam "RED" 1-can http://is.gd/iP1AZ
-- MH Ready Patch http://is.gd/iP1KN (size depending on job)
-- 3ft of 14 gauge wire
-- pencil
-- 1 roll of Gorilla Tape
-- 1 roll of 2" blue painters tape
-- some medium/fine grit sanding sponges
-- personal safety equipment goggles, gloves, etc.
-- homemade nozzle as seen in attached picture composed of:
+ vacuum universal adapter http://is.gd/iP26Z
+ PVC valve size unknown/forgotten you don't need a valve .. maybe just a coupling .. turning off the valve makes the cellulose clog so valve operation is NOT needed.
+ short length of clear Poly Tubing size forgotten
+ undersink J-trap like this but PLASTIC: http://is.gd/iP5L7 (cut off the lip on the curved end, sand down a little bit with sandpaper since the O.D. is exactly 1-1/4", you want a snug fit in your wall holes)
the J-trap fits very tightly in the clear tubing .. the clear tubing fits tightly in the PVC valve .. the vacuum adapter needed to be trimmed down 1 level and fits tightly in the PVC valve .. stick em all together and gorilla tape em ..
1) DAY1 - drill holes 14inches from ceiling and 3ft from floor in each stud bay using grit saw. while drilling, use the vacuum with brush to capture as much dust as possible very near the drillsaw location. the grit saw will go through the plaster easily and cleanly .. then push a bit harder when you get to the lathe .. it will go through and it beats changing to a toothed bit for each hole. once you drill first hole, stick your 14gauge wire in the direction you intend to travel to find the next stud. continue until you are done. tape over each hole sparingly with blue painter's tape until you are ready to blow the hole.
2) DAY2 - blowing insulation .. 2-man-job .. the supply hose that came with the "FREE for 24hrs if you buy 20 bags of "Green Fiber" machine (even if you return 10bags later) (Home Depot)" mated perfectly with the Rigid Vacuum Adapter (with a couple wraps of G-Tape on the adapter for a snug fit) .. do not clamp/tape nozzle to hose, you may need to punch out a clog with your 14gauge wire and as you get learning this may be more often than you would like to clamp and unclamp. it's a snug fit, but make sure you hold both the hose and the nozzle.
my guy on the ground got really good at just how much to open the blower gate (i think it was about 3-4fingers) for a good mix of air + material .. too much material will cause a clog and too much air will make the job go slower
stick your nozzle (just the first inch or so of nozzle, you don't need to go fully into hole with curve, in fact you don't even need curved nozzle .. the nozzle fits very snugly in 1-1/4" hole if some plaster chips away from nozzle manipulation, that's ok) in BOTTOM first hole and have him/her power the blower WITH GATE SHUT...then slowly open gate to desired amount. when the hole is finished, the wall guy will know by sound and back pressure, the blower guy *may* hear/see the machine literally burp, in any case the wall guy should YELL or somehow communicate a shutdow .. blower guy should CLOSE GATE then shut down blower power. closing the gate will clear the hose of material and will prevent clogs when the blower starts back up (also with gate closed) .. wall guy should wait until pressure has decreased before removing nozzle .. then move to next hole (TOP hole)
while blowing bottom holes you may get some material float out of the TOP hole, this only lasts for a short period and then stops floating out even though your bottom hole is not yet filled .. something about that particular amount of fill (floor to hole) and the air current in the bay perhaps.
once you have filled all your holes, clean up any mess with shopvac.
depending on your building's construction, you may end up having very long blows in some holes especially near ceiling where you are filling (at least partially) into the floor joists (or in my case shed roof) above.
as a side note, the blower guy was breaking up the cellulose with a garden rake in a big plastic tub prior to putting in the blower, not sure if that was required for anti-clogging, but i thought I'd mention it
the messy part of the job is down at the blower .. use something (shop vac, leaf vac or leaf blower) to disperse any material before it RAINS.
3) End of Day 2 .. patching begins .. wearing latex gloves! (great stuff does not like to come off skin for several days i dont care how much acetone you try to clean with) .. spray Great Stuff into your holes .. not too much, not too little
4) Morning of Day 3 -- cut off all your great stuff mushrooms (you'll know em when you see em) with long bladed serated knife as flush as you can to wall
5) Day 4 -- your great stuff has probably dimpled after being cut ... not sure why, but we like dimples for hole patching .. spread your MH ready Patch over the dimpled great stuff (Ready Patch dries hard as a rock, is pre-mixed, but certainly off-gases during drying)
6) day 5 - Sand, while holding vac brush very close to sanding site, your Ready Patch as necessary and touch up anything that needs it, you need perfectly flat/flush/full patch if you intend to finish paint
7) day 5.5 .. prime/paint as desired.1-pipe Homeowner - Queens, NYC
NEW: SlantFin Intrepid TR-30 + Tankless + Riello 40-F5 @ 0.85gph | OLD: Fitzgibbons 402 boiler + Beckett "SR" Oil Gun @ 1.75gph
installed: 0-20oz/si gauge | vaporstat | hour-meter | gortons on all rads | 1pc G#2 + 1pc G#1 on each of 2 mains
Connected EDR load: 371 sf venting load: 2.95cfm vent capacity: 4.62cfm
my NEW system pics | my OLD system pics0 -
Thermal Scan Results
The photos aren't too striking, but I'm getting a 2.5 degree difference of the temperature on the outside wall.
The photo on the right shows the uninsulated radiator locations. On the left, the insulated radiators are invisible on the outside.
Of course, the hot column is the chimney/flue.
Again, small but measurable gains for a small investment. DO IT!There was an error rendering this rich post.
0 -
Brick Wall Foam Injection
The foam injection was done on the right side of my home office. The exterior of the two course brick wall is at least 2 deg F cooler where it was injected with foam.
See attached PDFThere was an error rendering this rich post.
0 -
hot spots
That's about what I would have expected. It's important to remember that those bricks are a big heat sink, so the hot spot you are seeing is *despite* the diffusion of the heat through the surrounding brick wall. That's pretty significant. A lot of btus are going into the space rather than into the wall and outside.0 -
blown-in
Thanks for the very complete description.
So far, the method that seems the most promising to me is the single-hole, fill-tube method. A single hole at the top of the cavity is drilled and a narrower tube that can be fished into the cavity is inserted to within about a foot of the end of the cavity. It is then fill and pull. This method gets you a dense pack without multiple holes. Have you come across it? If you have, why did you go with the two-hole method instead?
One addition that will help if you do any more walls is to painter's tape the holes before you drill. You put up a patch of tape that is bigger than your hole. The tape will reduce the trauma to the plaster resulting in less fracturing of the plaster and will capture many of the chunks that can get knocked loose in the drilling or the filling.0 -
i looked at..
the instructions on the greenfiber website (http://is.gd/jaMe3) as well as other people's methods in various forums.
i hear that sometimes there is a horizontal firebreak in the middleof the wall, the 2-hole method gets around that obstacle.1-pipe Homeowner - Queens, NYC
NEW: SlantFin Intrepid TR-30 + Tankless + Riello 40-F5 @ 0.85gph | OLD: Fitzgibbons 402 boiler + Beckett "SR" Oil Gun @ 1.75gph
installed: 0-20oz/si gauge | vaporstat | hour-meter | gortons on all rads | 1pc G#2 + 1pc G#1 on each of 2 mains
Connected EDR load: 371 sf venting load: 2.95cfm vent capacity: 4.62cfm
my NEW system pics | my OLD system pics0 -
blocking and filling
Sometimes there's a fire break, sometimes there is simply blocking. There are few ways to know for sure where they will be until you get in there. In those cases that do have some kind of blocking, you have no choice but to do 2 holes. But when there is no break, I think one hole and a snaked feeder hose makes more sense.
I think the reason you see the 2-hole method put out there is very simple: that's what they do in new installations. When you just have the netting on open studs, it is much faster to use two holes and no snaked feeder tube. You can see where the voids are and deal with them as you go. No snaked feeder tube means you can blow the insulation in faster since you are going through the full-sized hose.
However, in a retrofit situation, I think you are much better off snaking a feeder tube. It is easier to ensure a voidless install when "blowing blind." You can more easily and successfully deal with obstructions in the wall. And of course, it means fewer holes.
I'd love to be corrected by a pro installer, but that is where my research has brought me.0 -
are there numbers
with respect to $avings/costs for the foam insulation?
Does foam injection addess the vapor problems expressed earlier in thread?0 -
foam and moisture
As has been said on this and other threads, how moisture behaves in buildings is not completely known.
That being said, I personally think that the hydrophobic qualities of foam make it a bad retrofit choice for buildings unless you are in a position to install a true vapor barrier. Open celled foam may be more moisture permeable than the closed-cell variety, but it is less permeable than the wood structure. This will effectively reroute the moisture through the wood where it can wreak havoc. For this reason, in retrofits where you are unable to install a true vapor barrier, I personally think that blown-in cellulose is a safer option.0 -
Foam Injection in a Brick Wall
There are some of us that are pretty comfortable with injecting foam between the two courses of brick in a wall, but only in a dry climate! We only do it because EIFS devalues a brick property, and furring, insulating and drywalling the inside of a brick wall is a big costly hassle.
The worst failure mode would be: Brick and mortar absorb moisture. After insulating, the outer course of brick is colder, and the absorbed moisture could freeze and spall the brick. The process shouldn't be bad for wooden floor joists embedded in the brick though.
Radiators, however, should have the silver surface insulation next to them.There was an error rendering this rich post.
0 -
cavity walls
Dry climates are a Godsend for insulation retrofits. The rest of us **** have to deal with the moisture.")
I wouldn't be comfortable injecting foam in the cavity in general. The worst failure mode isn't the one you mention. Most cavity walls have metal ties. Since they bridge to the exterior wythe, they are going to be the first condensation point for moisture and the foam encapsulation will keep the moisture on the metal longer. Corrosion could lead to metal failure and the decoupling of the two sides of the cavity wall and complete destabilization of the wall. Another failure mode could be stress fracturing (or even decoupling) due to the fact that the two sides of the cavity are now undergoing significantly different thermal expansion rates.
I have a hard time justifying the risk for a couple of inches of insulation.
Beyond this, we have to remember that cavity walls are predominantly found in commercial buildings and only rarely in residential buildings. Envelope issues are simply not as significant for commercial buildings as they are for residential buildings (due to the significant differences in usage patterns, occupant density, internal heat gains, etc.), so envelope measures aren't essential or as cost effective. More extreme climates like yours change that somewhat, but not completely.0 -
I think for me
it was hole size more than quantity. I didn't trust my ability to patch well so I went with smaller holes but more is them. for single hole snake you really need a full bore hole to get snake in and manipulate it.
additionally I wanted to be gentle with the lathe/plaster joins...I didn't want to be forcing, wrestling with a shake in to wall breaking off the plaster that had seeped through the lathe and is holding the will on the lathe
when the "pros" blew my old wood frame house from outside..they jammed the snake right in the hole giving no concern to the damage they were doing to the plaster/lathe..2 years later my interior walls were full of cracks. they may have also packed it in too tight to cause the cracks...lastly when they were drilling from outside in once the drill punched through it would often stop by slamming into the lathe...that couldn't be good
thanks for your continued insight.1-pipe Homeowner - Queens, NYC
NEW: SlantFin Intrepid TR-30 + Tankless + Riello 40-F5 @ 0.85gph | OLD: Fitzgibbons 402 boiler + Beckett "SR" Oil Gun @ 1.75gph
installed: 0-20oz/si gauge | vaporstat | hour-meter | gortons on all rads | 1pc G#2 + 1pc G#1 on each of 2 mains
Connected EDR load: 371 sf venting load: 2.95cfm vent capacity: 4.62cfm
my NEW system pics | my OLD system pics0 -
hole size
The size of the holes is the same. The feeder tube is meant to be a narrower than your standard hose .. 1-1.5". This is why it is slower; that restriction means less volume, but also more propensity for clogging. The narrower tube allows better ability to get around obstacles, but also allows you to get further into the cavity wit less damage. And damage is a big issue. Broken plaster keys can cause some serious problems.
I've been researching all this because my plan is to insulate the ceiling cavity on my third floor with packed cellulose. There is nothing now, and that will make a huge difference, both in insulation and in infiltration. I've been trying to think of little changes to make to the hose end to make it ride over the plaster keys better and cause less breakage.0 -
feed hose...
through a 12 oz. plastic soda bottle.in the bottom of bottle and out the cap end....then you just need to figure out how to get the bottle in your ceiling.
I knew that plaster seep joins had a name..thanks for that.
FYI, the "standard" hose with my rented blower machine was 3" .. not 1-1.5"...I reduced down with my custom nozzle. and you will need a fairly stiff non-flexible hose otherwise it will simply propulsion itself all over the cavity like an out-of-control firehose. you can't simply drop rubber surgical tubing in the hole1-pipe Homeowner - Queens, NYC
NEW: SlantFin Intrepid TR-30 + Tankless + Riello 40-F5 @ 0.85gph | OLD: Fitzgibbons 402 boiler + Beckett "SR" Oil Gun @ 1.75gph
installed: 0-20oz/si gauge | vaporstat | hour-meter | gortons on all rads | 1pc G#2 + 1pc G#1 on each of 2 mains
Connected EDR load: 371 sf venting load: 2.95cfm vent capacity: 4.62cfm
my NEW system pics | my OLD system pics0 -
bottle and hose
My attic floor doesn't go all the way to the edge, so I can get pretty much anything I want into the cavity. The bottle idea is good. I would probably use a 2-liter for a full-sized hose. I'd just need to secure it in place. The rounded top and bottom will keep hose edges from doing much damage.
I knew the standard hose was big. I was trying to differentiate between hose and tube in my comments. My thought for the smaller wall cavities was the clear plastic, semi-flexible tubing that you often see as a snaked feeder hose. They aren't floppy, and 1-2" isn't that hard to find.0 -
not in the old days
Metal brick ties weren't originally used in brick walls, I don't think. A perpendicular "stretcher" brick tied both courses together.
But still, foam injection is risky deal.There was an error rendering this rich post.
0 -
cavity walls
Vitruvius mentions cavity wall construction, so if you are talking about those old days, then you are probably right.
But cavity wall construction didn't really pick up in the US and Europe until the 19th c. While I am not sure, I think you will find that metal ties were more common than brick stretchers in cavity wall construction. Of course, stretchers were the norm for bonded wall construction where special, extra long bricks or weird brick-laying patterns weren't needed to create the cavity between the wythes.0


This discussion has been closed.
Categories
- All Categories
- 87.6K THE MAIN WALL
- 3.3K A-C, Heat Pumps & Refrigeration
- 59 Biomass
- 430 Carbon Monoxide Awareness
- 124 Chimneys & Flues
- 2.2K Domestic Hot Water
- 5.9K Gas Heating
- 120 Geothermal
- 168 Indoor-Air Quality
- 3.8K Oil Heating
- 78 Pipe Deterioration
- 1K Plumbing
- 6.6K Radiant Heating
- 396 Solar
- 16K Strictly Steam
- 3.5K Thermostats and Controls
- 56 Water Quality
- 51 Industry Classes
- 51 Job Opportunities
- 18 Recall Announcements