What radiator valves do I need AND help removing radiator spud

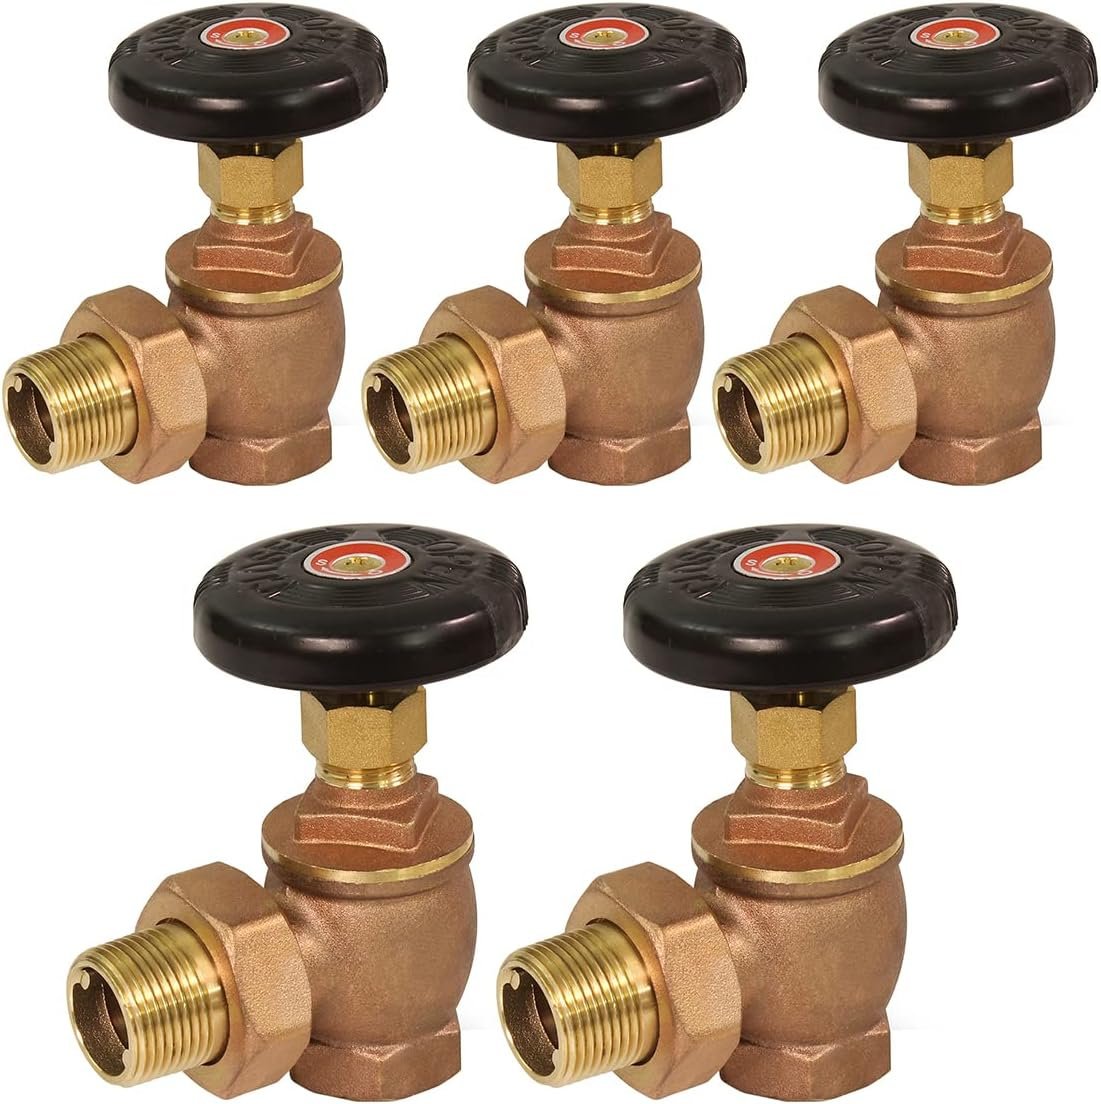
I have a water boiler (not steam) system and have replaced a couple radiator valves in the past. I brought the old valves to the pro plumbing supply and they sold me valves that look like these in the image.
Amazon has these valves that look identical but say they are for steam radiators. Can I use these steam radiator valves with my water radiators? I would assume the steam valves need to handle higher pressure and heat than water but I really don't know and need advice. The Amazon valves sold in bulk are more affordable than the plumbing supply valves.
Also, I have the long spud wrench but find it difficult to get it in and held in place to remove the radiator spud. I've seen one video with a smaller spud wrench tool but can't find it online. I'm wondering if there is a specific technique for removing the spud. If the wrench fit into the spud more tightly, I think this would be an easier job. Maybe the joints could be heated with a torch with some WD-40. I'd appreciate advice from someone who has removed the spuds on 100 year old radiators.
Comments
-
This is the Spud Wrench I used for that jom many times. https://www.supplyhouse.com/Jones-Stephens-J40030-Radiator-Spud-Wrench
I am looking up more info about radiator valves for water systems.
Steam systems are usually 215°F and hot water systems can run as hot as 225° under normal operating pressure.
Steam systems operate at about 1 to 2 PSI with a relief valve setting of 15 PSI while a hot water system can operate at 10 to 25 PSI under normal conditions with a 30 PSI relief valve. Some water boilers can be operated with a 50 PSI relief valve when properly certified by the manufacturer for 50 PSI operation.
So the valves for steam and water systems are sometimes interchangeable but there are some water system valves that allow for a trickle of flow to keep the radiator from freezing if the radiator is turned off completely.
BRB
Mr. Ed
Edward Young Retired
After you make that expensive repair and you still have the same problem, What will you check next?
0 -
In reality it is very likely you may need to cut the old spud out. You can also try putting a rod or pipe inside it that fits tightly so it won't collapse and grab it with a pipe wrench to take it out.
Steam valves need to be arranged to allow condensate to drain. Hot water systems typically have higher pressure than residential steam systems. A steam valve should work ok on hot water. I would be careful about buying the cheapest off brand valve I can find. They are likely to be thin and not be machined accurately so they leak in a variety of ways.
0 -
Here is the technical specifications of a hot water radiator valve:
FEATURES
- HighHeatResistance Able to with stand a maximum temperature of 250°F at 60 PSI (non-shock).
- Fully-Compliant Meets ANSI/ASME B1.20.1-1983 standards for threaded piping.
Here is the technical specifications of the steam radiator valve:
FEATURES
- C85700 Brass Construction Ideal for applications requiring durability, aesthetic appeal, and resistance to water and heat exposure.
- Versatile Pressure and Temperature Rating–Design ed to safely operate under moderate pressure conditions (60 PSI-15 WSP Non-Shock) and conditions without freezing or boiling water.
Both will valves are within the values of water heating system operating limits. Neither of these valves have an opening to allow for some flow of water or condensation to bypass the valve when closed.
In the past, some valves were manufactured with a 3/16" hole in the closed side of a 180° ball that would shut of the valve. This was thought to be needed in the event you might close a radiator in a finished attic room when that room was unoccupied. Often that closing caused the attic to get very cold and the radiator could freeze up and burst. It appears that a valve like that is not something anyone is interested in purchasing anymore. Otherwise there would be more valve companies offering them.
Edward Young Retired
After you make that expensive repair and you still have the same problem, What will you check next?
0 -
The forum didn't allow me to post a direct link to the valves I found in bulk on Amazon. I didn't look closely at the brand but the expensive valve I bought at the plumbing supply house looked 100% identical to these valves. I wouldn't want to buy a valve that is low quality and leaks, but I suspect it's the same valve. I reused the spud on one of the radiators but on the next one I tried it leaked, so I had to put the old valve back. I sure wish there was an easier technique/method/tool I could use to remove the old spuds. I don't like the idea of cutting the old spud out, I don't want to mess up the threads on the radiator. That would be worse than a sticky old valve.
0 -
@guitbox Since they are hW valve the spuds are probably small which are more difficult to cut out.
There usually isn't much room to get a wrench on them.
If you use a spud wrench the nubs on the inside sometimes break off.
Hers a few tricks"
Cut the nut off the spud. You can hold it with Channellock's or vise grips and use a hacksaw or hacksaw blade. An angle grinder works good with a cutting disk or a Dremel tool or you can get an adapter to put a small cutting disk on an electric or cordless drill.
Once you get the nut offput a pipe wrench on the spud. Use the biggest wrench that will fit between the rad and the end of the spud. Use a piece of pipe over the wrench handle or a scrap of copper tubing for more leverage. Then put the sput wrench inside with a wrench on it and turn both of them at the same time.
If you don't have a spud wrench just use the pipe wrench. Put something inside the spud so it can't collapse as @mattmia mentioned. A bolt, piece of threaded rod, cold chisel anything steel to "fill it up" and reinforce it. It will come out I have removed many of them.
0 -
let's back up a step, what is wrong with your current valves, can you rebuild them? put a new washer on, repack them with string packing, clean up the stem and other parts with a fine wire wheel on a drill or bench grinder.
0 -
The old valves are 116 years old and are either really tight or some of them just spin so you can't tell what is open/closed — it's guesswork. I can live with them if needed. A couple are green — showing signs of leakage along with some of the maple floor showing water damage. So, if when I take them off, I'd prefer just to replace them instead of simply adding tape/dope to stop the leaking. But if I can't easily get the spuds out then I may have to live with them until we sell the house in 10 years.
The method in the above video looks promising. I'm wondering if anyone knows where I can find this single size spud tool? I find the common long spud wrench impossible to work with because it sticks out too far and won't stay squarely in the spud without having an extra hand to hold it in. The nubs in some of my spuds are clearly worn and it will be hard to grip them with spud wrench alone, I think a thin vise grip like the video is the way to go.
0 -
if they spin they may be plug type valves that are 1/4 turn from on to off. there may be a pin missing that keeps them from stopping. 116 years old doesn't necessarily mean there is anything wrong with the valves other than lack of maintenance.
0 -
Ops come here all the time for advise. We give them the best advise and they do something else or go away and never come back.
0 -
I watched a few more videos and many of them cut/chisel out both the spud and the valve. It looks easier than I was expecting, maybe because it's soft brass? I appreciate all the advice and am just looking for multiple options and opinions for when I do the work in the spring. I imagine cutting the valve out would prevent breaking the seal on the nipple that's in the floor, I was trying to avoid destroying the old valve in case I couldn't get the spud out and needed to reinstall it. But if cutting out the spud is as routine as it seems in the videos then maybe it's a non-issue.
0 -
"if they spin they may be plug type valves that are 1/4 turn from on to off. there may be a pin missing that keeps them from stopping. 116 years old doesn't necessarily mean there is anything wrong with the valves other than lack of maintenance."
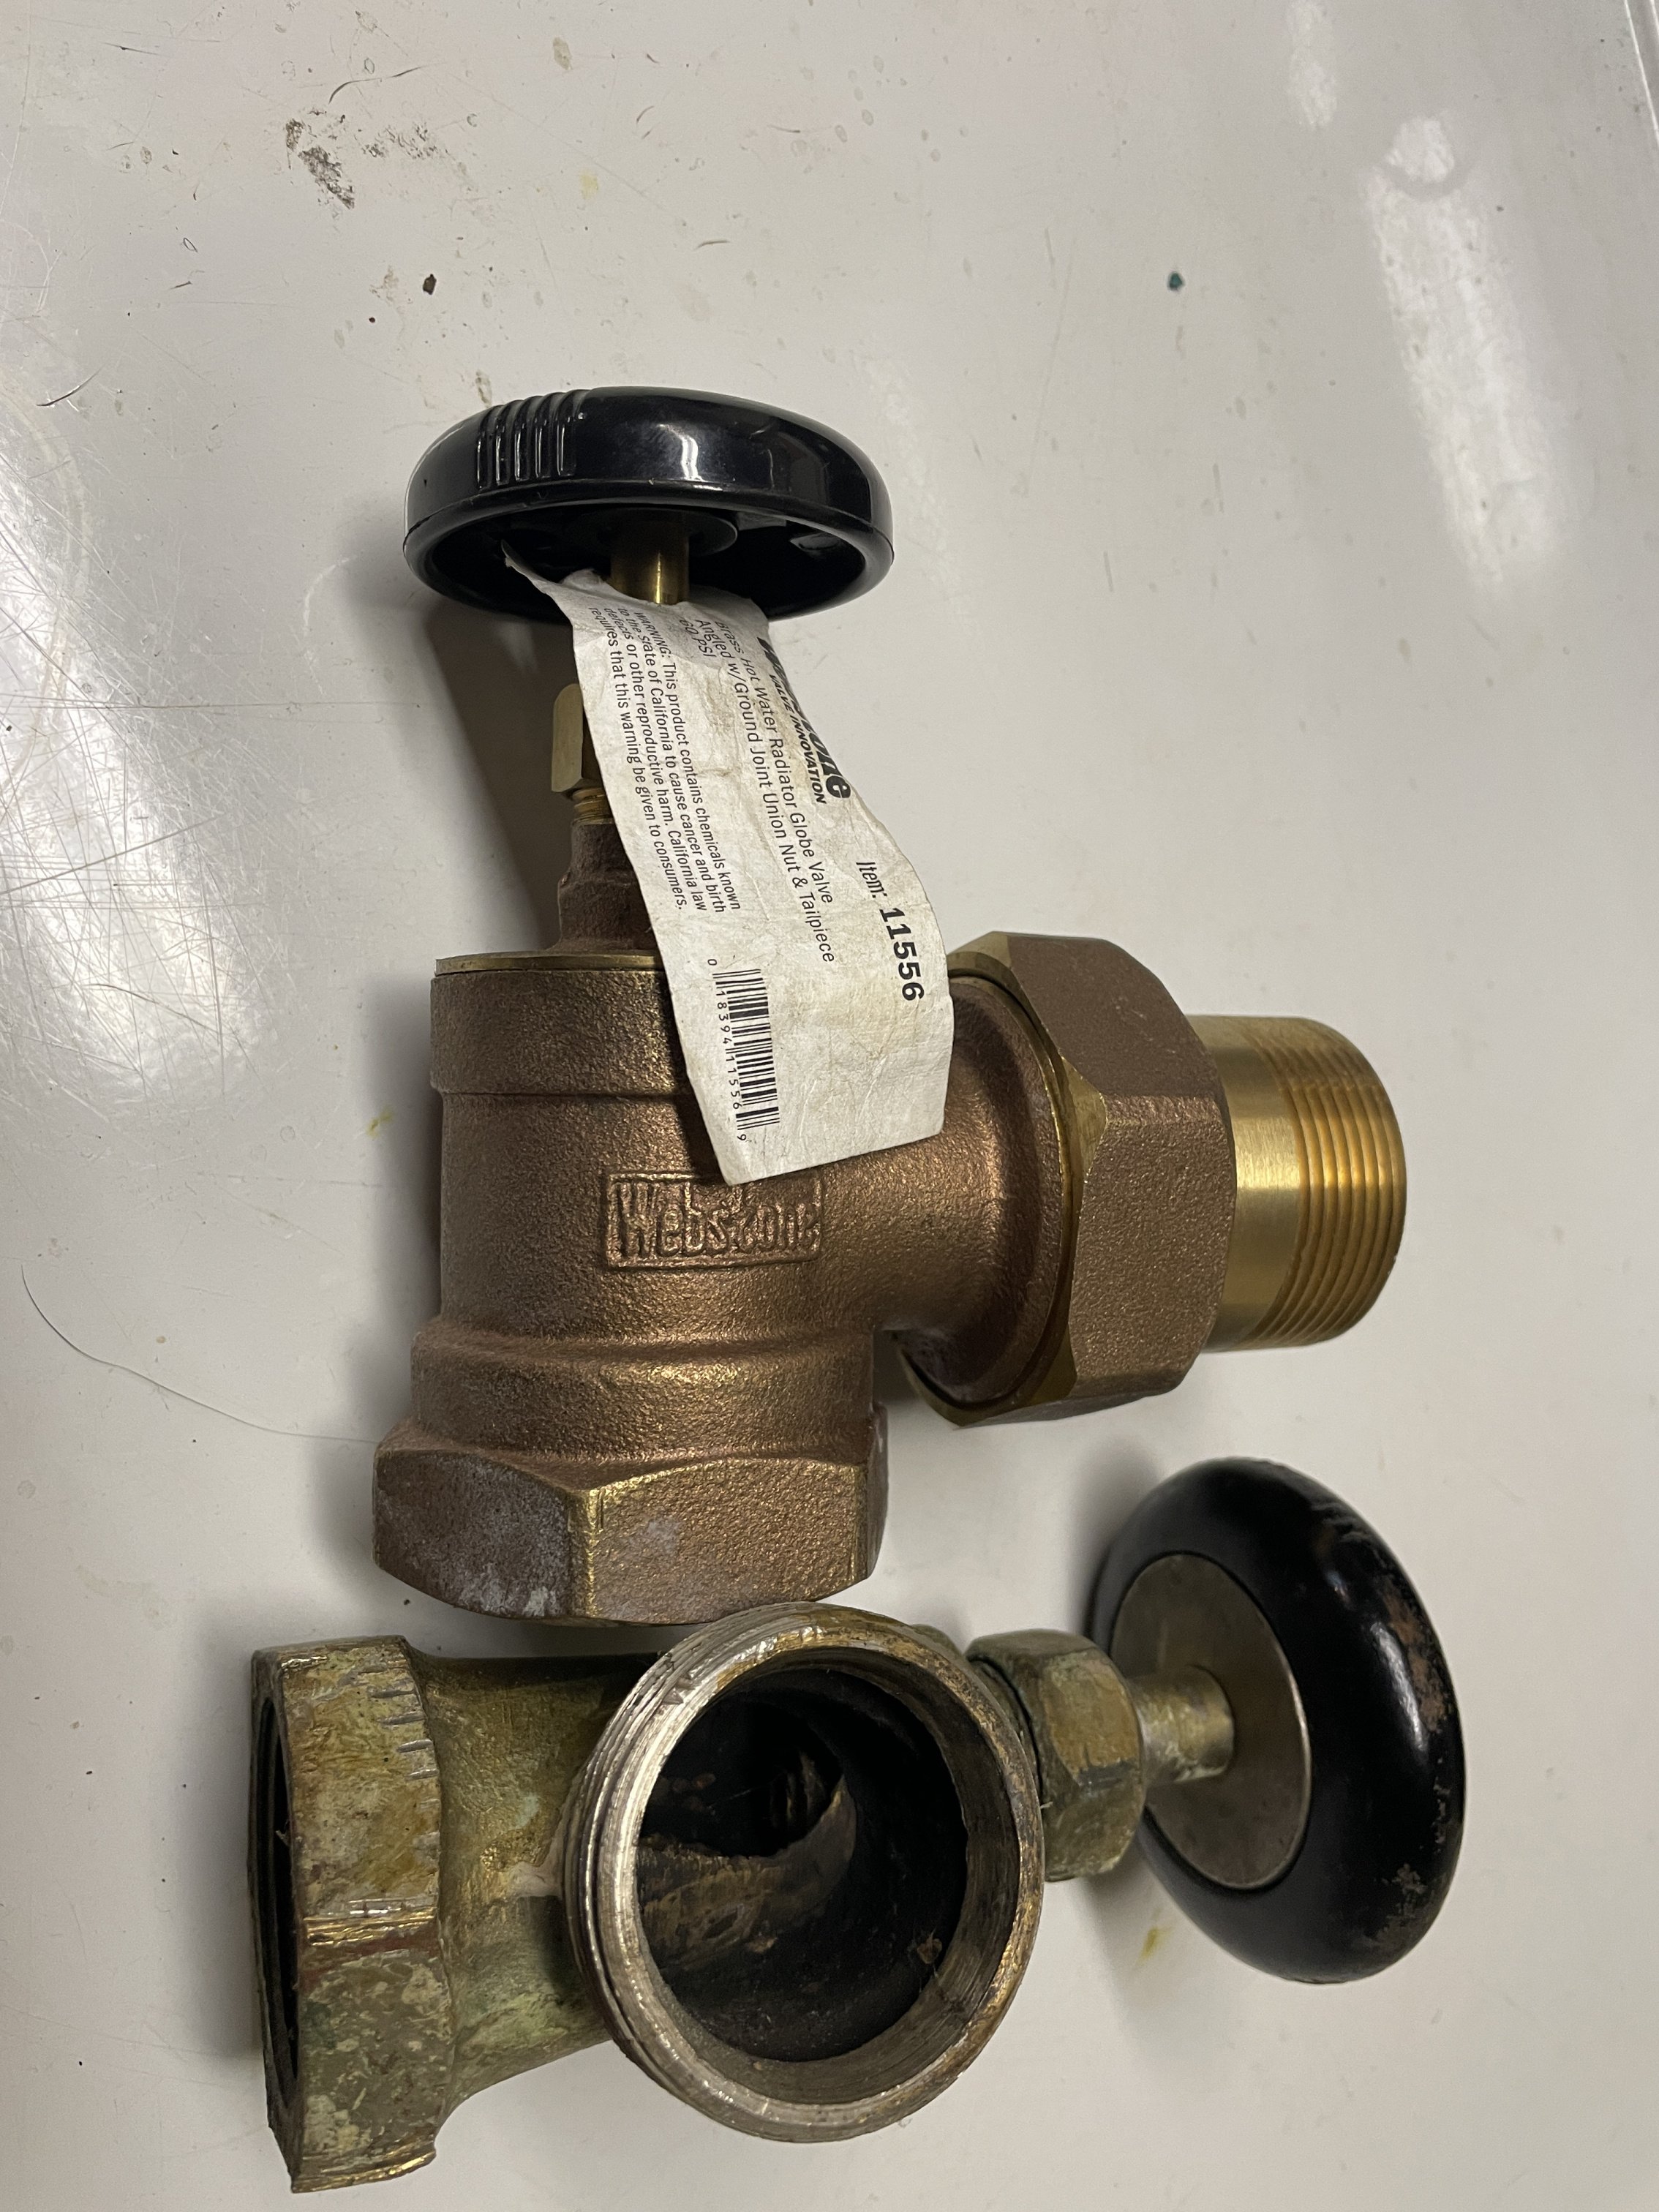
You make a good point, maybe I can clean them up and repair them. Are pins and parts available for these old valves? It is the 1/4 turn type, see pic of new and old valve.
 0
0 -
you won't be able to get them from the manufacturer but you can probably get a roll pin from mcmaster carr or tap a screw or setscrew in to it to replace the original stop. you would have to take it apart and see where the stop is supposed to be. sometimes there is a washer on the stem that is notched that serves as the stop.
the markings on the handle may show where on and off are as well.
0 -
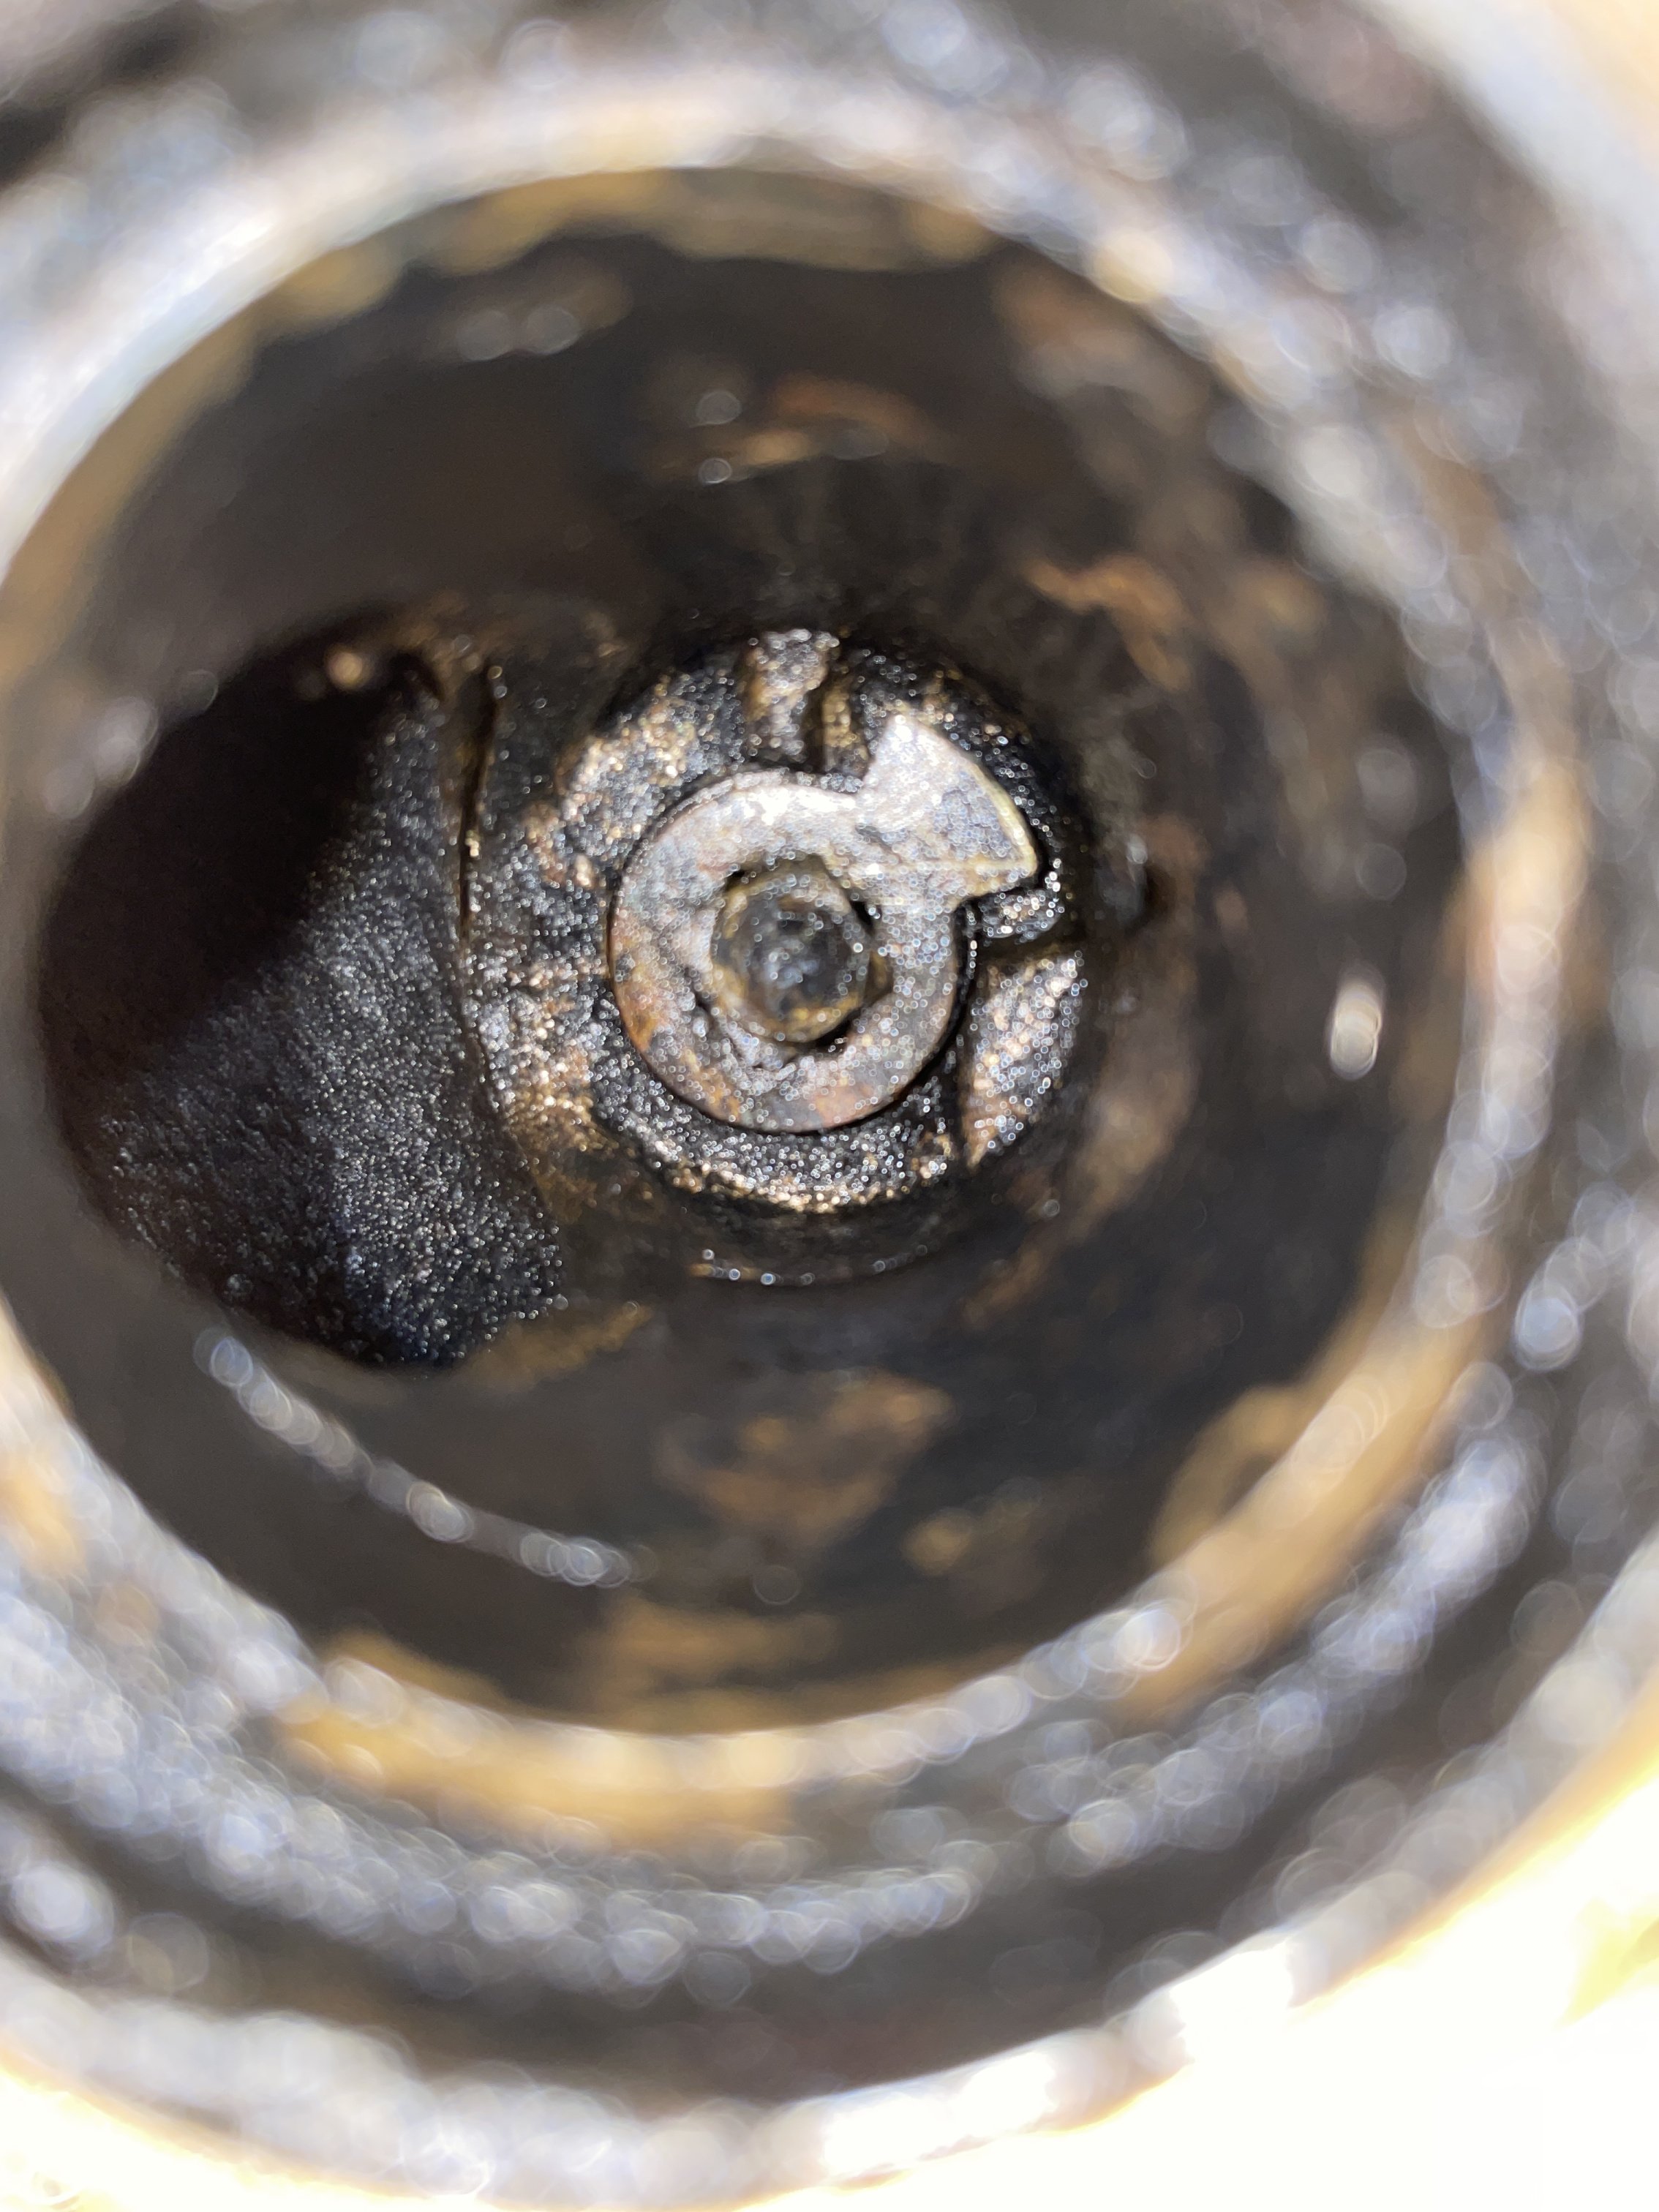
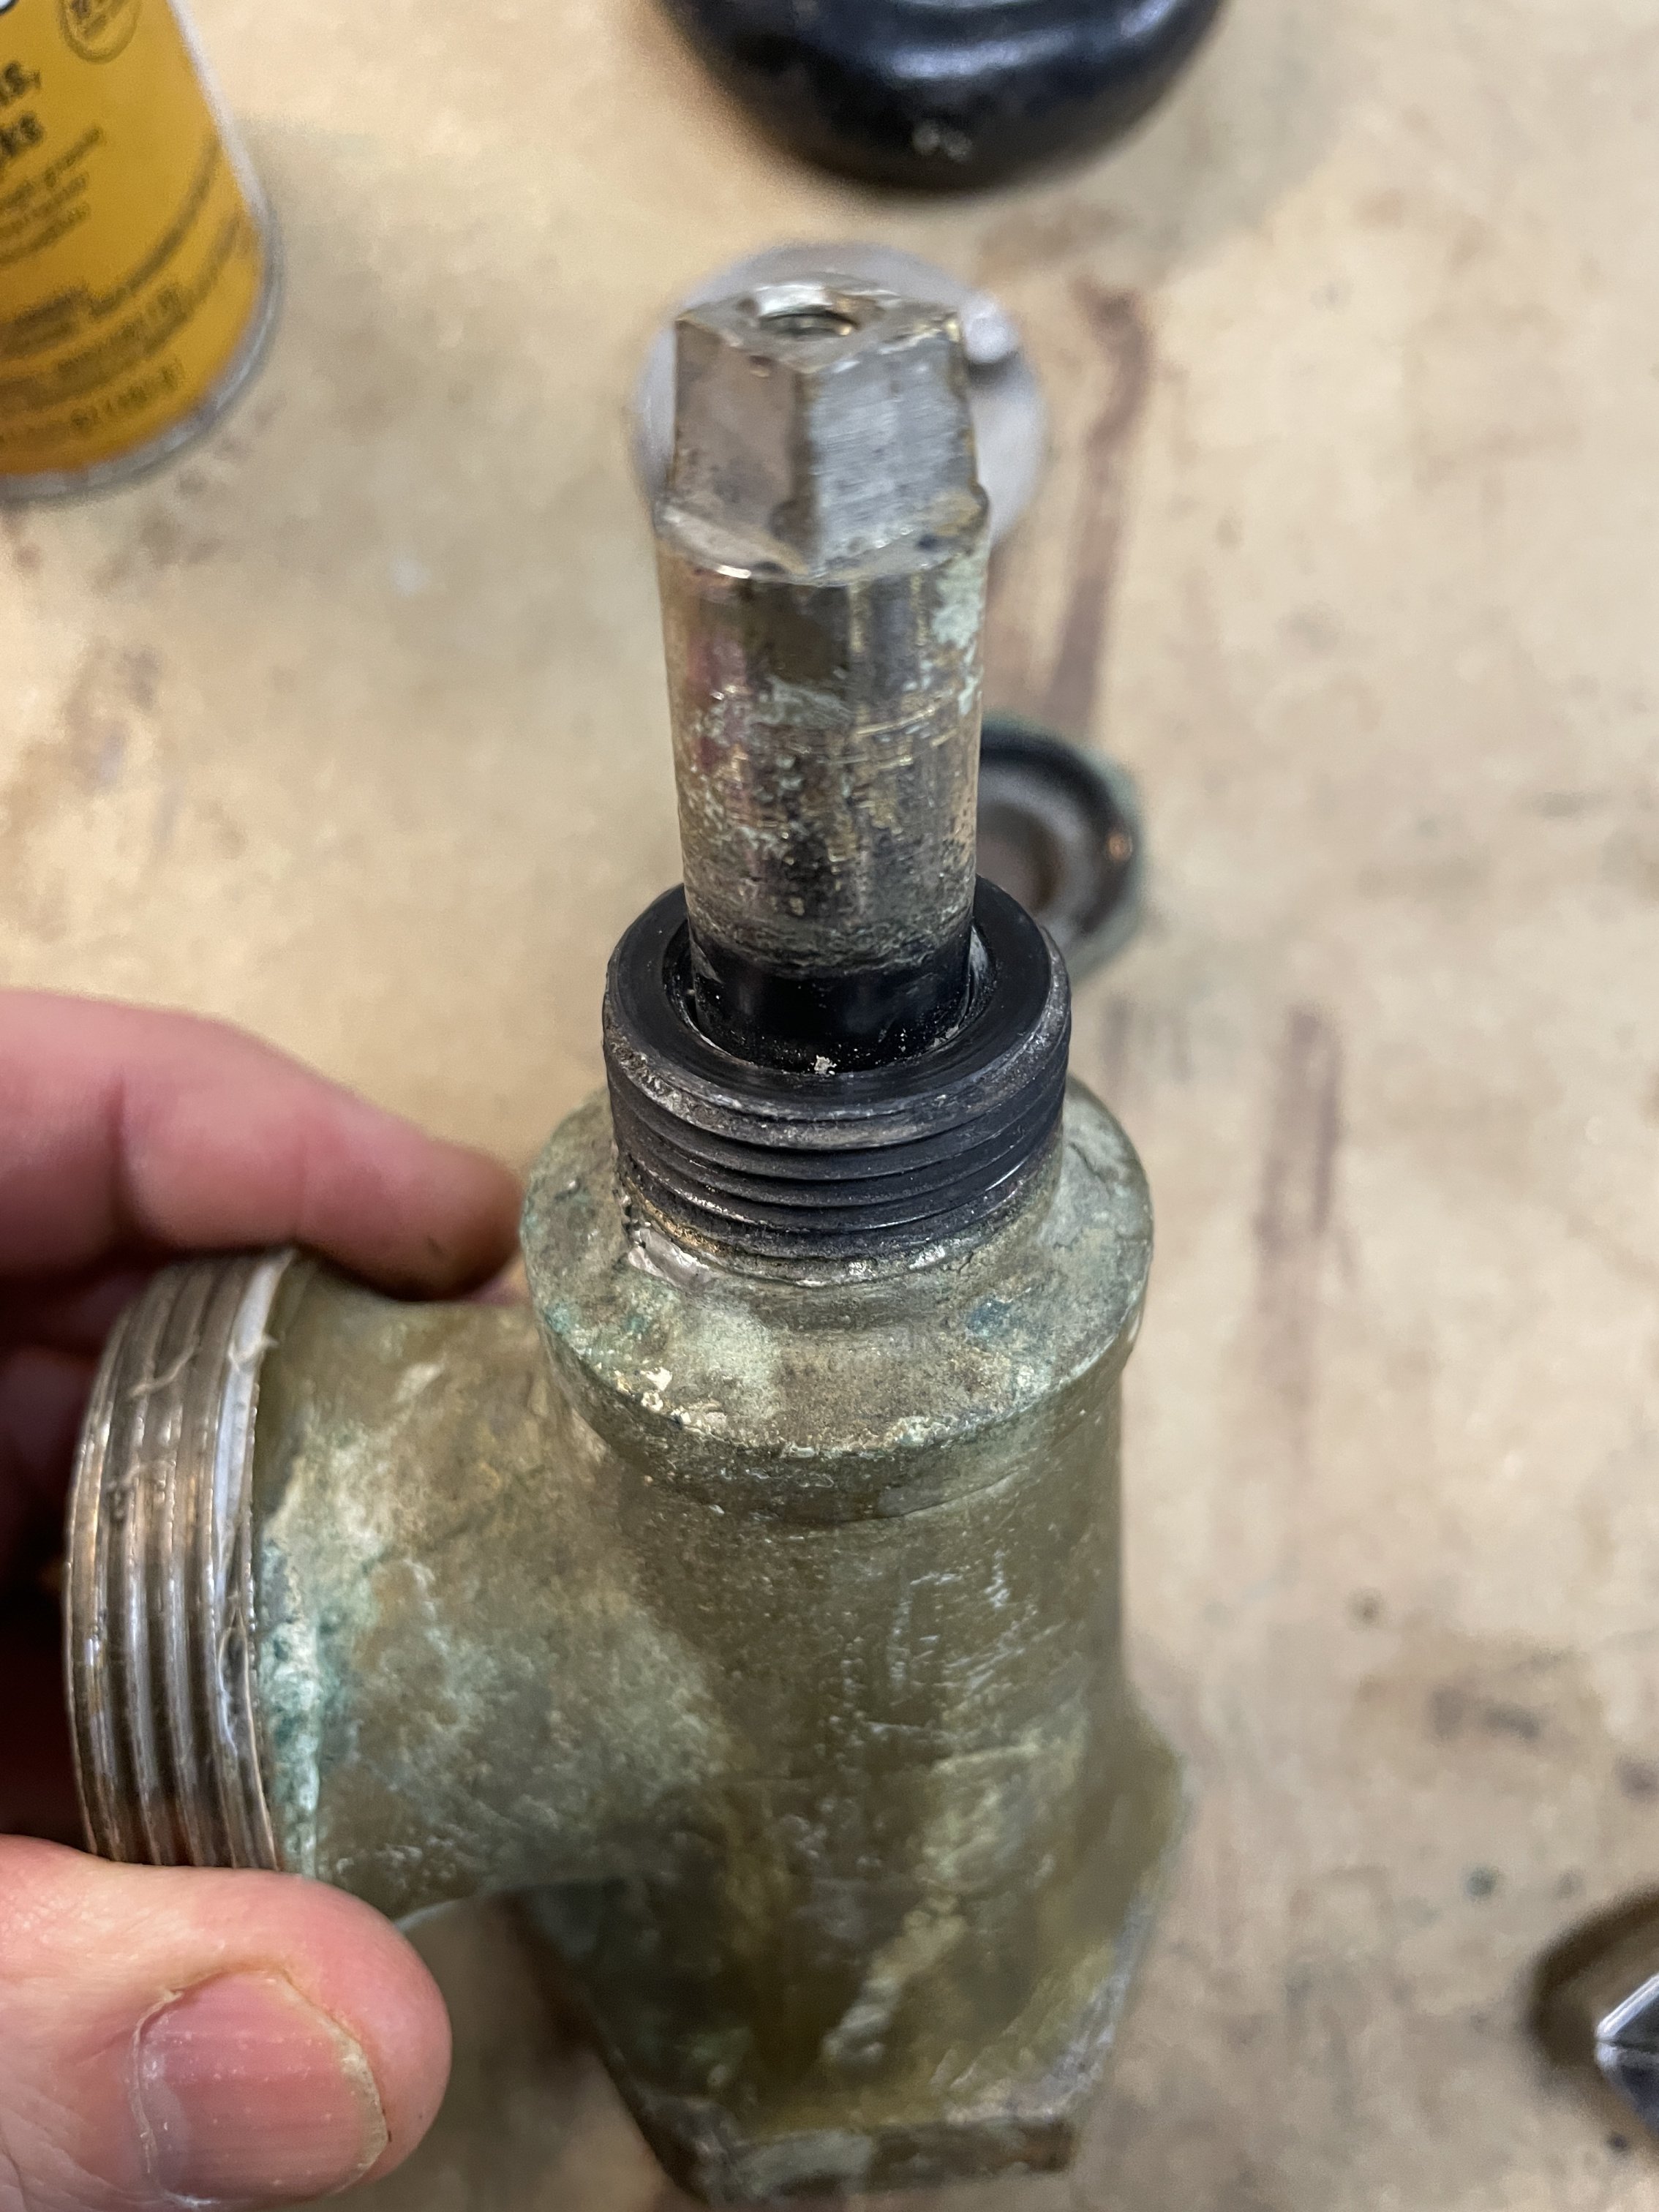
I took this valve (which isn't the one that's spinning) apart to look for a pin and to see how easy it would be to fix them in general. Do you think it will come apart more than this? I don't see a pin, it looks like there are two brass nubs that are built into the valve wall. I assume either that washer or the brass nubs are worn off and that's why it's just spinning. Maybe I'll just replace that one and refurbish all the other ones that are functioning correctly. Does this sound like a reasonable plan for refurbishing them?
- add a rubber washer on the stem (seems like there was one, but it's worn off? )
- tape/dope all the threads
- add some teflon rope to the nut on the stem
Also, I've always heard that you're not supposed to put thread sealant on compression fittings, but I've found in other instances that as long as I keep the sealant away from the compression parts, it can help make a better leak-free joint. Any thoughts on this? I've taken most of the radiators out in this house to paint and then reinstalled and that compression nut seems to be the place they leak the most and then I need to get out the long metal pipe to really crank down on that joint for no leaks.
 0
0 -
That cam plate or "washer" and that nub in the brass are what restricts the movement. If that is broken in other valve you will have to see what part is broken and repair it.(or replace the valve depending on what is broken). Might be what holds that plate in place came unscrewed or clipped, might be the nub is broken off, might be the cam is missing). The nub could be fixed by tapping a screw in to the valve, missing clip or screw for the plate is easy to fix, missing plate could be harder to fix.
Is there a washer somewhere inside the valve? Can you show us where you think it is missing? Normally that plug type of valve seals by the brass plug tightly fitting against the brass body. The stem itself has packing in it. You can buy various types of packing cord from mcmaster carr in longer lengths than the hardware store packages. Sometimes the fibers in the old packing are asbestos so be careful of that.
The unions should seal without dope on the sealing faces if they are clean and aligned properly. you can put a little dope or oil or grease on the threads and back where the nut turns to help it go together easier. Dope won't keep it from sealing but also shouldn't be required if everything else is right.
0 -
Maybe it didn't have one of those black rubber washers. It just looked like a black rubber washer was once on the stem where the stem meets the threads and the nut tightens down onto.
So, is this as far as the valve will break down? I can't see how it can come apart any more for cleaning.
I'll just replace the one valve that is spinning. I already have the new valve that I purchased a few years ago but I gave up and put the old valve back because I couldn't get the spud out. After the advice I heard here and saw in videos, I'm more confident I can saw and chisel the spud out.
I do like the idea of repairing the existing valves that work. No reason to waste $ on new valves if the old ones can work fine and be made leak-free.
0


Categories
- All Categories
- 87.7K THE MAIN WALL
- 3.3K A-C, Heat Pumps & Refrigeration
- 59 Biomass
- 430 Carbon Monoxide Awareness
- 127 Chimneys & Flues
- 2.2K Domestic Hot Water
- 5.9K Gas Heating
- 121 Geothermal
- 170 Indoor-Air Quality
- 3.8K Oil Heating
- 79 Pipe Deterioration
- 1.1K Plumbing
- 6.6K Radiant Heating
- 396 Solar
- 16K Strictly Steam
- 3.5K Thermostats and Controls
- 56 Water Quality
- 51 Industry Classes
- 51 Job Opportunities
- 17 Recall Announcements