More questions for another heating season……

Looking for some directions on some questions I have…….I’ve got a gas fired Peerless single pipe system. Boiler is about 10 years old, and has worked great ever since it was installed when transitioning from oil heat.
Reading some of the messages regarding main line venting, I’ve taken a look to see what arrangements I have. Took me a while to find the vent as some of my basement is finished. I had to cut an access port in a closet to locate it. Appears I have, at the far end of the main lines, a Gorton vapor equalizing valve No. D. Surprised that it has such a small 1/8 inch port at the base of the vent. It seems as if it’s working correctly, but after being in my house 20 years I’m wondering if it’s time to replace it, or even upgrade to a different arrangement to vent the main lines. For starters, looking to understand how to check its operation during a cold start. It does get hot after a few minutes after a cold start, I have to actually time it so I have a reference point.
I’ll leave it to that one question for starters, rather than creating confusion with additional questions on other parts of the system.
I’ll just add in that I have plans to replace a leaking shut off valve in a radiator on my first floor that’s directly above my boiler in the basement. The valve is beyond repair, corrosion and a previous attempt (by someone else) using epoxy or JB weld to repair the leak leaves me no option. I’ve replaced a few others in my house before, so I’m well aware of the sensitivity of the vertical pipe coming from my basement. Still, fingers crossed…..
Any assistance is appreciated on the main line venting questions I have…….thank you.
Comments
-
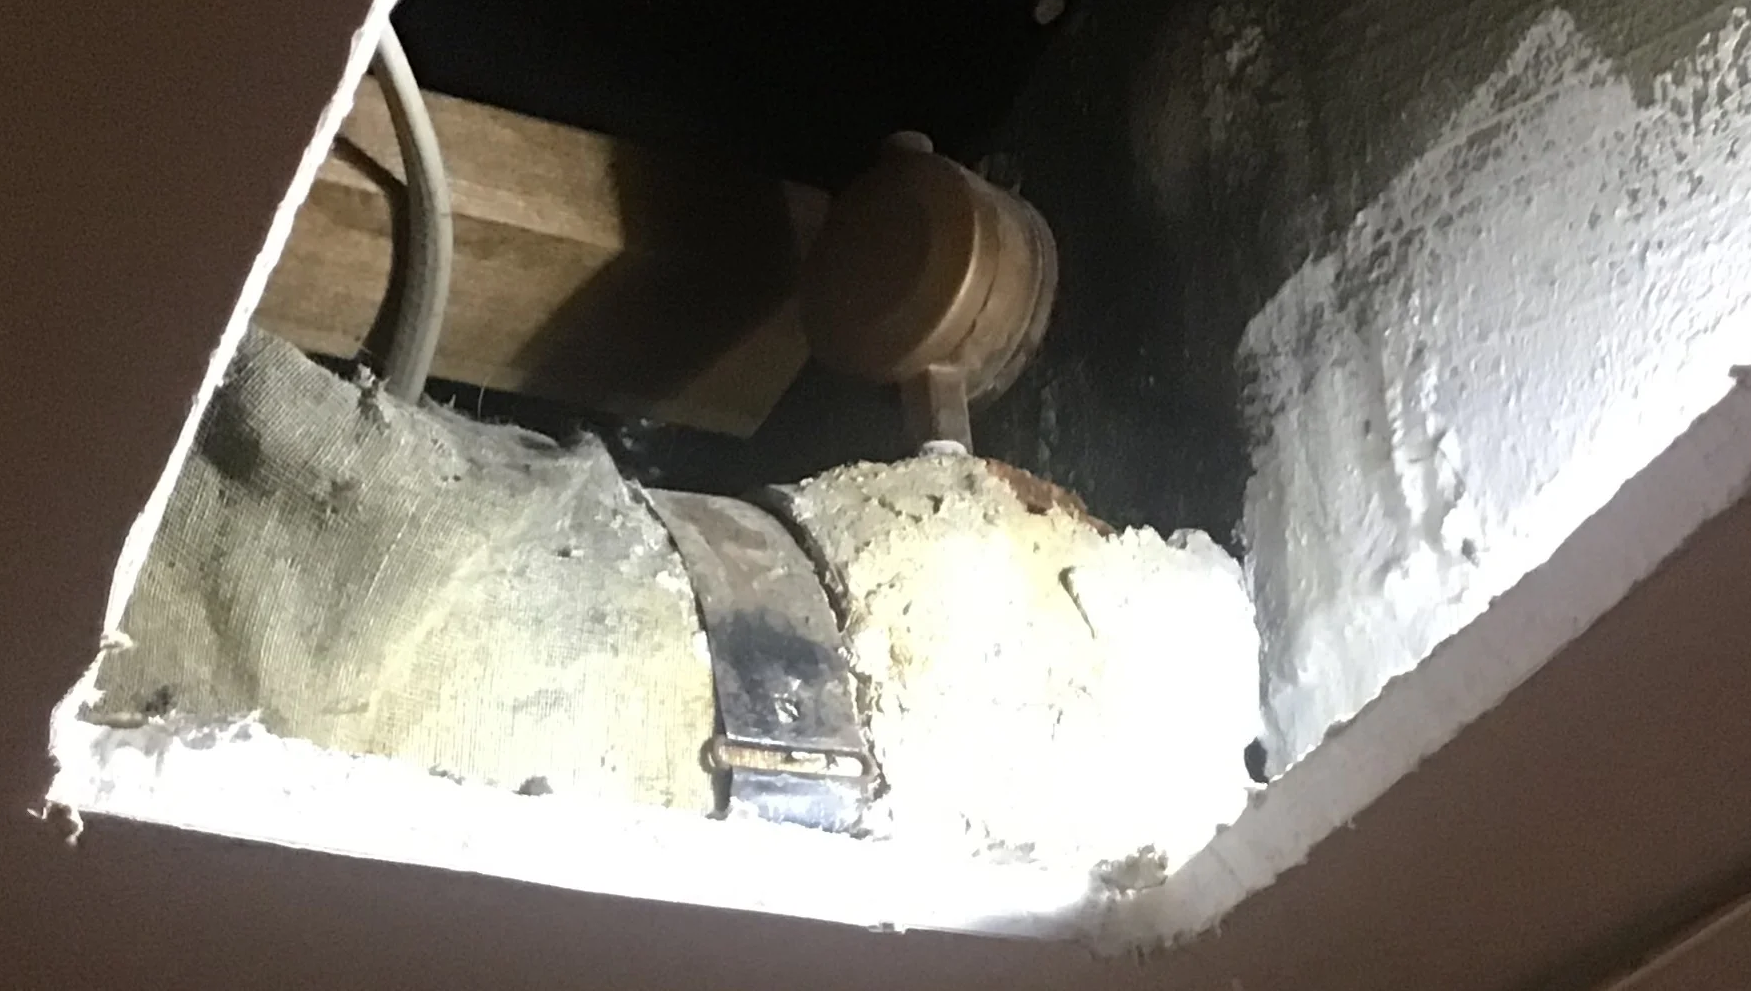
Adding in a picture of the vent and its location….
0 -
Looks like you could do better. Even if you still just use the 1/8 Inch pipe. I would see it there is a pipe reducer bushing below the present vent that can be removed to upgrade to a larger vent pipe / vent. Dealing with old pipe in a confined space may also be a challenge. Also if you do upgrade I would offset it from the main a bit, that current position may invite damage.

From:
https://heatinghelp.com/assets/documents/Balancing-Steam-Systems-Using-a-Vent-Capacity-Chart-1.pdf
National - U.S. Gas Boiler 45+ Years Old
Steam 300 SQ. FT. - EDR 347
One Pipe System0 -
" looking to understand how to check its operation during a cold start. "
Cold start or warm start the vent should pass air (you may be able to hear it) until steam gets to the vent. Once steam heats the valve assembly the vent valve should close and not let any steam pass, keeping the water in the system.
National - U.S. Gas Boiler 45+ Years Old
Steam 300 SQ. FT. - EDR 347
One Pipe System0 -
@geemalar , how long is the main the vent is on, and what pipe size?
Baltimore, MD, USA
Steam, Vapor & Hot-Water Heating Specialists
Oil & Gas Burner Service
Consulting0 -
I’ve measured 78 feet of the main lines, with the pipe being 2 1/2 inch outside diameter. The boiler is at one corner of the basement, with the main vent at the furthest opposite corner. The mains are set up in a rectangular position. All the feeds for the radiators generate off this rectangular main arrangement.
@109 5 - understand that aspect of it, was curious as to how to determine the amount of time it should take to start releasing vapor/steam, and eventually close. Understand that there are many factors in determining the time in this situation. AFA the base of the vent, yes there is a reducer screwed into the main pipe. I do have reasonable access to it, but it being X amount of years old and it being October, I’m a little reluctant to try to remove the reducer. Something I should have looked into in July. I do have some room above and to the side of the current set up, so if there was an alternate method that requires off setting possibly a pair of vents using the existing 1/8 inch port I’m willing to attempt that.
Thanks for everyone helping me out……..
0 -
OK, is the main just one long pipe wrapping around the basement with a vent on the end? Or are there two separate mains?
Baltimore, MD, USA
Steam, Vapor & Hot-Water Heating Specialists
Oil & Gas Burner Service
Consulting0 -
It's one long pipe in a rectangular shape that wraps around the entire basement. The boiler is just slightly offset in one corner (it's not at the exact corner, perhaps 4 feet from the corner) the main vent is directly at the 90 degree bend at the far opposite corner.
All of the feeds to the radiators branch off of this rectangle.
0 -
Dose the main circle the basement or does it end in the corner diagonally across from the boiler?
0 -
You'll need at least one Gorton #2 vent at the end of that main. If it still doesn't vent fast enough, add a second Gorton #2 on a tee. You want the steam to fill the main before it starts going up to any of the radiators.
Baltimore, MD, USA
Steam, Vapor & Hot-Water Heating Specialists
Oil & Gas Burner Service
Consulting0 -
@ EBebratt…….
It circles the basement.
0 -
So I can add this to the conversation………about an hour ago I ran the boiler to see how long it took the steam to reach the main vent. My only mistake was that I did not use a stopwatch, it was just a kind of quick check to see what happens.
Boiler was lukewarm from running this morning. Raised my thermostat, went and held my hand on the main vent. It was cool, not cold. Took approx 5 minutes to start hearing the main venting. I could put my finger over the outlet port of the main vent to feel/hear it venting. After the initial 5 minutes from raising my thermostat temperature and touching the therostat, it started to get warmer. Within 30 seconds from it starting to get warm, it went from warm to hardly being able to touch. At that point it stopped venting. So it would appear it's functioning properly afa operation. Just not sure if it's taking too long to vent based off the time I mentioned.
I'll use a stopwatch next time in order to get a more definitive timeframe.
Not sure if I'm just wasting my time with it works and leave it alone, or I can make it better. My belief is any 5% improvement in any aspect of the system quickly adds up.
0 -
I would think with that length main maybe 8 minutes max when everything starts out at room temperature. That is the time to just the main to fill with good venting, not the boiler's time to start to produce steam. If the main is warmed up then less time. Even with an open pipe at the far end (for a vent) some of the steam is used up warming the main pipe as it goes along, slowing its progression.
Measure the time from when the boiler's header gets steam hot to when you feel the far end of the main getting hot.
In general I would think improved venting would help you. However if you break off the 1/8 inch part in the reducer bushing you may have a bigger fight on your hands, you may want to wait till spring time.
National - U.S. Gas Boiler 45+ Years Old
Steam 300 SQ. FT. - EDR 347
One Pipe System0 -
If it was burning your hand in 5 1/2 min leave it alone.
0 -
@geemalar , what main vent is on it now?
Baltimore, MD, USA
Steam, Vapor & Hot-Water Heating Specialists
Oil & Gas Burner Service
Consulting0 -
I believe he stated a "Gorton vapor equalizing valve No. D." which I believe is the same venting rate as a Gorton #1 just with a 1/8 inch pipe thread.
 National - U.S. Gas Boiler 45+ Years Old
Steam 300 SQ. FT. - EDR 347
One Pipe System0 -
Right. I'd start by removing the bushing the vent is in- or if that can't be done without disturbing the asbestos, I'd drill it and tap it for 1/2" pipe thread. Then I'd install a Gorton #2, and see how it does.
There is a neighborhood in Baltimore where almost all the houses have this type of main, and the Gorton #2 makes them heat quickly and evenly.
Baltimore, MD, USA
Steam, Vapor & Hot-Water Heating Specialists
Oil & Gas Burner Service
Consulting0 -
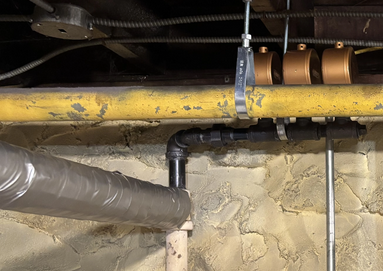
Ultimately since you a have a working Gorton D, I'd do a build out that resembles this with a Gorton #2 and the Gorton D.
 National - U.S. Gas Boiler 45+ Years Old
Steam 300 SQ. FT. - EDR 347
One Pipe System0 -
I think I’m at the point where it works well enough for this season, and will revisit it in the spring. Thanks for all the responses, and offering some options.
 1
1 -
So, moving on with the system in my house………..I was able to successfully remove and replace a 90 degree shut off valve that was leaking at the base of a first floor radiator. Took my time, the difficult part (for me) was the insert stub pipe into the radiator was steel pipe vs brass. I've replaced brass ones before, which are relatively easy. The steel one was a bit trickier, in that I did not want to damage the threads of the radiator. Also noted at the same time that the small section of flooring below the shut off valve was pretty rotted from the water loss. Fortunately it was only a 4x6 inch section, and the subfloor below that was completely undamaged. New shut off valve, new small section of 1 inch plywood, new vent……….works like a charm. My water loss at my boiler seems notably reduced. Being that this radiator valve was directly above the boiler in the basement, my guess is that I was losing a substantial amount of steam due to it's close proximity to the boiler. So it appears like a win.
So my next question………my sight glass has been continuously getting contamination above the water level line. Knowing that I probably needed to perform a skim, I went ahead and skimmed the system. During the skimming process, which I did for about 1.5 hours, I noted substantial amounts of residue coming out along the top level of the water. Once it seemed to stop releasing residue, I put the system back together, lowered the water to the proper level, and ran it. Seemed to work ok, but after 2 days, the residue returned to the upper level of the sight glass.
I skimmed the system again………found more residue at the top of the draining water as the system was draining out. After it seemed to stop releasing residue, I put the system back together again. Sight glass upper level is much better, but it still shows residue after running the system a few days.
My question………should I skim the system once again………or would it be in my best interest to entirely flush out the boiler chamber. I believe I have enough room to access through the upper level drain port.
I guess in summary……….understanding that the level of contamination is unknown……….should I just keep skimming if a few more times? Any assistance is appreciated………..
0


Categories
- All Categories
- 87.7K THE MAIN WALL
- 3.3K A-C, Heat Pumps & Refrigeration
- 59 Biomass
- 430 Carbon Monoxide Awareness
- 127 Chimneys & Flues
- 2.2K Domestic Hot Water
- 5.9K Gas Heating
- 121 Geothermal
- 170 Indoor-Air Quality
- 3.8K Oil Heating
- 79 Pipe Deterioration
- 1.1K Plumbing
- 6.6K Radiant Heating
- 396 Solar
- 16K Strictly Steam
- 3.5K Thermostats and Controls
- 56 Water Quality
- 51 Industry Classes
- 51 Job Opportunities
- 17 Recall Announcements