Welcome! Here are the website rules, as well as some tips for using this forum.
Need to contact us? Visit https://heatinghelp.com/contact-us/.
Click here to Find a Contractor in your area.
If our community has helped you, please consider making a contribution to support this website. Thanks!
Danfoss Thermostatic Rad Value (Air vent on single pipe steam system)
Options

mike212
Member Posts: 51
I'm trying to install a Danfoss thermostatic radiator valve on my single pipe steam system. I'm installing this at the air vent location. There are three parts I have for this setup....
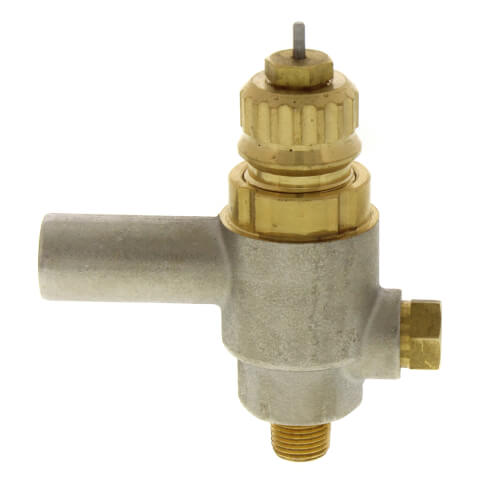
1) 013G0140 - Danfoss Thermostatic Rad Valve / vac breaker
http://s3.supplyhouse.com/images/products/zoom/013g0140-3.jpg
2) 013L8011 - Danfoss 1 pipe steam air vent
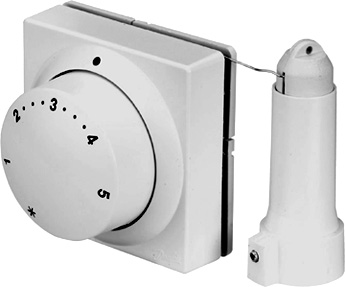
3) 013G8562 - Danfoss Remote Setpoint & Sensor - Wall Mount
https://www.phwarehouse.com/product_images/s/492/Danfoss-013G8562-15150__65037.jpg
Its clear to me how the valve and air vent connect and how to install that on the rad (just replace existing air vent with this). I'm stuck on how to install the remote setpoint and sensor. The instructions included are not getting me there. Any advice on this setup?
1) 013G0140 - Danfoss Thermostatic Rad Valve / vac breaker
http://s3.supplyhouse.com/images/products/zoom/013g0140-3.jpg
2) 013L8011 - Danfoss 1 pipe steam air vent
3) 013G8562 - Danfoss Remote Setpoint & Sensor - Wall Mount
https://www.phwarehouse.com/product_images/s/492/Danfoss-013G8562-15150__65037.jpg
Its clear to me how the valve and air vent connect and how to install that on the rad (just replace existing air vent with this). I'm stuck on how to install the remote setpoint and sensor. The instructions included are not getting me there. Any advice on this setup?
0
Comments
-
The gray cap on the 013G0140 should come off, and one of the remote sensors (actuator) should mount in its place.-1
-
-
I found it interesting the grey cap is actually a knob to manually control the TRV.
I say this because I can see that being beneficial to some, but Danfoss doesn't mention it.Single pipe 392sqft system with an EG-40 rated for 325sqft and it's silent and balanced at all times.
0 -
I think the grey cap comes off to accommodate the Thermostatic piece. The grey piece/knob is flow control.0
-
Got it, thanks. Now of course it all doesn't fit within the enclosure. The radiator enclosure is metal so its not so easy to make it hole. Been doing some reading and it seems like I can make use of another part: Angle Adapter for Snap-Lock Sensor SKU 013G1350 to make this all fit. Will report back later this week once I get the part and install.0
-
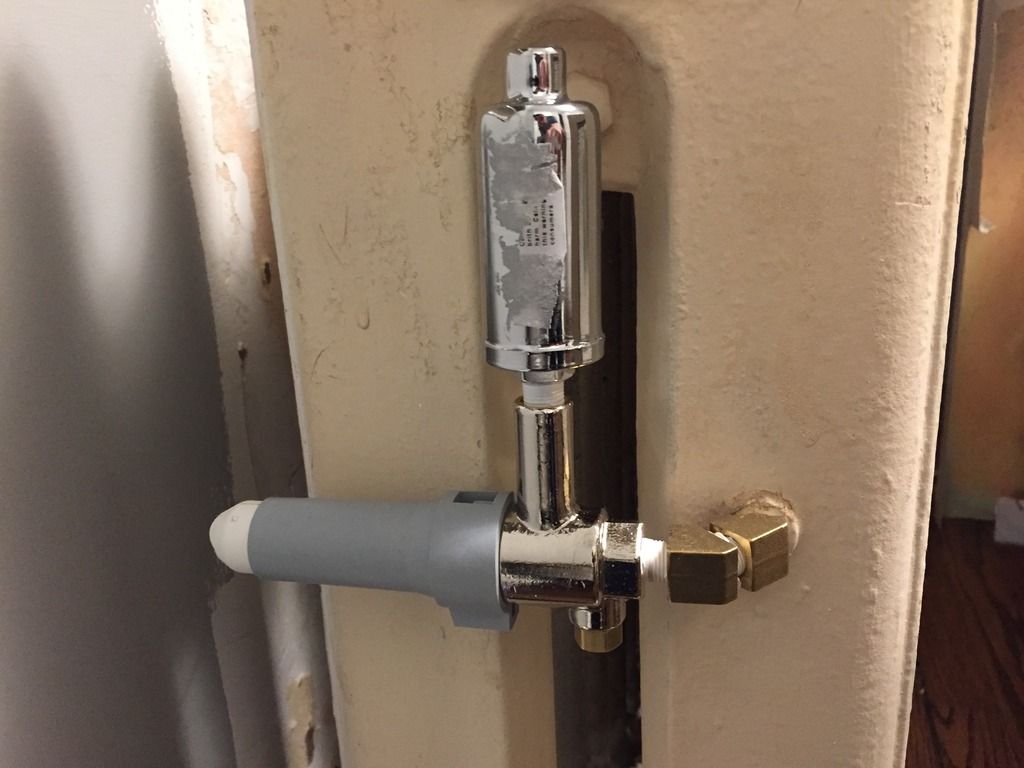
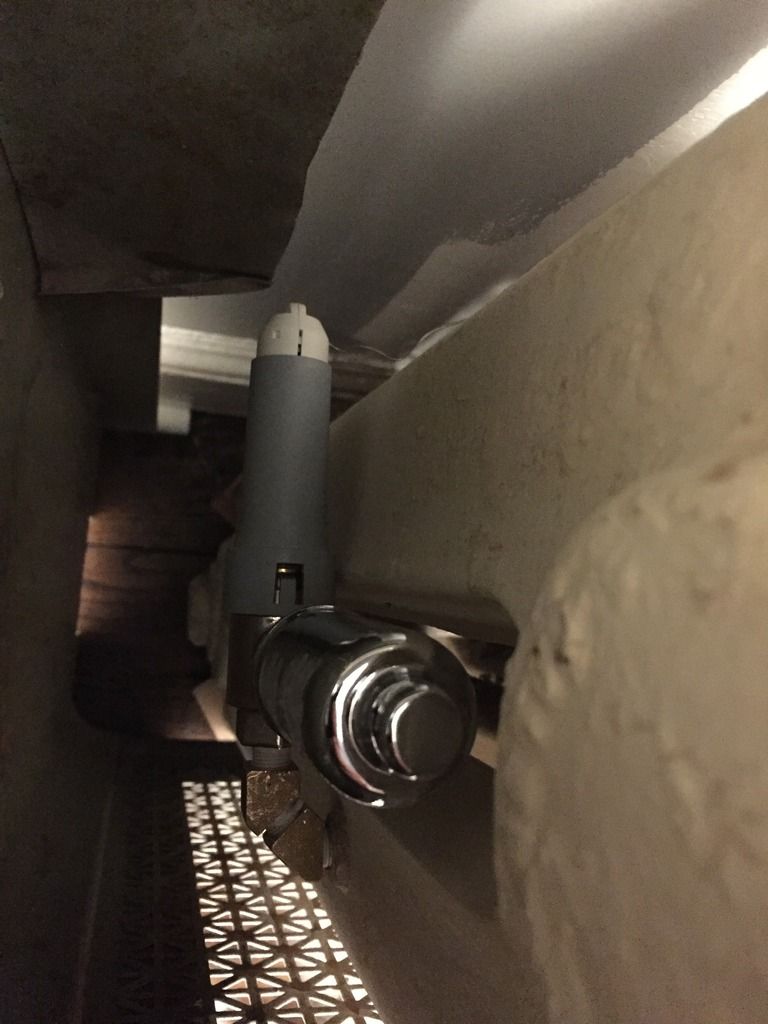
@LionA29 I will post a picture this weekend. I installed one this evening in a tight spot and it fit well. I used a different part than I mentioned earlier. SKU 013L8300, which is a 45 degree elbow for the RA 2000 Valve. I used 2 of these to create a 90 degree turn from the radiator which then fit the contraption easily alongside the radiator side instead of sticking straight out.
I just installed and didn't get much time to test, but it seemed to at least prevent steam from reaching the radiator. I need to make sure tomorrow that it will still give steam when the temp is cold enough (or the setting dial is set high enough). 1
1 -
My Danfoss TRVs are strange, in that to maintain 64-66F I need it set to #1 or just a hair past. For 68-70F #2.
At first I thought they were broke because of this, but I removed them, let them sit for a while and then messed with it while blowing through it to see where it was closes, started to open, wide open etc.
The numbers on my two certainly aren't even close to what they claim on the instructions.Single pipe 392sqft system with an EG-40 rated for 325sqft and it's silent and balanced at all times.
0 -
Yep seems like it's going to take some trial and error to get the settings right.
Here's what my first one looks like. Easily fits within the cover. Seems to be working so will install another this weekend.
Cant get the photos to upload for some reason so these links will need to do.
http://i1253.photobucket.com/albums/hh596/mike212581/IMG_6294_zpsfvfz5fjf.jpg
http://i1253.photobucket.com/albums/hh596/mike212581/IMG_6293_zpspczmeoyc.jpg1


Categories
- All Categories
- 87.6K THE MAIN WALL
- 3.3K A-C, Heat Pumps & Refrigeration
- 59 Biomass
- 430 Carbon Monoxide Awareness
- 124 Chimneys & Flues
- 2.2K Domestic Hot Water
- 5.9K Gas Heating
- 120 Geothermal
- 169 Indoor-Air Quality
- 3.8K Oil Heating
- 78 Pipe Deterioration
- 1K Plumbing
- 6.6K Radiant Heating
- 396 Solar
- 16K Strictly Steam
- 3.5K Thermostats and Controls
- 56 Water Quality
- 51 Industry Classes
- 51 Job Opportunities
- 18 Recall Announcements