Hanging Runtal radiators is sending me to early grave

I posted a pic below of how I think I need to go about piping these radiators in the wall. Short version: (1) cut out more drywall than seems necessary, (2) secure blocking and a drop elbow, (3) hope everything is in the right position, (4) hope I can tighten the valve enough without *%@!$ it up or twisting off the drop elbow. I don't have this much hope.

1. Am I taking a more complicated approach than is necessary? (My wife won't let me pipe into the floor because it will interrupt the baseboards)
2. How do I get the depth of the drop elbow accurate? As well as other rough-in dimensions? I'm concerned that the threads will tighten more or less than I need them to and then the radiator either won't connect or will not be plumb against the wall.
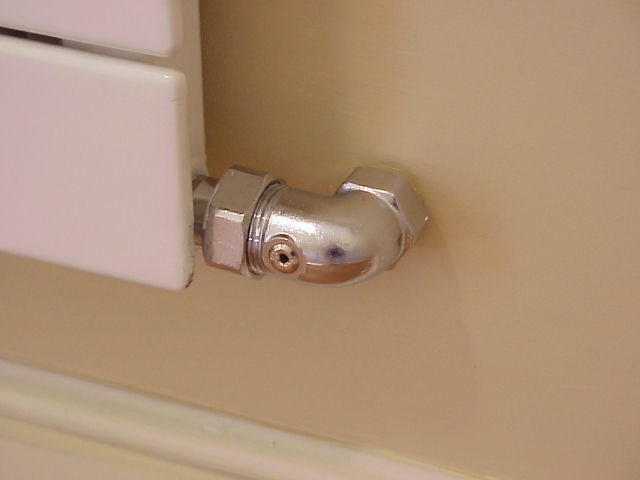
3. How do I tighten the decorative chrome valve without leaving tool marks? With the valve terminating in the wall and having no flat surfaces for a Crescent wrench I'm almost guaranteed to ruin it.
4. Is there a smart amount of drywall to remove so that patching isn't more difficult or obvious-looking than it needs to be.
I really don't want to rip out all this drywall - or patch it. I'm willing to change valves to make this easier - or even eliminate the valve and use a union elbow - but I'm not finding a polished chrome fancy anything to replace them. The big variety of valves and fittings I find in polished chrome are all BSP/UK not NPT.
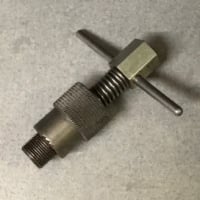
I checked some threads here about not leaving tool marks. Parmelee wrench, if not mythical, is ridiculously expensive. Strap wrenches have not served me well in the past [but I bought a rigid one anyway, arriving today]. Some other recommendation had hardened jaws and a chain - not the sort of thing I trust to not leave a mark.
Thanks
Boon
Comments
-
Go out to the Runtal USA site and find the valve your using. Let us know which one it is. I went to the website and did not see a valve such as you show in your drawing. Also are you using runtal's nipple into the panel first , and then plan attach attach the valve to the nipple? One side of the valve should have a rotating collar to attach to the nipple. Put up a few photos of where your install site.
0 -
Doc, it is the DEC-ANG-SET, decorative angle valve. http://www.runtalnorthamerica.com/residential_radiators/residential-accessories.html top right picture on their webpage.
I'll have to get home to post actual photos of work site. I have the union/tailpiece nipple part screwed into the radiator.
DIY'er ... ripped out a perfectly good forced-air furnace and replaced it with hot water & radiators.0 -
This how I installed the Dianorme brand panels. A pex stub out ell, soldered into a HoldRite bracket. Mount the panel, cut the stub out and put on a compression style angle valve or TRV valve.
There are other versions of brackets
that would not require exposing two studs or stud and plate.
I think Dianorme has a cardboard template to get the spacing correct, or make your own.
With a copper stubout you had adjustability in and out, just get the bracket height correct.
You may see some copper tube exposed, there are wraps available to cover the stubout if needed.
I have not tried the Caleffi brand valves on Runtal, I think the panel connection would be the same.
Trying to use a threaded stub out can be frustrating, the copper give you unlimited adjustability.
A couple open end or cresents work fine, not much torque required. We have a special open/ box wrench for the nuts

w
Bob "hot rod" Rohr
trainer for Caleffi NA
Living the hydronic dream0 -
Boon's install looks trickier than mine as I going through floor. Straight run, will use the beauty covers.

0 -
Making this way too complicated.... go through the floor. Figure a way to compromise w/ the wife.0
-
Boon this is why we say its a two man trade you need more hands, your wife should be a gay asian architect,
Do the rads hang on some sort of hook or slot bolt hole, can they come off and on relatively easily. figure your throat dimensions and solder up and mount to the rads on the floor or some milk crates ,
Im guessing youre in this because you didnt want the crimp connection in the wal;l because if you dont mind that, cut the pex back at the manifold im sure you can spare an inch and pull it up into the room enough to make the connection to the valve already attached to rad, if not solder on copper pigtails long enough to get them below the floor,if your penetrations are anal lol, then use copper tubing. Now hold the rad while your partner threads the pigtails through the penetrations while you hang in back on hooks or the slot holes. of the rods hung you dont need the ear elbows and all.0 -
We are in this because we like the aesthetics of the units piped into the wall; it is a clean look. I'd prefer the pex crimp to be below the floor instead of in the wall and I don't have a problem hard piping down.
The bigger trouble, I think, is the valve we have chosen as it terminates in the drywall. Even bringing pex to the valve ... we can barely stick a wrench on a compression nut, although the valve Bob pictured would give us 1/4" to grab with the wrench. But we really want a polished chrome.
And bringing the pex to the valve is also tricky... Fostapex was a bouquet of flowers to pull through the house but bending the last couple inches of that stuff to line-up with anything is a real SOB.DIY'er ... ripped out a perfectly good forced-air furnace and replaced it with hot water & radiators.0 -
yes i used pex on my radiant its not what you expect is it, thats kind of why i suggested pulling it several feet into the room to get a handle on it with the pre valved rad on a table or something to make the crimp connections then slide the whole thing back onto its hooks. but i thought i remembered you not wanting the crimp behind the wall, I would have thought the valves would at least have a oringed compression connection to the rad so you might have a shot. I think using copper tubing would work if your penetration are not too small. these valves penetrating the gyp sounds a bit unfinished ho about turning them 90 degrees and either making a bend in the soft copper or putting a little elbow on first i bet you could find a chrome 90 degree sweat elbow for som bathroom application0
-
http://www.supplyhouse.com/Wirsbo-Uponor-F5600500-Chrome-Finishing-Sleeve-for-1-2-PEX-11-16-OD-4273000-p
chrome sleeves for exposed pex1 -
possibly when a valve like that is installed in Europe it is done with a straight thread nipple. Either hemp or Loctite string, or 272 is used to make a seal.
With straight threads you can stop where you need to line up with the radiator. There is no taper involved in the seal.
Same type of straight thread goes into the radiator, with an o-ring or tapered washer for the seal.
Getting a NPT thread to end up exactly to a dimension is hit or miss, especially when screwing a chrome plated anything into it.Bob "hot rod" Rohr
trainer for Caleffi NA
Living the hydronic dream1 -
Boon:
I feel your pain. I can't tell you how many sleepless nights I've had trying to figure out how to mount Runtal radiators. They have a wonderful sleek design, but no answers on how to mount them to look professional.
We used Ballofix angle connectors (with integral ball valves) and chrome plated brass nipples with much success until we couldn't get Ballofix anymore. I spent a long time figuring critical distances to make it come out right; where to stub out left to right to make the radiator fit perfectly and also the depth to mount the drop ear adapter to allow for nipple length.
I spoke to the general contractor that I did not like to use chrome escutcheons and that he had to come after us to touch up the sheetrock penetrations with plaster or caulk.
I've got some Runtal radiators coming in and again, I am stressing on how to make it look right. My supplier is providing Oventrop connectors and I will see what I can do with them.
As I remember, the Runtal wall brackets can be installed two ways: one way further away from the wall than the other which might make things easier.


8.33 lbs./gal. x 60 min./hr. x 20°ΔT = 10,000 BTU's/hour
Two btu per sq ft for degree difference for a slab2 -
braided stainless flexible hoses come in high pressure and heat rating have chromed compression or standard pipe fittings and can be found in 1/8 to 1- 1/2" and lengths from 6" to 10 feet these also could be pre assembled and thread through as the rads re hung though they are flexible enough they might be put on afterwards.
is your architect ok going through floor if baseboard is unmolested you could shim the panel away from the wall it shouldn't be much a 1/4' could be caulked or the plaster built up and feathered out. Also a offset could be put into the tail or the valve could be swung out at at an angle a bit to miss the baseboard.another brand valve might have different throats. your panels seem unlike the other people posted here in as much as the seem to have bottom not end ports. Rather than have that nice chrome valve partially in the wall and such tight tolerance in the wall i would turn it paralell with rad and find a nice elbow to add to it to turn into wall0 -
I've used this option before: http://www.supplyhouse.com/Runtal-PC-10-10-Vertical-Cover-Fits-All-Models-6318000-p0
-
I did a job a while ago with 34 Runtal rads, 8 of which had to go into the wall, I feel your pain.
I did have the luxury of roughing it all in before the drywall went up though so that was nice. I used drop ear ells with a pex end on them, and the ones I got (they may be wirsbo brand, not sure) had three screw points on them. Take your time, measure for the rough in you need and get it within a 1/16". This may take some time, I usually cut a piece of backing that will fit between the studs, measure side to side where I want the drop ear, and screw it into the backing before it goes into the wall. do this for both inlet and outlet, then take a laser level (indispensable for this) and set it up at the height you want, get both positioned and screw the backing in place. Depth is hard to nail, just make really really good measurements, and do your math.
There is no easy way trust me....1 -
If you are stubbing out of the wall the do provide valves.We use female x copper 90's and use whatever nipple you need.Agree with delta T your measurements have to be bang on.0
-
Good idea with the 3 ear FIP ells, I think those are machined from bar stock, much more durable that the cast/ forged two ear type.delta T said:I did a job a while ago with 34 Runtal rads, 8 of which had to go into the wall, I feel your pain.
I did have the luxury of roughing it all in before the drywall went up though so that was nice. I used drop ear ells with a pex end on them, and the ones I got (they may be wirsbo brand, not sure) had three screw points on them. Take your time, measure for the rough in you need and get it within a 1/16". This may take some time, I usually cut a piece of backing that will fit between the studs, measure side to side where I want the drop ear, and screw it into the backing before it goes into the wall. do this for both inlet and outlet, then take a laser level (indispensable for this) and set it up at the height you want, get both positioned and screw the backing in place. Depth is hard to nail, just make really really good measurements, and do your math.
There is no easy way trust me....
Bob "hot rod" Rohr
trainer for Caleffi NA
Living the hydronic dream2 -
I shared this thread with our friend, Owen Kantor, at Runtal. He asked me to post these documents. I hope it helps.Retired and loving it.1
-
Thanks, Dan! And Owen!
I did realize the wrench could turn the valve but the threaded connections are the big unknown variable in all this. For example, if the valve is tight at 3pm on the clock I can't imagine turning it 3/4 of the way around to High Noon without a wrench being on the other side of the drywall. But I think I solved that problem....
To get the valve properly oriented & tight and the rough-in correct, I decided that the VERY LAST STEPS I take would be to place the blocking between the studs and affix the drop ell to the blocking.
I'll hang the radiator on its brackets on the wall, connect the valve & piping - fully tightened/crimped. Then, lastly, secure the blocking and drop ell. I'm guaranteed to get the rough-in correct - almost without measuring a thing - since everything is already tight/connected when the blocking/elbow are secured.
Of course, this still involves removing far more drywall than I ever anticipated but I've had time to own my fate and I'm ready to accept it. There is comfort knowing I'm not the only one in this pickle.
And I'll be pretty embarrassed if affixing the blocking and drop ell last is how everyone does it or how it is supposed to be done. No one told me!DIY'er ... ripped out a perfectly good forced-air furnace and replaced it with hot water & radiators.0 -
The steps I outlined above have removed all the guess work from the rough-in. It is far more intrusive than I'd like it to be but the end result will be better-looking, a more clean appearance, than pipe through the floor. And, the rough-in is perfect. The only better-looking install would be to pipe from behind and completely conceal the supply/return; not happening.
For some units, I was able to crimp below the floor and sweat 1/2" copper into a CxF drop elbow. Other units, I ran the tubing up into the drop ell as pictured.
The last step, not pictured, is to paint that hideously purple wall.
Hope this helps someone.DIY'er ... ripped out a perfectly good forced-air furnace and replaced it with hot water & radiators.0
Categories
- All Categories
- 87.3K THE MAIN WALL
- 3.2K A-C, Heat Pumps & Refrigeration
- 61 Biomass
- 429 Carbon Monoxide Awareness
- 120 Chimneys & Flues
- 2.1K Domestic Hot Water
- 5.8K Gas Heating
- 115 Geothermal
- 166 Indoor-Air Quality
- 3.7K Oil Heating
- 77 Pipe Deterioration
- 1K Plumbing
- 6.5K Radiant Heating
- 395 Solar
- 15.7K Strictly Steam
- 3.4K Thermostats and Controls
- 56 Water Quality
- 51 Industry Classes
- 50 Job Opportunities
- 18 Recall Announcements


