tapping main vents during heating season?
We really need more venting on the main vents in our building (24 unit coop). A friend who has drilled and tapped new vents in the main vents in his building is willing to help me. I'd rather not wait until spring since the system really needs to be balanced. Has anyone done this work during heating season? What do you think?
Eric
Comments
-
What sizes do you want to tap, and in what size pipe?
Sometimes it's better to bring in a welder and have him install thread-o-lets.............All Steamed Up, Inc.
Towson, MD, USA
Steam, Vapor & Hot-Water Heating Specialists
Oil & Gas Burner Service
Consulting0 -
I'm guessing the pipe is 2". We're planning to do 3/4" NPT taps so that we can install an antler of three Gortons 2, if necessary.

This photo is a vent in a neighbor's coop that was built at the same time. I believe our pipes are the same size, but they are covered with insulation.
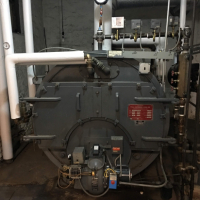
Single-pipe steam | 24 apartment, self-managed coop | Federal FST-40 Scotch Marine boiler | Carlin 701CRD burner | Heat Timer EPU-CH | Honeywell pressuretrols | Heating oil #2 (20% bio)0 -
Depending on how much room you have, consider breaking up the 3/4x6" nipple with a union. That suggestion from others made my install much easier.
HarryHome owner, 1927 2-story, single family
1 pipe Burnham IN4I, Boston area0 -
A 3/4" tap on a 2" pipe is more
than I would be comfortable with, but then I think a lot and worry to much about the ratio of 2" to 3/4" with pipe threads. I recently added 4 Gortons #2 on 2" pipe by drilling and tapping 1/4" holes 4 times. It is my understanding that a 1/4" nipple will pass more air than the #2.
IMHO it would be easier to do three 1/4" taps than one 3/4" drill & tap. I used a bit of Lennox Pro tool lube oil for drilling & tapping. This stuff is water soluble; not sure what it contributes to oil in the steamer; but this job will need cleaning anyway. I put a 1/4" X 2" nipple in the top of the pipe, added a 1/4 X 1/2 90 ell, went horizontal about 5 " (uphill) to match the drainage slope of the 2" main, then 90 ell up 6" with coupling to vent. For support I used a 2" Mini pipe hanger bolted back to back (washers if needed) to a 1/2" mini pipe hanger. (Mini= electrical conduit pipe hangers). I also installed a 1/2" CI strainer horizonley for each vent so this was a lot of weight to hang on a 1/4" nipple tap. The strainer is less than 10 % of the price of the vent so it is cheap insurance. To do this you need a good run of horizontal pipe as the vent taps are about a foot apart.
Just a suggestion.
0 -
"To do this you need a good run of horizontal pipe as the vent taps are about a foot apart."
@Jughne - thanks for the great explanation. I wasn't quite sure about that last part though. Where did you do your drilling and tapping for the 4 vents? Did you put them all in an elbow at the very end of the main so that they are after the very last radiator takeoff?
I guess everybody's situation will be different as to where they can squeeze these in. The elbow at the end is the only place I could do it, unless I put them in the beginning of the dry return somewhere. Right now mine are all the way at the end of the dry return.
I'd love to see some photos if you can get the chance sometime.
0 -
Pictures attached---- maybe. In this case there was a lot of pipe available . As long as they go after the last steam riser. On the right side of the boiler the last riser is in the boiler room; on the left side the last riser is maybe 20' away but the vents went in the boiler room anyway. These are end of steam main drips that drop down into the wet return on the floor before Hartford loop. there are also vents on the dry return but it was possible to install a tee . This is a 2 pipe system. The electrical conduit hangers are common, a trade name is "Minneralac". That might be 3/8" all thread between the hangers for spacers. The strainers have a 1/4" nipple capped for blowdown/inspection/cleaning.0
-
Thanks! That really clarified it for me. I have a 37-1/2 ft, 2" main that I could probably put 2 of those tapping assemblies like you did with Gorton #2's in the cast iron elbow at the very end of the main. That should be thick enough metal for getting a few full threads. The only issue would be water hammer possibly, being that it is at the end of the main. Those Y-traps are a good idea.0
-
It has been mentioned on this wall that cast iron fitting tapping may be a little dicey especially 2 taps on one fitting. The taps I show are on 1918 steel pipe. What size is your dry return? My understanding is that wherever you put the main vents all piping before that becomes steam main. This may not always be bad. The time factor for the vents to close will be longer, but the steam is at the last take off sooner; that is the actual steam main will get full quicker. The dry return or "unused steam main" is still filling with steam. Some consider this wasteful but if insulated would only contribute a little heat to the basement or crawlspace. I have put vents at the end of the dry returns on another project because....it would have been a piping challenge at the end of the 3"steam mains.....also it would place the 10 vents above a ceiling of a finished space (potential water damage and lack of easy observation of operation)....and third the dry returns are insulated and the heat lost helps to heat the basement which would otherwise rely on electric resistance heaters. Also there was a 2" bullheaded tee at the end of the dry returns which was eliminated by installing the venting in the boiler room.0
-
I have a 37-1/2 ft, 2" steel main looping back into a 36 ft, 1-1/4" brass dry return, with the vent located in a copper Tee located near the end of the dry return. I have already insulated the dry returns up to that vent and the Tee is tapped 3/4", so I could easily put 3 or 4 Gorton #2's in there. I will first try using some spare varivalves that I have, to try to set up something with equivalent venting capacity for testing purposes. Only problem with that is that Gorton's close at around 110 F, and varivalves at around 160 F, so it will be different performance.
That would be the easiest thing to do. The next possibility would be to get an oxy acetylene torch and solder in another Tee in the brass return near the beginning just after the main loops into it for vents. At least then I'm not filling that 36 ft of pipe with steam unnecessarily.
Most of what little heat is lost through the insulation of the dry return only helps to help heat the floor above so I don't think it is all that wasteful. Like you said you need a little heat in the basement too.0 -
I'm assuming that your 1 1/4" brass pipe is copper tubing. If one was to cut in a tee why not install a 1 1/4 X 1 1/4 X 1" with a 1" male adapator pointing straight up. I would put it about a foot after the 90 ell of the return. Then with a 1" black pipe union you could build an antler assembly with a black 90, include the 1" wye strainer if desired, nipple to tees and risers. The union lets you take the whole thing off to work on any part of it. (Getting the screen out of the CI strainer in a few years might be tough, I would just take the union apart, take the whole thing to the sink remove the plug/nipple-cap and back flush thru the opening to clean the screen. Nipple/cap is much easier to remove than a plug.) Point the antler towards the main and parallel to the dry return so as to get slope to drain any condensate down the dry return. All of this will get fairly long so I would use a pipe hanger to insure the slope towards the union. The Gorton #2 are 6 1/2" tall included the 1/2" thread. An air/acetylene will do this easily. I have done this size of copper with a Turbotorch on Mapp gas, just takes longer and you have a big flame to be careful with. You had info on when both vents close did you see any temp at which they will reopen?
A 3/4" pipe might only handle 3 #2 vents, depending upon operating pressure...not sure.... but you can't be too big on the pipe size for venting0 -
I swear it's brass though. Definitely golden brass appearance rather than copper. Buffed some up and it stayed gold.JUGHNE said:I'm assuming that your 1 1/4" brass pipe is copper tubing.
Thanks, I'll do exactly that ! I assume the strainer is in the straight part of the wye that leads to the vents, just after the downward leg of the wye that has the cleanout? Did you use some stainless steel screen cut into a disk like they have in water faucet nozzles?JUGHNE said:Then with a 1" black pipe union you could build an antler assembly with a black 90, include the 1" wye strainer if desired, nipple to tees and risers. The union lets you take the whole thing off to work on any part of it. (Getting the screen out of the CI strainer in a few years might be tough, I would just take the union apart, take the whole thing to the sink remove the plug/nipple-cap and back flush thru the opening to clean the screen. Nipple/cap is much easier to remove than a plug.)
That's a very good idea to use the union. Thanks. Not sure how that works though as far as being easier to remove. Do you have to have reverse pitch threads on one end so it works like a turnbuckle? If so, do you have to buy a special short nipple or street ell or special die to cut reverse threads on the short nipple? My plumbing knowledge is not complete obviously.
I was going to try that first actually. Thanks for the confirmation on that. I have two propane torches and I guess if necessary can put two mapp cylinders on them and get a helper to hold one for me. I used to have an oxy acetylene torch but I loaned it years ago brand new to a co-worker right before I got laid off and I never got it back. Never even had a chance to use it either lol.JUGHNE said:An air/acetylene will do this easily. I have done this size of copper with a Turbotorch on Mapp gas, just takes longer and you have a big flame to be careful with.
0 -
PS: Is this what you are referring to regarding the Turbotorch?:
http://www.amazon.com/TurboTorch-X-4B-Acetylene-Torch-0386-0336/dp/B000NO6VTC
That certainly isn't cheap but I guess you save on not needing an oxygen cylinder?0 -
I use this turbo torch for larger copper diameters
http://www.amazon.com/TurboTorch-STK-11-Double-EXTREME-0386-1283/dp/B000650T96/0 -
thanks Abracadabra that looks good. It mentions "easy to change orifice". Do you have to swap out orifices to go from propane to mapp? Does it come with different orifices or do you have to buy?0
-
My feeling about the strainer is if it is there, it must be maintained. If you have generous venting, then the velocity will be lower, and the vents less likely to get plugged with debris.--NBC0
-
I am just a homeowner, but I bought this one recently and have soldered 1 1/2" copper with no problems. I like the hose because it gets me in tighter spaces without having to deal with the bottle.
http://www.homedepot.com/p/Bernzomatic-BZ8250HTKC-Map-Pro-Hose-Torch-Kit-331665/203391035?N=5yc1vZbqmd0 -
I've never really had to think about changing orfices, with MAPP gas you're supposed to be able to do up to 6" copper. Mine didn't come with a different set of orfices.0
-
@KC_Jones - thanks good to know that would work for my small job immediately at hand. I also might have to try to fix some chimped up near boiler copper piping work that is larger further down the road. There are numerous problems with the way the previous owner's installer (may have done it himself) did the near boiler piping. I've actually got a copper header which is 2-1/8" OD that ells down into the equalizer (no reducer !!) and the Hartford Loop is copper that is about at the NWL instead of 2 to 4" below !! The whole job was inspected and passed (LOL) ! I guess the inspectors only care if the thing is going to blow up or spew CO gases. Why can't they make sure it was done according to the mfg specs??
Anyway, I'm wondering if the double barrelled one that Abracadabra mentioned might be better able to handle those larger diameters.0 -
We all have our opinions on stuff and I am never shy about voicing mine. If it was me I would evaluate changing the copper to black steel as you know it should be. Personally I wouldn't waste my time fixing something that would still be wrong after I am finished. You would be surprised how much you can do without threading pipe. I was able to pipe my entire boiler without cutting any threads, all stock off the shelf lengths. I think that is why people sometimes shy away from the threaded pipe. I know that can't always be done, but it is something to think about.0
-
In my part of the country the only brass pipe I've seen is threaded just like steel pipe. With the length you have there must be a coupling and also look at the existing tee with the old vent on it...are they soldered or threaded? There would be some threads showing at these fittings.
Go to a hardware/big box store and look a 3 piece threaded union and everything should be explained. They might have an inline strainer, look inside that and you will see the screen and understand how it works. They are made in CI or brass and priced according. I just get the CI ones.
After getting the copper male fitting installed I would do the rest in black pipe fittings.
The Turbotorch with Mapp gas I referred to was a STK-R; it just screws to the top of a bottle and the torch tip arm is connected to the side of the regulator and swivels so you can keep the bottle upright. I had this 30 years ago; maybe it is not available anymore but it did a good job on even 1 1/2" copper ftgs.
Torch you showed above does not come with the acetylene tank...that would set you back about the same dollars as the kit. On the site you show they have a STK-99, the new version of my old one..I guess I'm the old one also.
Where are you by the way?0 -
I'm in NJ.
It's definitely soldered. I just looked at it again and it has a beautiful polished brass appearance where the insulation has been rubbing it, but where the chain I have supporting it wraps around it has cut a groove into the pipe and it definitely looks like copper there. So I guess it's copper but why would it have a beautiful shiny brass patina on it instead of the usual green patina from copper? Very weird and the jury is still out.0 -
The varivalves begin to close at, say 155 F typically and finish closing at 160F typically (depending somewhat on pressure). There is very little or no drop away pressure affect with them according to the manufacturer and Dan says drop away pressure only is a factor with vents that have floats.JUGHNE said:You had info on when both vents close did you see any temp at which they will reopen?
So, the varivalves will start to open at 160 and finish opening at 155. It varies quite a bit from one vent to the next, I have found some that close as low as 130F and one that closed at 184F. These were both old ones. I just started testing new ones and so far I've only tested one new one and it was closed at 160F.
I tried to test a Gorton #1 but wasn't too successful with the pot of hot vinegar technique I used on the varivalves (cleans em at the same time as testing). The Gorton has a float and needs to be held vertically and my pot on the stove technique just couldn't accomplish that. Probably best to test them in action on a steam pipe with a thermocouple at the base and another one at the vent outlet. Use an inspection mirror or your ear to determine when it closes. Would have to put a tube over the outlet and try to blow through to test when it opens though. Not sure how to test that really.
0 -
I've noticed that on some new copper especially in the big boxes. (Think import). Also that could be Type M thickness, the thinness made, so your chain hanger could turn into a pipe cutter pretty fast. (you might pick up some 1 1/4 couplings just to have on hand for the Saturday night leak). So with the old vent at the end of the dry return does that turn your 1 1/4" copper into a steam main? If the near boiler piping hasn't gone south yet the return might be ok. What do the other Wallies think of copper dry returns located as such?0
-
I just wrapped the pipe under the chain with several wraps of teflon tape. Should be OK now thanks. I'm all too familiar with having to fix leaky steam pipes. One section of main, the part with most of the radiator takeoffs on it of course, is no longer pitched downward correctly (it was pretty much level last time I checked it) and so condensate tends to pool there a bit. I'd say in the 10 yrs that I've owned the house I've had to do 6 or 7 emergency repairs when a small hole develops due to corrosion and the boiler shuts down due to low water cutoff.JUGHNE said:Also that could be Type M thickness, the thinness made, so your chain hanger could turn into a pipe cutter pretty fast. (you might pick up some 1 1/4 couplings just to have on hand for the Saturday night leak).
That's why I have recently become increasingly concerned with the issue of water treatment. Don't really know how much difference it makes what you treat the boiler with though if the whole thing acts like a distiller and you've pretty much always got the equivalent of rain water or distilled water in the system piping, which tends to become very acidic due to carbon dioxide/carbonic acid. I have a pH meter on the way and will start testing pH of boiler and condensate and will report my findings. I have soda ash (sodium carbonate) and ordered some caustic soda (sodium hydroxide) for raising the pH. I decided it is better to use the caustic soda because it doesn't contribute carbon dioxide to the boiler water. Apparently a pH of 10.2 is optimal for boiler water regarding corrosion. Not sure if that will cause a foaming issue or not. We'll see.
0


Categories
- All Categories
- 87.5K THE MAIN WALL
- 3.3K A-C, Heat Pumps & Refrigeration
- 61 Biomass
- 431 Carbon Monoxide Awareness
- 124 Chimneys & Flues
- 2.1K Domestic Hot Water
- 5.9K Gas Heating
- 118 Geothermal
- 170 Indoor-Air Quality
- 3.8K Oil Heating
- 78 Pipe Deterioration
- 1K Plumbing
- 6.6K Radiant Heating
- 395 Solar
- 15.9K Strictly Steam
- 3.5K Thermostats and Controls
- 57 Water Quality
- 51 Industry Classes
- 51 Job Opportunities
- 18 Recall Announcements